Preparation and execution of the order
Introduction
The document shows the mechanism for creating an order associated with the selected work order. We indicate several paths for generating an order depending on the mechanism and information available in the system. We also show the basic interaction of contractors through the Supplier Portal.
Task
The work order requires materials to be delivered to the construction site. Therefore, you must prepare an order that will allow the materials to be delivered to the construction site. The order can be prepared based on material plans, manually added elements or as an empty order only specifying the scope, which the supplier independently composes based on design knowledge.
Execution of the contract
We go to the work orders view, select the work order/object/construction element that interests us.
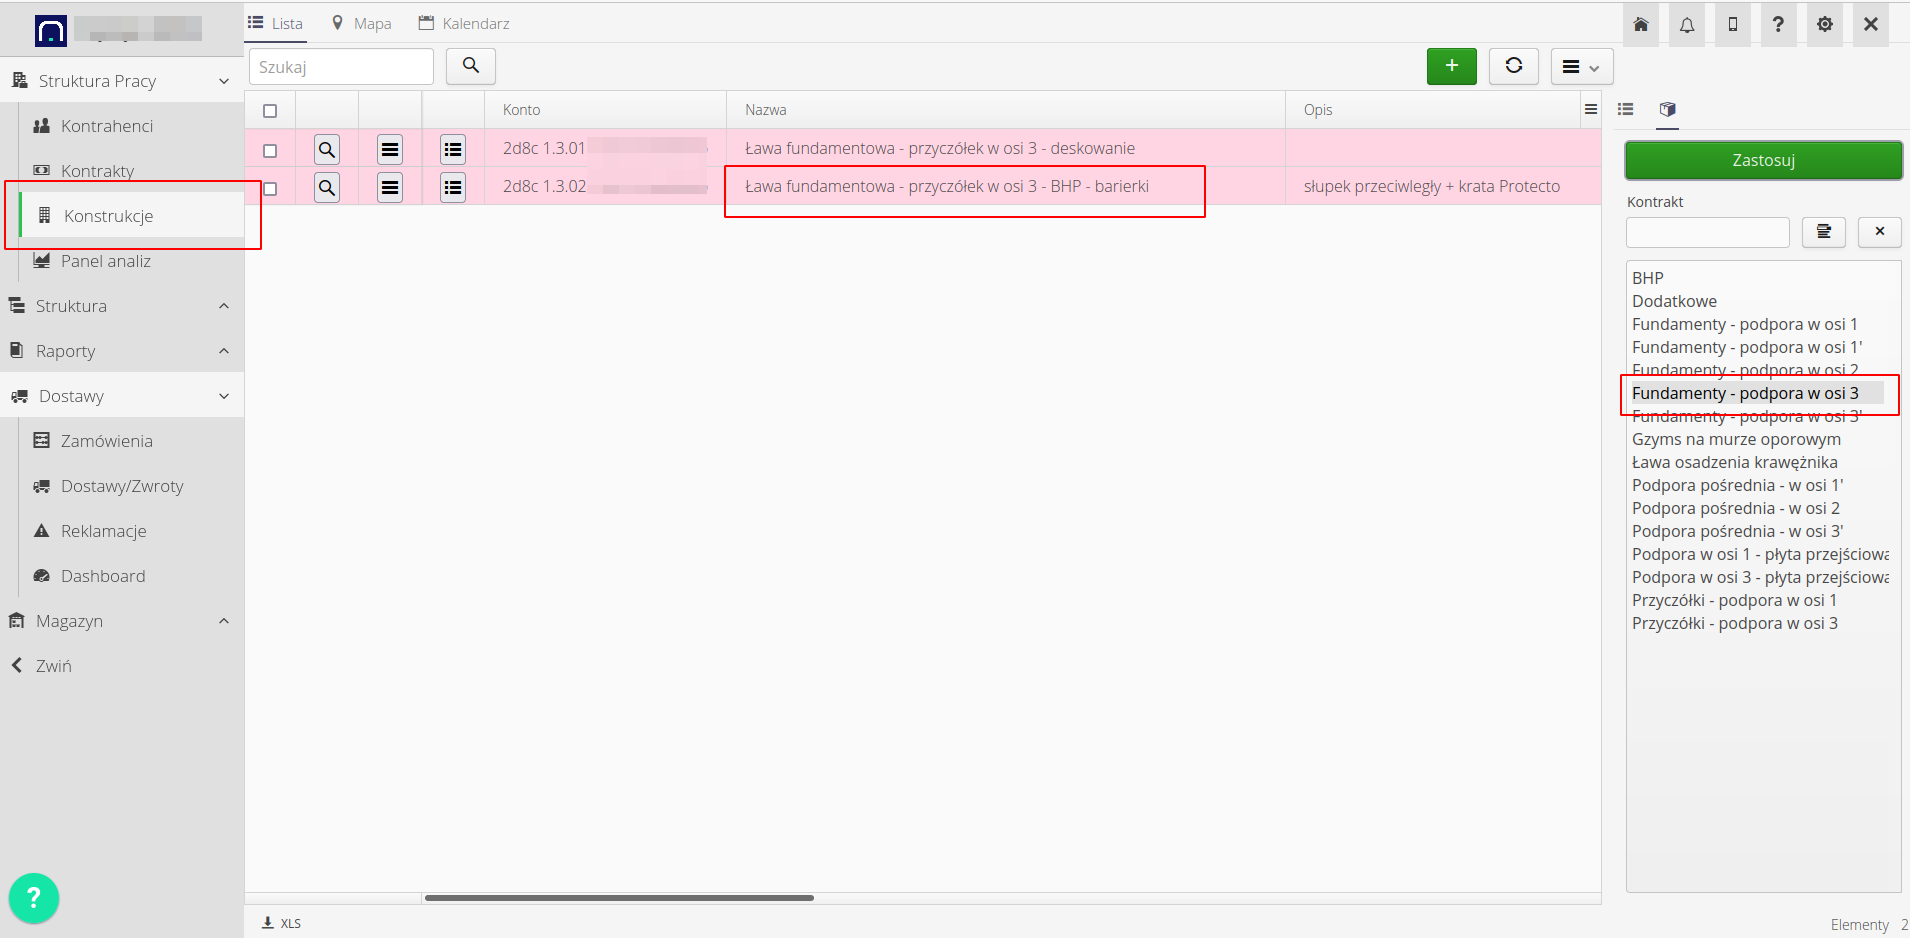
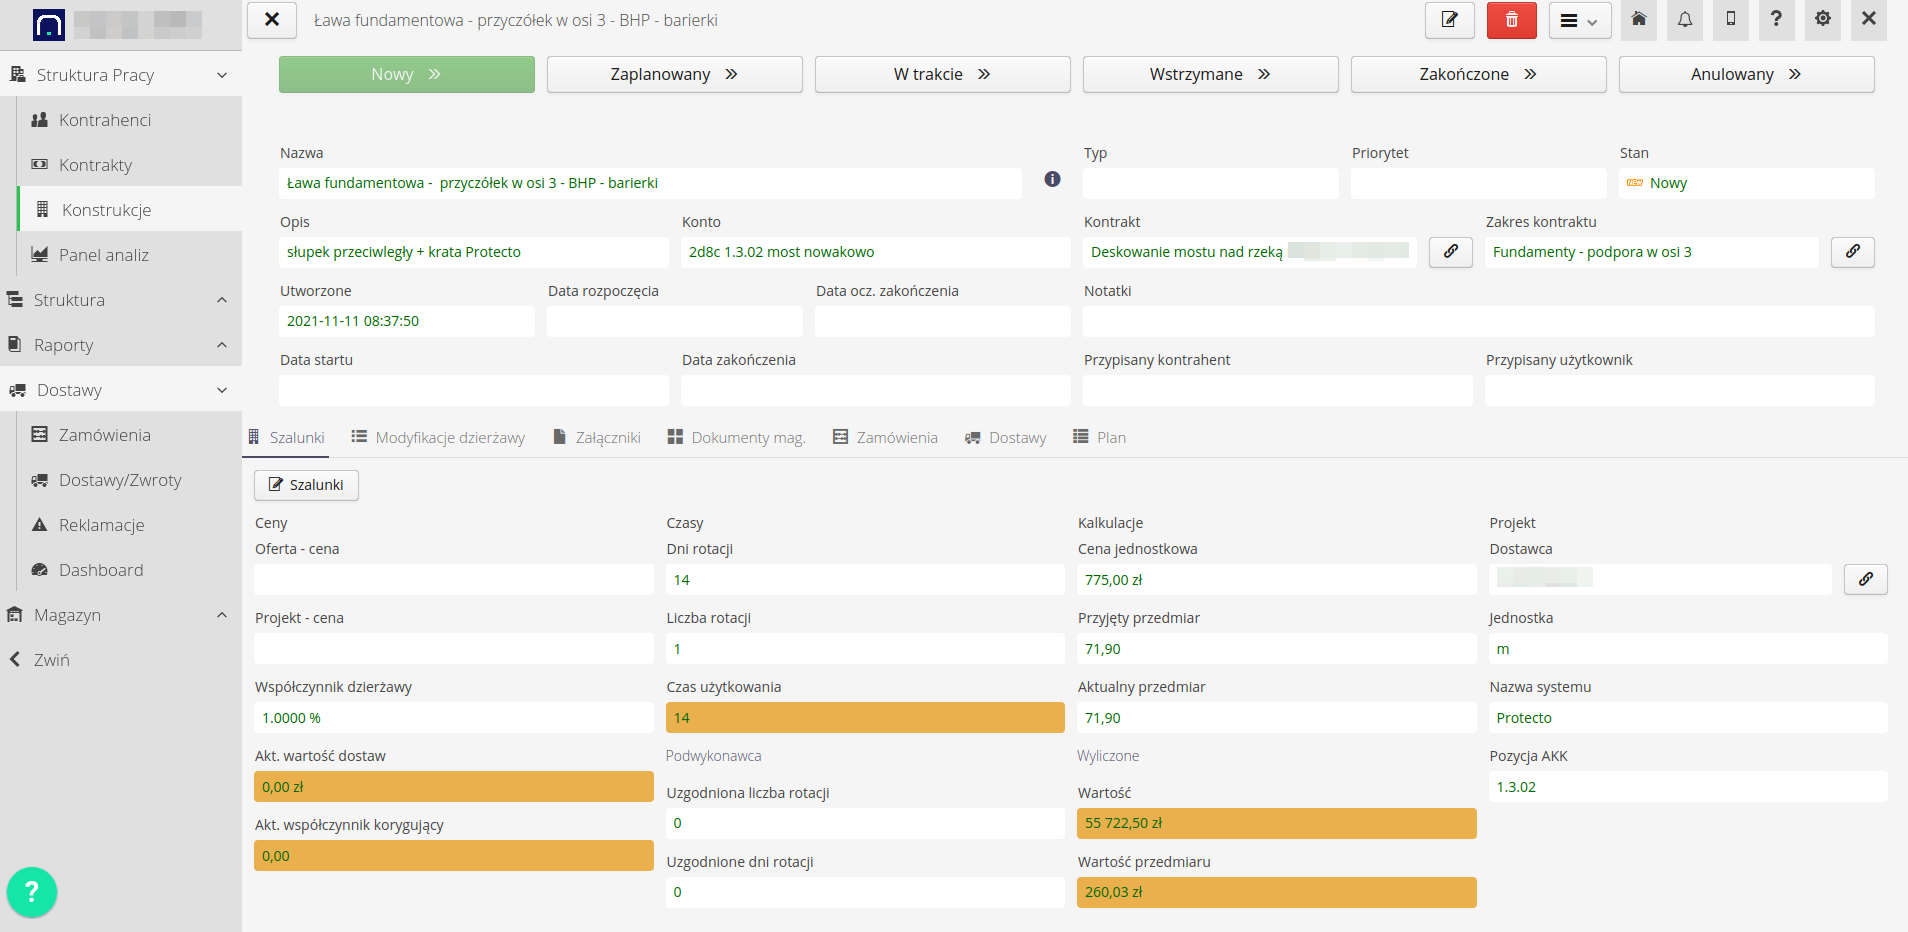
The work order detail view displays. Based on it, we can make a decision about generating an order. We can create an order as a quick order, the content of which will be selected by the supplier, or we can specify the order elements in detail based on the material plan for a given work order.
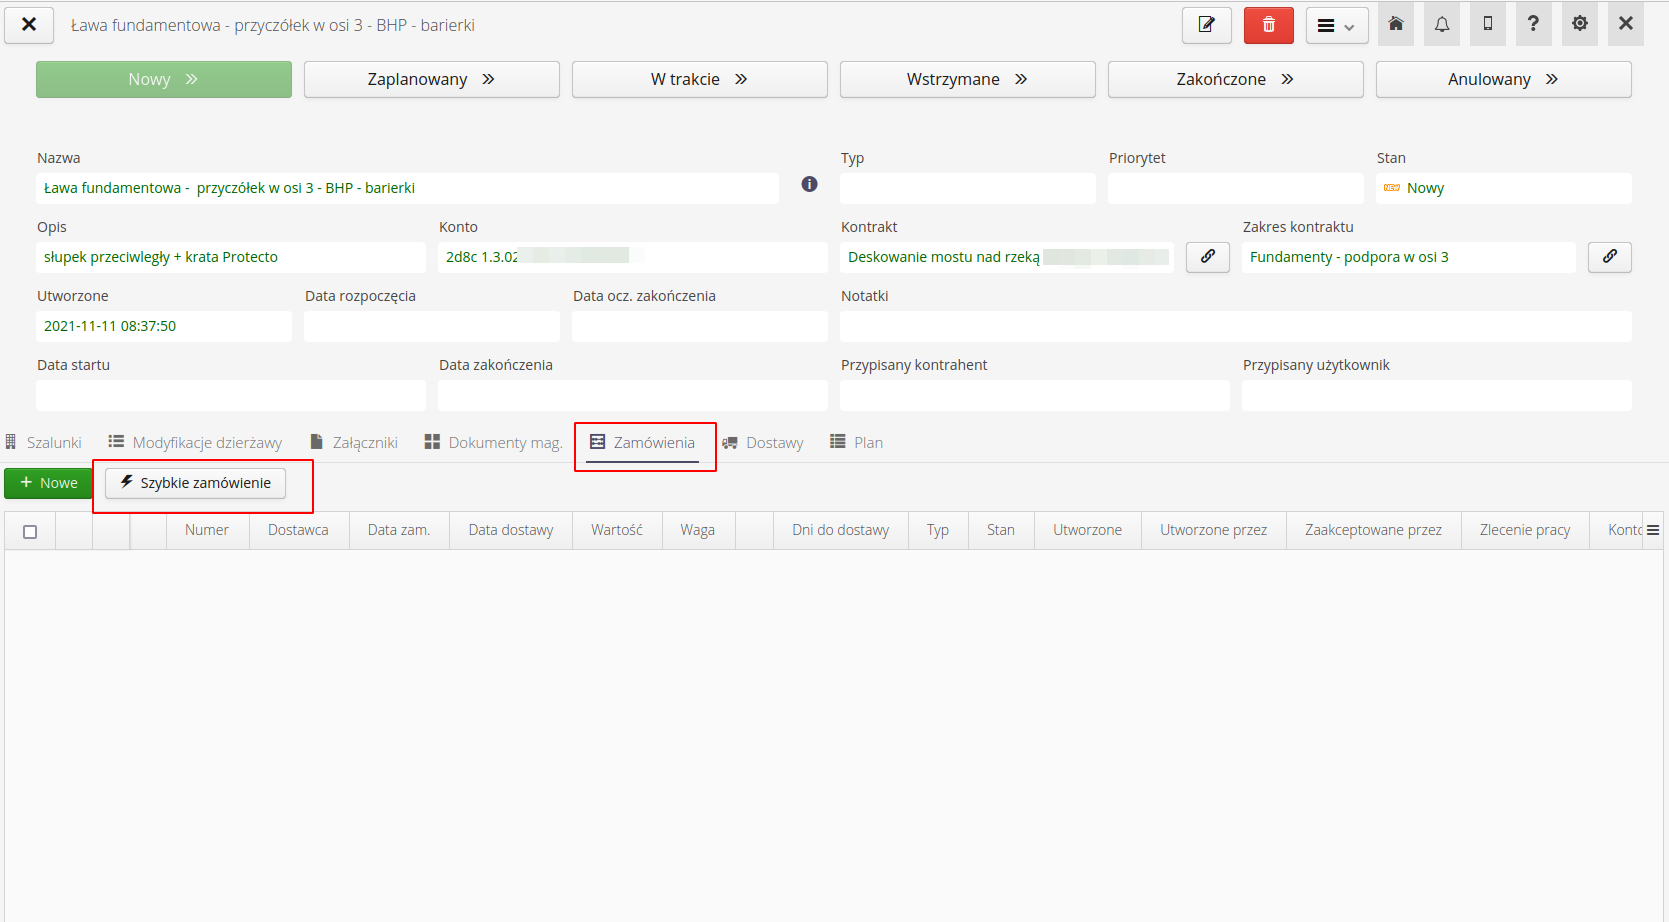
If we want to order a delivery of material from a supplier and only need to specify an additional message for the supplier. For example: "Please implement all elements for this facility in accordance with the agreed design", then select the "Generate quick order" option. The system will then create an order with a specific scope, which the supplier will complete independently.
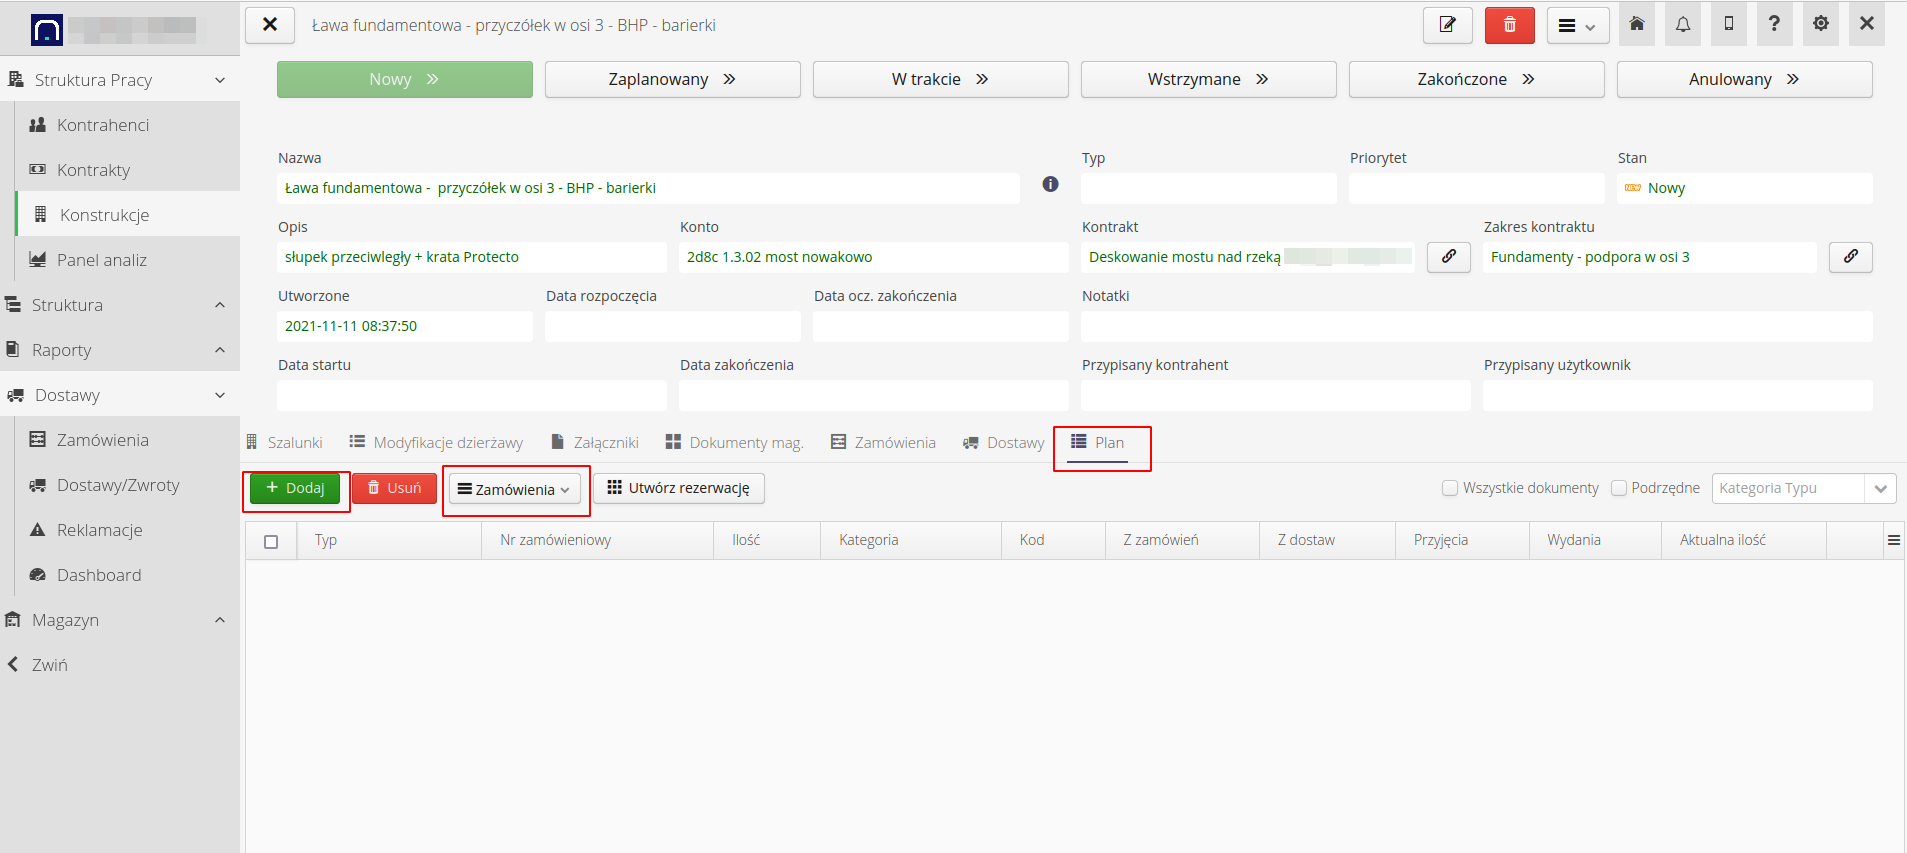
We can also go to the list of material plans, select the elements we are interested in from the material plan and send them as elements to be delivered by the supplier.
After generating and changing the status to 'Ready', the order can be sent automatically to the Supplier and then be processed - deliveries created - via the Portal, to which the supplier will have access. To complete this order, the order must be in the 'Ready' state and the machines (schedulers) that are responsible for sending documents to the supplier must be turned on.
We can also manually change the statuses to the appropriate ones in the order when we want to enter the content of deliveries ourselves, e.g. post-factum for documents that the supplier sent as email attachments. To do this, go to the 'Delivery' tab and select the '(+) Delivery' button.
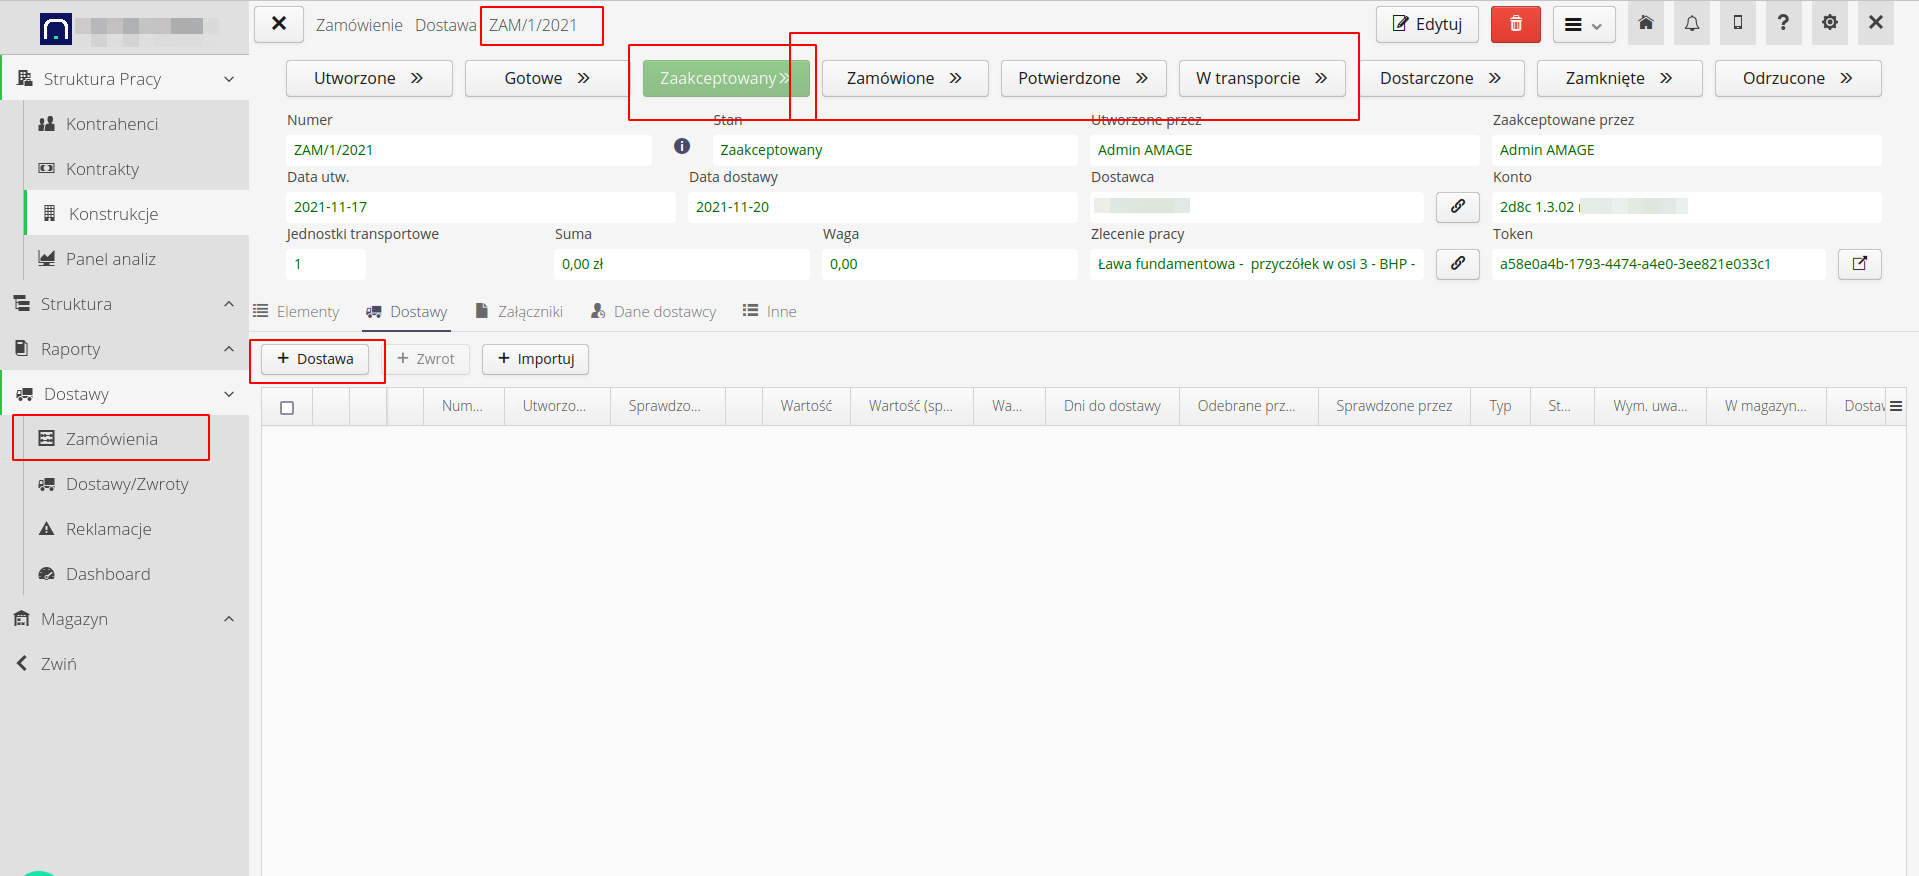
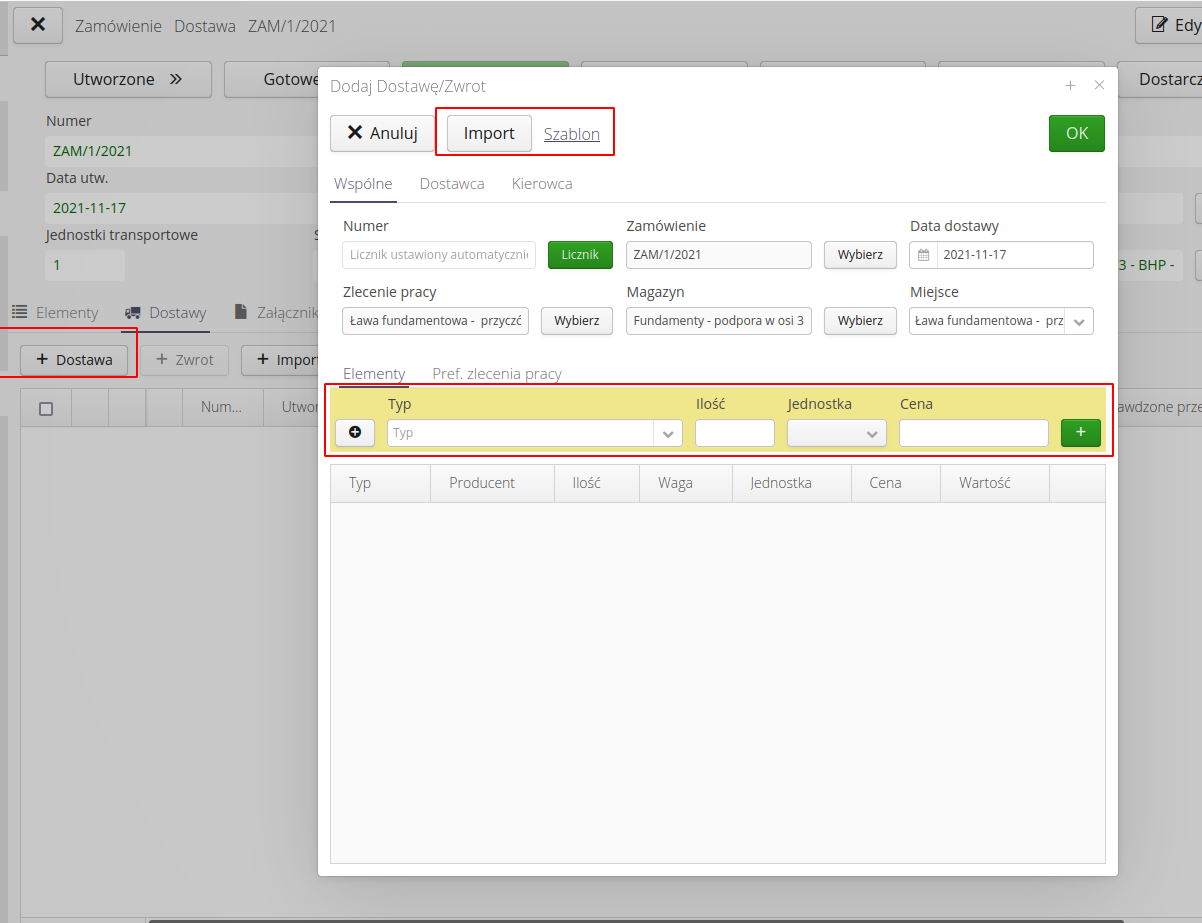
Then, to make our work easier, we can import delivery elements directly from the CSV/XLS file into the content of a given delivery. We can also add elements by manually selecting them from the local element type dictionary.
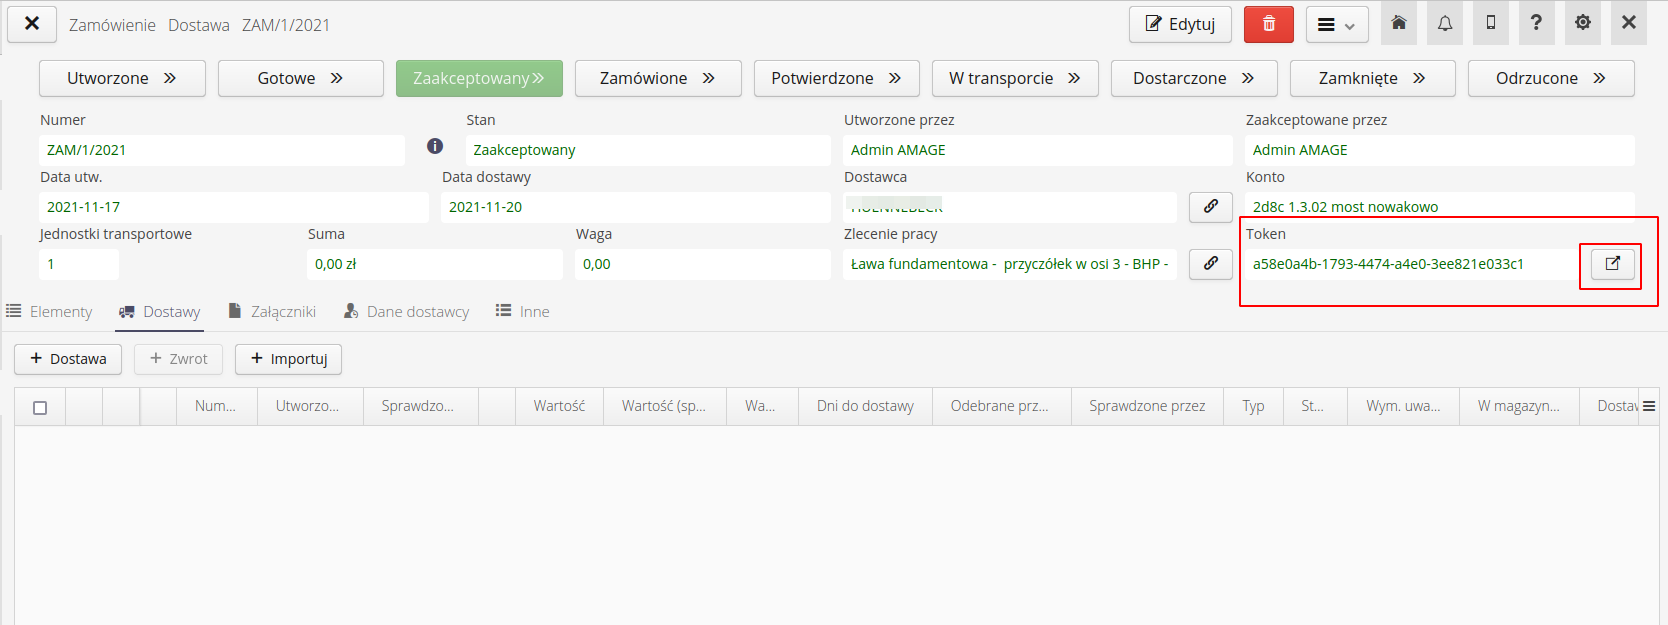
Or we can send a link to the Order document to selected supplier people. We can do this automatically or manually by selecting the appropriate button from the view. To see what the order visible to the supplier in the Portal looks like, select the appropriate button, which will automatically open a new window with the order view in the Portal.
Within the document, we can perform all operations that would be performed by the supplier’s representative. We can check order details, see delivery items, check stock status, and see the history of changes. We can also import delivery items.
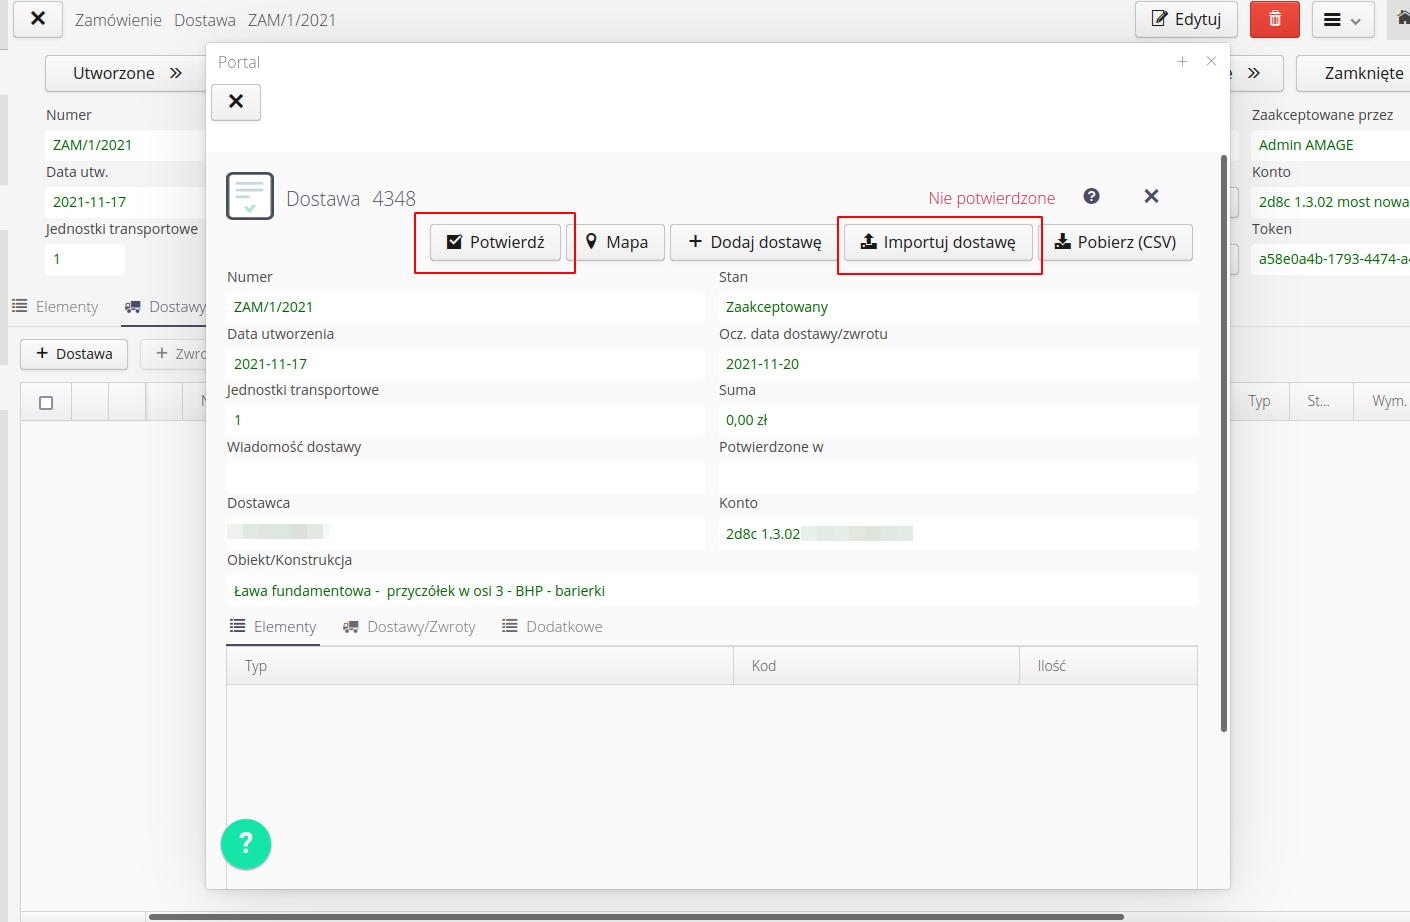
| All operations are described in the Portal documentation and the relevant user manuals for AMAGE system modules. |
If the delivery has already been entered into the system, we can perform further steps, i.e. checking the delivery and entering the delivery via a warehouse document to the selected warehouse.
Next steps
We check the delivery by selecting the appropriate action from the main system menu. Of course, all these activities are available in the mobile application, which allows you to check the delivery directly at the delivery site.
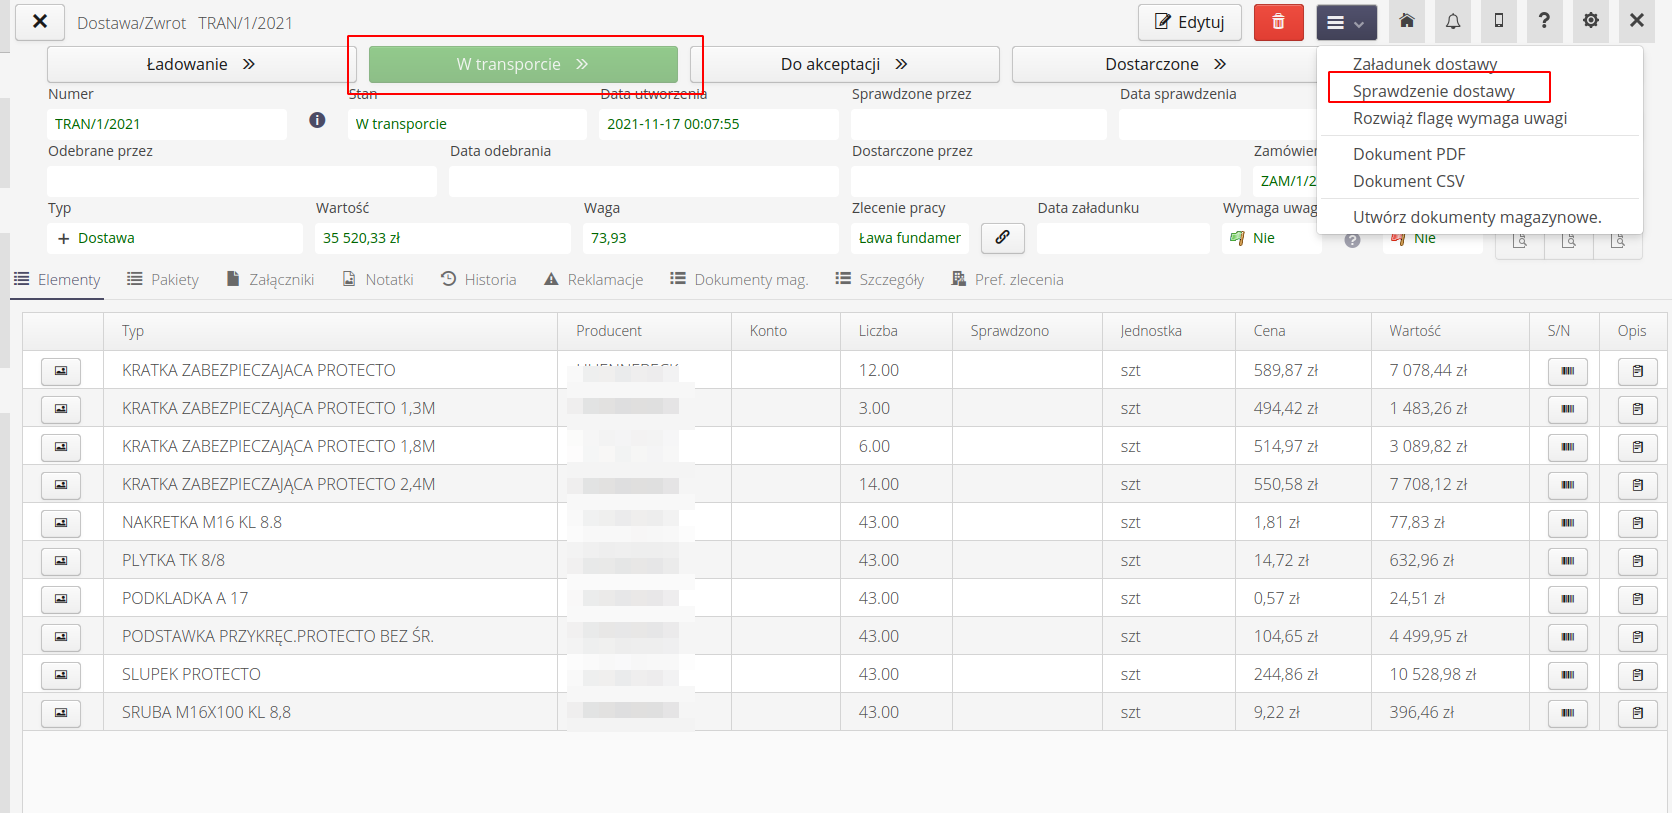
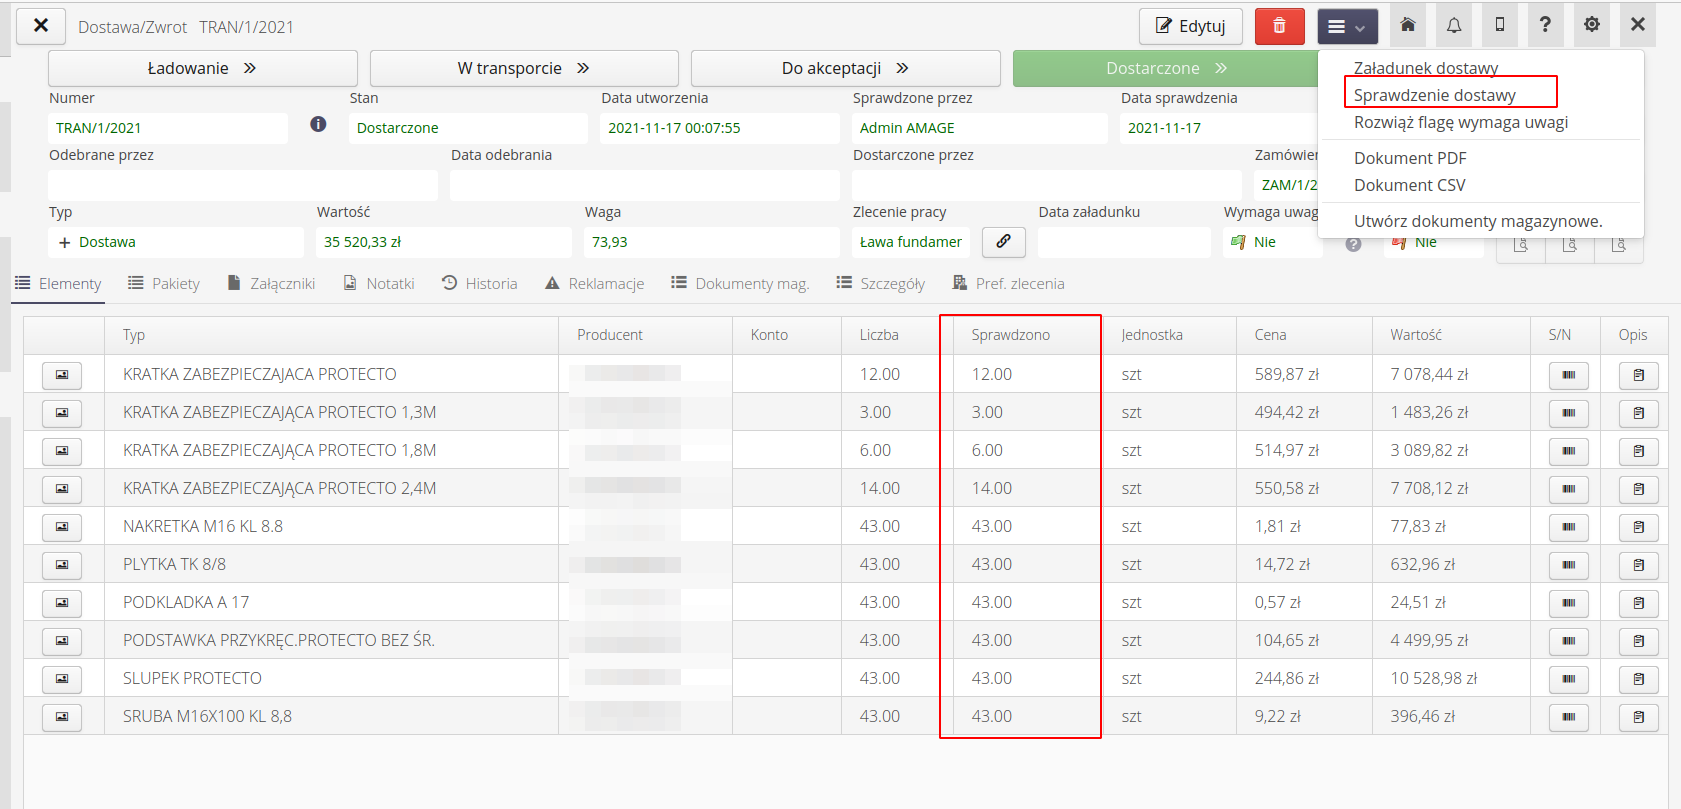
After checking the quantity of materials, they constitute information for carrying out warehouse operations and entering items through the warehouse receipt document. The materials will then be posted to the warehouse and will be available for further operations.
Items visible in stock.
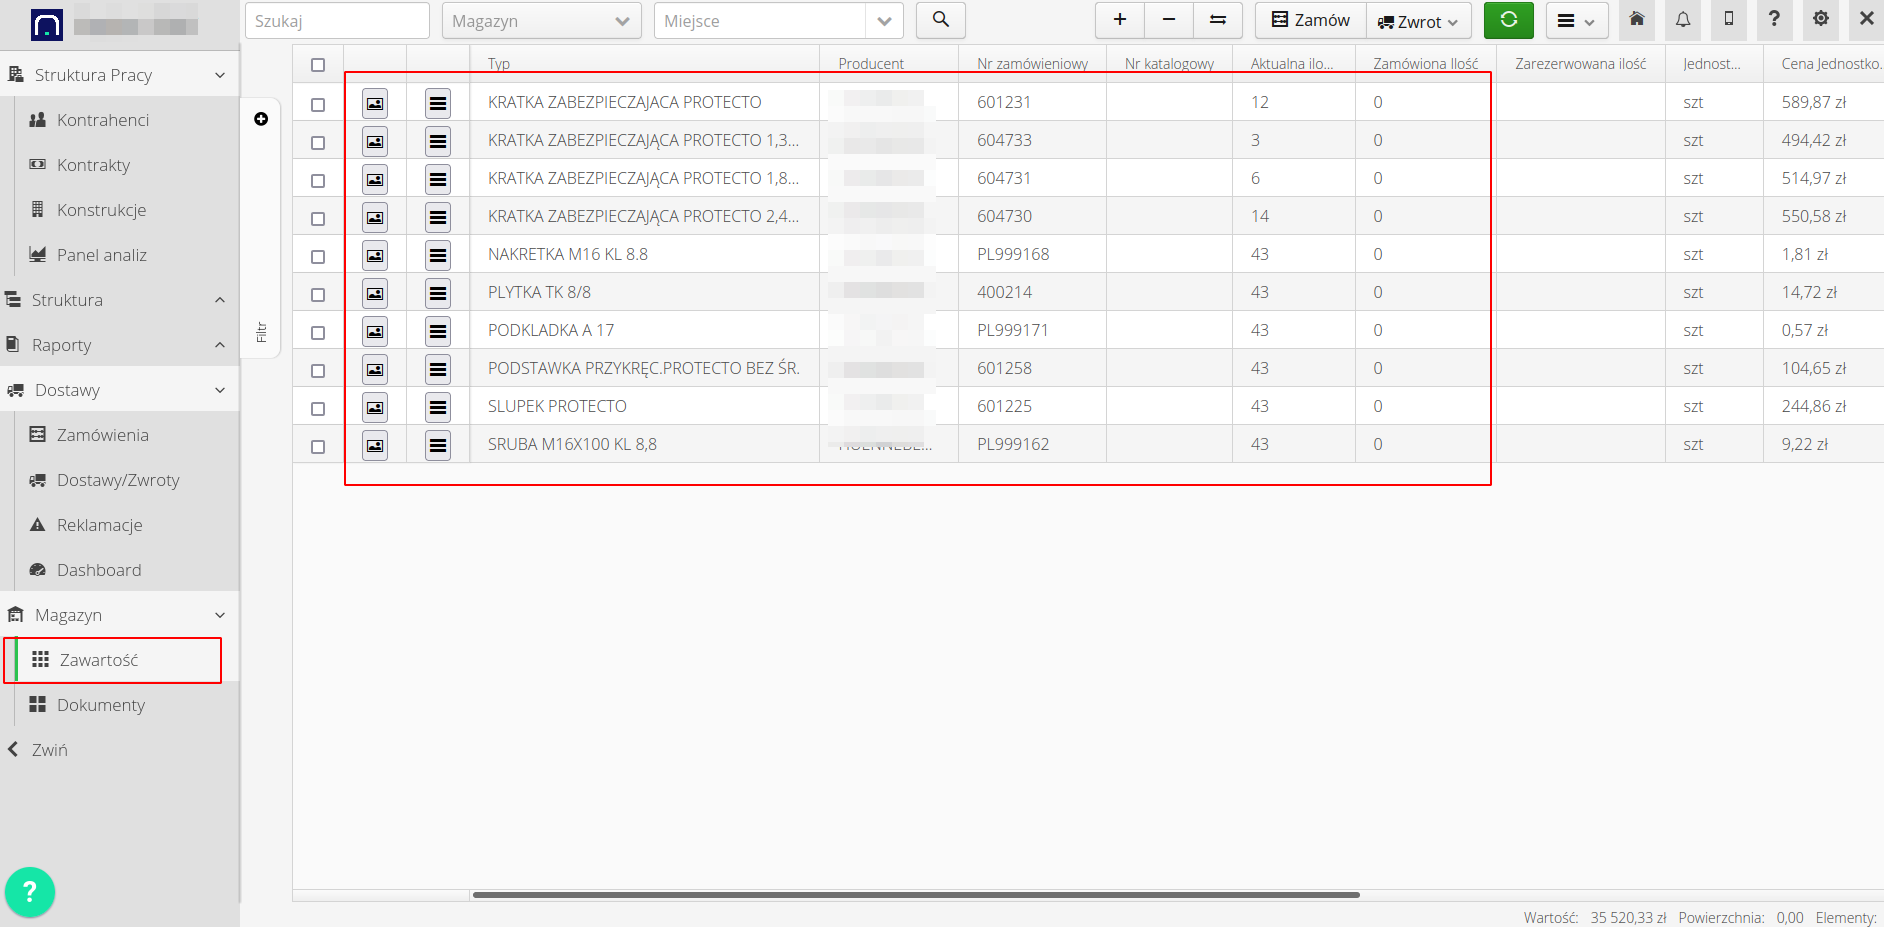
| The system allows full tracking of the material path from order, through delivery, delivery check, to posting the materials in the warehouse. All operations are saved in the system and available for viewing at any time. |
More
| The Howto is based on system version 1.17.0.2 (03.2022) and presents features that may not be available in your system. Ask AMAGE about making this functionality available. |
| Due to ongoing development of the system, some screens or configuration files may look slightly different, but will still retain the full functionality described here. This does not affect the core functionality described in this document. |