Support for supervision over drums with data import and delivery
Introduction
The document describes a full use case for the supervision of elements such as cable drums on a construction site. Supervision is based on information imported to the system from external sources such as Excel® spreadsheets, and then the drum supervision mechanism is defined inside the system. Alternatively, the ability to automatically create drums in the supervisory module based on completed deliveries was shown, along with the registration of specific serial numbers of delivered drums during delivery or its verification.
Drums in the field of electrical works are additional elements that appear during the deliveries. They are not the main material of delivery, as cables are, but they play an important role in the process. Importantly, these drums are borrowed from the manufacturer and must be returned after use. In this case, it is important to be able to monitor such elements, their location and status.
This use case shows how to import such drums into the system from an external data source, e.g. a sheet provided by the supplier along with the delivery. Alternatively, the system allows for greater automation of activities and configuration of the system in such a way that serial numbers of delivered drums are declared at the time of delivery and the system automatically creates appropriate records in the supervision module and initiates its life stages.
Data import to the system
If we have an external list of drums - either from the supplier or from the design system - a list of drums that require supervision, we can import them to the system with all the necessary additional parameters using the importer mechanism.
The importer is available in the system configuration section. We go there in the menu related to Integration.
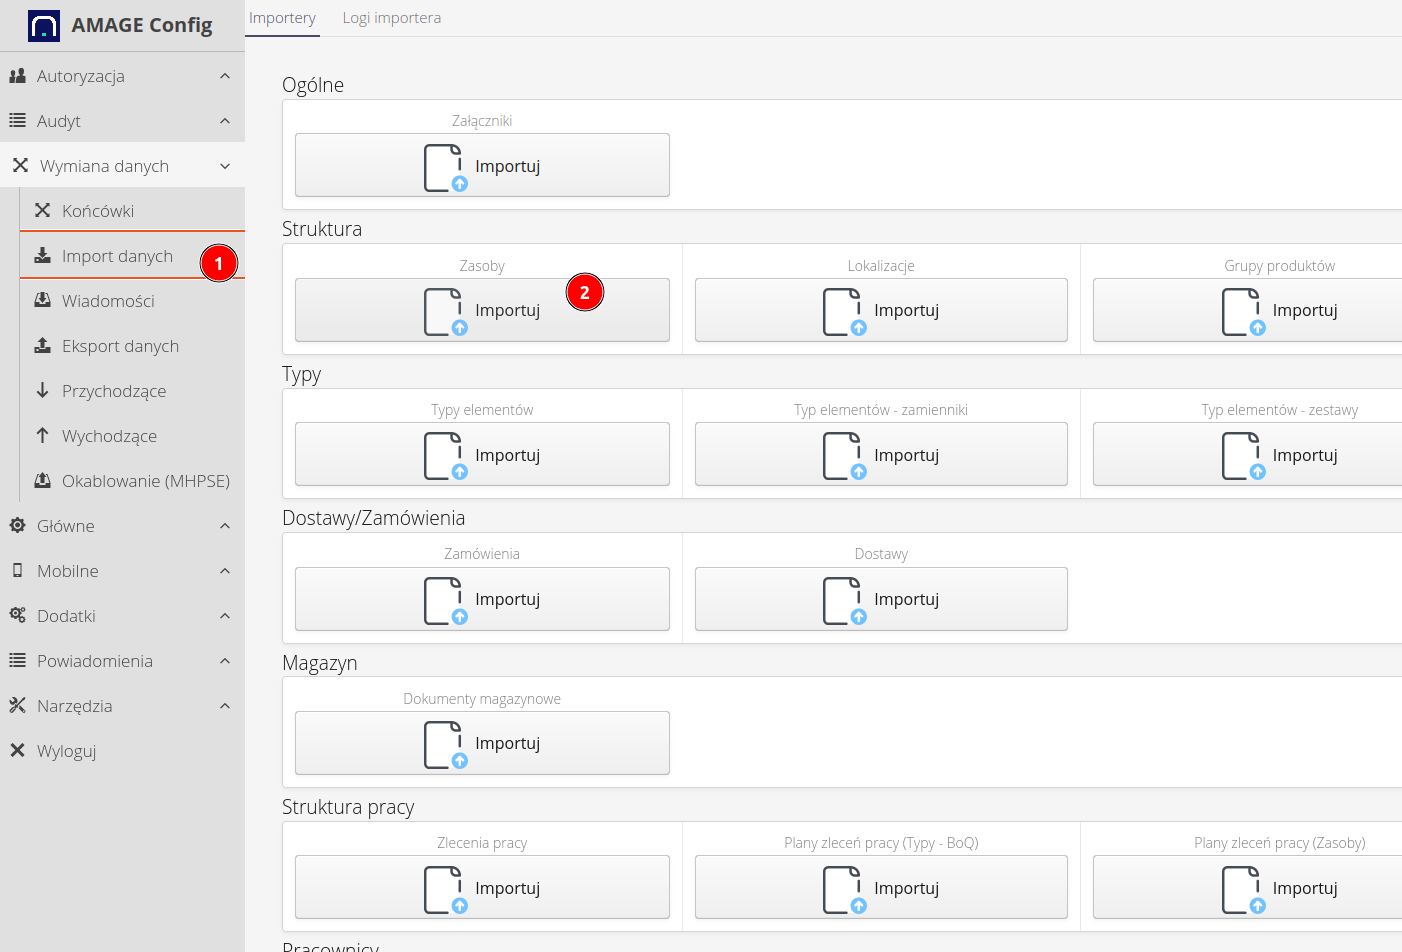
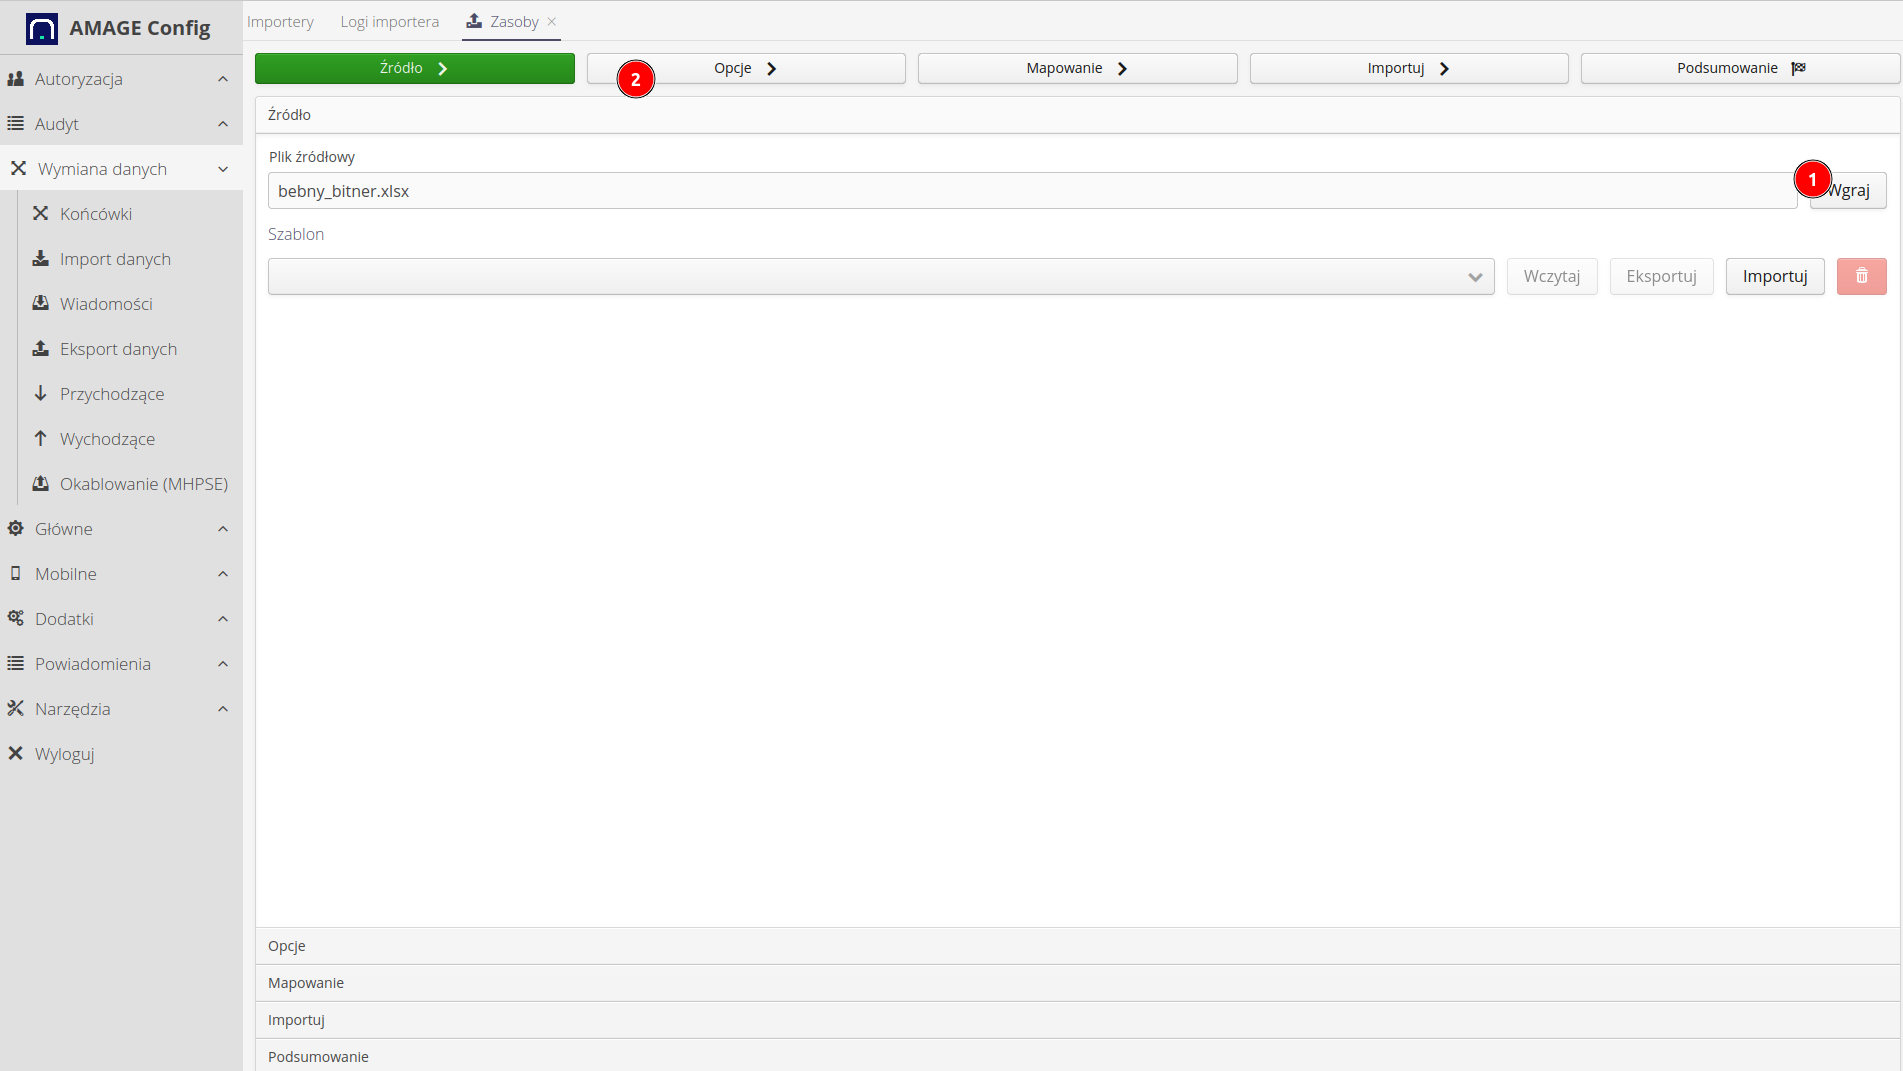
In the first step, we select the file we are going to import. This file can be in virtually any spreadsheet format. The interface allows flexible definition of parameters and then saving them to a template, which can then be used again.
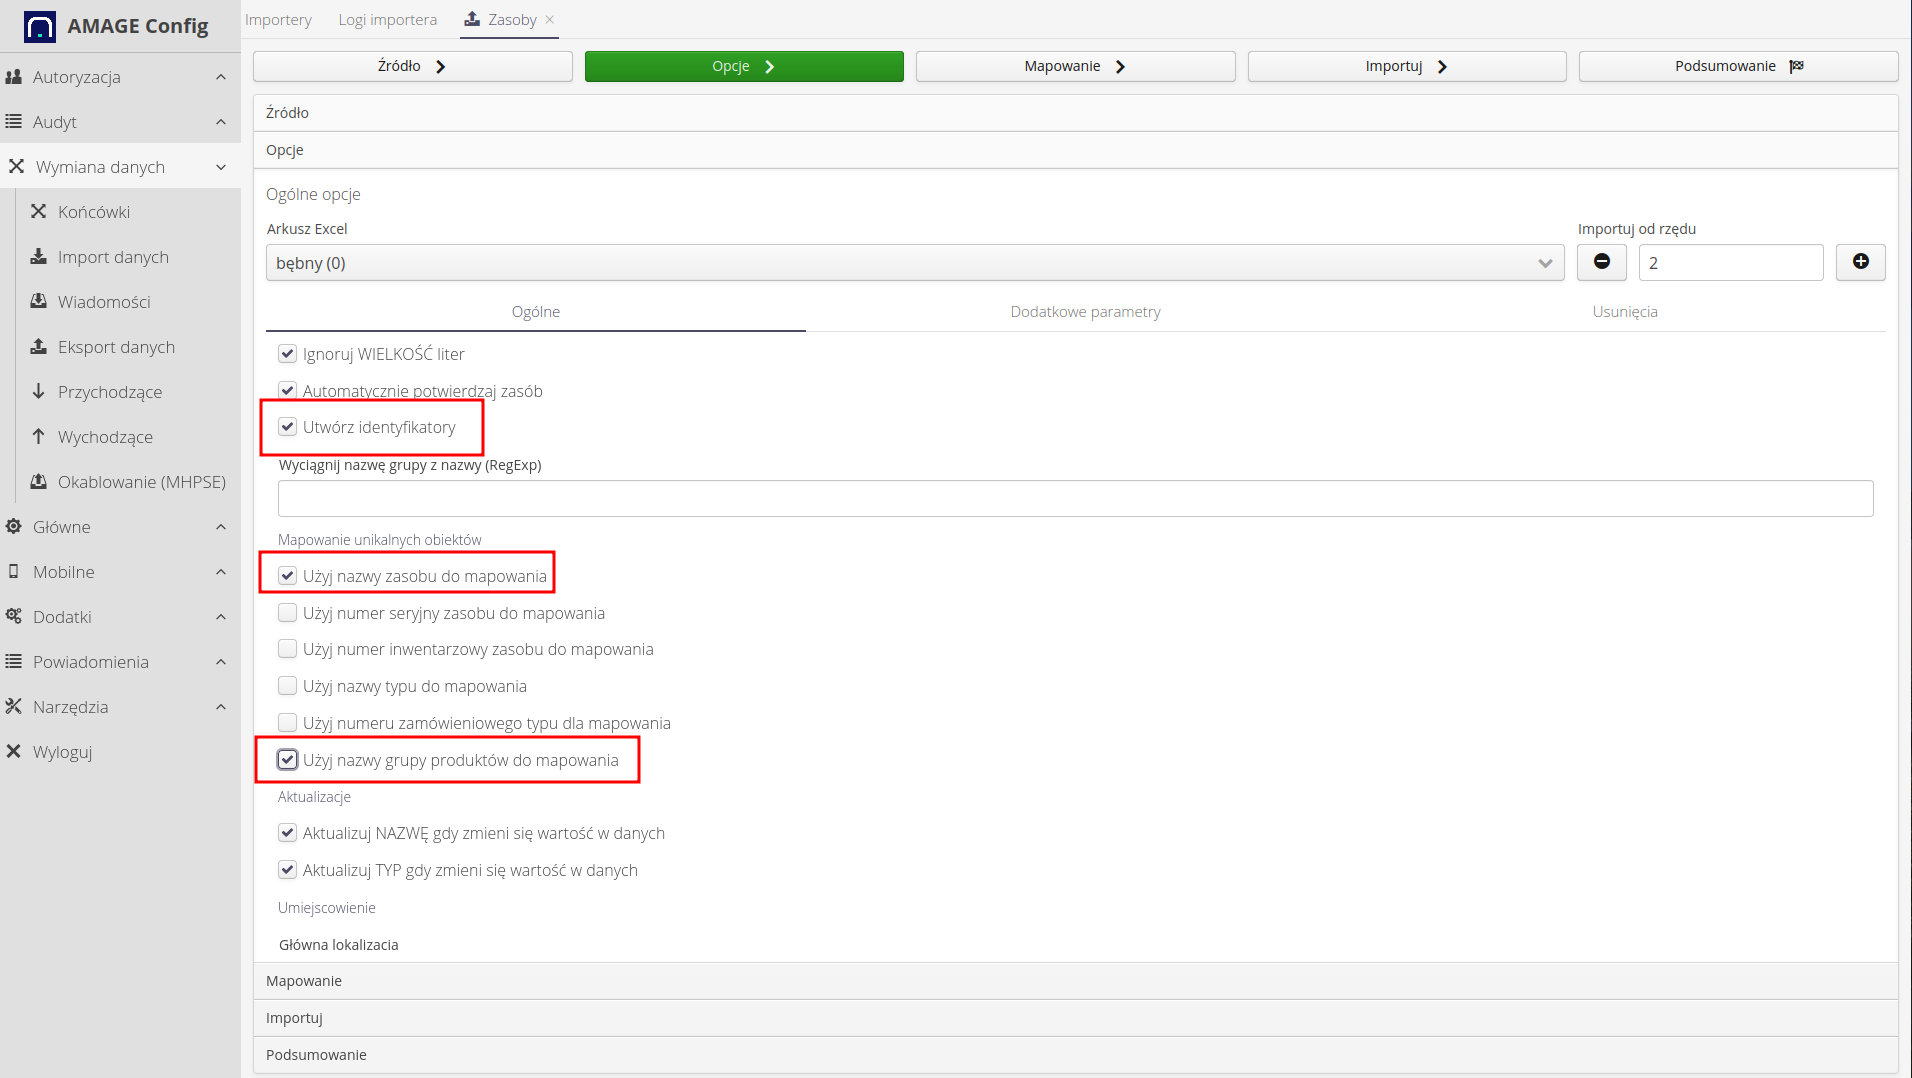
In the next step, we define information about specific settings. For the import of drums, we should set the following parameters:
-
create identifiers- automatically create new identifiers during import and assign them to a given resource. -
use the name of the resource for mappinganduse the name of the products for mapping- in order for the system to detect drums that were previously imported in the system and update the parameters, it should be indicated how to search for a given resource in the system to unambiguously detect it. In this case, the system will search for resources by their name (drum name) and location in the product group tree. If it finds such a resource there, it will start updating it. If not, it will create a new resource there.
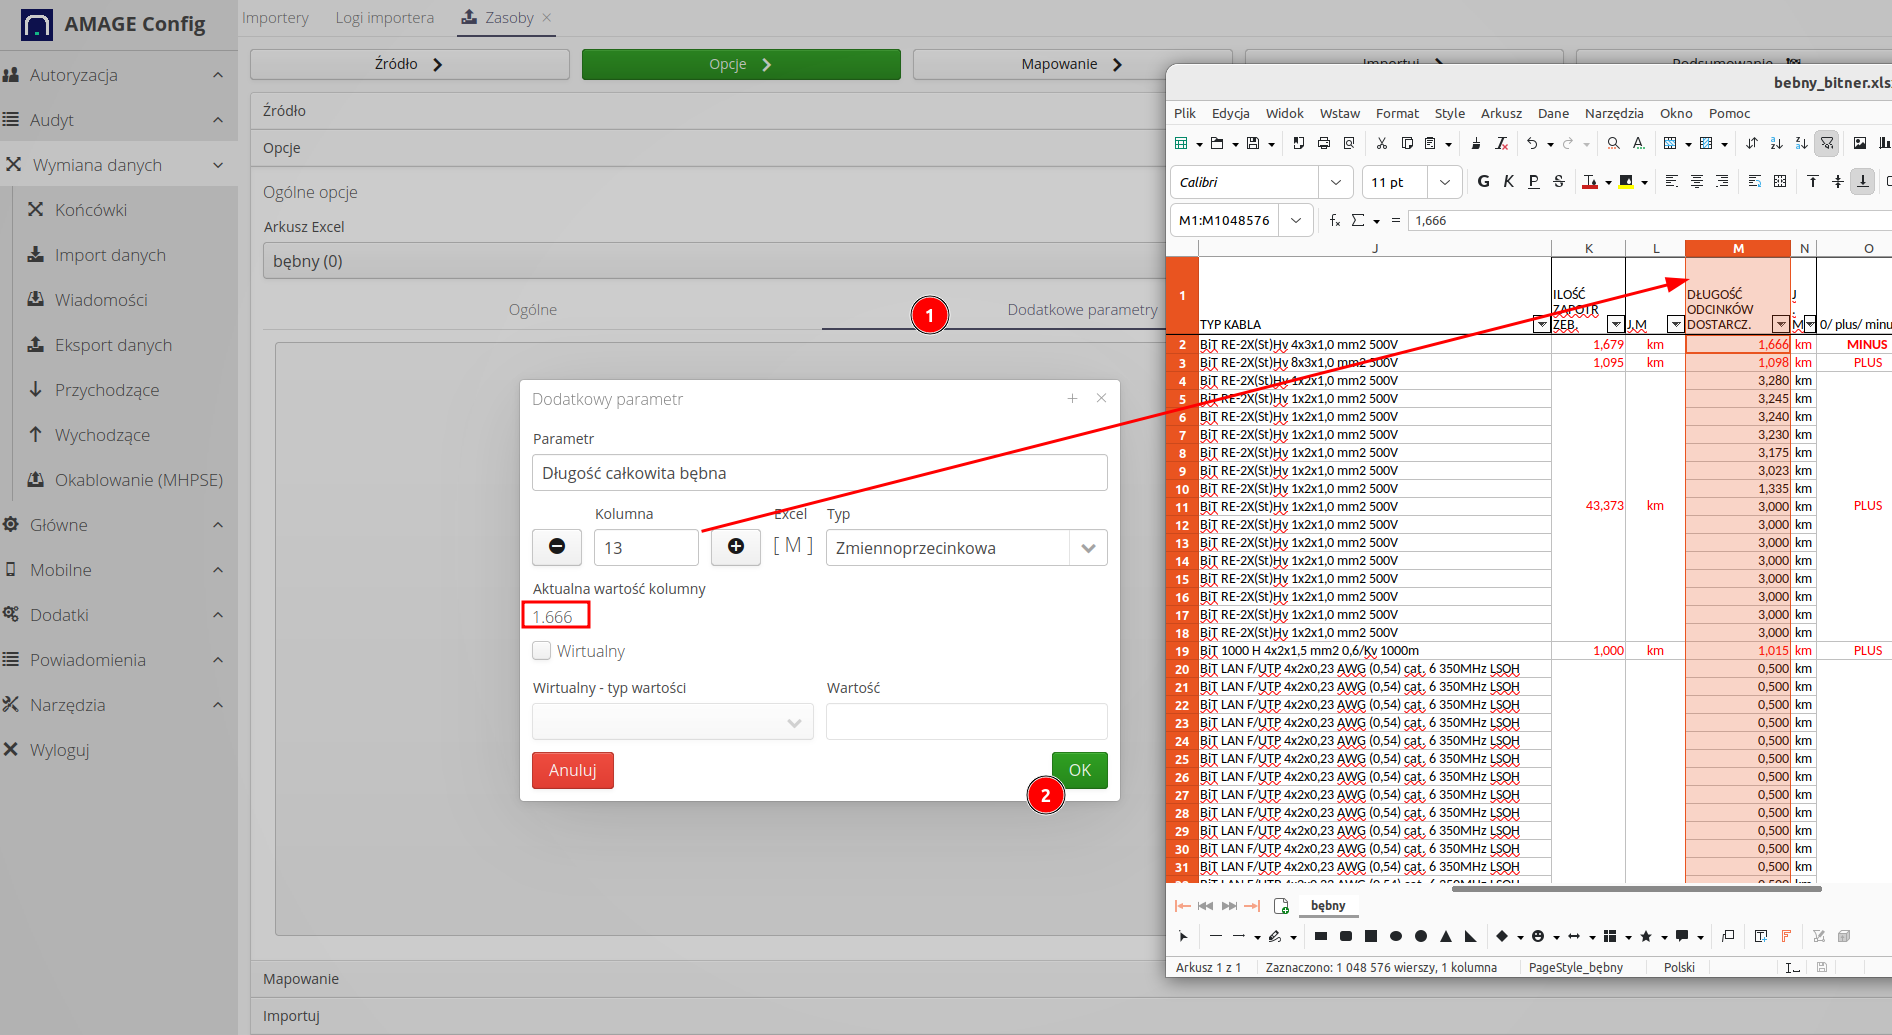
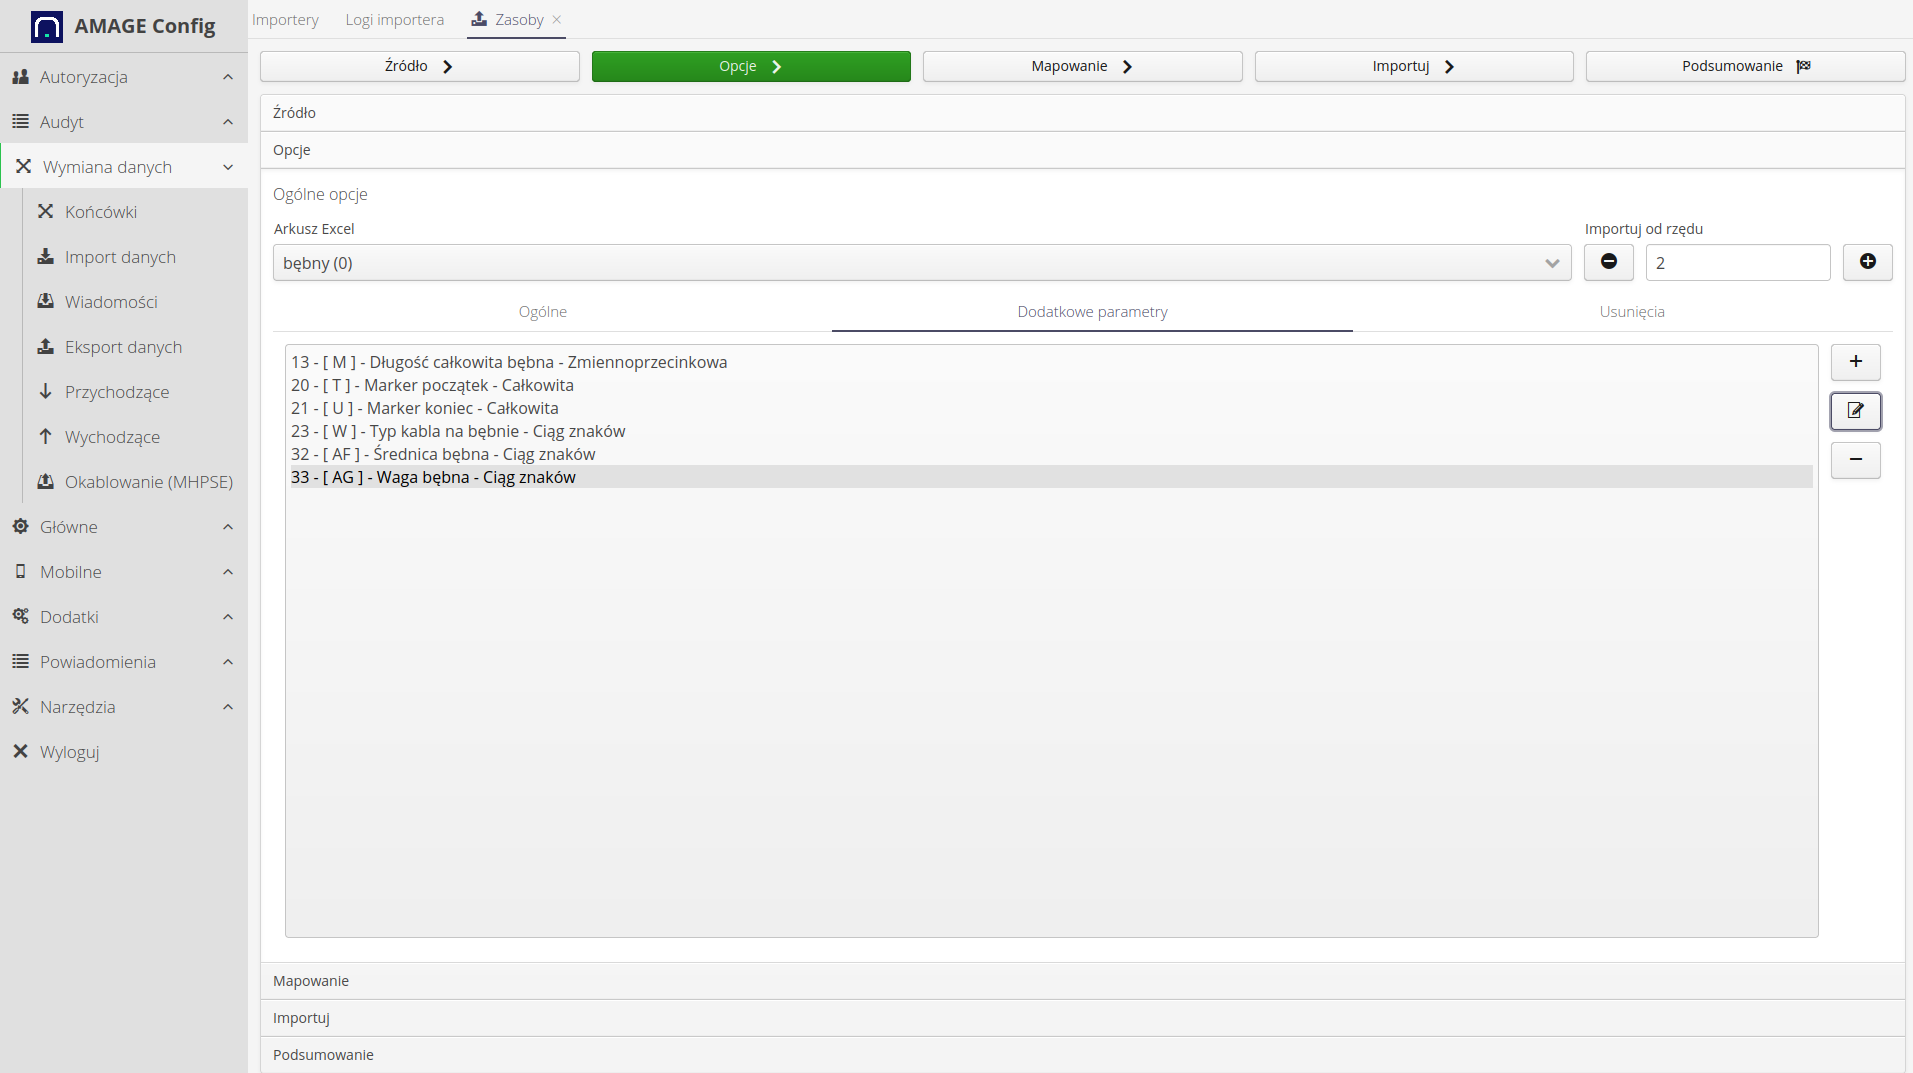
In a given sheet, in addition to basic information about the drum (type, manufacturer, serial number), we also have additional data, e.g. total length on the drum, ordered length, drum weight, etc. These parameters can be imported into the system by defining additional parameters.
We define additional parameters. Each such parameter is defined using the settings in the dialog:
-
Parameter - parameter name.
-
Column - the column from which we will import this data. The system automatically shows the value of this parameter when changing a column to make it easier to determine the appropriate column.
-
Type - type of data that will be visible in the system. The type determines the validation of data and, for example, the possibility of displaying graphs for numerical parameters.
-
Virtual - disabled in this case. A virtual parameter is one that does not physically exist in a given sheet, but which we would like to be imported/created.
-
Value (Default) - default value for the parameter, if no value has been provided in the worksheet or for the virtual parameter.
All defined additional parameters form a list that displays information specific to a given type of data - in this case drums.
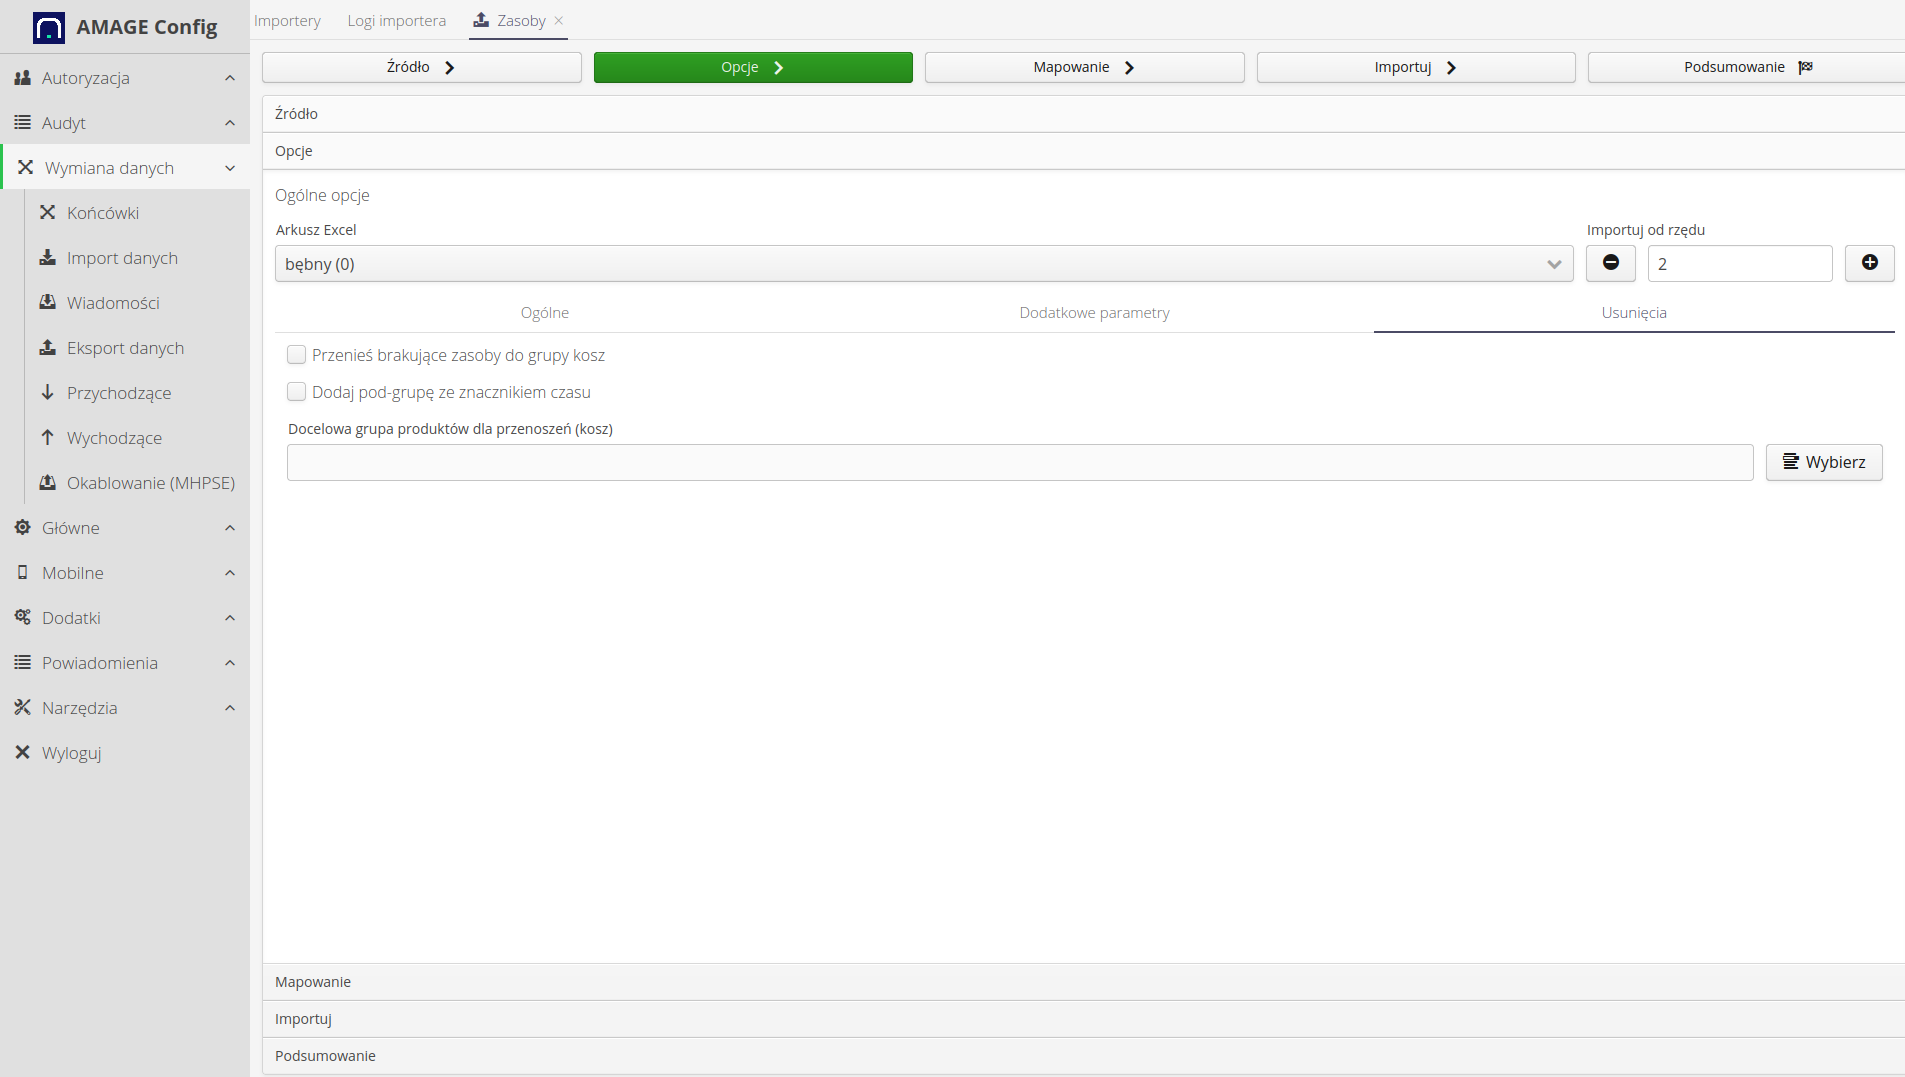
If we want the system to automatically "clean" the data in the system that are no longer in the sheet, we can use the delete option. After enabling this option, after importing the data, the system will perform a reverse analysis, i.e. it will compare the data existing in the system with the data in the spreadsheet. If it does not find a given resource (here a drum) in the sheet, it will perform the operations described here.
| In this case, the system does not remove the resources, but moves the resource (drum) to another group of elements (here marked as 'trash'). This allows you to save all asset data such as inspections, reports and supervision records. |
Operation options available:
-
move the missing resources to the "trash" group - enabling this option performs the removal procedure
-
add a sub-group with a time stamp - in addition to moving to a given group, the system will automatically create a sub-group with a given time stamp, e.g. 20230101, which will facilitate verification when a given transfer operation was performed
-
target product group (basket) - target product group to which resources that are no longer in the original worksheet will be transferred.
| This operation, if used carelessly, can move many resources to the 'trash' group. This is possible especially when data imports are carried out from many sheets. In this case, the parameter of the main import group should be used and the system will perform each operation against it. See the main user guide for an explanation of this method and all importer options. |
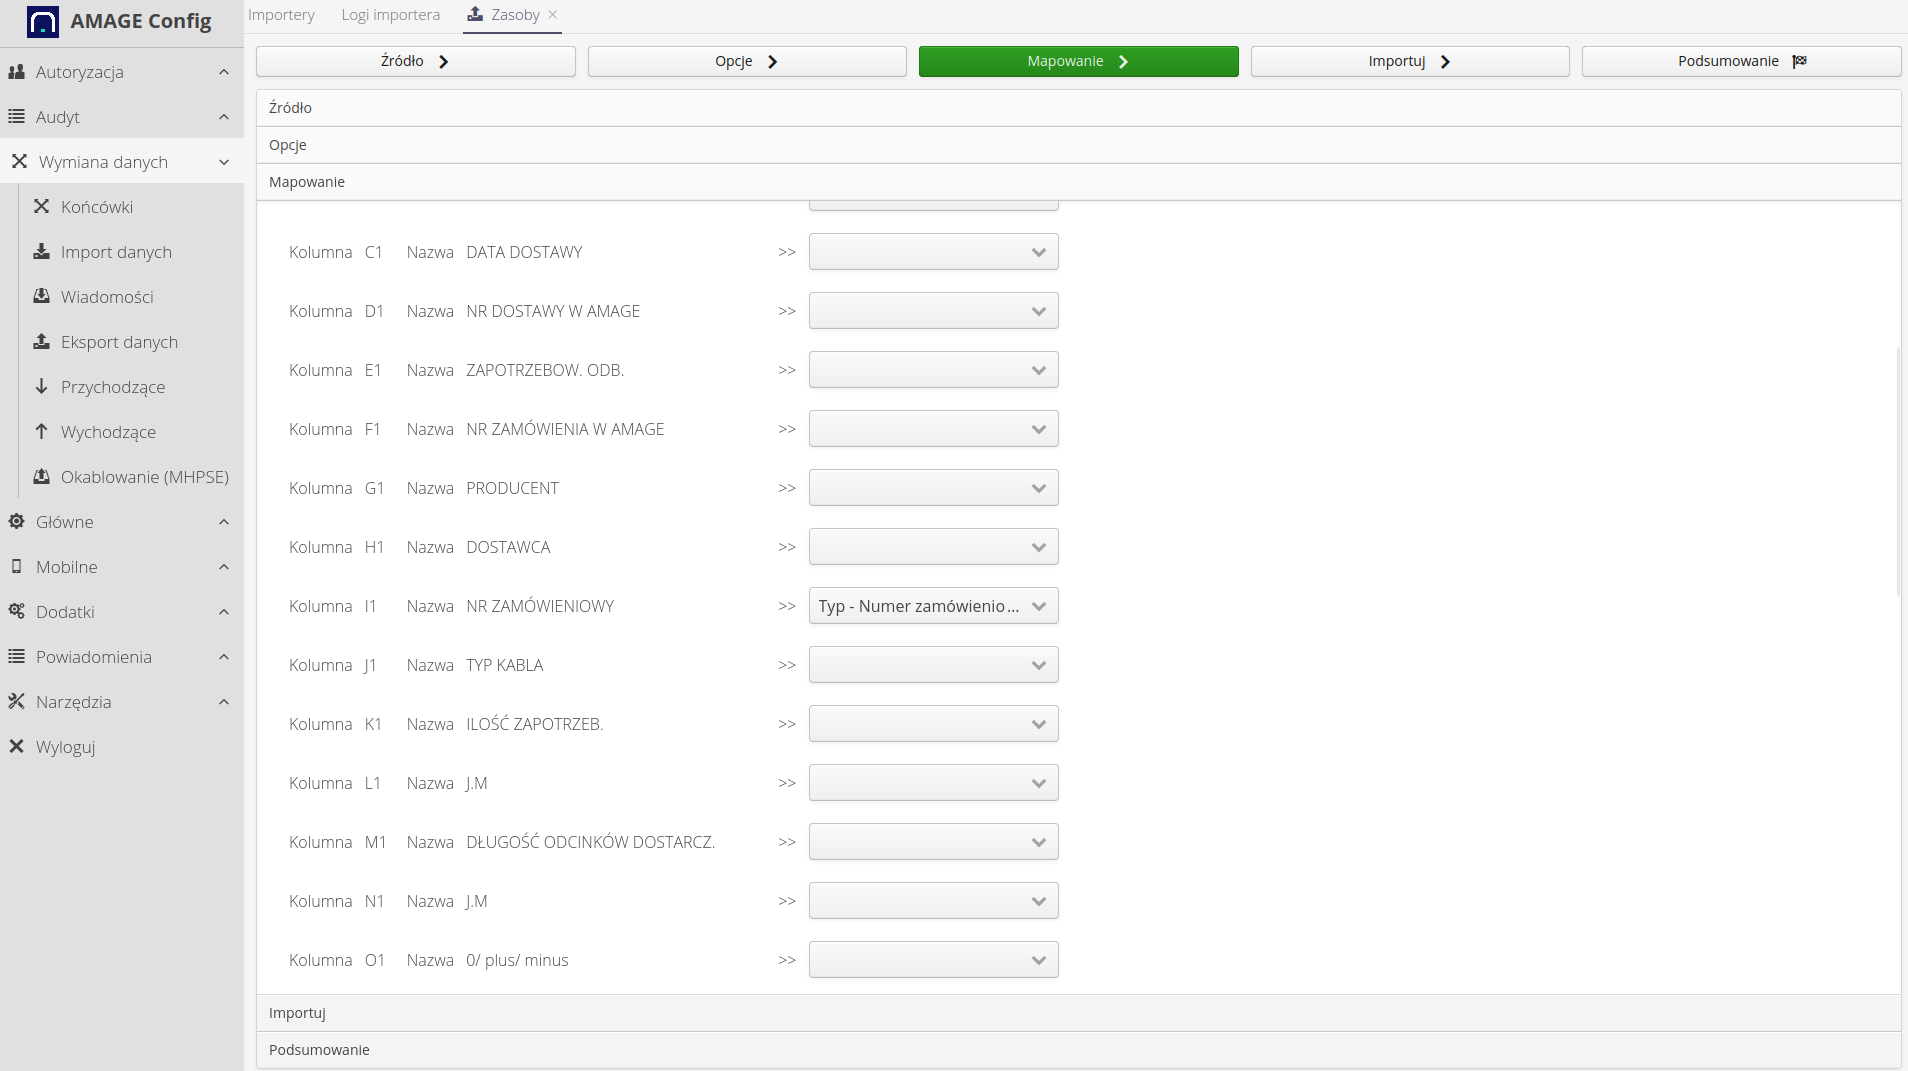
Then we move on to mapping the main parameters. All parameters are presented in the upper part of the screen on the first 2-3 rows of the imported sheet. The list allows you to select the corresponding resource parameter for each field in the sheet.
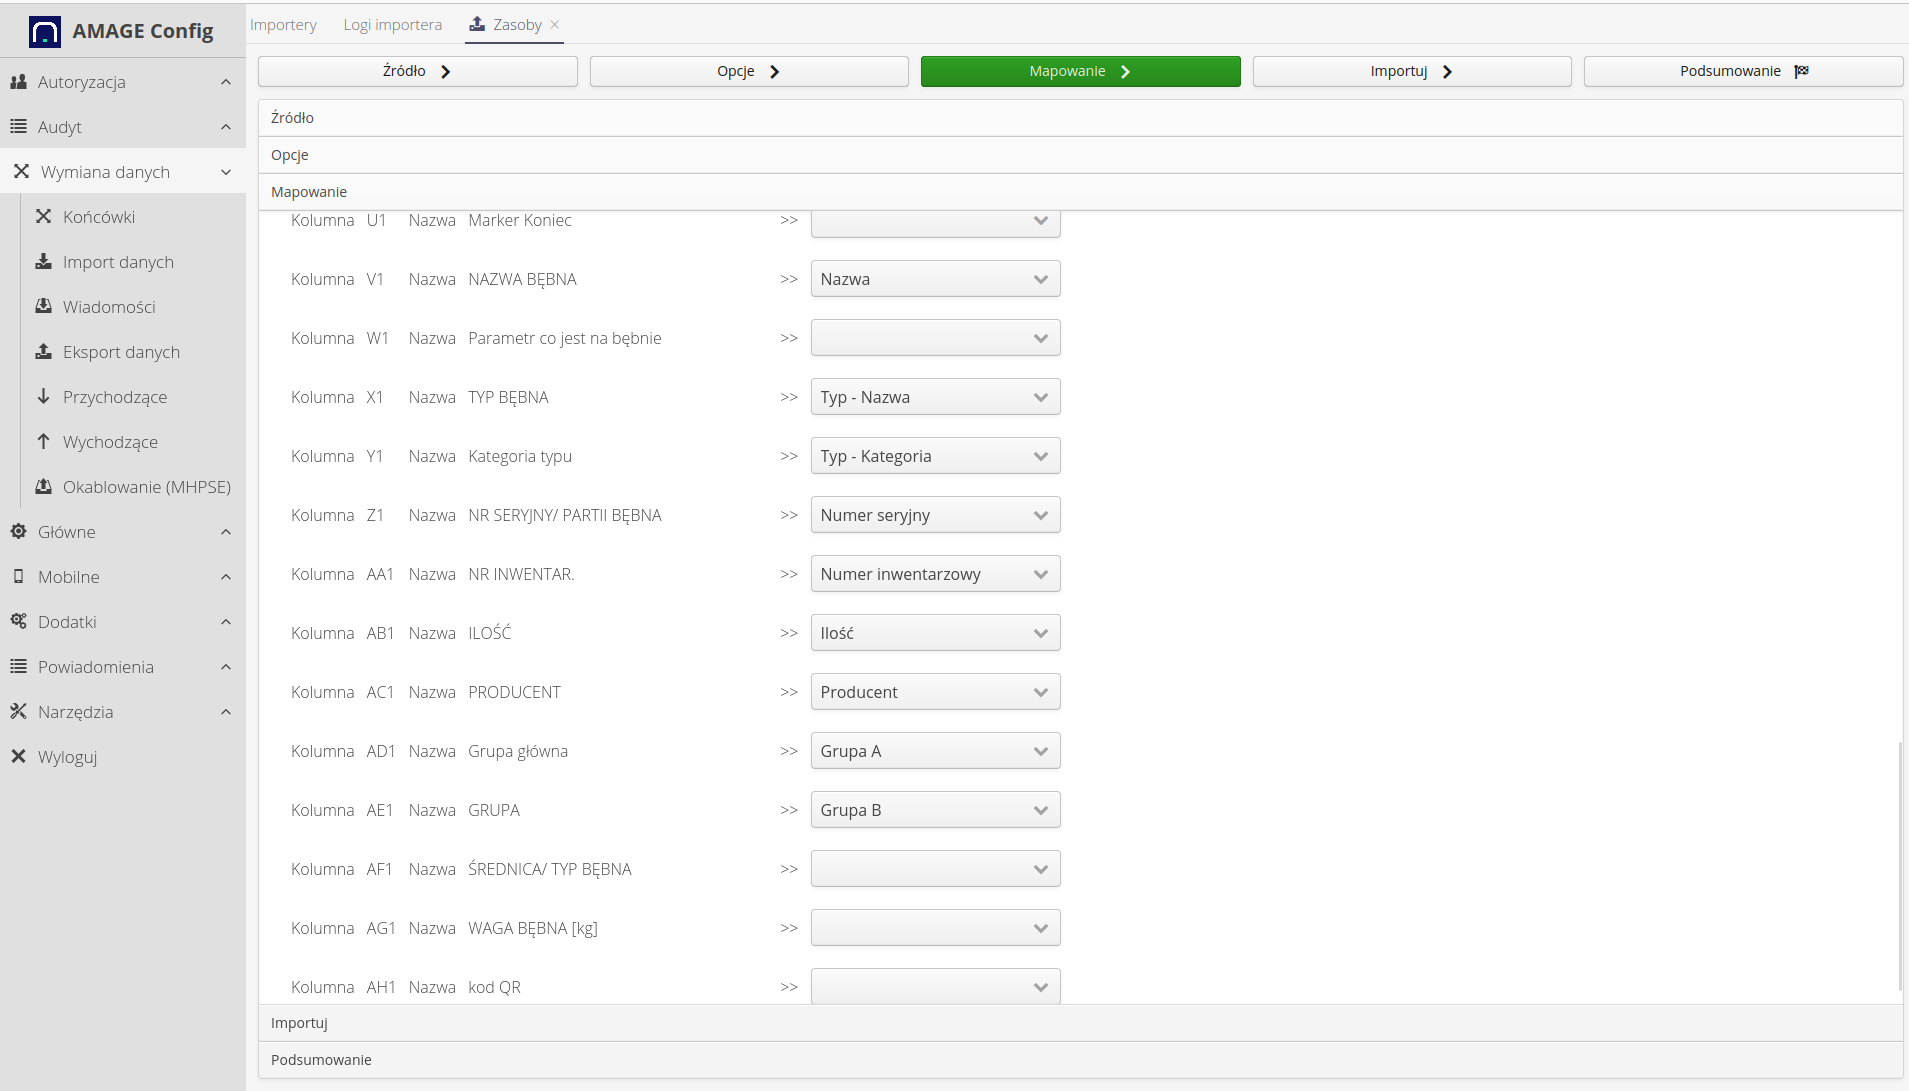
After creating these parameters, we can save the created template to use it in subsequent imports of sheets with the same structure.
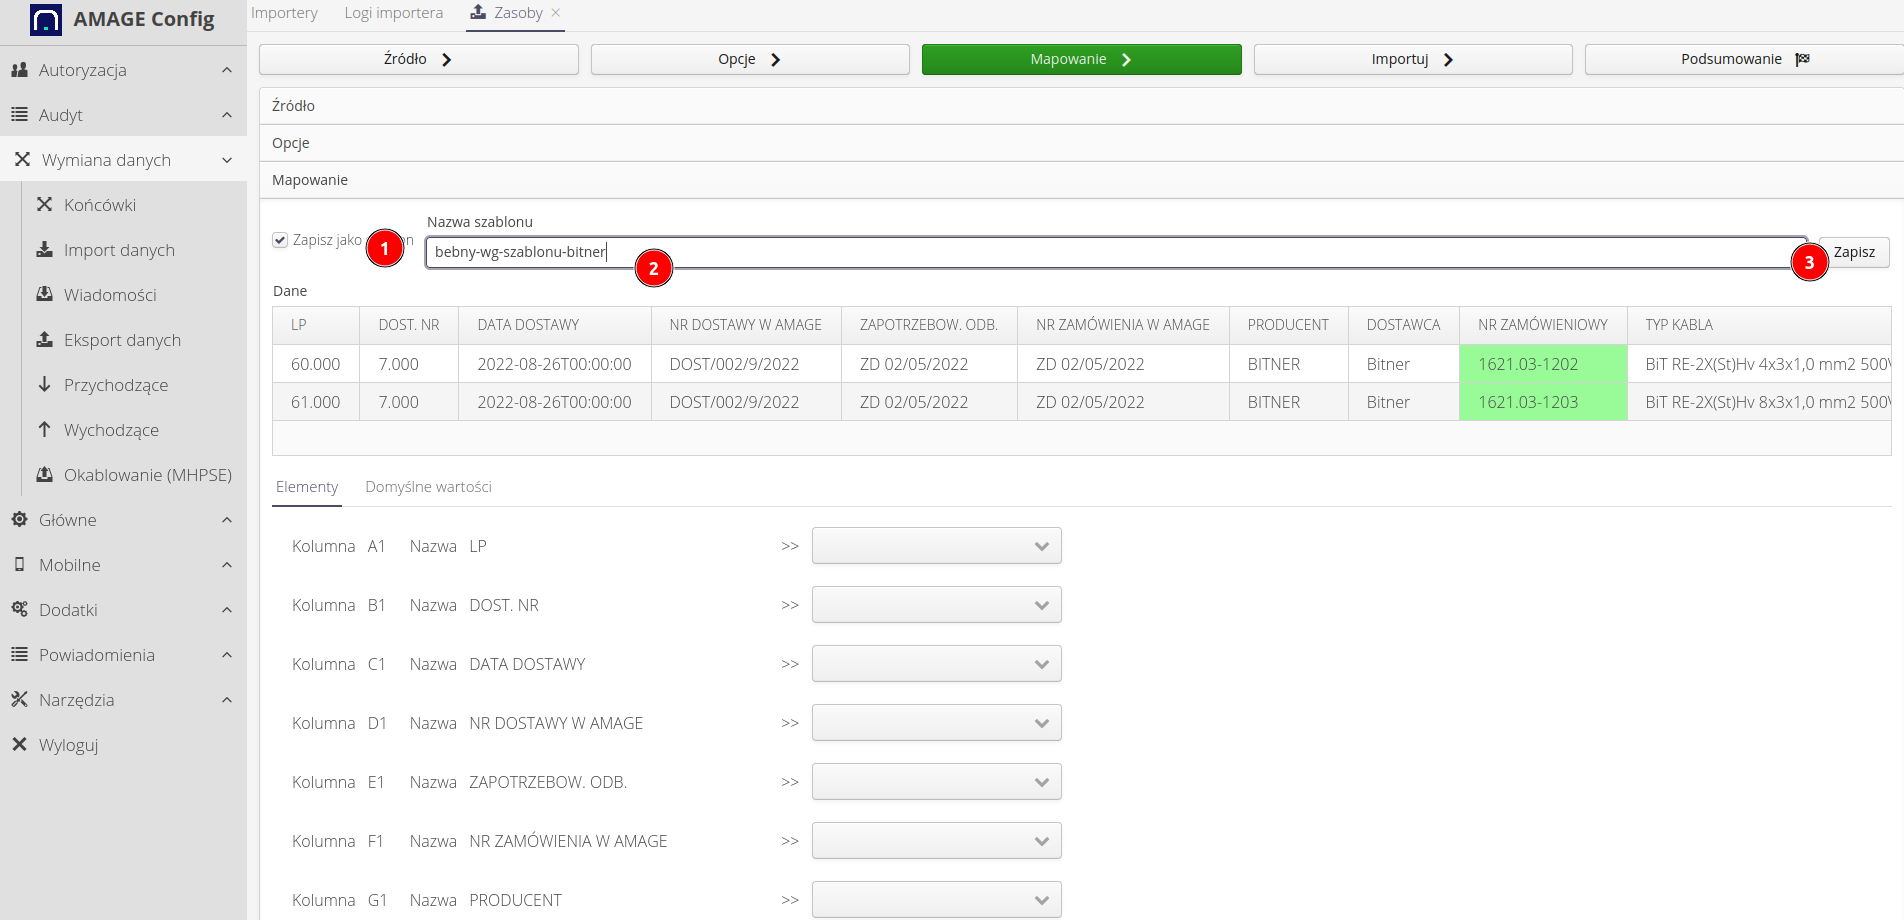
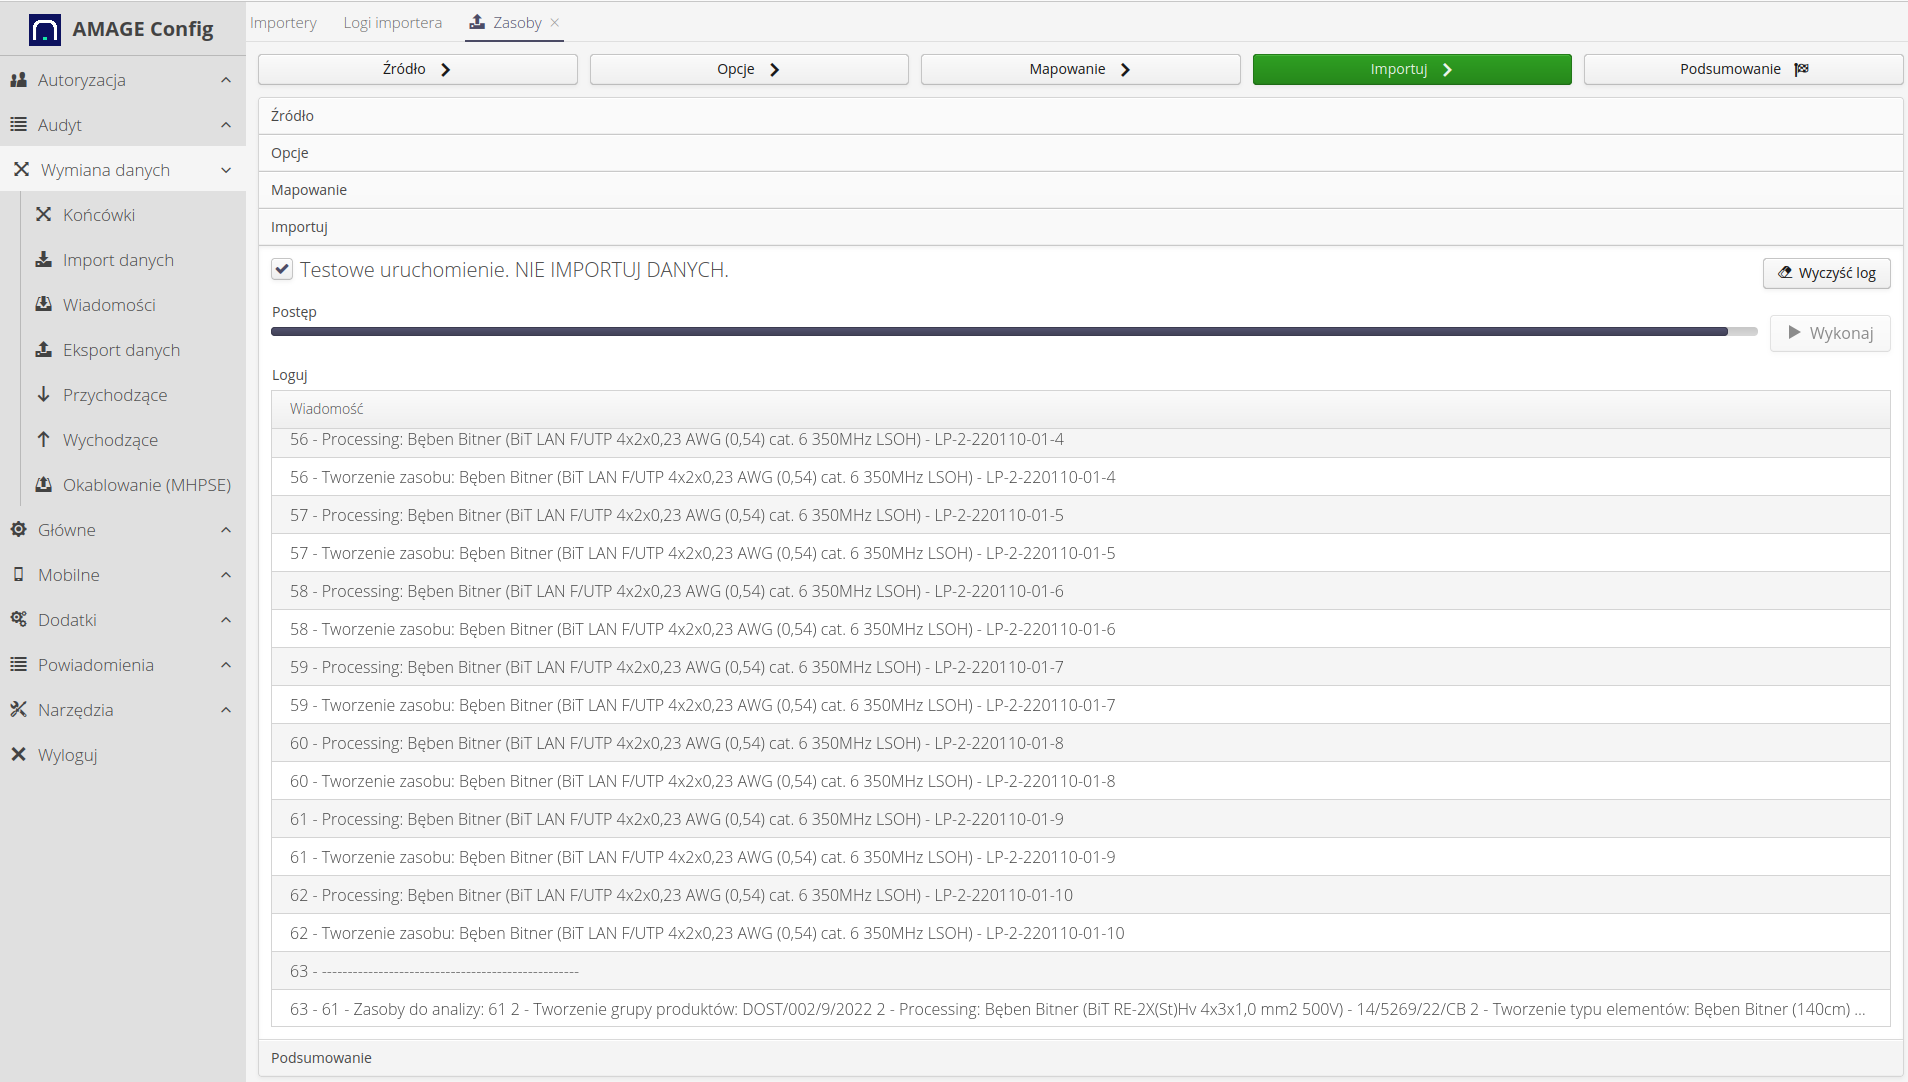
The next step is to import. We can do it in test mode. The system will import the data, but these changes will not be saved in the system. This allows you to check the configuration and trouble-free data verification.
-
Test run "DO NOT IMPORT DATA" - switching on will cause a test run and no data will be saved to the main database.
-
Clear log - clears the import view log
-
Execute - execute the import
The final import changes the color of the progress bar according to the result. If the import was done correctly, it will change to green, if with an error, to red.
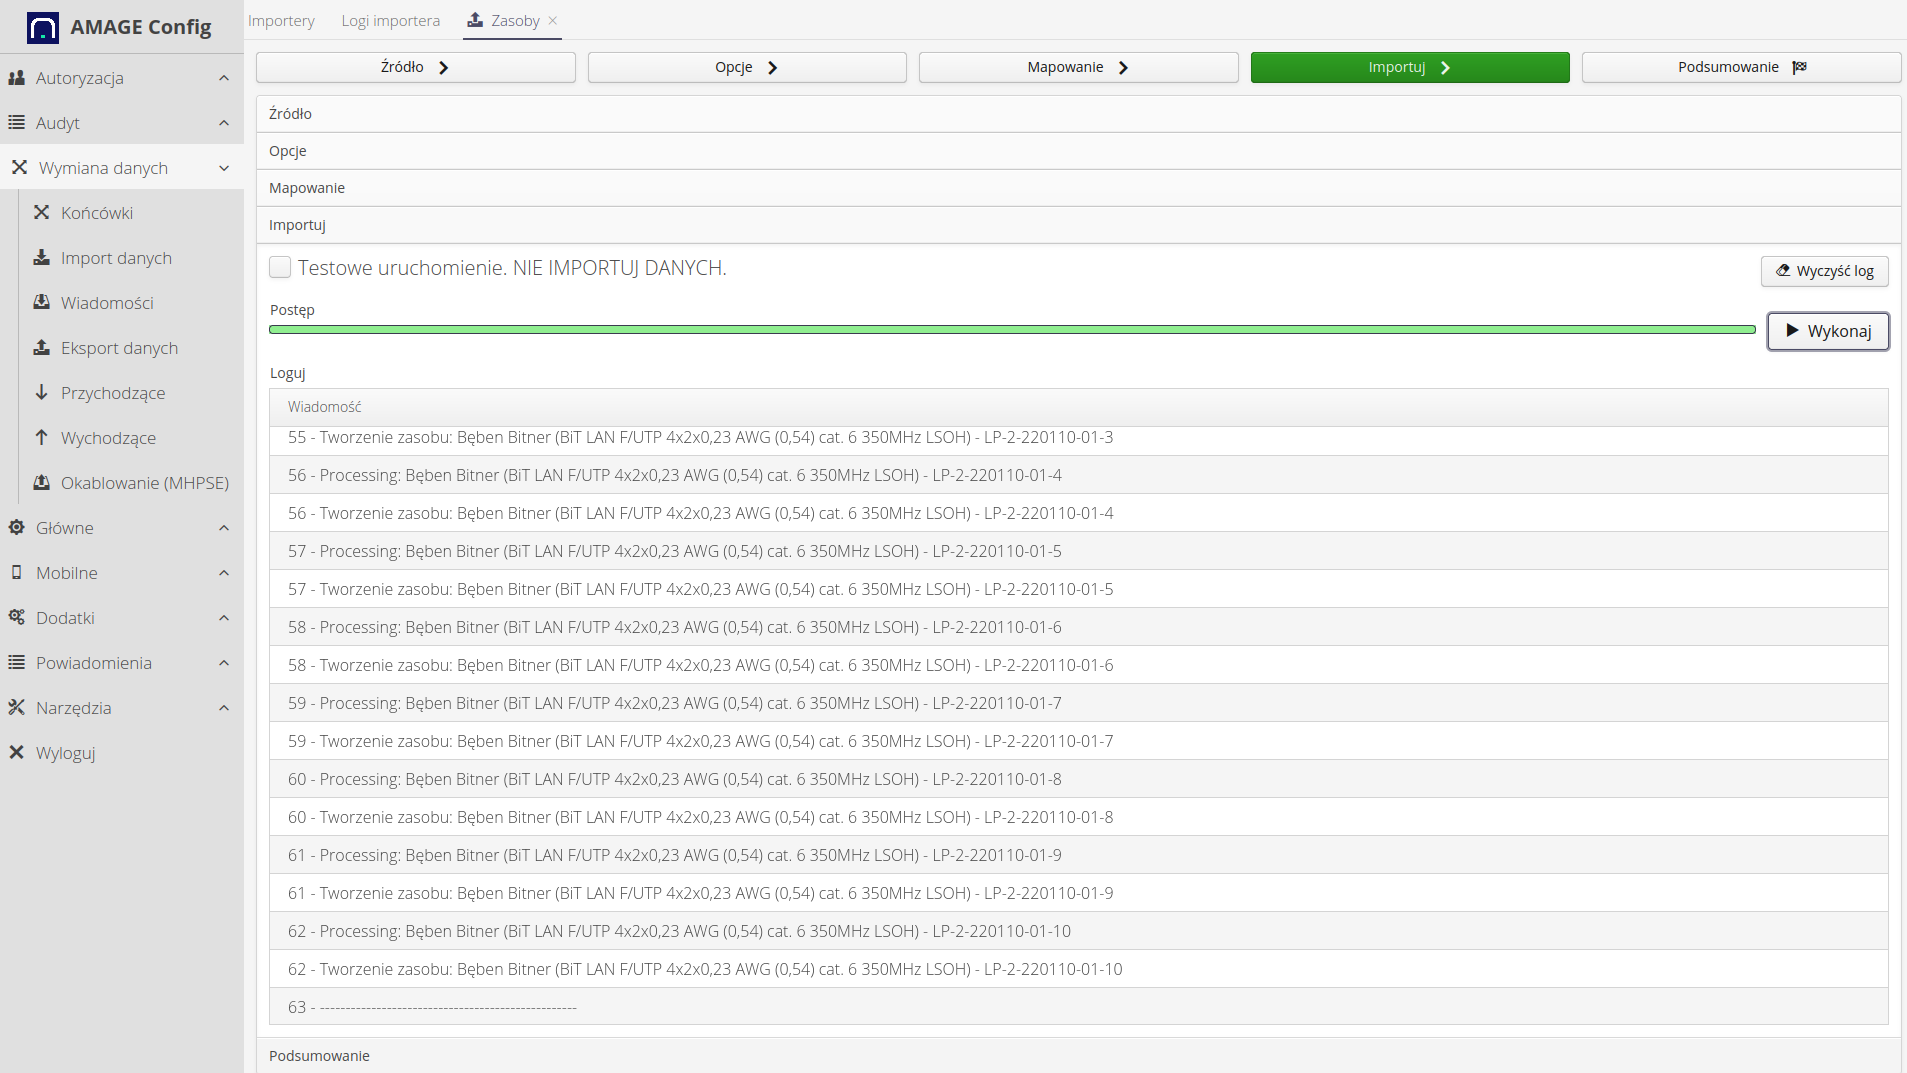
| Error during import, e.g. incorrect data in the sheet, which will cause a conversion or interpretation error, will interrupt the import and not save all data to the system. |
Data has been imported :)
Imported resources
After importing, we go to the main view in the system. To resource view. In this case, we additionally selected a filter to show imported elements from only one element, which was described with the delivery number. To do this we did:
(2) filtering by product group (3) selecting the appropriate group (4) filter application
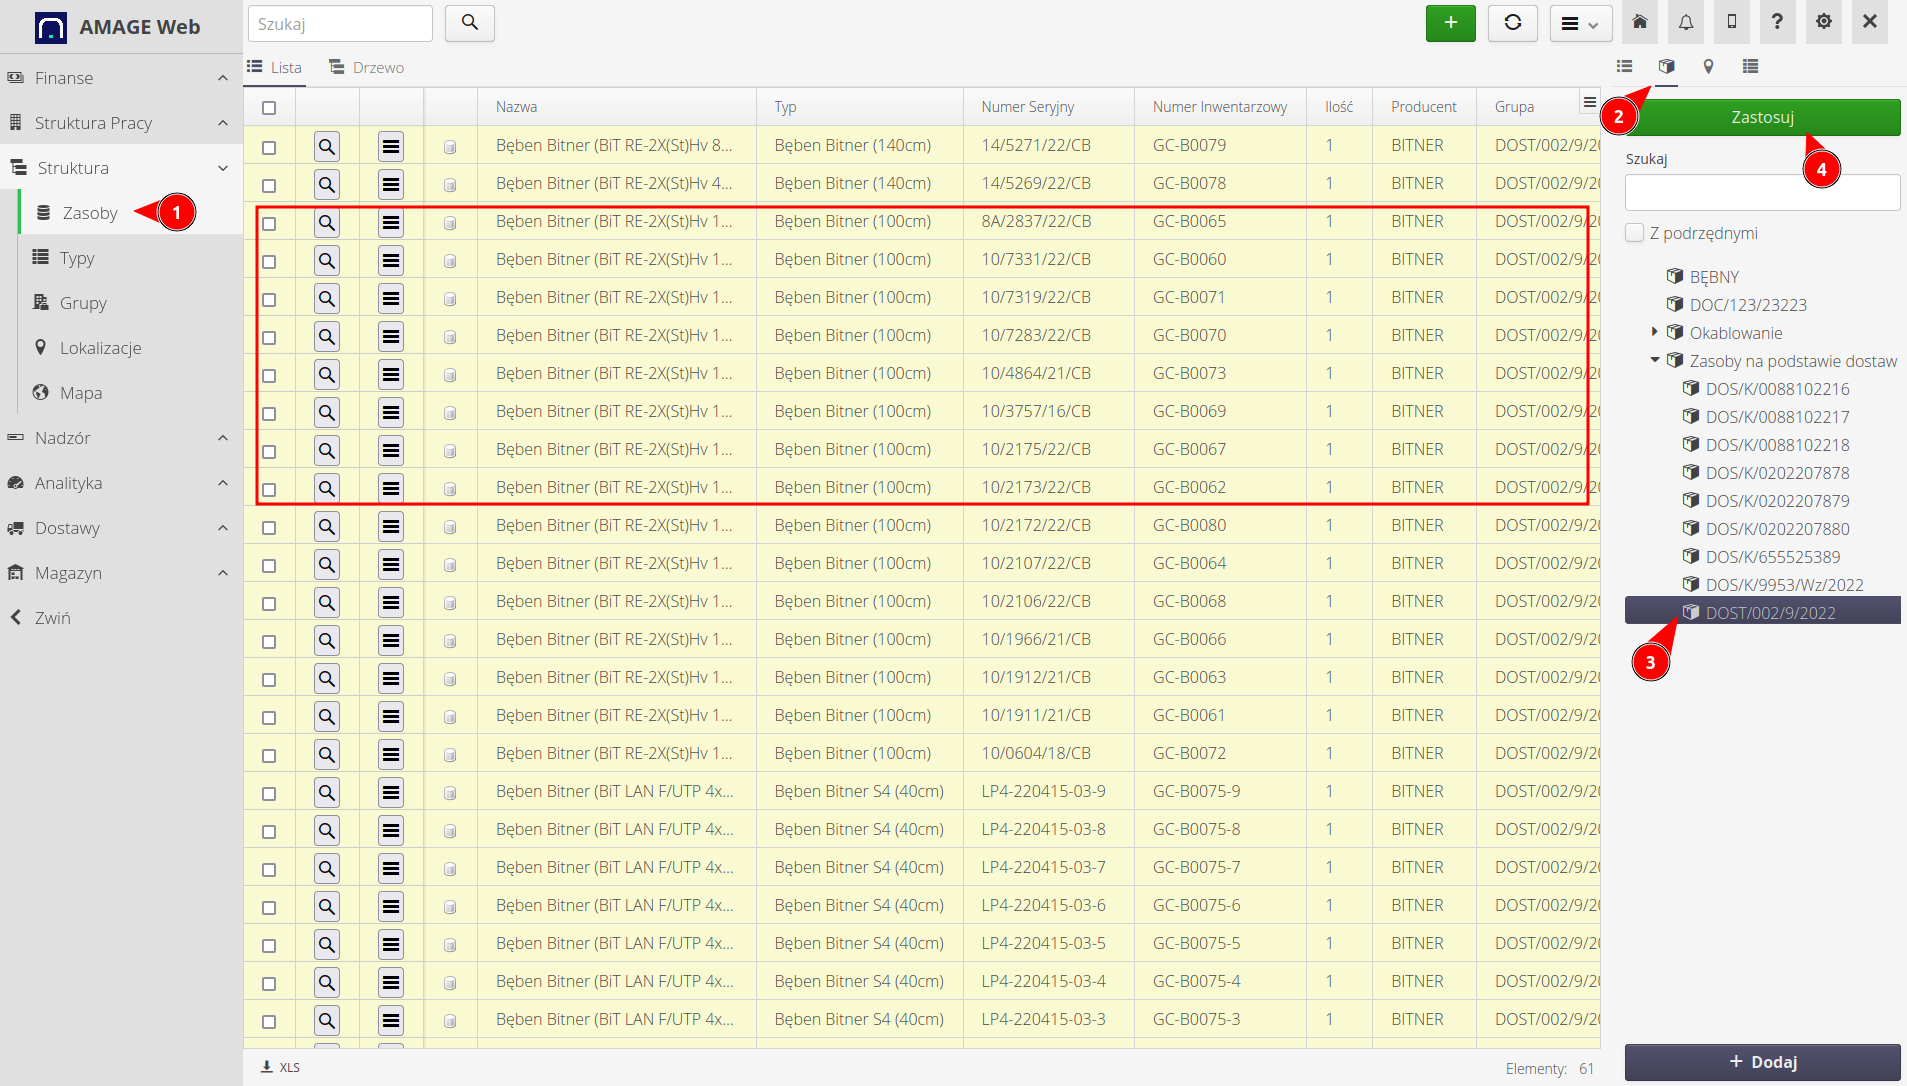
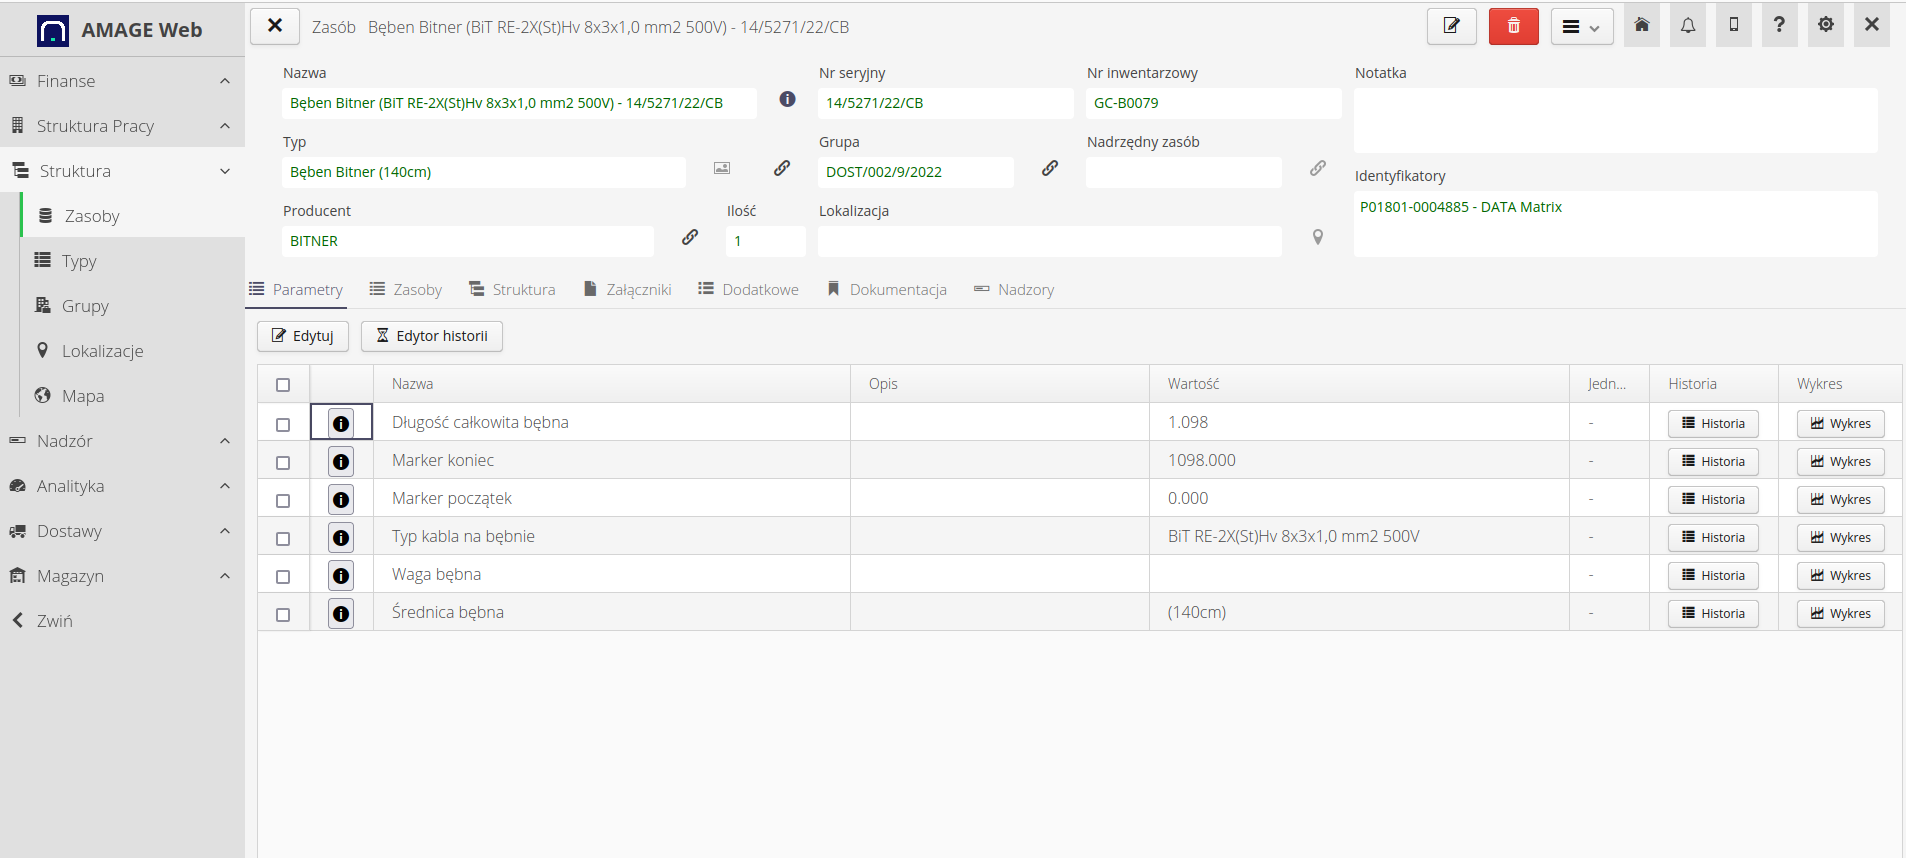
By selecting any drum with the magnifier button, we go to the details of the resource. Here you can see the additional parameters that we imported into the system
Supervision - initialization and review
To further supervise the drums, we have created the 'Drums' supervision template. It contains several basic states such as Ordered, Delivered, Under construction, Returned. In order for each new drum to have such supervision, we need to initialize it and do it automatically during subsequent imports.
Go to the supervision templates view and select the Initialization - by. category of types. We are adding a new rule that will say that if there is any new resource (unsupervised) whose type is described as 'Drums', then automatically initiate supervision for that resource.
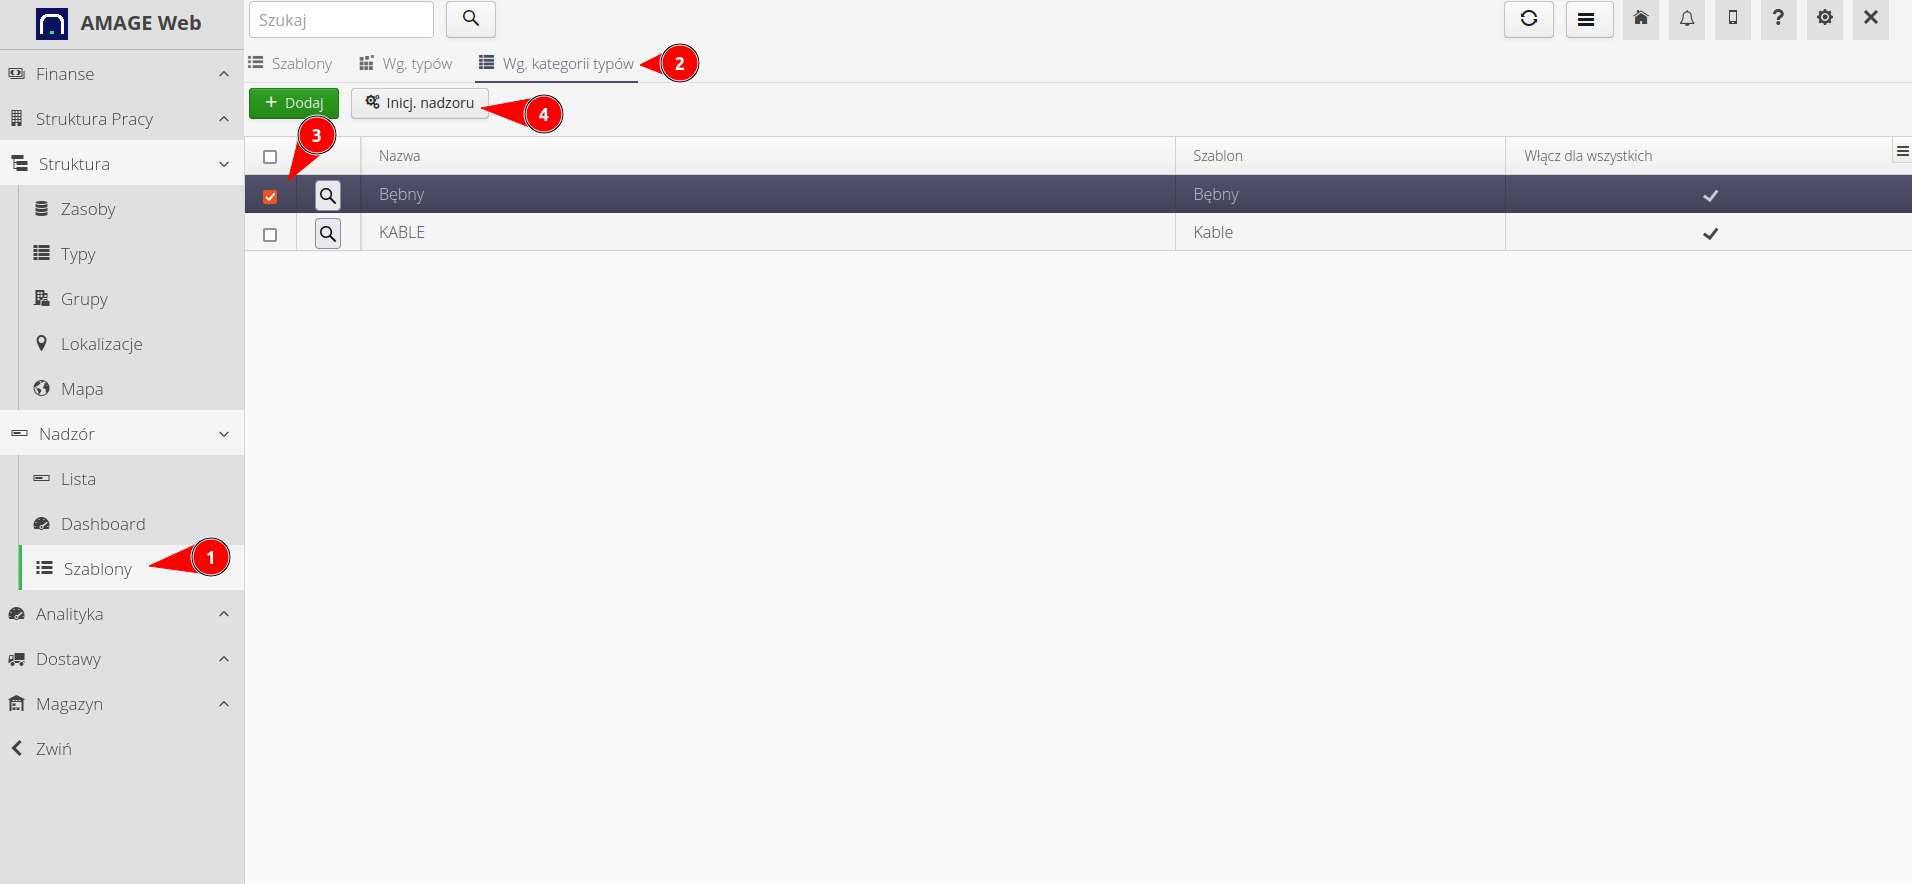
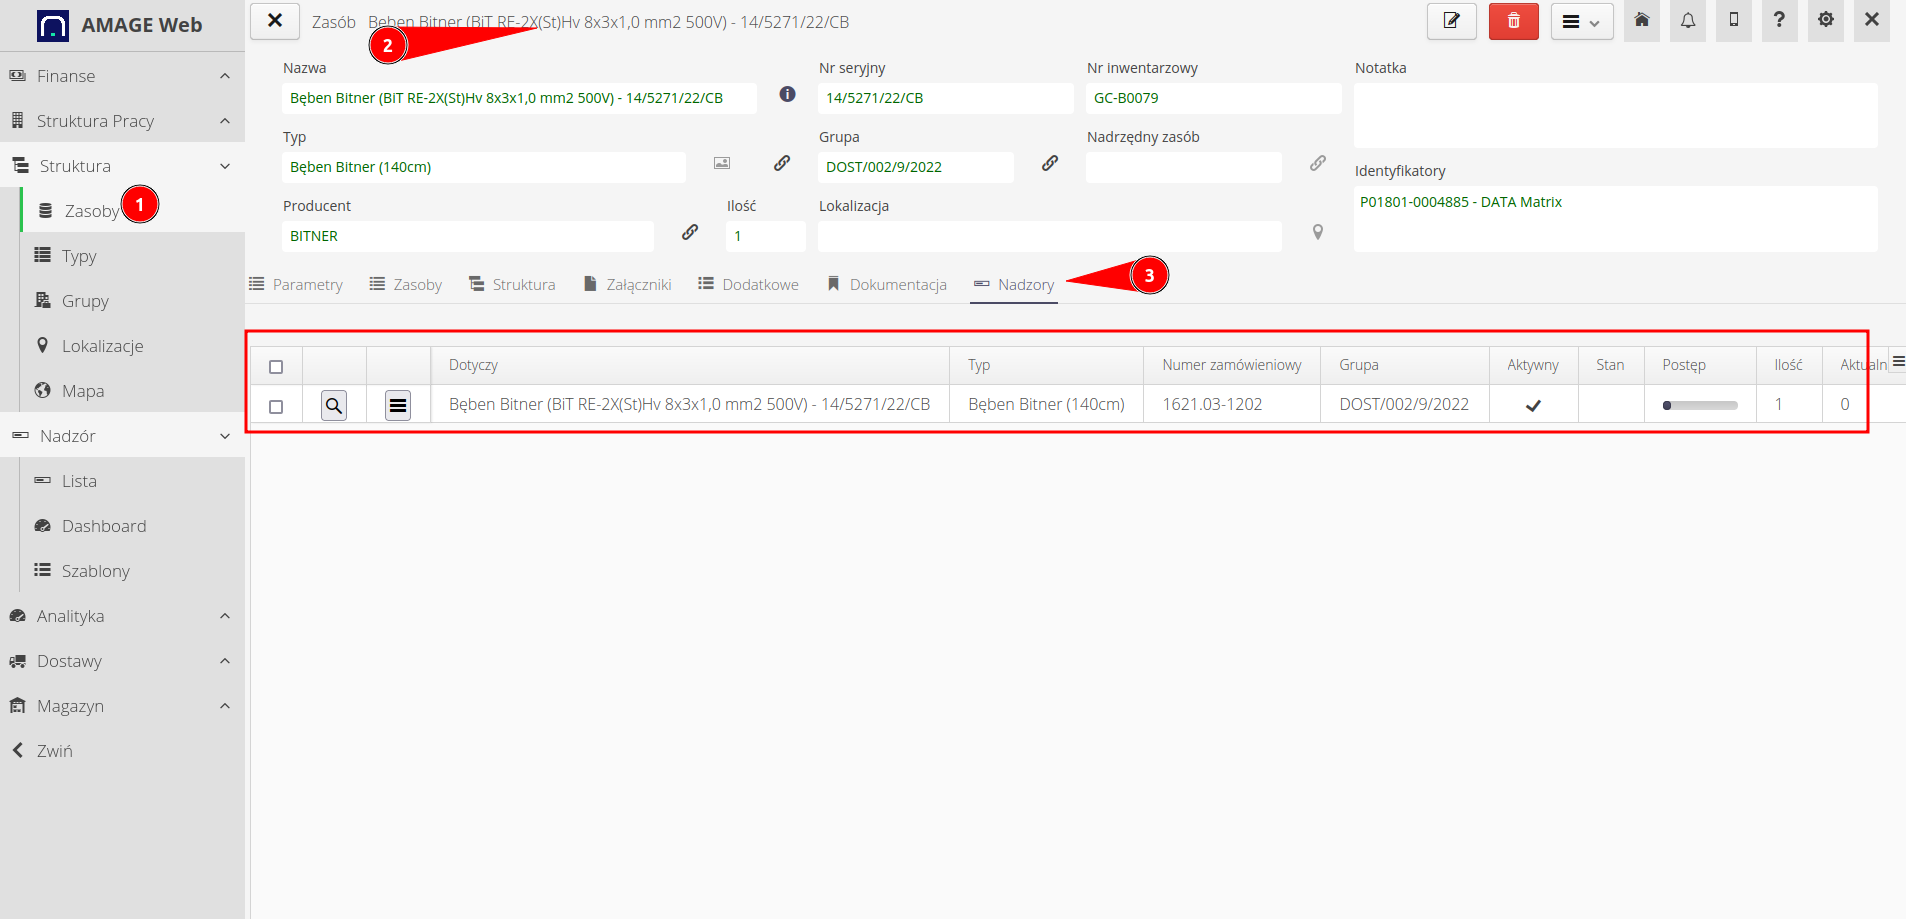
In this case, we additionally initialize the supervision ourselves to speed up the generation of this data. As a result, we get a list of all drums with superimposed states on them that we have defined ourselves.
Identifiers
In order to supervise and monitor the works during the cable works, we will use identifiers (labels) that will be mounted on the cables. To do this, we will use the built-in label designer. To invoke it, go to the supervision view, select the elements of interest and invoke the 'Generate identifiers' action on them. We create a new template.
In the new label print template definition dialog, set:
-
Label template (PPQ) - label type. Here predefined PPQ19080
-
Texts (1/2/3) - additional texts that we can define ourselves and display there any information about the resource (drum) as well as the parameters of this resource
-
Add missing identifiers - if any resource does not have a generated identifier, automatically assign a new one to it
-
Generate - generate identifiers
-
Save template + name + private - the configuration can be saved and used to generate the same labels again
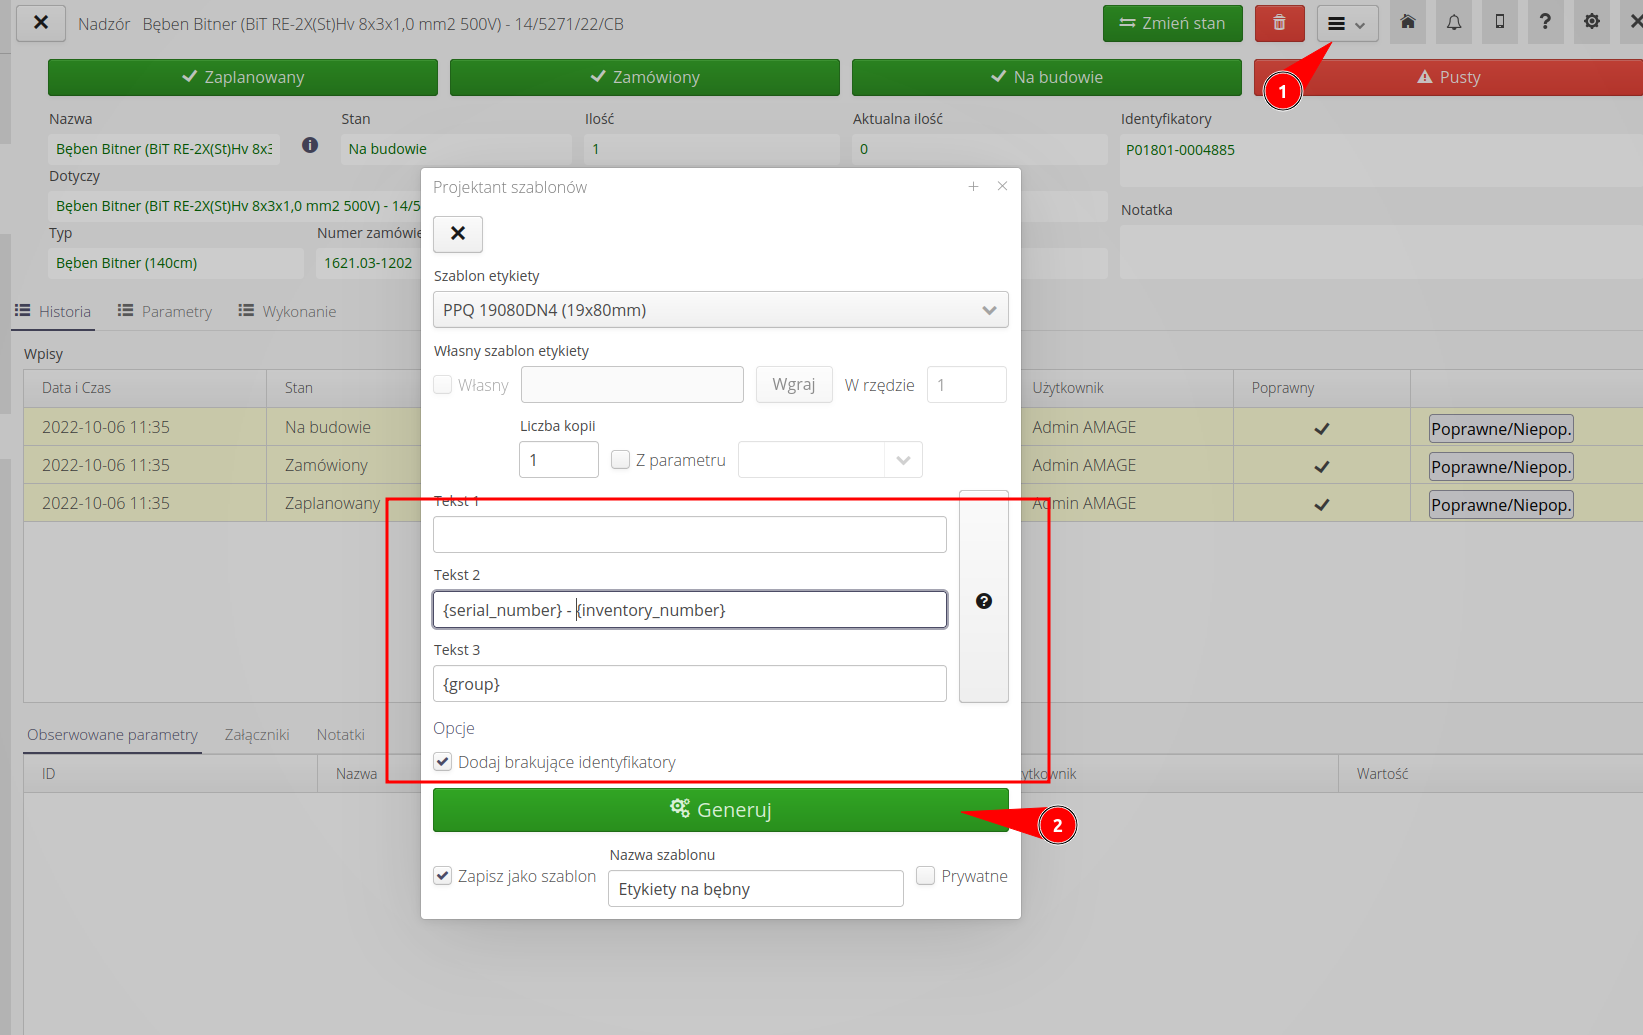
The result is a list of ready-made identifiers. We print them on a label printer.

| For more information on labels, data generation, and designing your own look, see the label and report design tutorials. |
For further operations on logging supervision and monitoring, see the user manual and other tutorials.
Import of drums by deliveries
As an alternative to the above-mentioned method of importing lists of drums from spreadsheets, it is possible to automatically create new drums based on deliveries and information contained therein.
| Other tutorials are available showing ordering/delivery procedures and all the operations available there. Here we show only the most important elements related to the configuration of serial numbers during delivery. |
Editing an existing delivery
In the case of already accepted deliveries, we have the option of declaring the serial numbers of the delivered assortment (here drums) after the delivery has been completed and entered. To do this, enter the edition of the given delivery and clean any missing data or redundantly added elements.
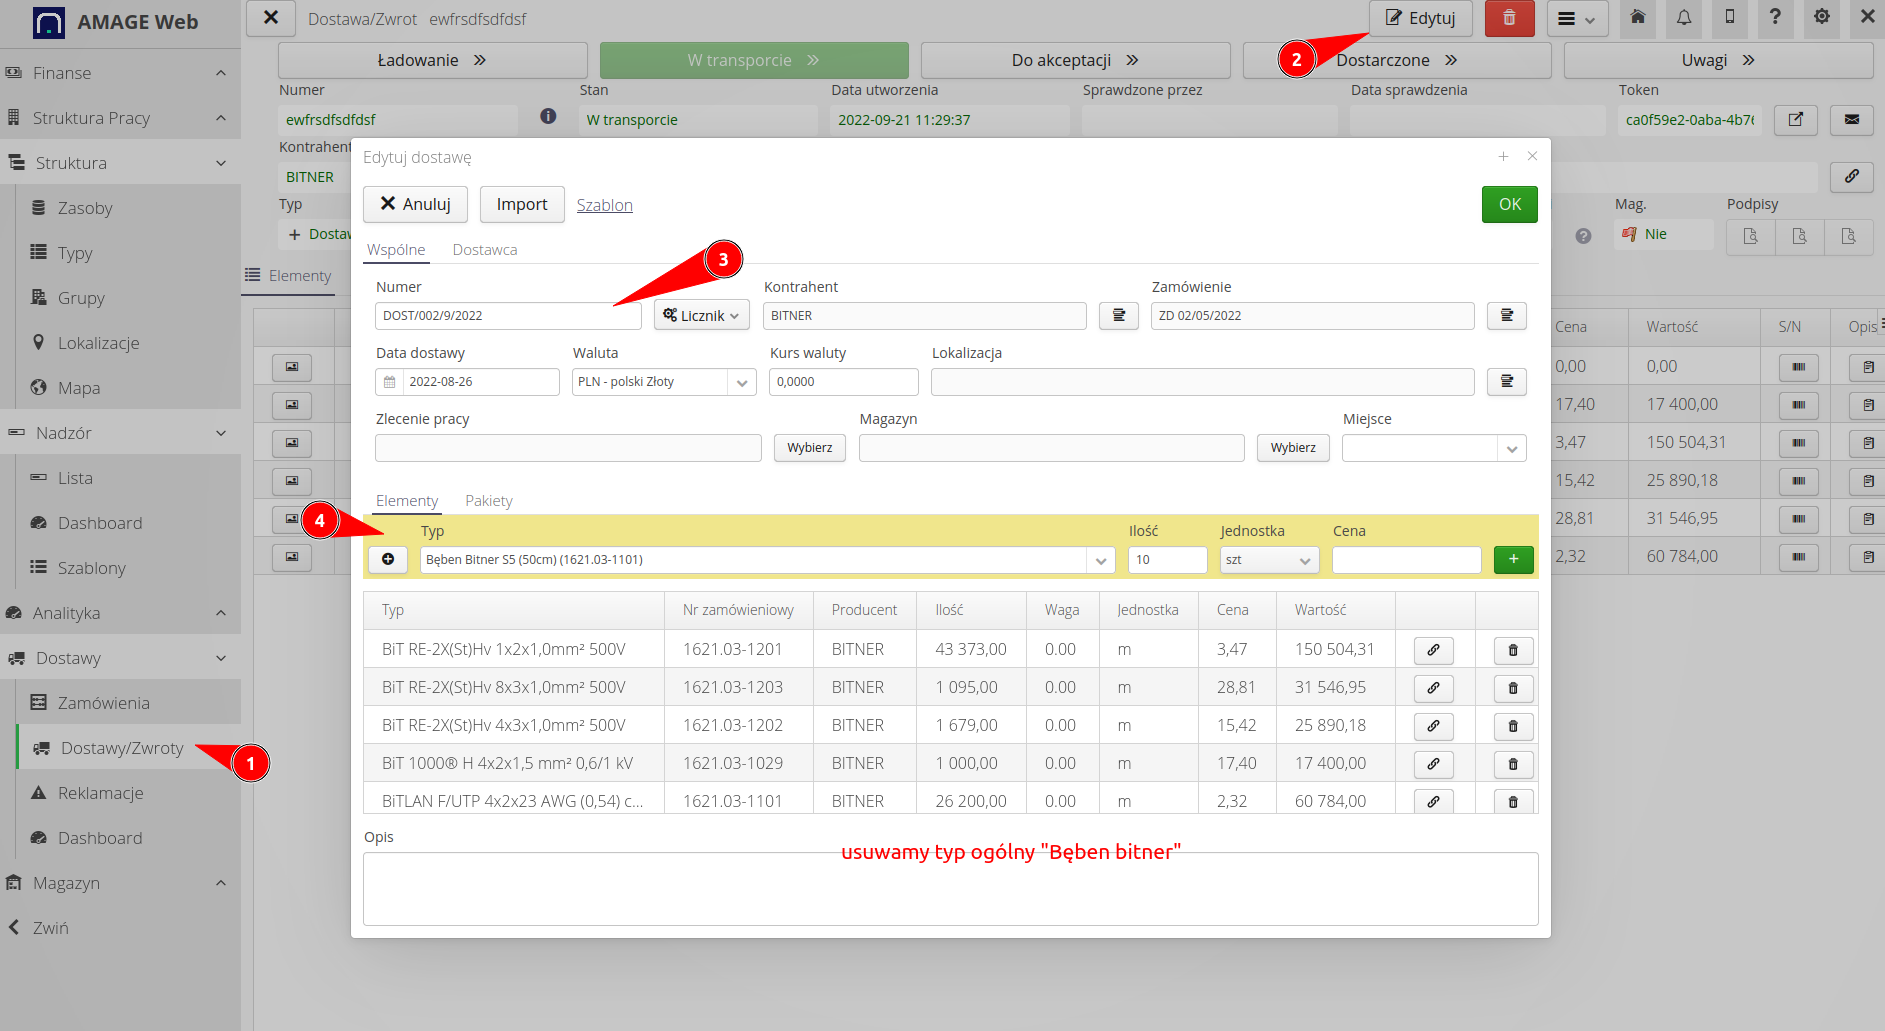
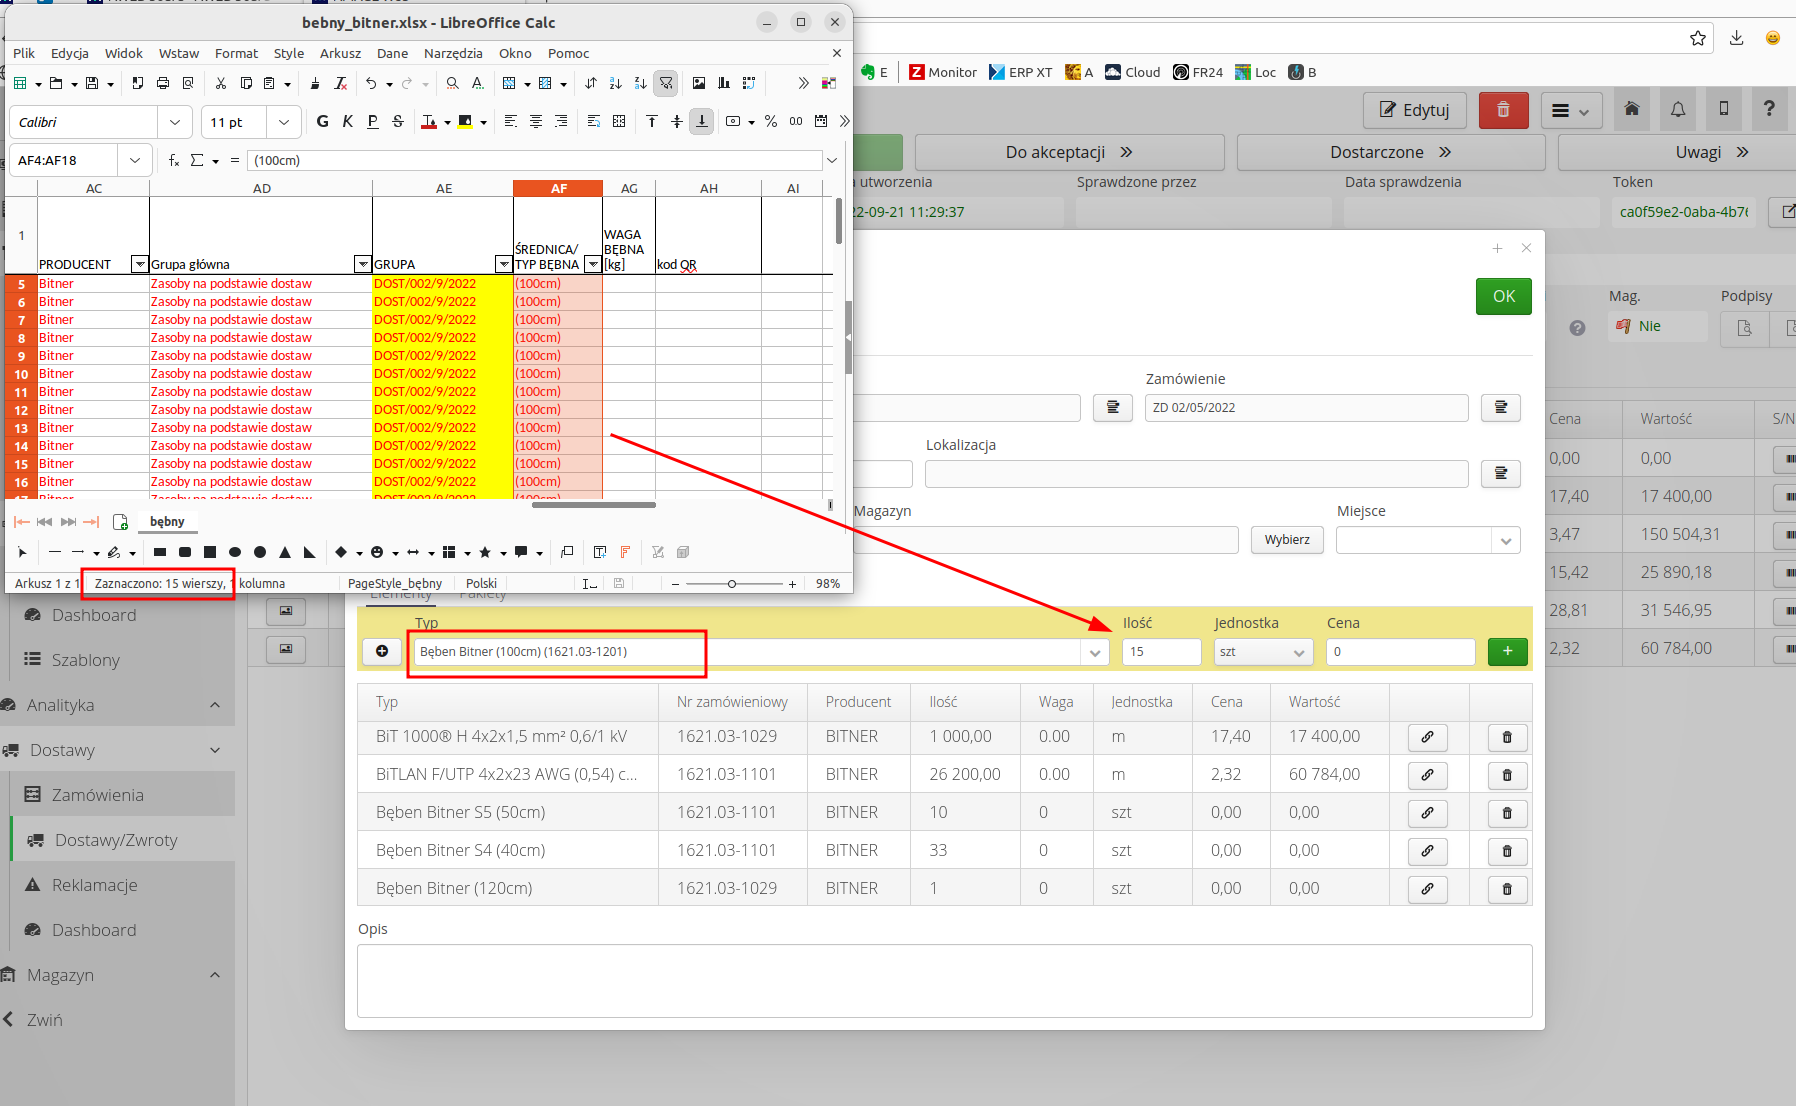
Then, by reviewing the sheet provided by the supplier with the serial numbers of the new drums, we add the new assortment according to the number of drums supplied. Here you can also define the serial numbers of the delivered drums.
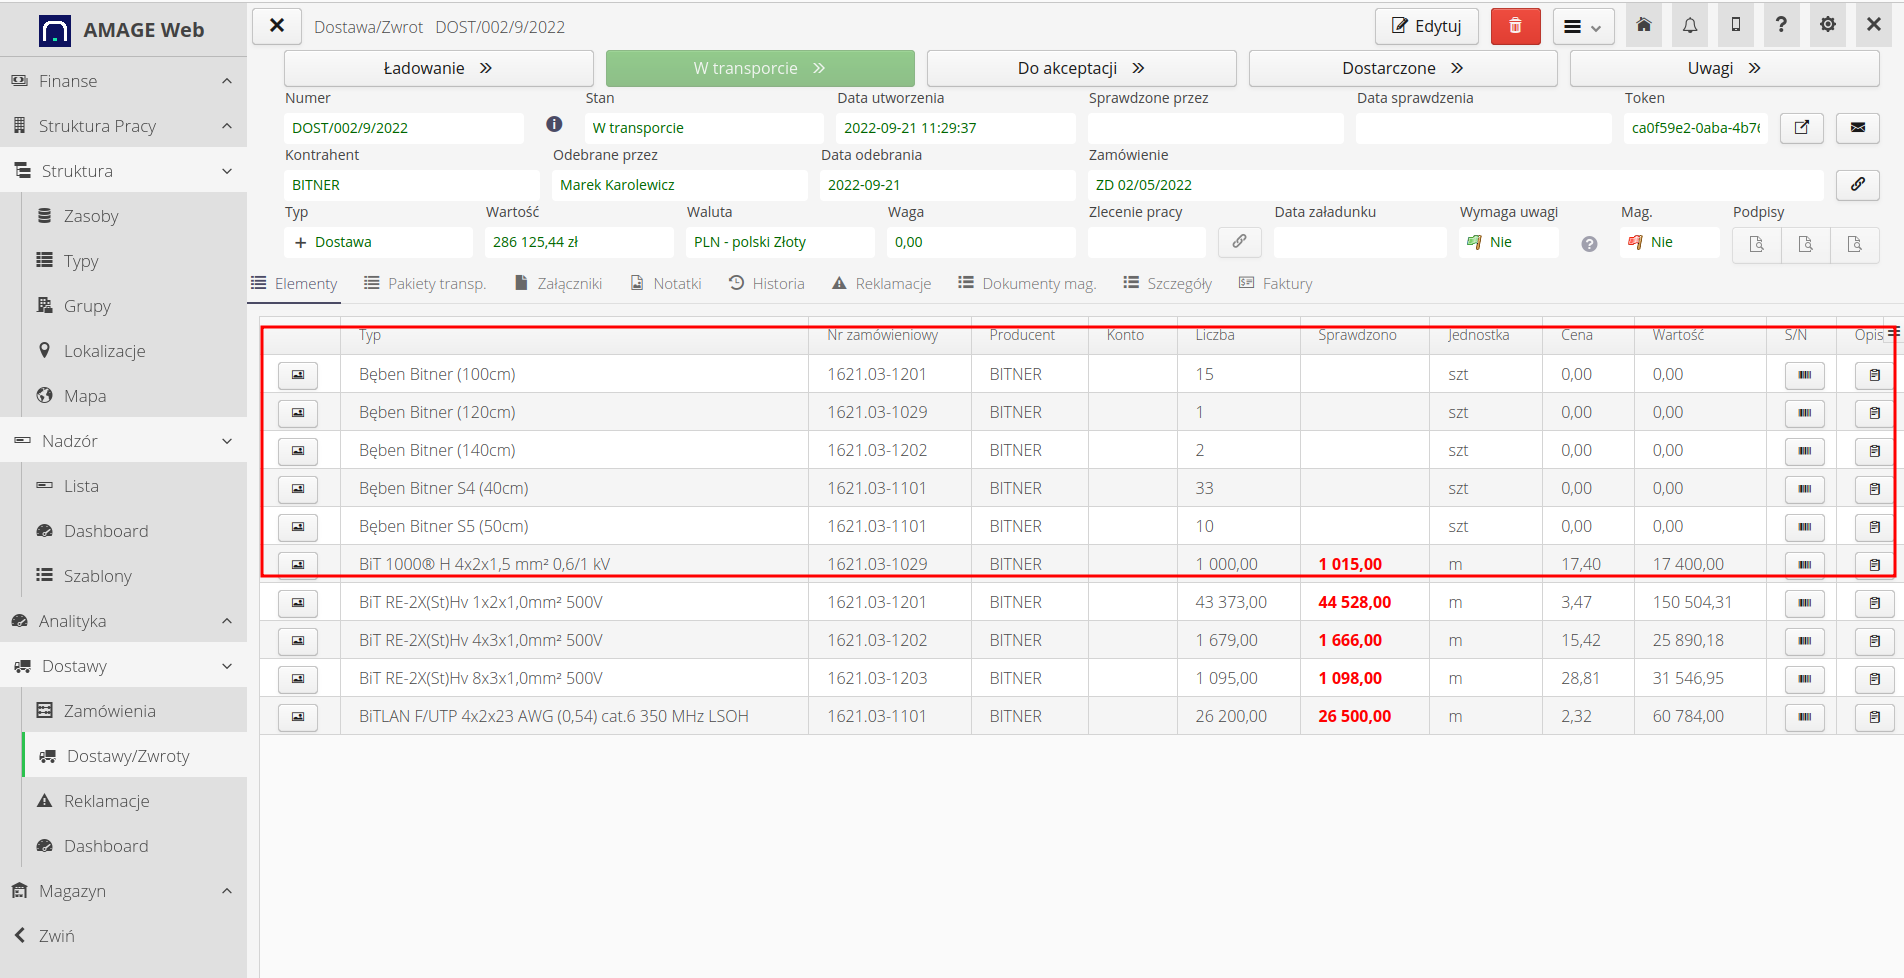
The result is a ready delivery with the quantities of drums, additionally with material elements and the correct definition of the data quantity.
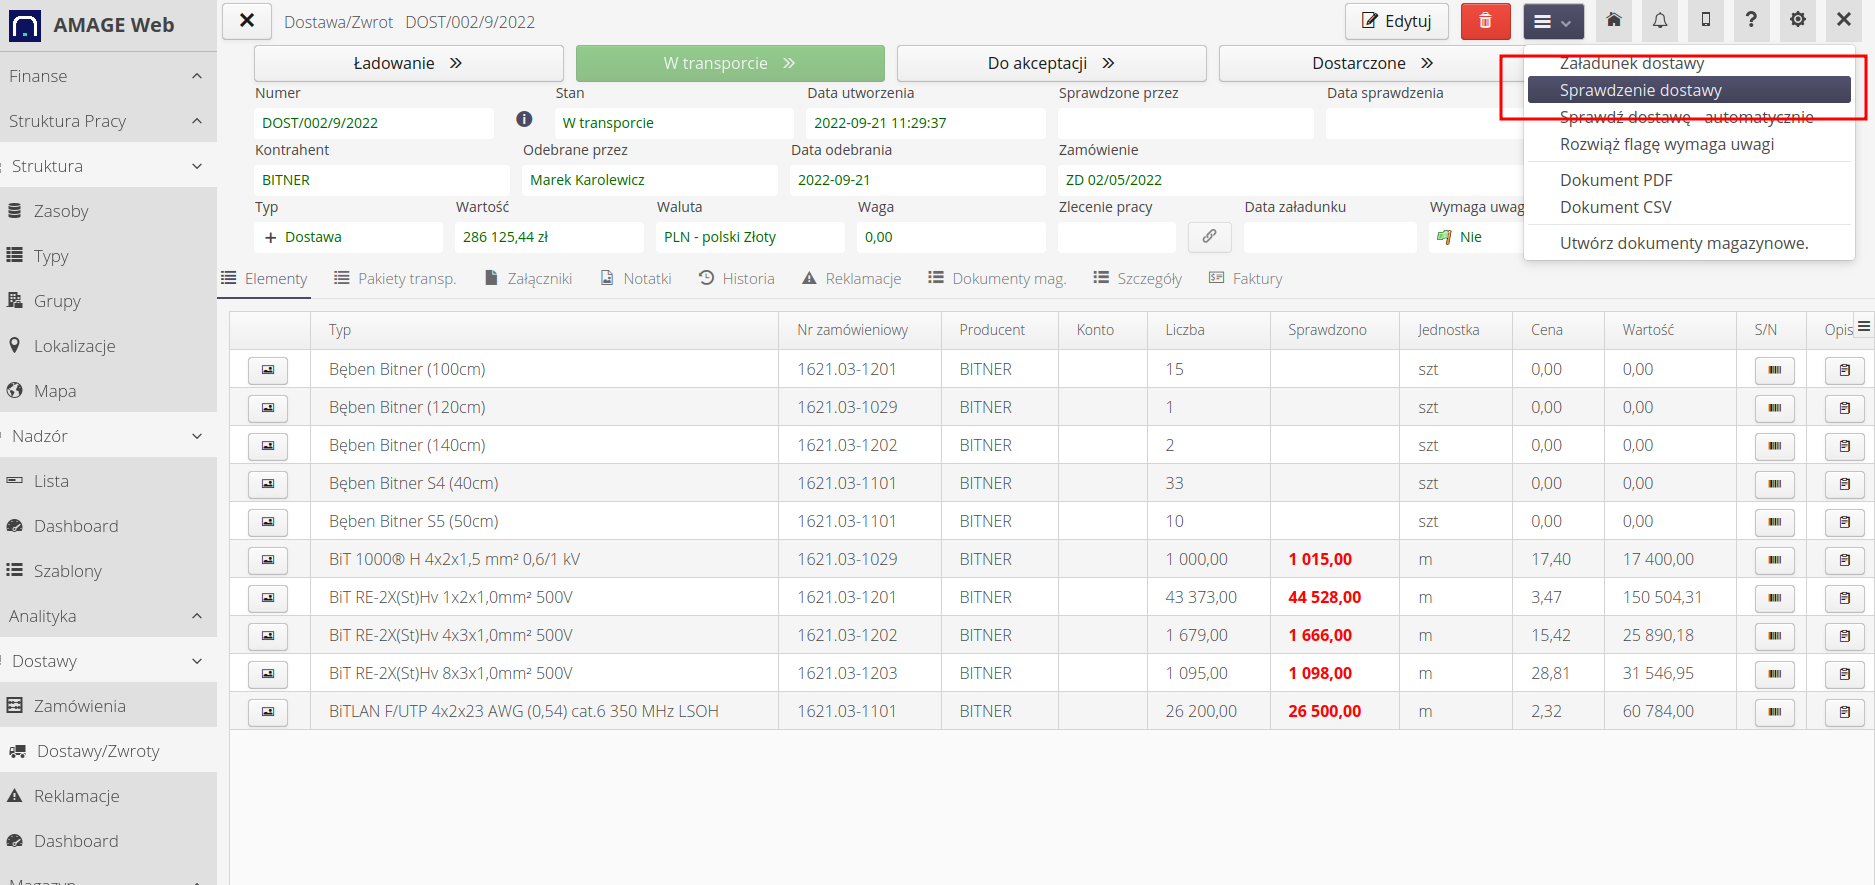
Alternatively, we can enter the drum serial numbers already during the delivery check directly at the construction site. When a delivery is defined by the supplier (or independently), it receives the status "In transit". In this case, we have the opportunity to check the delivery directly at the construction site. We also have the option to call this interface directly from the Desktop view. To do this, we call the action from the context menu of the delivery details view (or from the context menu in the list of deliveries).
The mobile view will show the standard view when checking the delivery with additional buttons that are responsible for entering serial numbers to previously counted items.
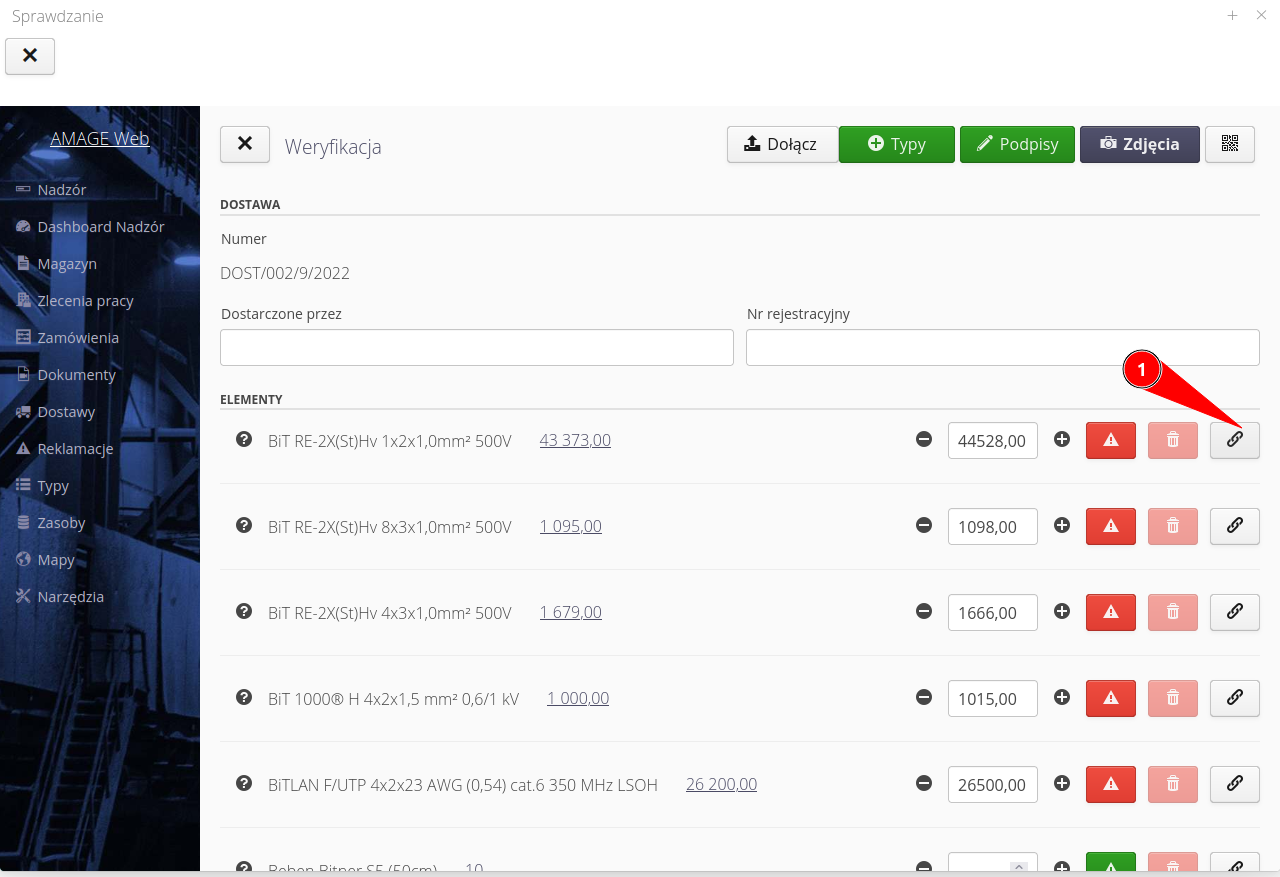
For this example, we received a list of drums with serial numbers. Also in this case, the system enables the automatic addition of serial numbers and, additionally, inventory numbers. We use a list of supplied materials.
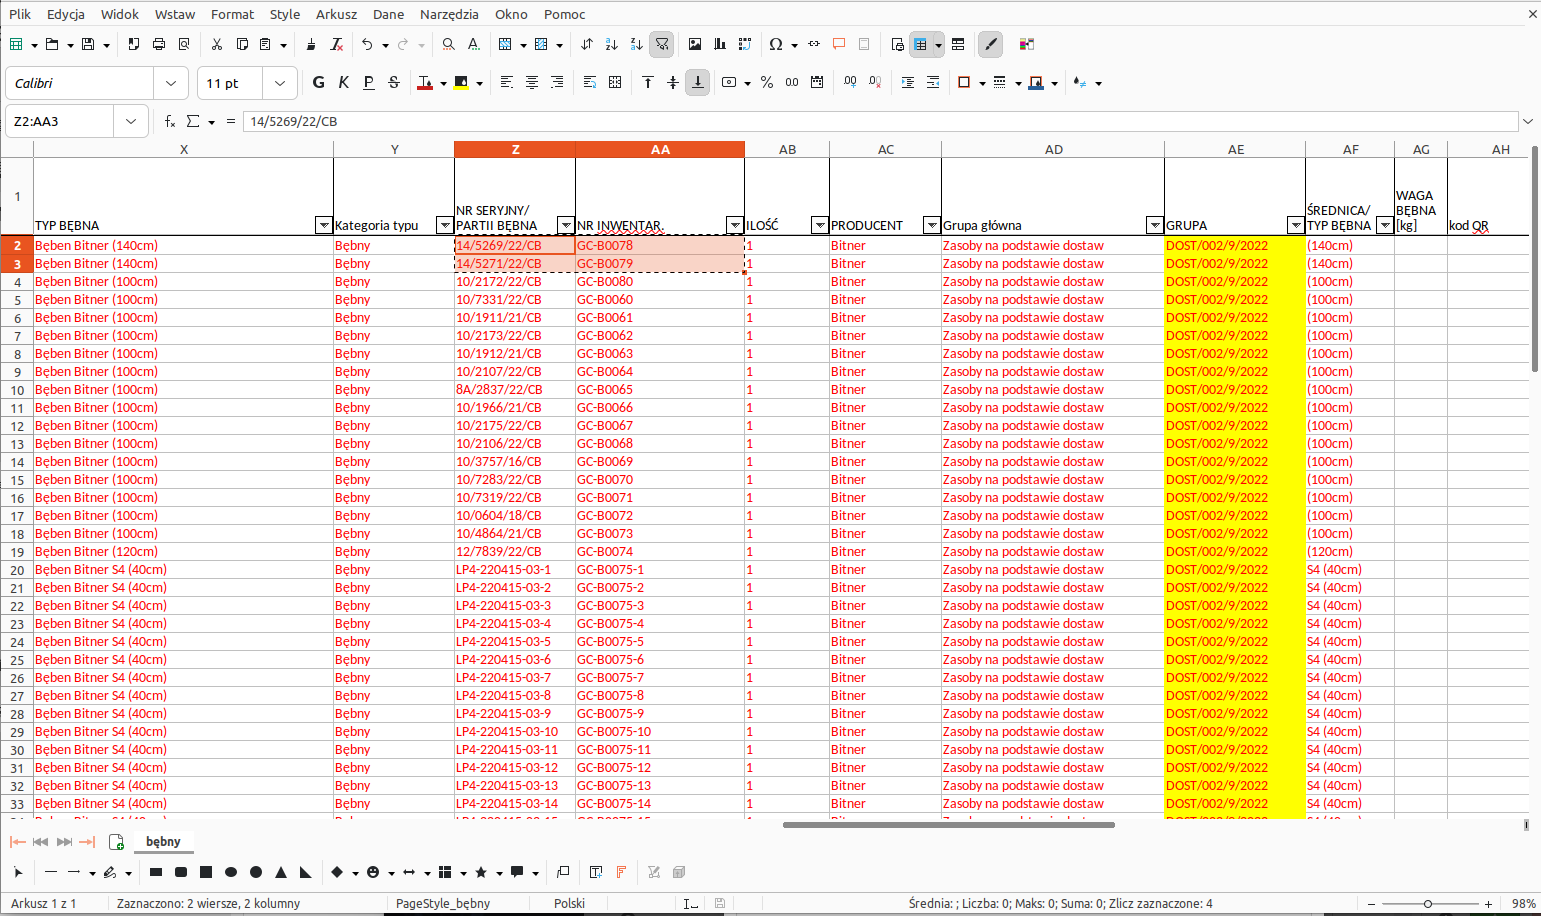
In this case, we use only serial numbers and assigned inventory numbers. We create a support sheet with only this data and import it into the serial number definition dialog. The system automatically imports this data and presents it in a list.
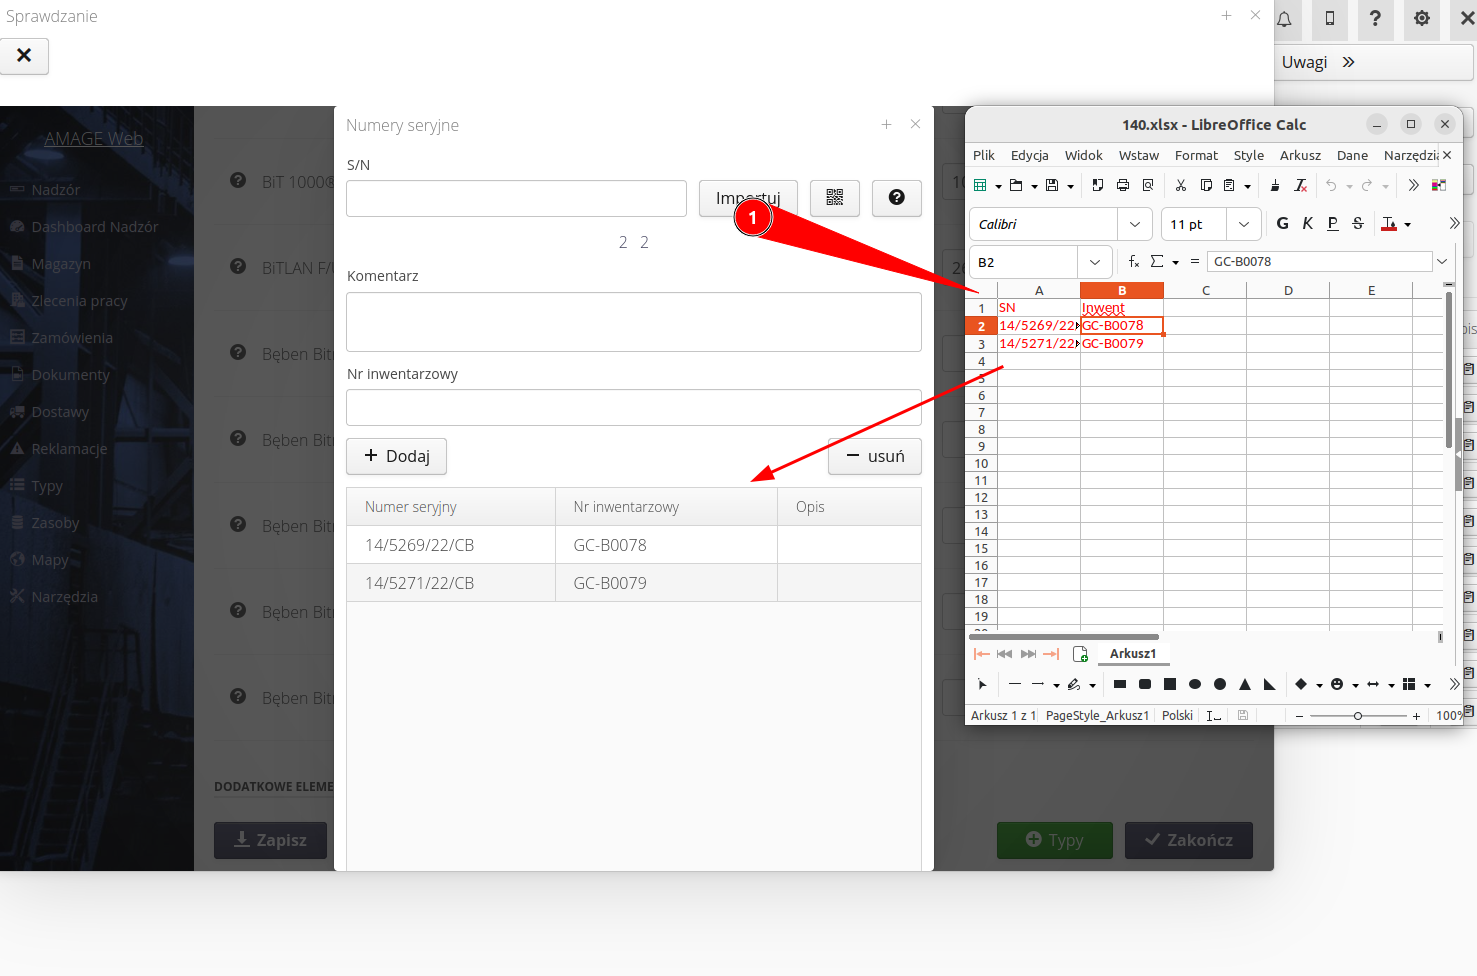
Once the serial numbers are approved, we can proceed to save the entire delivery check. After confirming the delivery, the system will automatically create resources for each drum separately and you will be able to perform the rest of the activities in the example.
| Howto was created based on system version 1.20.0.0 (01/2023) and presents functions that may not be available on your system. Ask AMAGE about providing this functionality. |
| Due to ongoing development of the system, some screens or configuration files may look slightly different, but will still retain the full functionality described here. This does not affect the core functionality described in this document. |