Inspections of measuring devices
Introduction
The document shows how to define in the AMAGE system the supervision of inspections of measuring devices. The example shows the use of modules responsible for the structure of devices and inspections to perform this work.
Task: Transfer to the system and automate supervision over inspections of measuring devices, which were previously saved in an Excel file. This file also stores information about performed/expected inspection/calibration dates of devices.
Example transfer data:

| As is usually the case in such examples, we rely only on some of the system’s functionalities and fill in only part of the data that is necessary to implement the presented functionality. It is recommended that you review the documentation in other areas to learn about other features. |
Device structure
Analyzing the input data file (Excel) we see that we need to define several elements in the system that will later allow for efficient grouping/filtering of devices. In the input data, we can see a division into several ranges:
-
definition data of a specific device (serial number, inventory number, etc.)
-
type definition data - i.e. manufacturer, type name or order number
-
data defining the arrangement of the device in the company structure (location, place, logical structure)
-
device inspection specific data - inspection period, responsible persons, etc.
By transferring it to the system, we create several elements that will then build the entire structure of devices and their properties. It is only on this structure that we will determine the parameters for inspection work. Let’s go to work!
We add a new group of devices. Only for measuring devices.
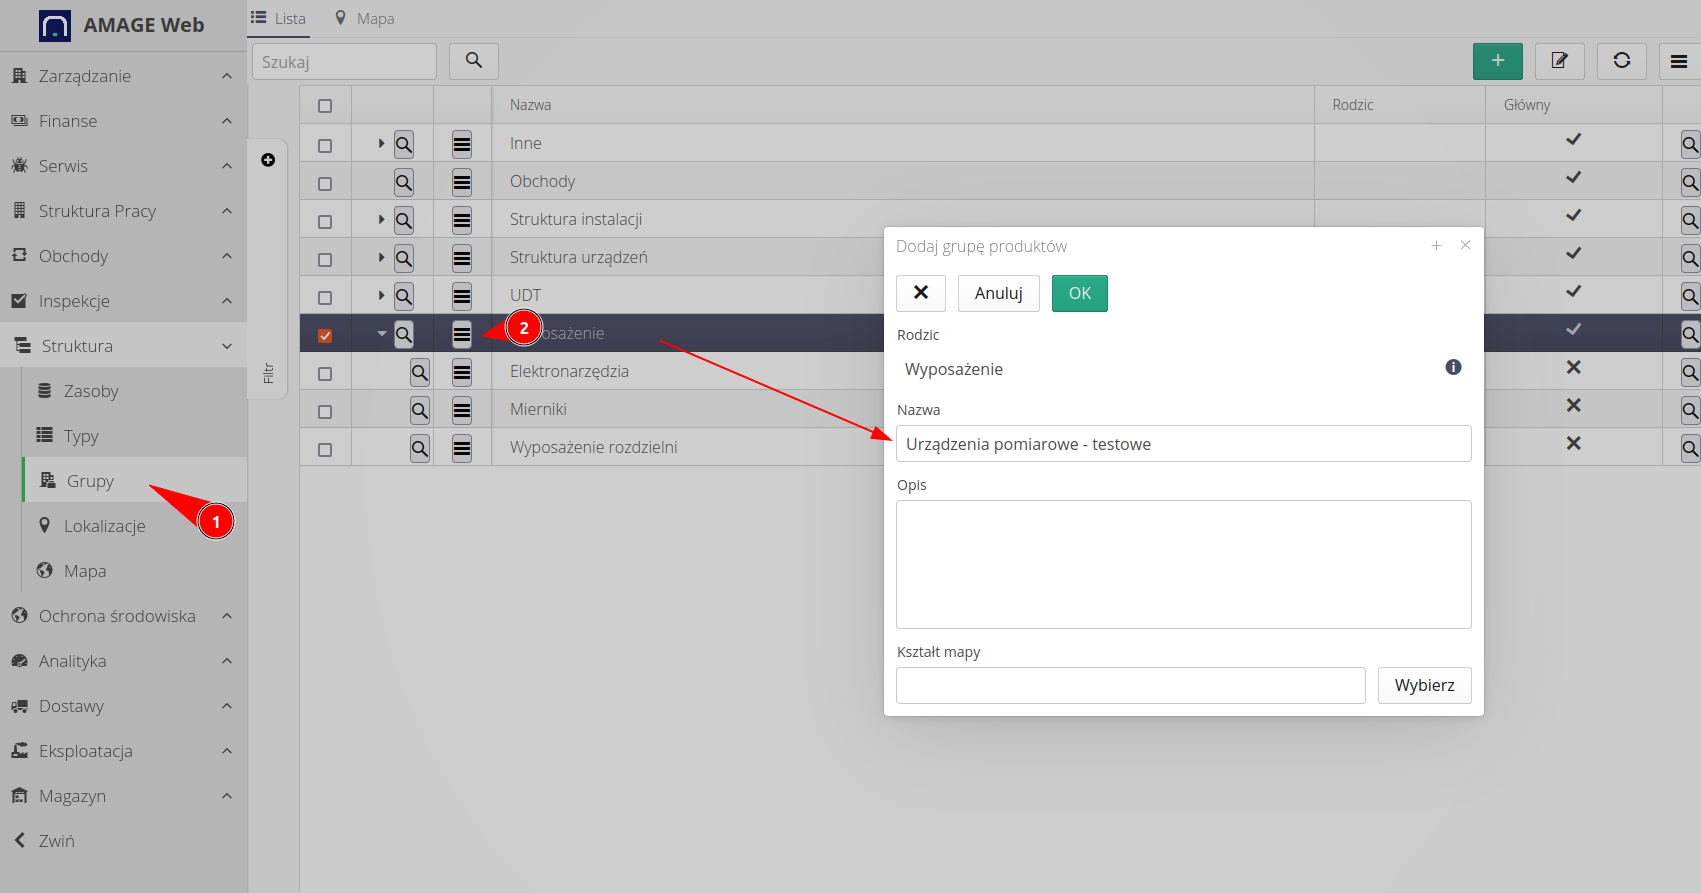
We also add a description of the location as in the source file. Of course, we can freely place locations in the tree. Here we decided to put the location away from the main element.

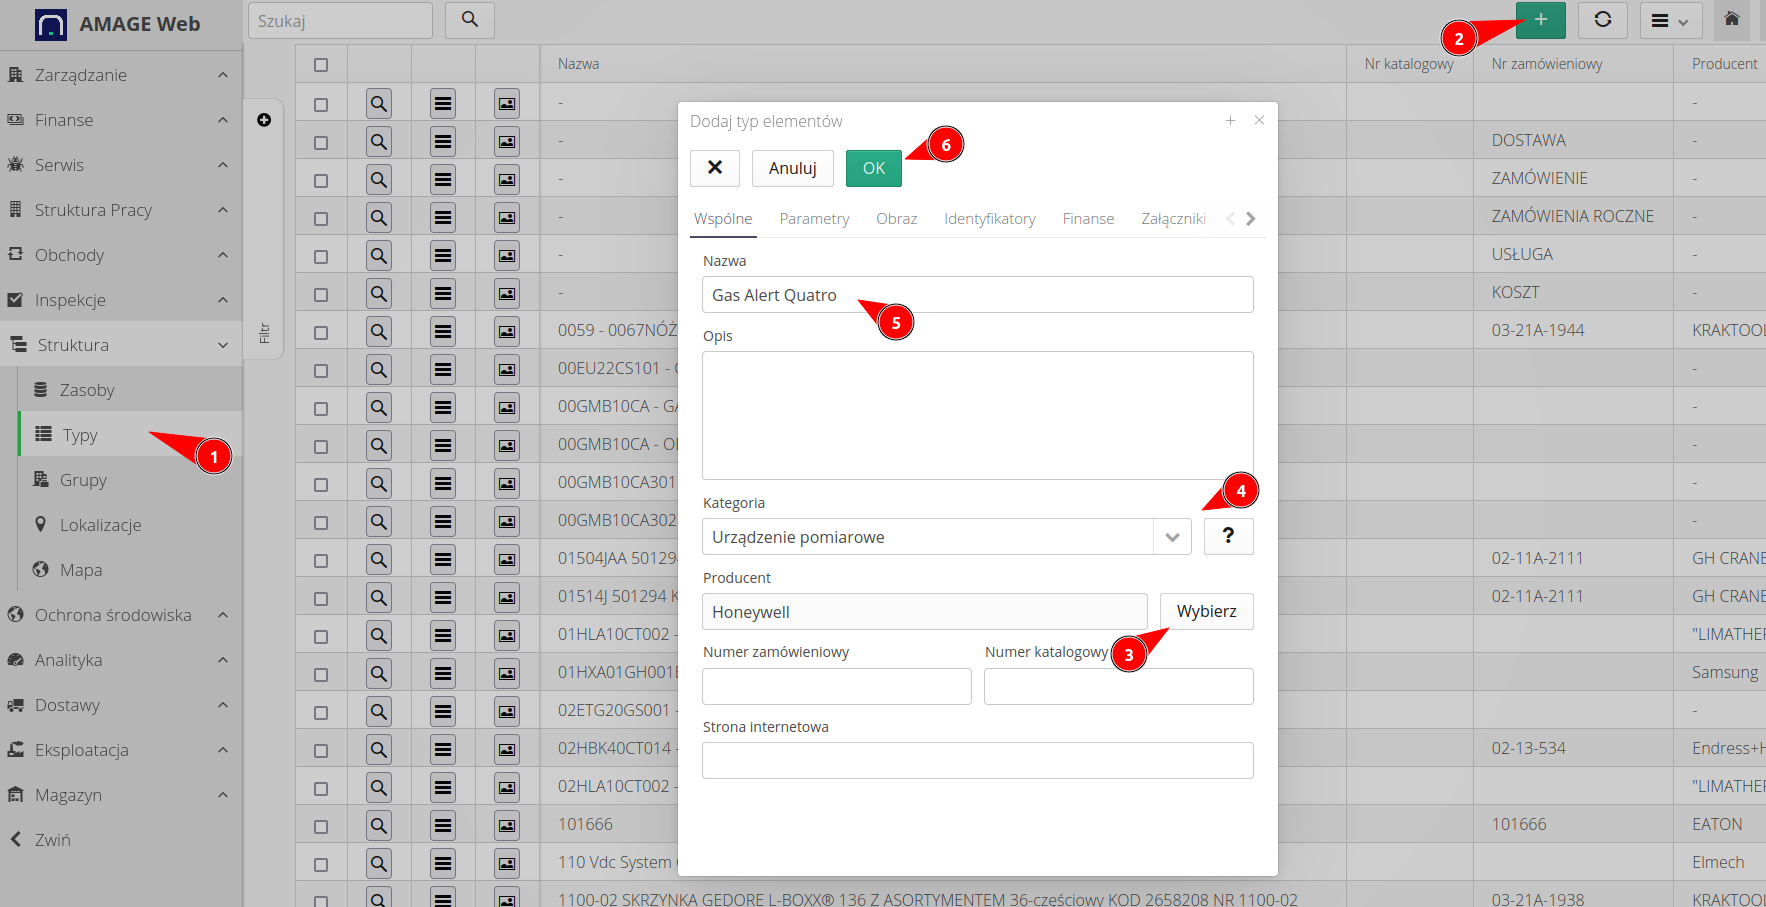
We define the type of devices. The type allows us to group all devices in our plant that are manufactured by a specific manufacturer and have their common features (data sheets, parameters, etc.).
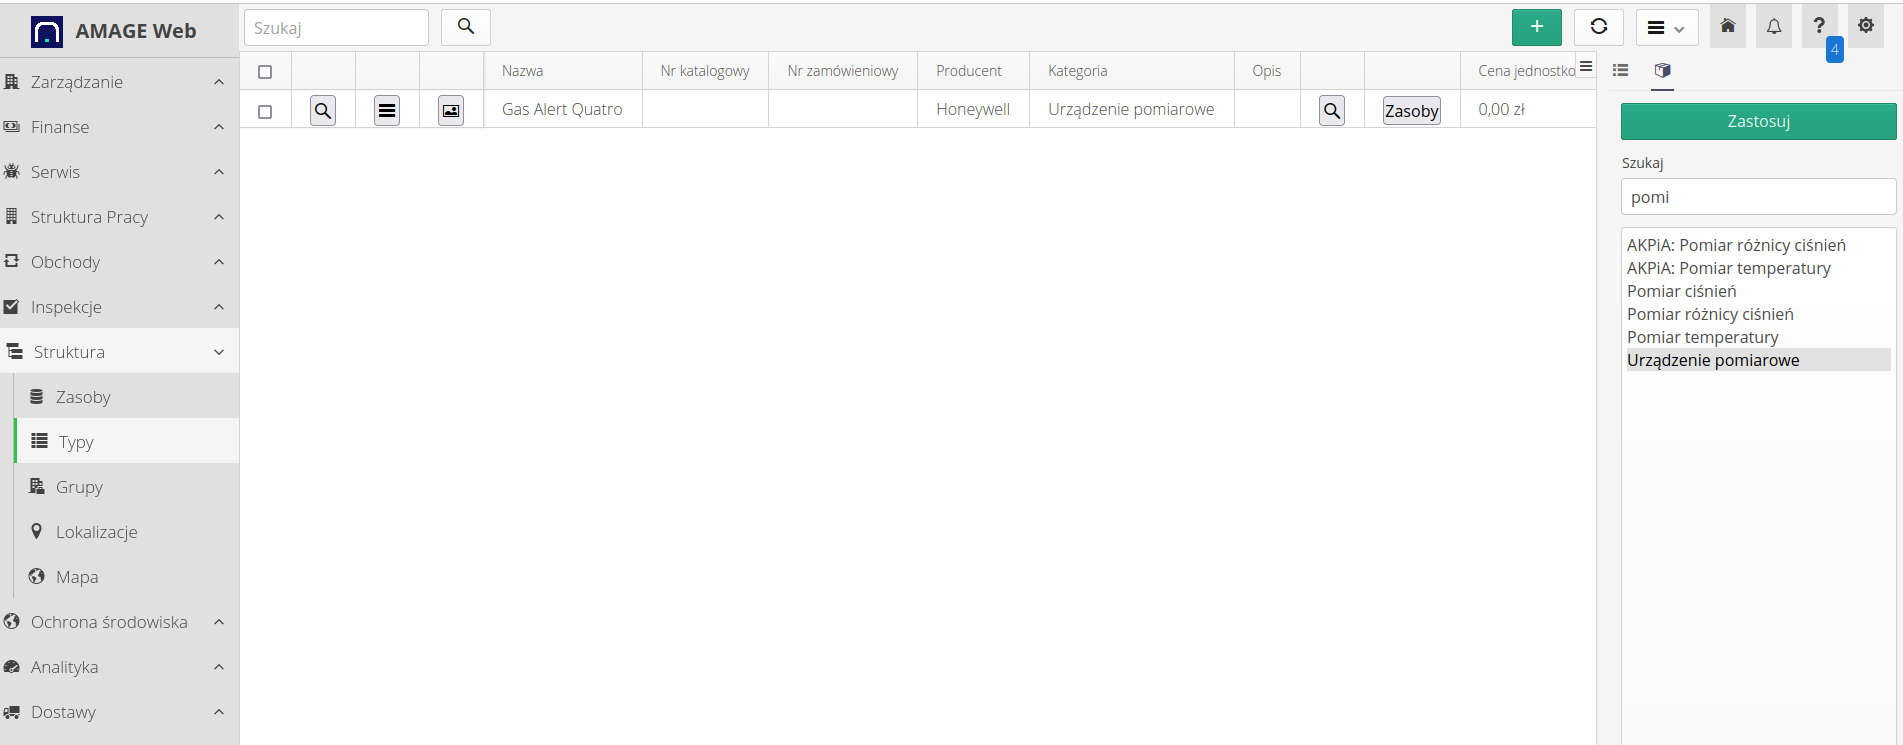
Ready. The type is already defined. We have all the components.
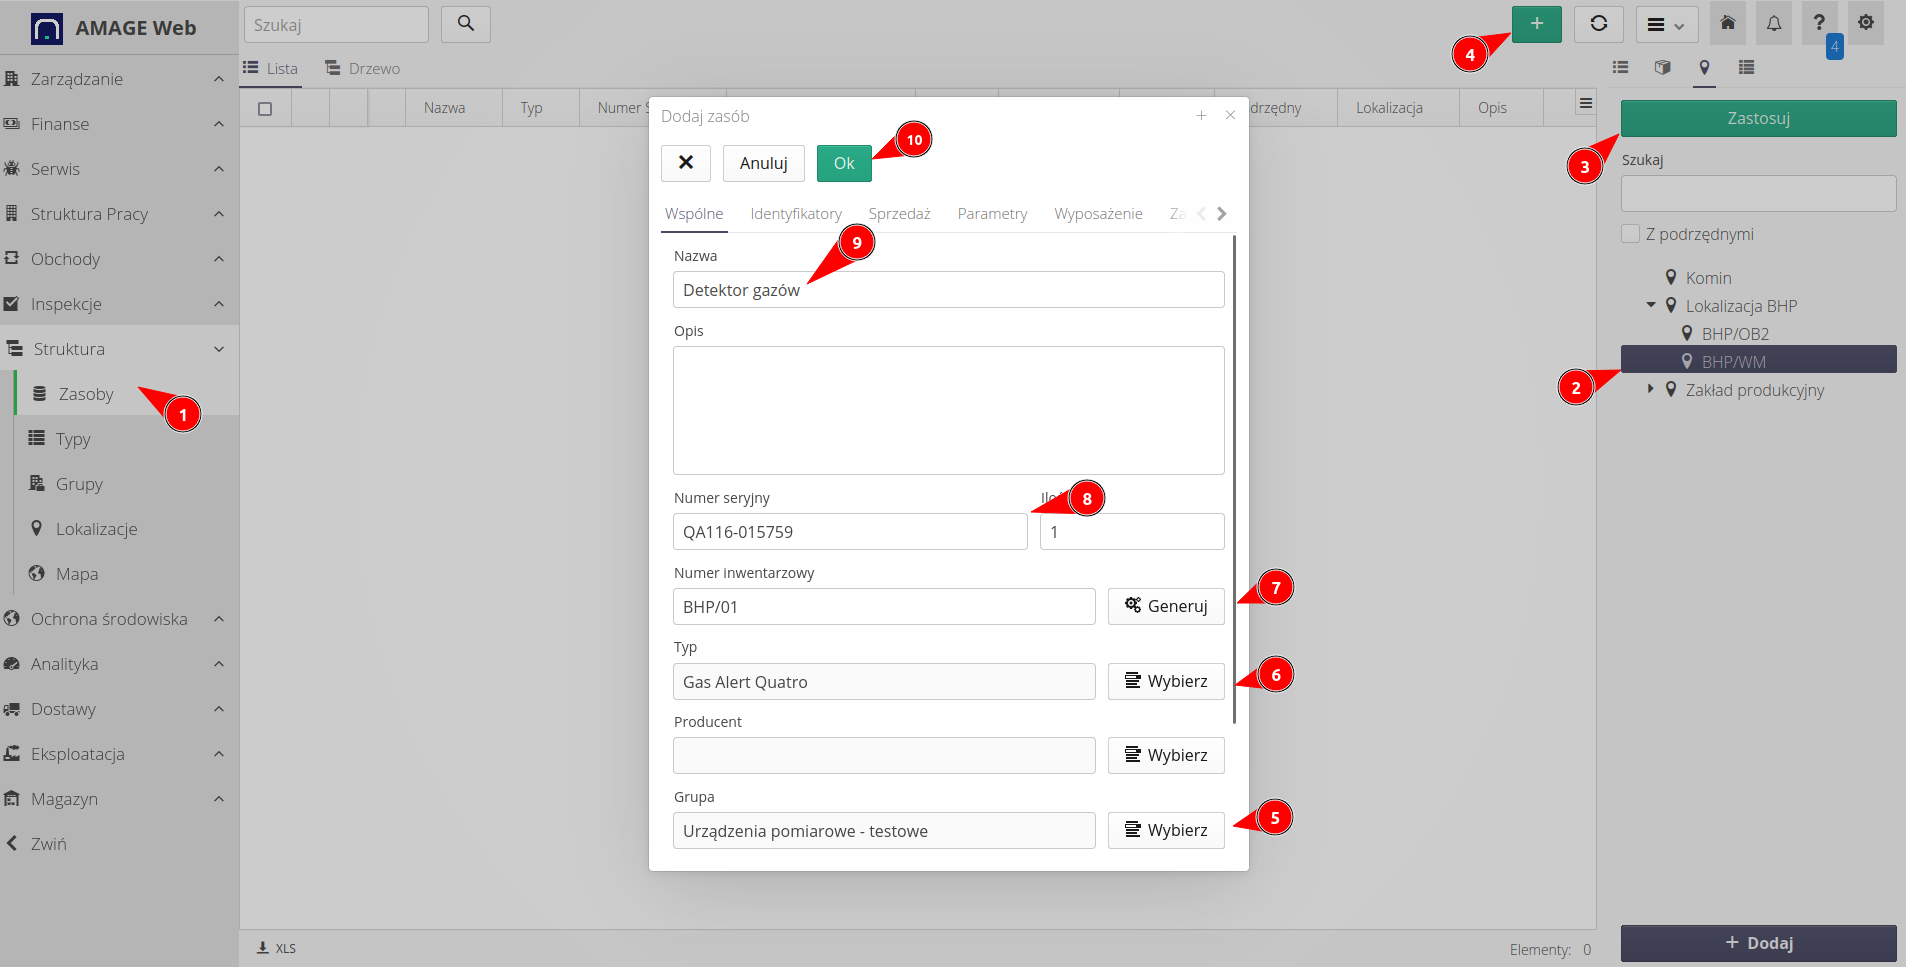
We create a specific device in the system. This device (asset) means a real, physical object, i.e. something that already has its serial number, inventory number and is placed in the structure of the plant.
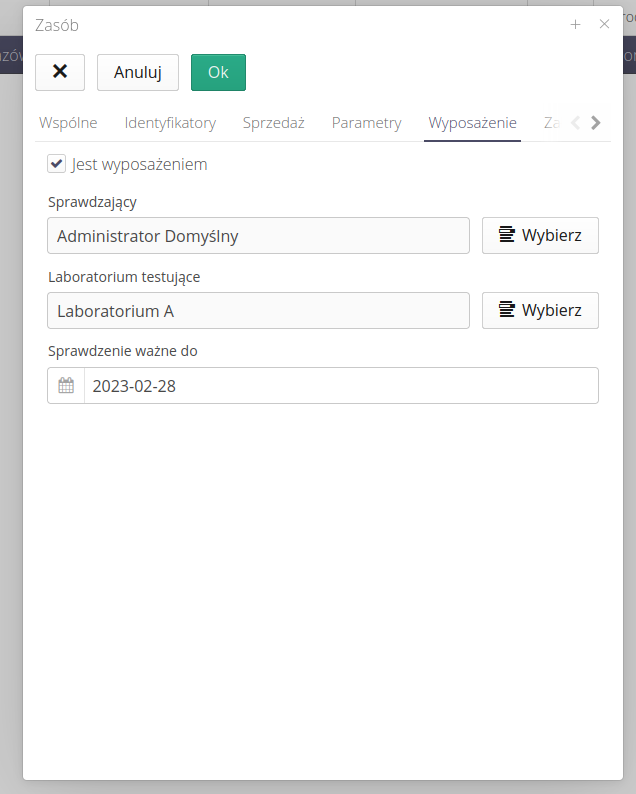
For this resource, go to the equipment tab and mark that this particular resource is equipment and fill in the basic information. Here I marked the person responsible for the calibration of the device and indicated the company that is responsible for the calibration outside our company.
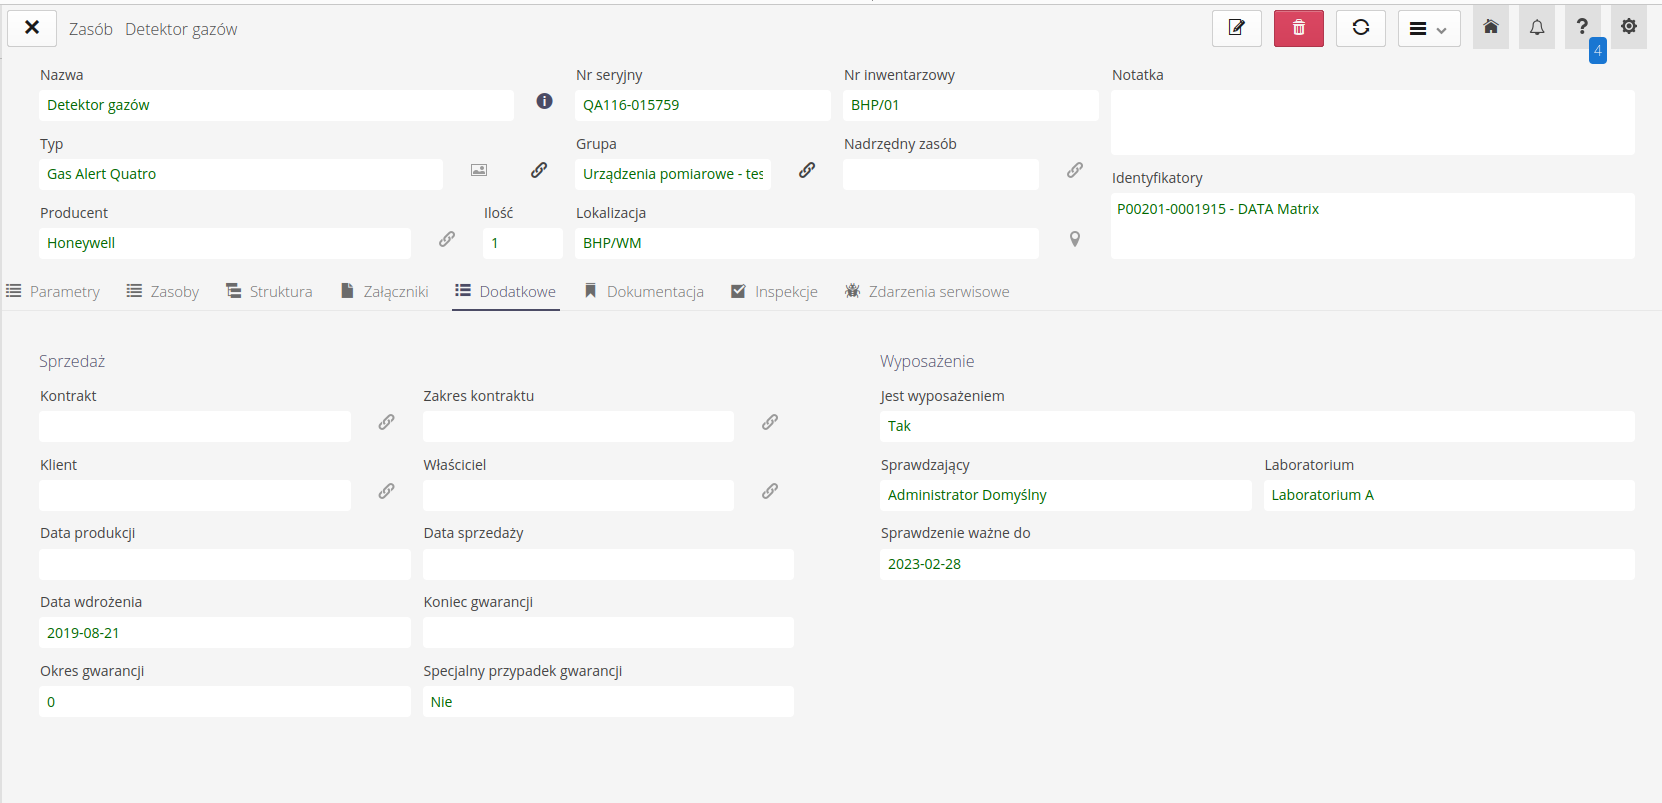
We have a ready device added to the system!
| Of course, this device can now participate in many other activities. Service requests, supervision, documentation are other areas that can be used here. |
Let’s move on to the definition of what needs to be done periodically - calibration and inspection.
Inspections
We go to the inspection module. In order to properly define all activities, we should prepare two things:
-
Define an inspection template - a template is a statement of what we need to know when performing such an inspection.
-
Define the inspection plan - indicate the rules according to which inspections should be performed, e.g. every six months or every parameter value - every 2000 hours.
| The inspection template can be general, e.g. record only that the inspection was performed, or it can be very extensive with a series of questions, measurements and tasks to be performed completely in electronic form. More in the full documentation for this module and other tutorials. |
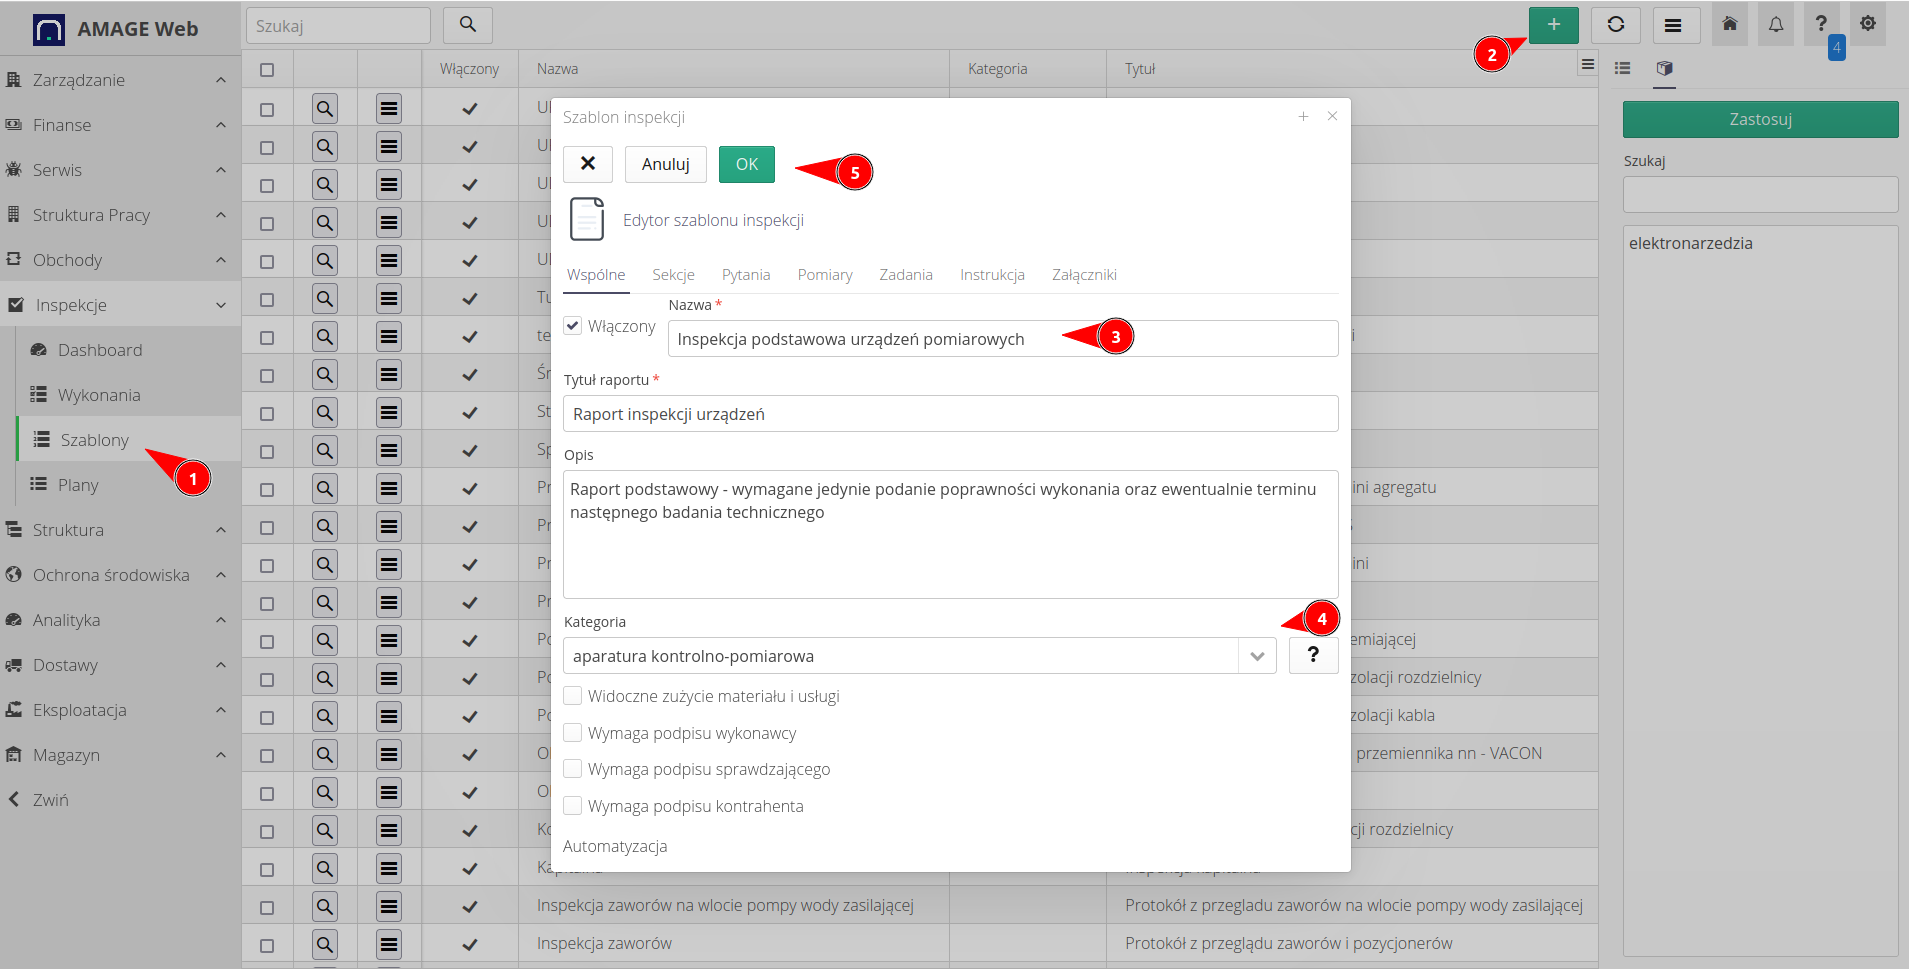
In this case, we define a simple template, i.e. we will only require confirmation of such a check. We proceed to inspect and define a new template. We enter only basic information.
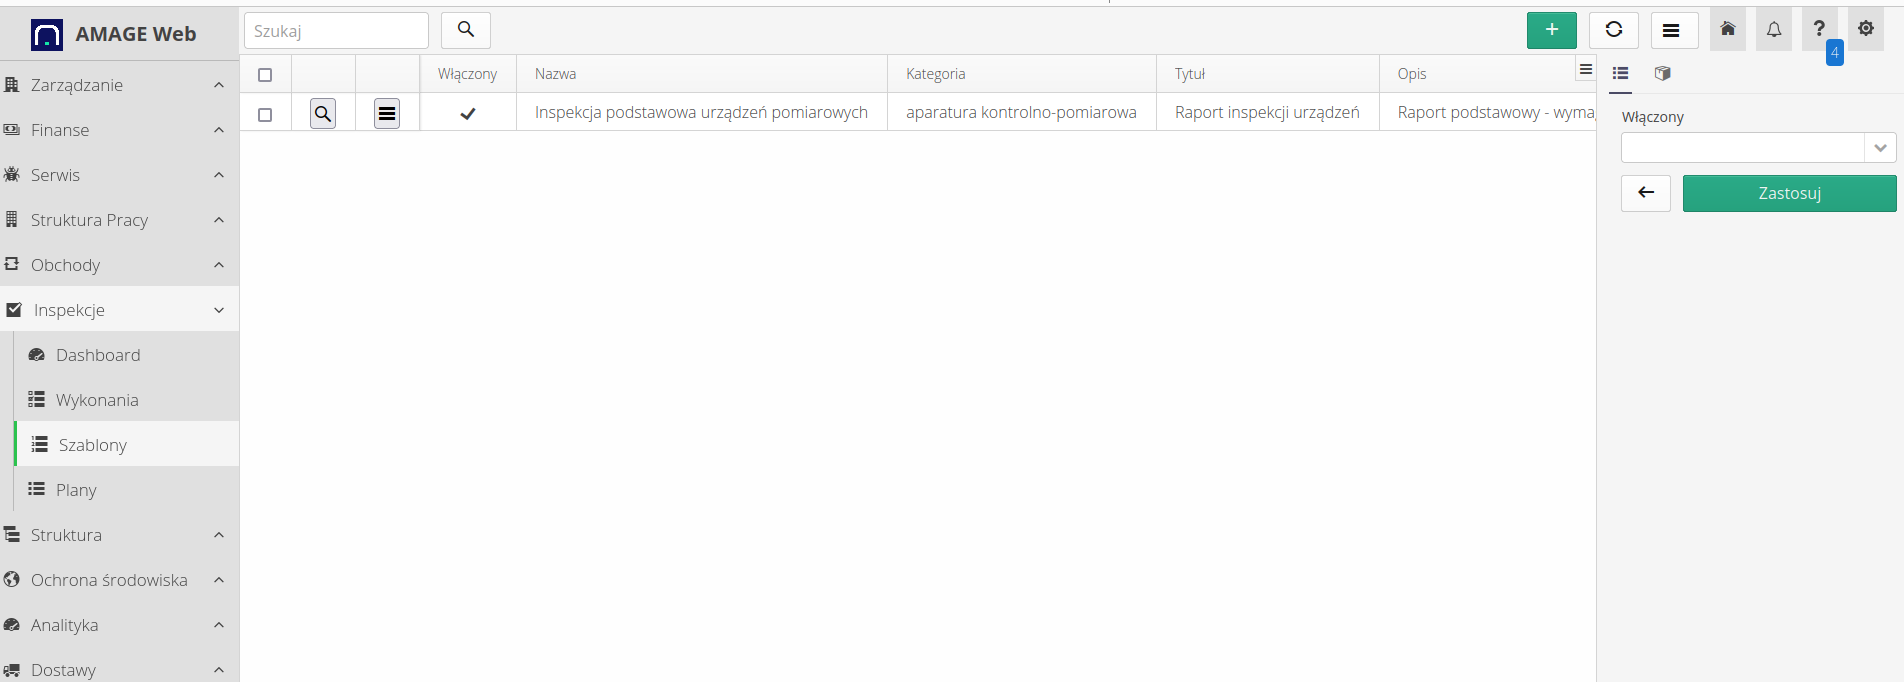
A ready-made template that has been assigned to the category of measuring devices.
We now move on to determining when such an inspection should take place. This is what inspection plans are for. The schedule can be defined for device types, e.g. for all MT-100 meters by X, or it can be defined for each of these devices separately, e.g. for the MT-100 meter with serial number 123/23. Sometimes we may specify an action plan for all devices of a given type or we may have different inspection times/periods for each device separately, e.g. due to a different place of operation.
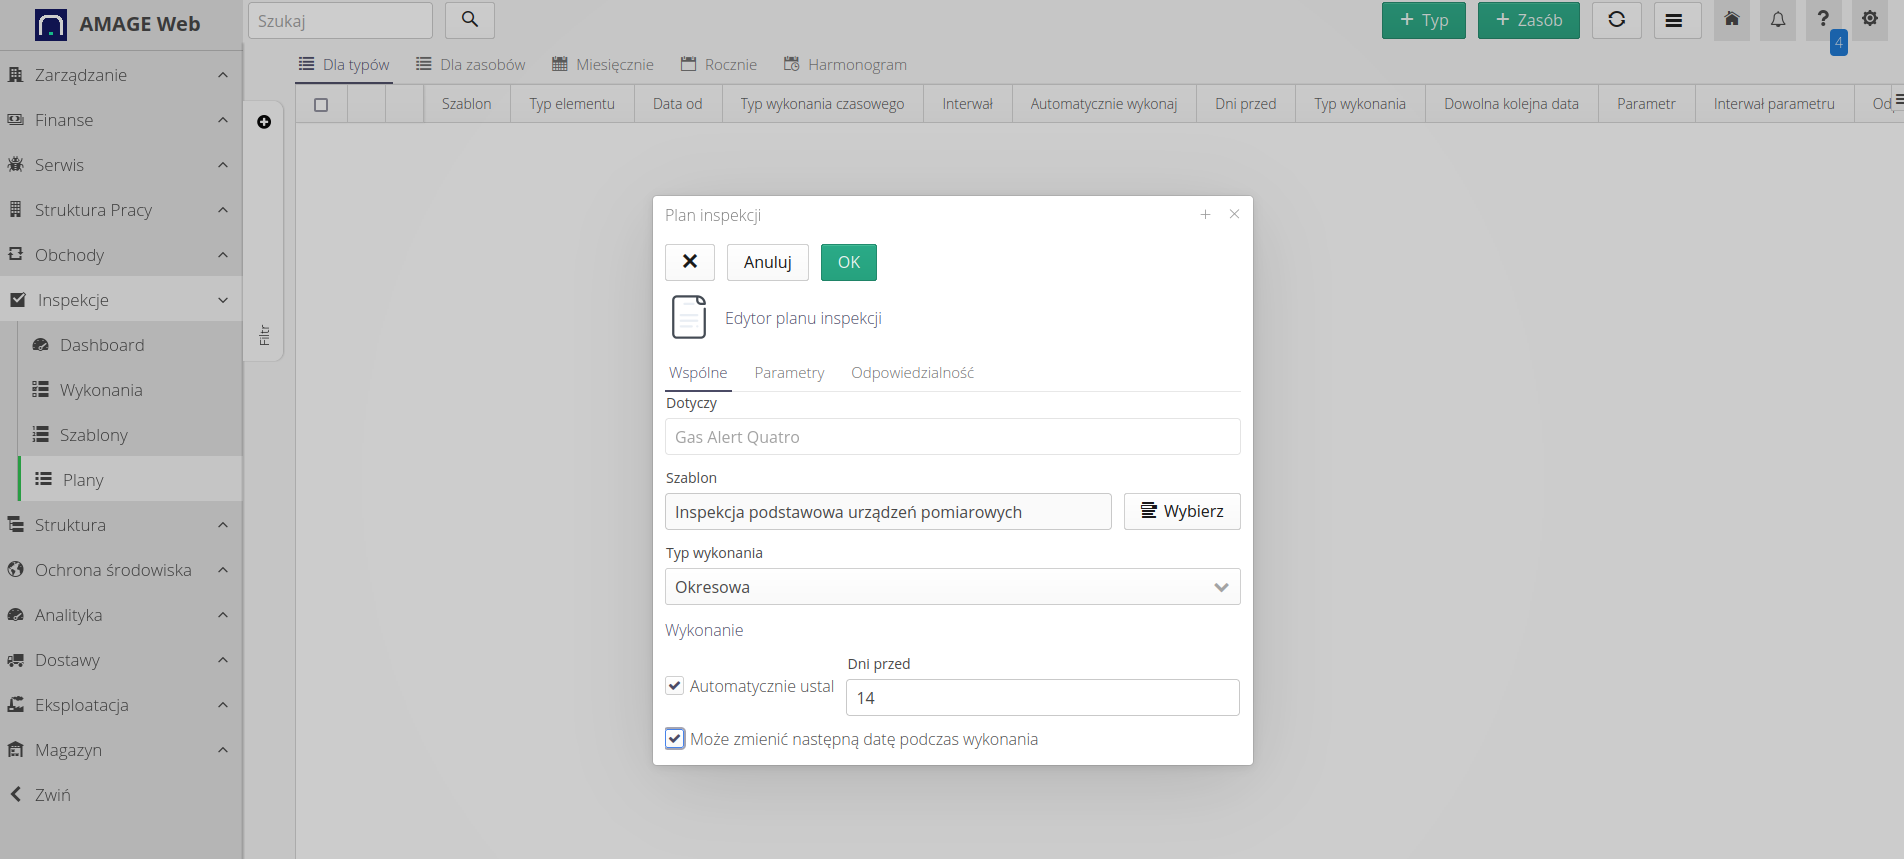
Here we define the plan for all such devices i.e. types. We select and fill in the basic information accordingly.
In addition to the basic data, we choose:
-
what inspection template to choose for this work
-
we enable 14 days before the planned occurrence of this inspection to define it for execution and assign it to the appropriate people
-
enable the option that will allow you to freely change the date of the next inspection during the inspection - this can be useful for inspections during which the next date is only determined.
We now move to the tab defining the parameters of this plan. We specify the start date for counting time and indicate that subsequent inspections should be carried out monthly - here every six months (6 months).
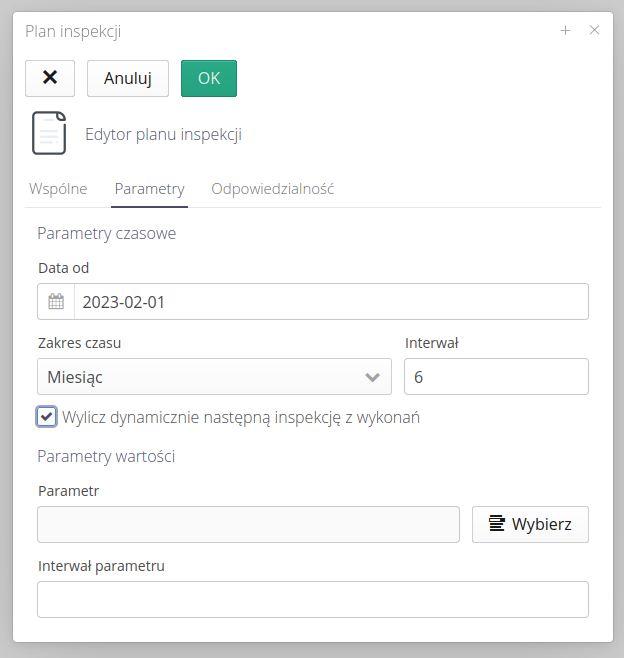
| Alternatively, if a given device had parameters such as engine hours defined, it would be possible to specify an order to perform an inspection for a given parameter, e.g. every 200 engine hours. How to add parameters and complete them (e.g. automatically from DCS/measuring buses) see other tutorials and main documentation. |
We move on to identifying those responsible for these inspections. Here, we specify which of the employees will be assigned to perform such an inspection and indicate the company that physically performs this operation. This will allow you to filter the data in the views or make this inspection available to be performed by this company through subcontractor portals.
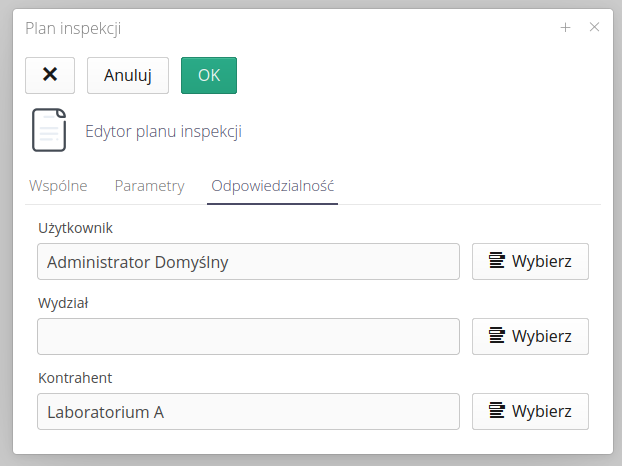
| The system makes it possible to share some works to be performed by external subcontractors using the so-called portals. Learn more about them in the main documentation. |
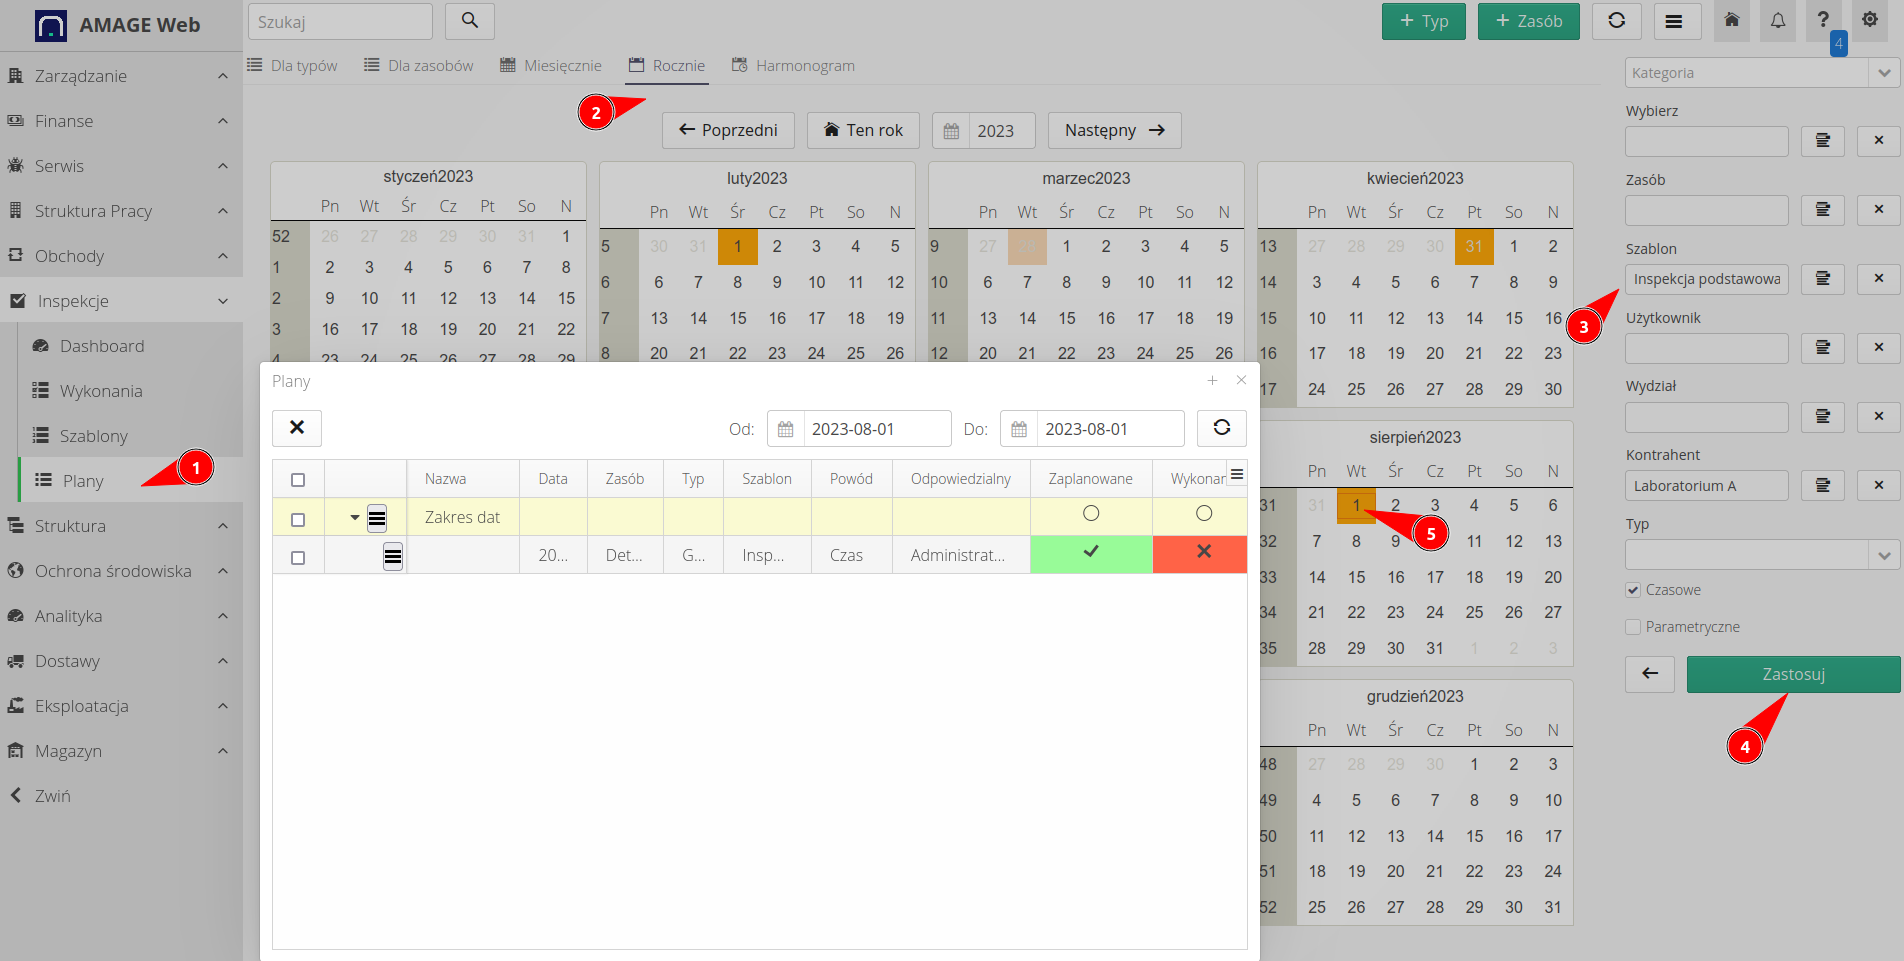
We have plans ready. Let’s see what the system can show us now. We go to the annual view of inspection plans. The calendar shows information about inspection dates resulting from the types with an orange marker. The filter allows you to select only the inspections you are interested in for review. Clicking on a selected day displays all inspections that are to be carried out on a given day (until a given day).
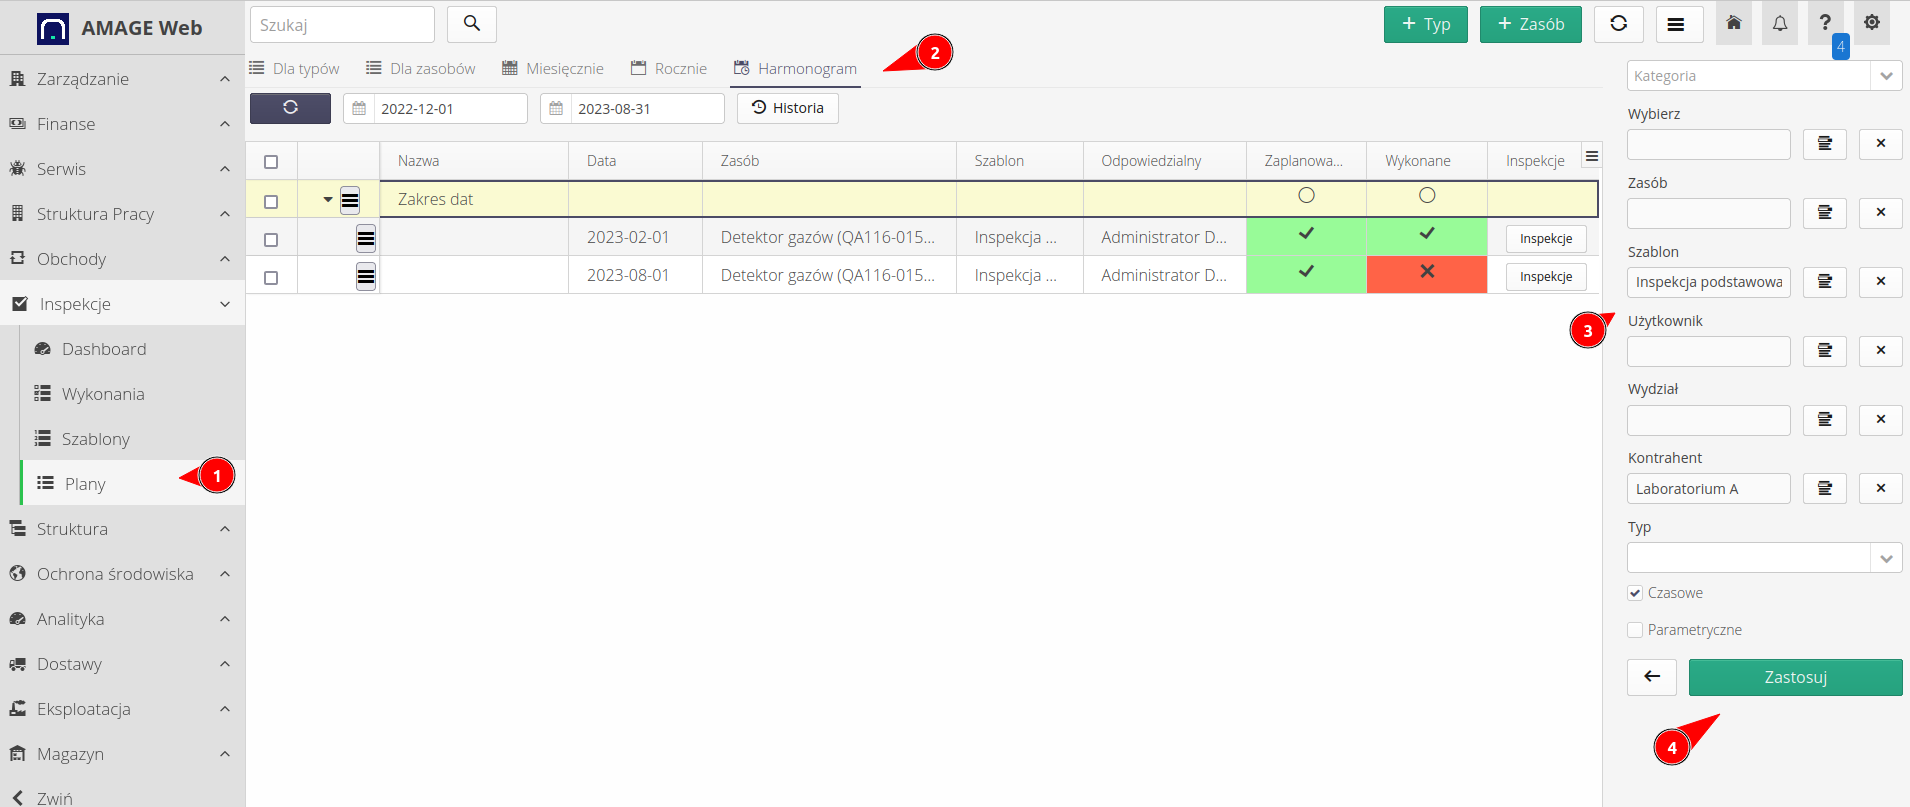
Going to the schedule view, we can display the data to be performed on the inspection in the form of a schedule, i.e. what is to be done this week, what is to be done next week, etc. The view shows basic information about a given inspection plan. In this view, we also see that both inspections have been scheduled for execution, but only one of them has already been executed. By clicking the 'Inspections' button, we go to the detailed view of the inspections that have been performed.
Performing this type of inspection, due to the very simple template defined by us, only requires providing basic information, i.e. the status of the performance, comment, setting the next inspection date. You can attach photos, protocols, files to the inspection. You can also put your signature or the signature of the contractor (contractor).
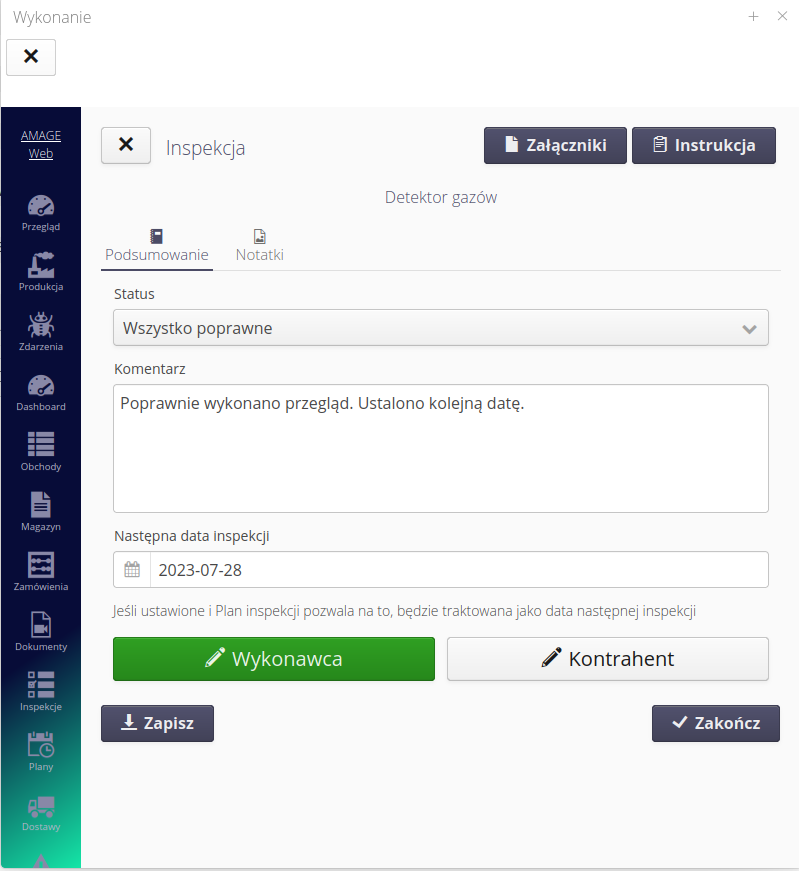
| In the mobile interface, we also have access to documentation, manuals and all data of a given resource. More in the full documentation for inspection modules. |
In the mobile interface, we also see another scheduled inspection that has not yet been performed and is assigned to me for further work.
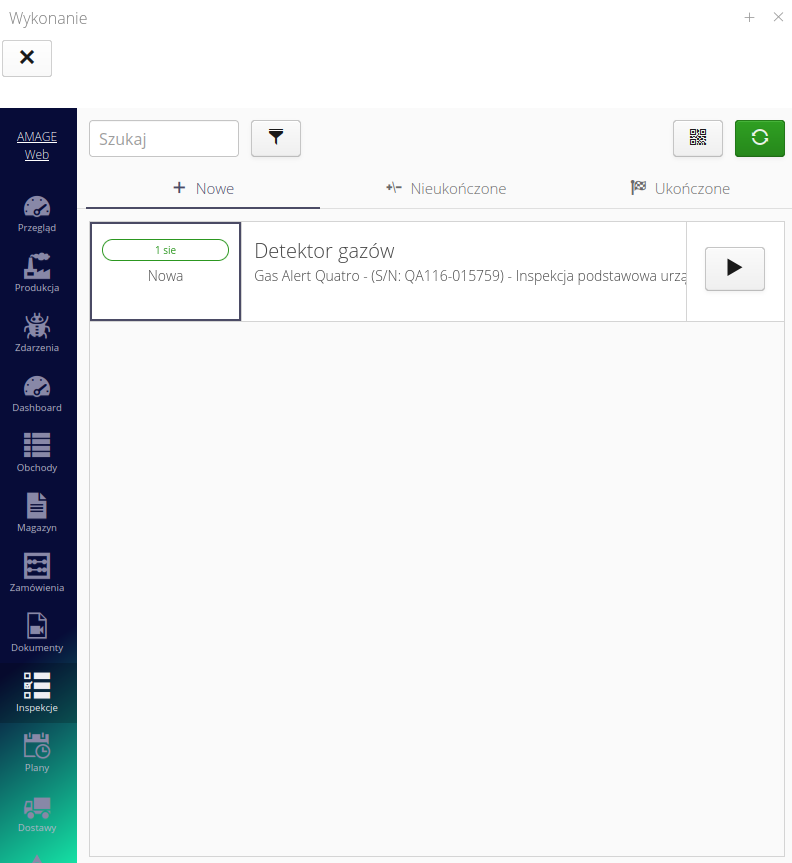
After the inspection is saved, all data in the system save the performed activities and, depending on the results, further activities can be generated, e.g. verification of the performed inspection, creation of service requests, setting dates for further actions.
Summary
This tutorial shows how to define a measurement device in the system and schedule inspections for it. Everything can be generated automatically and fully electronically. The relevant employees are notified about the tasks assigned to them.
Information about the performed inspection (calibration) is transferred to the resource data and can be used when performing other inspections. In this case, if you select this device as a measurement device in another inspection, it will be included in the report as a list of devices that were used to perform these measurements. This and much more in other documentation of this module.
| The Howto is based on system version 1.20.0.1 (02.2023) and presents features that may not be available in your system. Ask AMAGE about making this functionality available. |
| Due to ongoing development of the system, some screens or configuration files may look slightly different, but will still retain the full functionality described here. This does not affect the core functionality described in this document. |