Warehouses
Warehouses
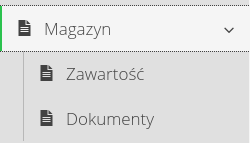
The warehouse area allows access to the data stored in the warehouse, the history of the circulation of these items and access to the history of warehouse documents with the creation of warehouse and related operations. Access in the main menu through the 'Warehouse' section. Available areas:
-
Contents - lists of items in stock
-
Documents - list of warehouse documents
Configuration of warehouses
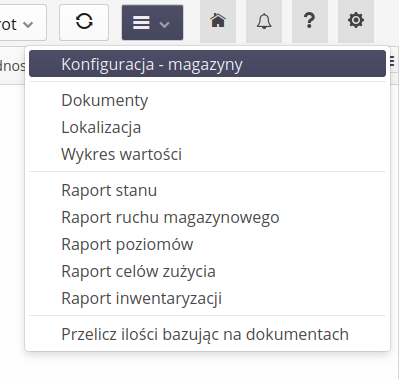
In the initial state of the system, there are no defined warehouses. To add them and define storage locations, we can go to the configuration (if we have the appropriate permissions) through the context menu of the warehouses view.
Or from the system configuration section of the dictionary definitions. Menu General → Dictionaries.

The list of warehouses and places is defined in this area. For a detailed description of the fields and functions, please refer to the help for the configuration section and dictionary settings.

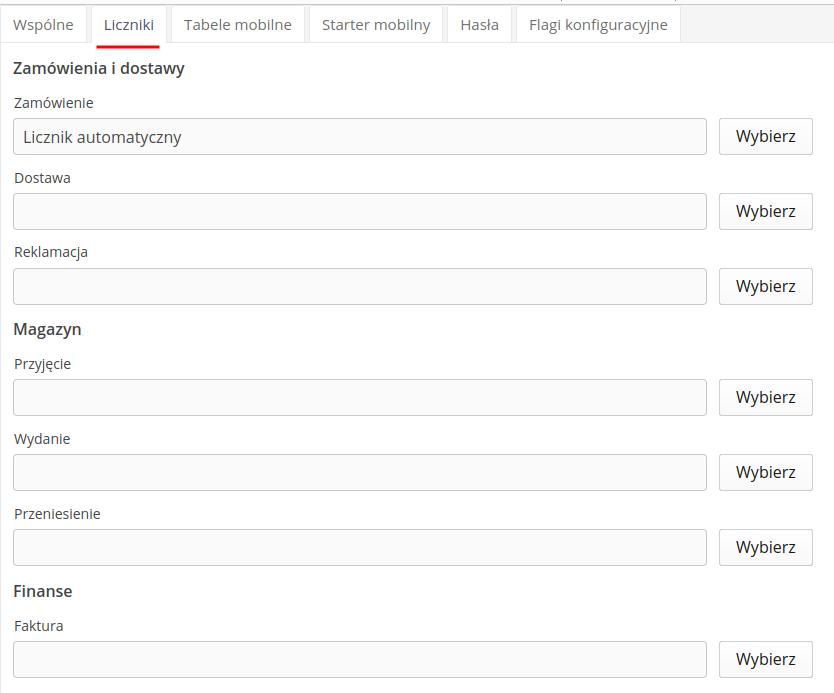
When defining warehouses, first define the default counters that will be used when creating documents for all warehouses. These counters are entered in the configuration section in the Main → System menu and the Counters tab. There we select the counter for all three types of documents separately.
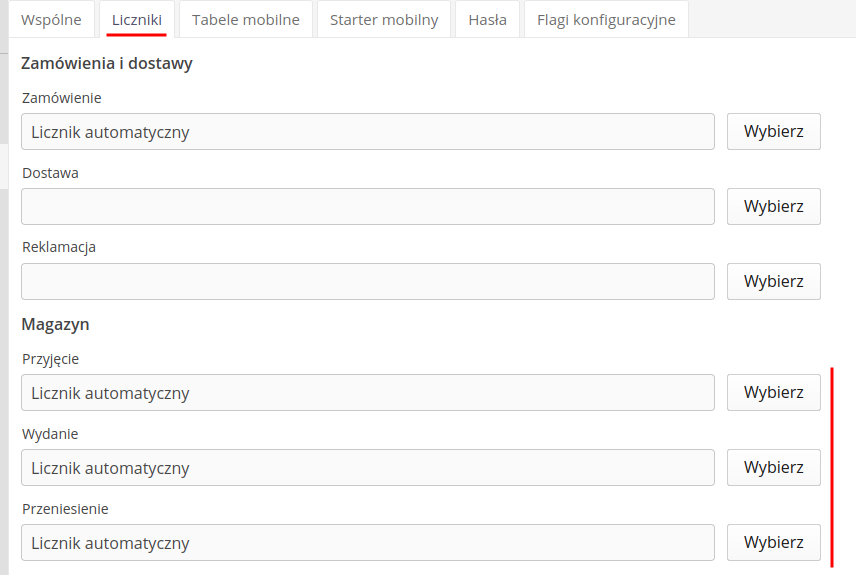
When creating warehouse documents, each warehouse document can be numbered using an automatic counter that is configured for this type of document or any number entered manually by the user. To select this type, click on the "Counter" button and select the counter from which the order number is generated or the option to enter counters manually.

Configuration of automatic counters is possible in the configuration section of the system. After going to it and selecting Main → System and the Counters tab, you can choose which counter will be used to generate a given type of document.
|
Using an additional tab, we can define additional parameters that we want to be presented in a given warehouse. This is a function that allows you to display the most frequently used parameters related to the material in the warehouse in the warehouse view.
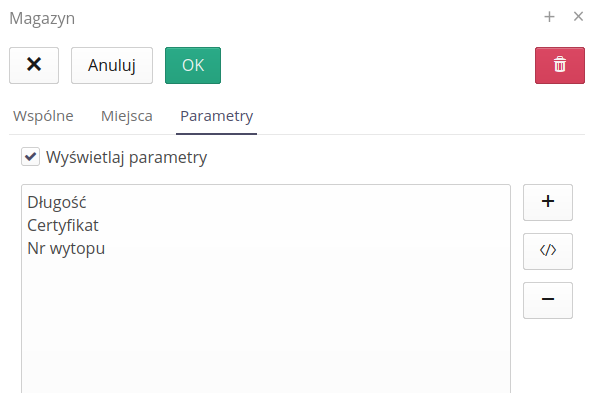
When adding a parameter, we can select it from the list of existing parameters in the system. This allows you to display parameters related to the material in a given warehouse. Here, in the example, we add parameters responsible for the categorization of material in the warehouse.
Additionally, we can introduce a definable parameter that is based on the values of the item in stock and fixed parameters. We add it using a dedicated button. Once selected, the definition window for such a parameter appears.
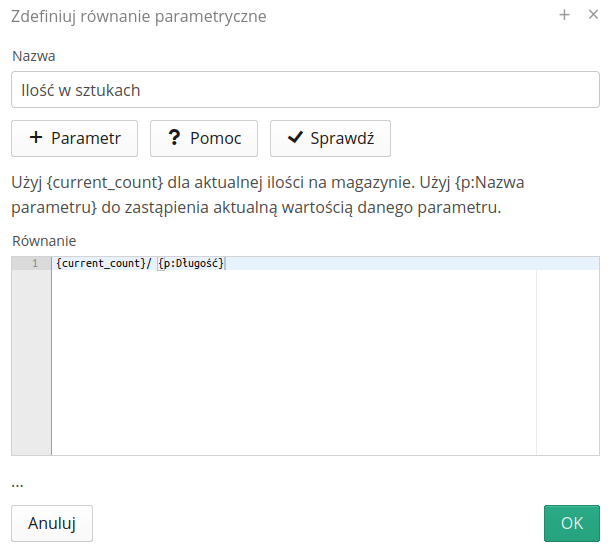
In this window, we can define the name of the column for a given parameter and enter the equation that will calculate a given value. Using variables such as current_count and p:parameter name, we can dynamically enter data into the equation that characterizes a given item in the warehouse. Here, in the example, we download the current quantity in stock (we store total lengths) and divide them by the "Length (unit)" parameter, which will allow us to display the number of pieces of a given material in this column.
Stock
The Inventory view allows you to view inventory by type and operation (receipt/release) along with a detailed history of inventory turnover. When the user selects this view, a general view is presented for all warehouses/storage locations. At the top of the view, we have access to quick filters and shortcuts to quick actions performed on warehouse items:
+ - generation of warehouse receipt document - - generation of warehouse release document * <> - generation of transfer documents between warehouses * Return - generation of order to return items from the warehouse
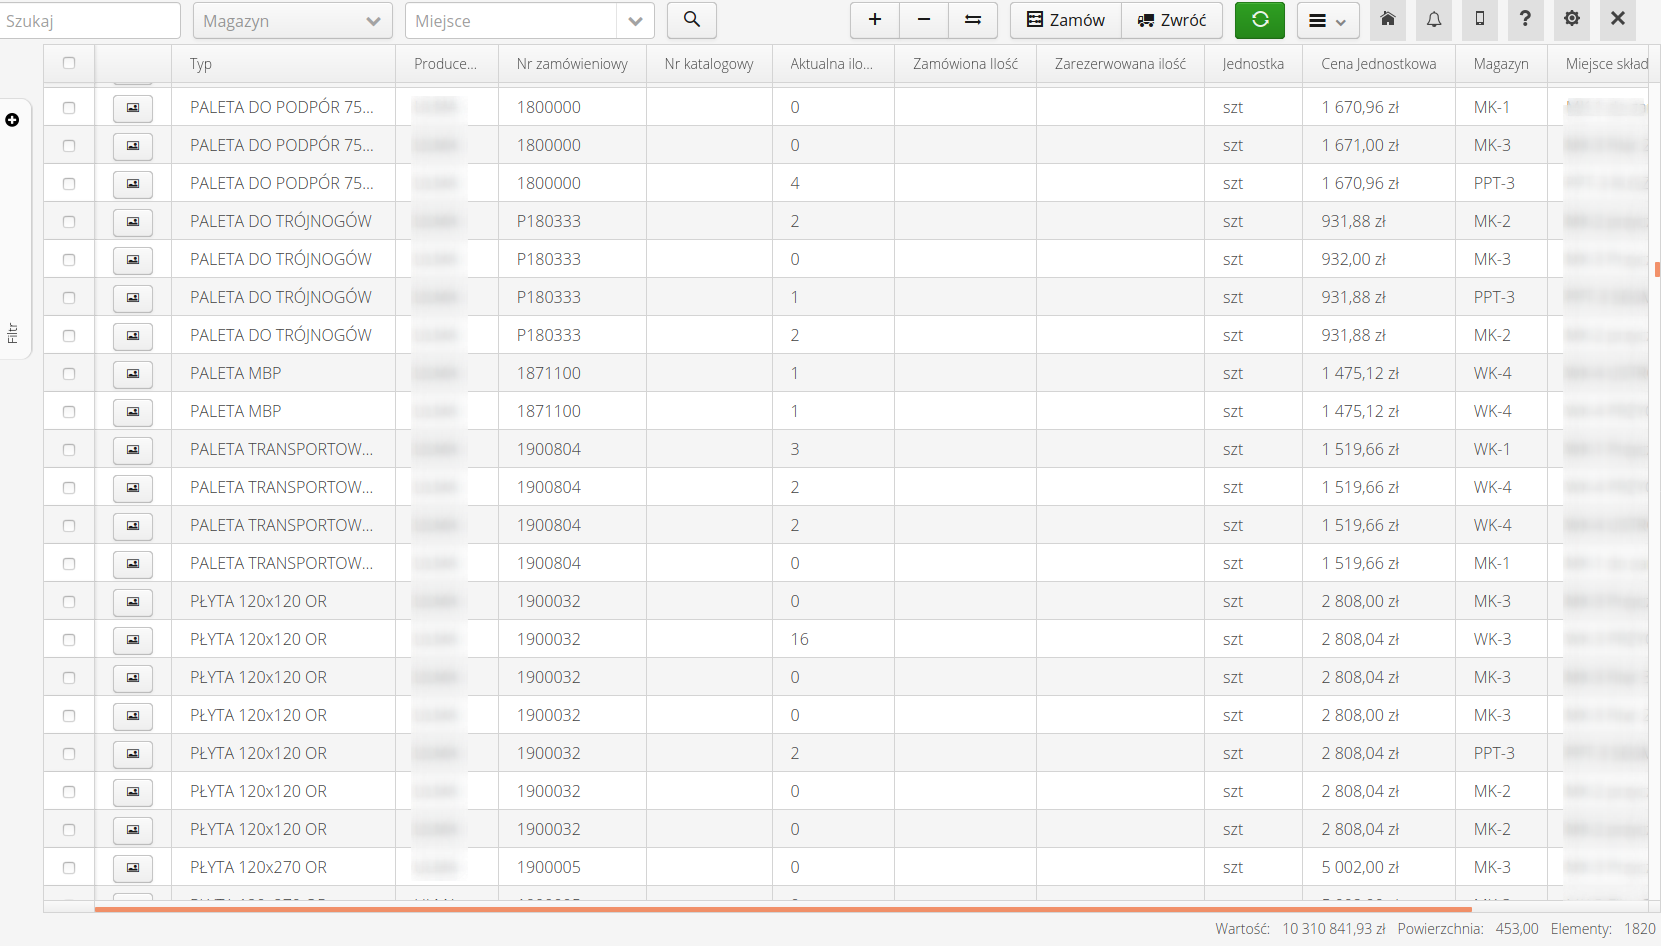
After enabling the option of tracking material parameters in the warehouse, additional information appears regarding the parameters (defined for the warehouse), which are permanently displayed, and action buttons with access to the parameters and identifiers of the material that is in this warehouse.

Detailed information access buttons allow access to all registered parameters of a given material and all material identifiers.

| The system does not verify the correct number of identifiers equal to the declared amount of material. This may not always be equal, e.g. accepting 100 meters of pipes in 10 m sections, hence 10 identifiers and the length equal to 100. |
If minimum and/or maximum quantities of items in stock have been defined for individual assortments (in the Types view), the system, when viewing inventory, indicates the items (in the quantity field) that have exceeded the defined min/max values.

At the bottom of the view is a summary of the value and quantity of selected/visible warehouse items. Access to additional search filters is available in the side panel of the view.
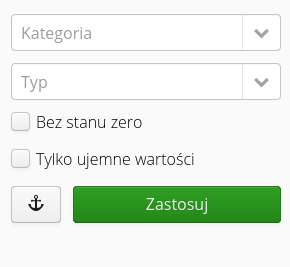
In addition to selecting a warehouse/location, the user has the ability to filter by type category, specific item type, and to display only non-zero items in the warehouse or show items with negative counts. The selection of warehouse and storage location is remembered during the entire time of logging into the system. When you re-enter the warehouse view, the last selected warehouse and storage location are automatically selected.
| Zero and negative values arise in the case of implementation of the order procedure for return/loading and transport to the supplier. In this case, the inventory of leased items is reduced. Ideally, at the end of the lease, the inventory would be zero. In the event that during loading, more material was loaded than was declared in a given warehouse (it was taken from another warehouse), a negative state may appear, i.e. more was returned than was delivered to the warehouse. |
The status bar shows the values and quantities of items in stock. Additionally, by selecting records, we can display the value, sum of quantities and the number of selected records.


You can create internal (stock) documents and create a delivery/return order directly from the stock view. Invoking the various actions requires, depending on the type, selecting the items to be returned/moved/delivered using the selectors in the view’s main table. Additional items can be added in later stages.
A context menu is available for the warehouse details view with access to the main information and contextual actions for general data or individual items on the warehouse.
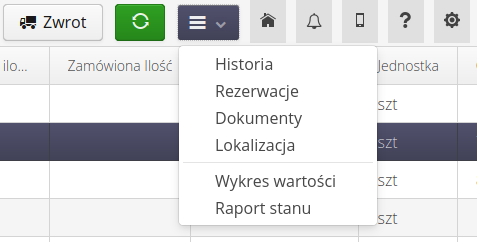
Available actions:
-
History - access the history of the selected item.
-
Reservation - access to the reservation history of the selected item.
-
Stock Documents - history of stock documents of the selected item.
-
Location - go to the map view with the location of the given storage site.
-
Charts - charts of warehouse values, etc.
-
Reports - stock report shares
View details of selected actions:
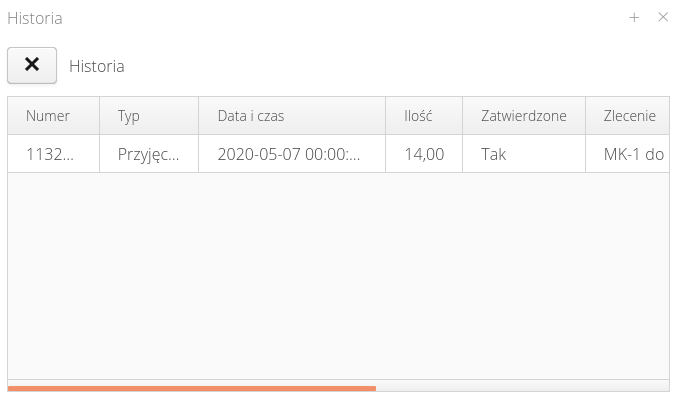
The history view shows all operations performed on the selected item (stock documents) and information about the turnover of quantities of the item. The same is the reservation view, which shows the reservation history of the item during the execution of maintenance work.
In this view, detailed information about history elements appears at the bottom. This information contains general information, i.e. regarding all elements, but also only those selected by the user. This allows for a quick assessment of individual operations and a summary of their quantity and value.

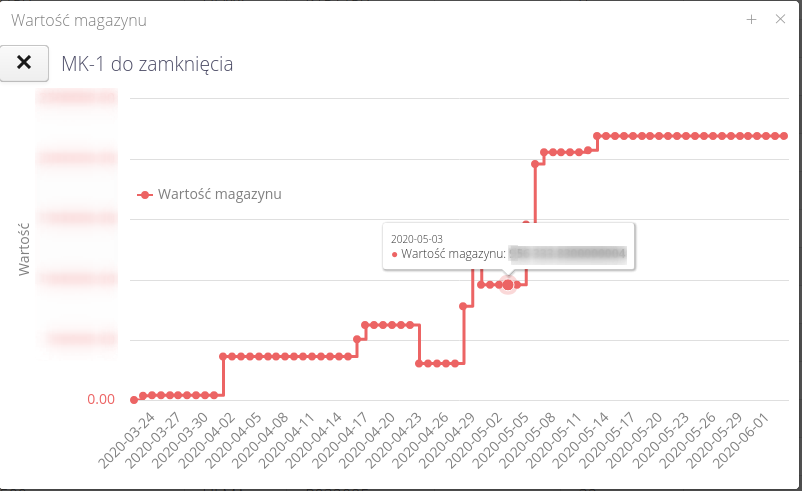
The stock value chart indicates the value of items in stock as a function of time.
The stock report is defined by its detailed filter
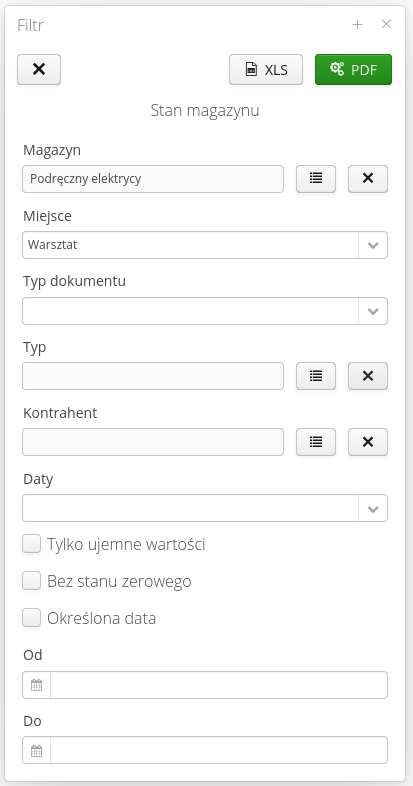
The stock report allows you to generate a detailed stock report based on stock documents. Filters allow you to specify in detail which documents and which end results are to be presented in the status report. The system allows you to generate a report for all warehouses without indicating a specific location.
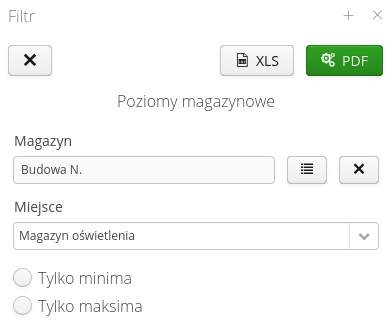
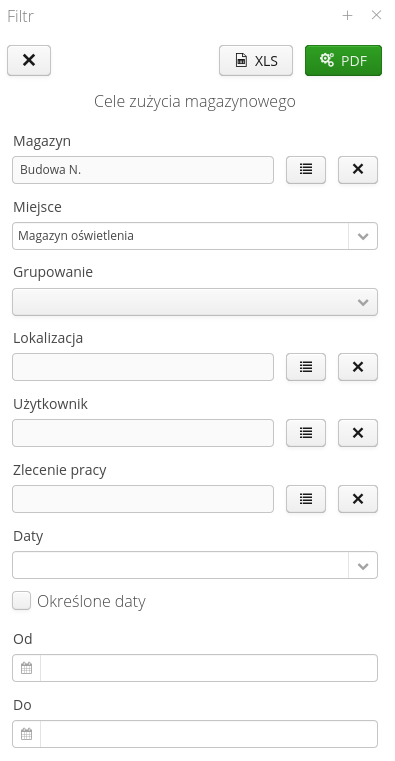
| If you do not select a date range (or one of the dates), the system generates information based on all warehouse documents for the warehouse/storage location. Using date ranges, it is possible to analyze not only the stock of a warehouse over time, but also the change in the stock of a warehouse over a selected period of time. |
Warehouse operations (Receiving/Dispatching/Transfers)
The system allows you to carry out all necessary warehouse operations directly from the warehouse elements view. In this case, it is required to specify the warehouse/storage location at the beginning. It will be treated as a warehouse/destination or source depending on the selected operation.
The actions available at the top of the view allow you to carry out warehouse operations: receipt, release and transfer between warehouses.

For simplicity in warehouse operations, if a warehouse has only one storage location, it is automatically selected as the source or destination parameter (in the document for transferring items between warehouses). The same applies to work orders. If a storage location is associated with only one work order through the same account, the work order in question is automatically selected in warehouse operations. The user can, of course, modify these values in the editor windows.
| Depending on the implementation configuration (when the system is deployed), after adding a new item in the release/transfer operation, the system automatically sets the number of items either to 0 (the user determines the value himself) or to the number of all items in the warehouse. |
Warehouse operations windows are divided into an item list section and document master information. Documents can be of external/internal type, i.e. issued/received to an external supplier or own employee/subcontractor.
Additional information is the meter number (can be automatically assigned by the system from selected meters or entered manually). Work order, receiving person, receiving company/supplier, document date.
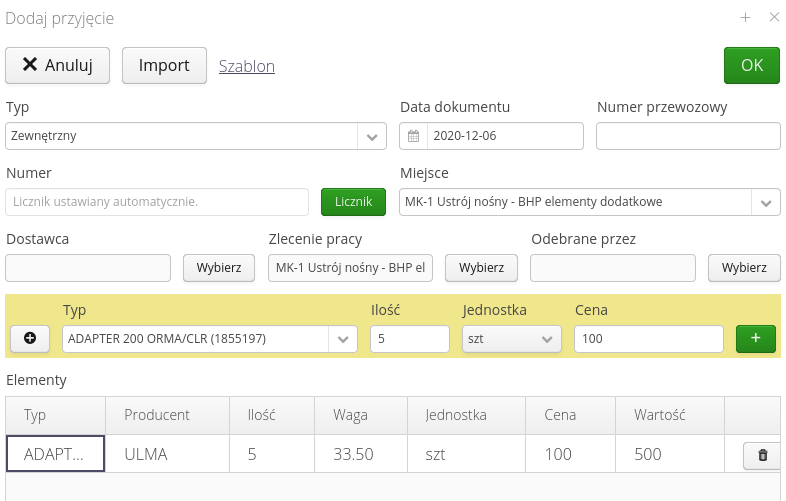
In the list of materials in stock, items appear for easy editing. Selecting multiple items allows you to quickly remove them from the list collectively. An edit button allows you to enter the editing mode of an item without double-clicking. The screen also shows additional buttons for registering parameters and identifiers with a corresponding indication that an action has been performed.

| During the warehouse receipt operation, it is possible to add a new assortment (type) directly from the format window. We use the (+) button next to the type selection list to do this. The window for creating a new assortment type will be displayed, speeding up warehouse operations. |
Releasing from the warehouse is carried out in the same way, with the option of selecting elements from those existing in the warehouse instead of from the available material dictionary.

The transfer between warehouses requires the indication of the warehouse/destination for the operation of transferring materials between warehouses.
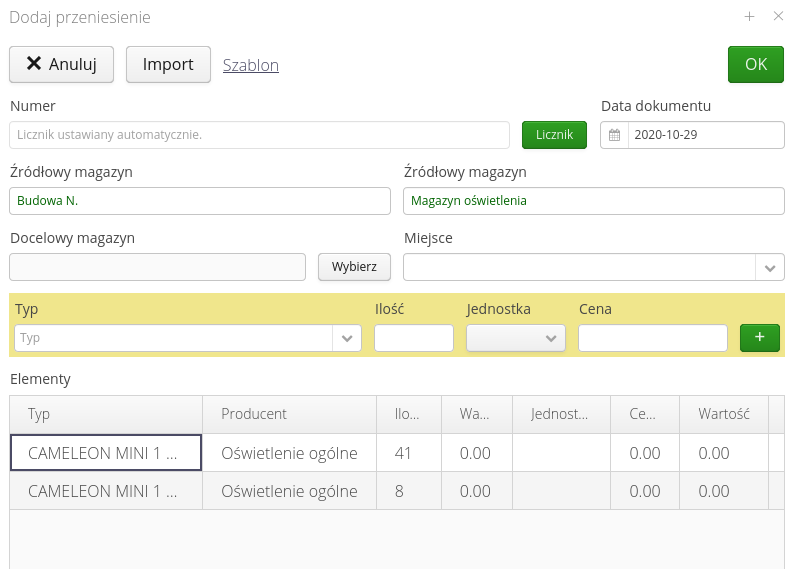
The system has added support for processing a reservation document into a transfer document between warehouses. At the end of such an operation, the user has the option to delete the reservation. This allows you to use the material reservation function in work orders and then transfer the data to the warehouses of individual production cells.
In the warehouse document definition view, you can use the option to import items from the list. By selecting the 'Import' button, choose a Microsoft Excel format file. This data will be imported into the system with preliminary validation (availability of a given order number, etc.)
| In the document creation window next to the import button, there is a link whose selection will download a sample (template) xls document that can be used as a template to fill in the data for the import data. |
Approval of the document triggers changes in inventory and the creation of corresponding documents, which are available in the warehouse documents section of the main menu. The inventory is also changed accordingly.
Related operations - order/reimbursement order
If the system has an active order/supply module, the operations for executing an order/return from the selected warehouse are available directly from the warehouse view. Calling these operations with selected items from the warehouse results in delivery/return document formats with already pre-filled assortment list.

For details of procurement/delivery operations, please go to the relevant section of the documentation.
Warehouse balancing
The warehouse balancing action is available in the context menu of the elements of a given warehouse. We can select a larger number of assortment for collective balancing.
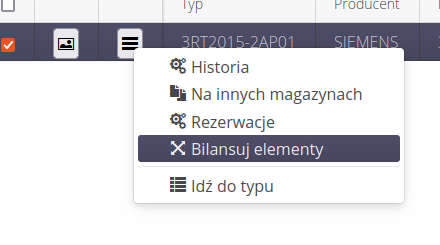
Balancing is used to generate transfer documents between warehouses/storage locations to correct information on individual warehouses. It can be used, for example, to correct information in many storage locations that serve as containers for leased elements associated with an extensive project. In this case, it may happen that one storage location has a shortage (negative values), which must be corrected with data from other warehouses/locations. To do this, it is enough to filter out items in the warehouse that have negative stocks and call the balancing operation.
The balancing window is divided into three parts. The first contains the elements selected for balancing. Selecting any item from this list generates the information in the second section. This one shows information about the quantities of a given assortment in other warehouses/places. Using the buttons, we can select the place and adjust the appropriate quantities according to the demand of the initial element.
After selecting and confirming the action, information is generated in the last section - the list of documents that will be generated. Two documents will be created for each operation between a pair of warehouses - one reducing the stock and the other increasing the stock.
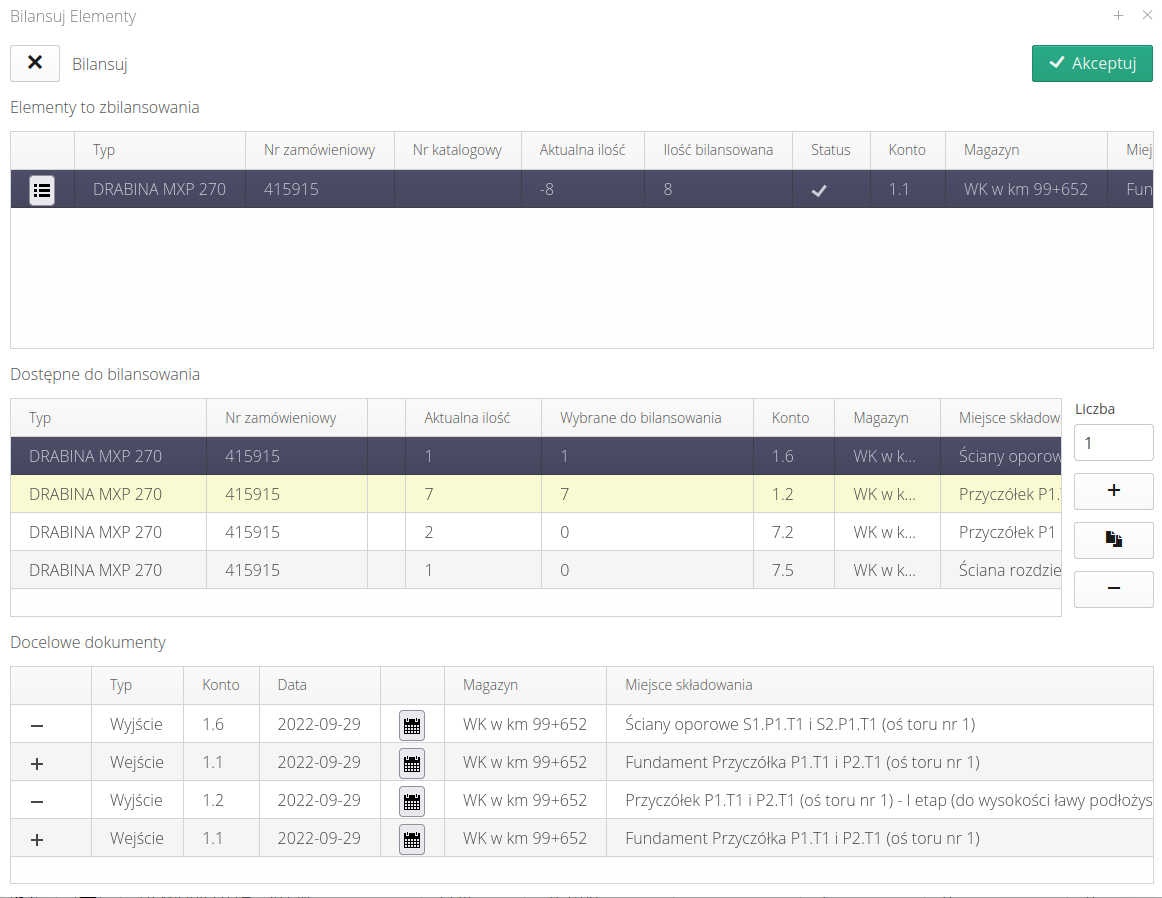
When the elements are properly balanced, they change the background color to green. Approval of the operation of the entire window generates all documents and corrects the data accordingly.
Warehouse documents
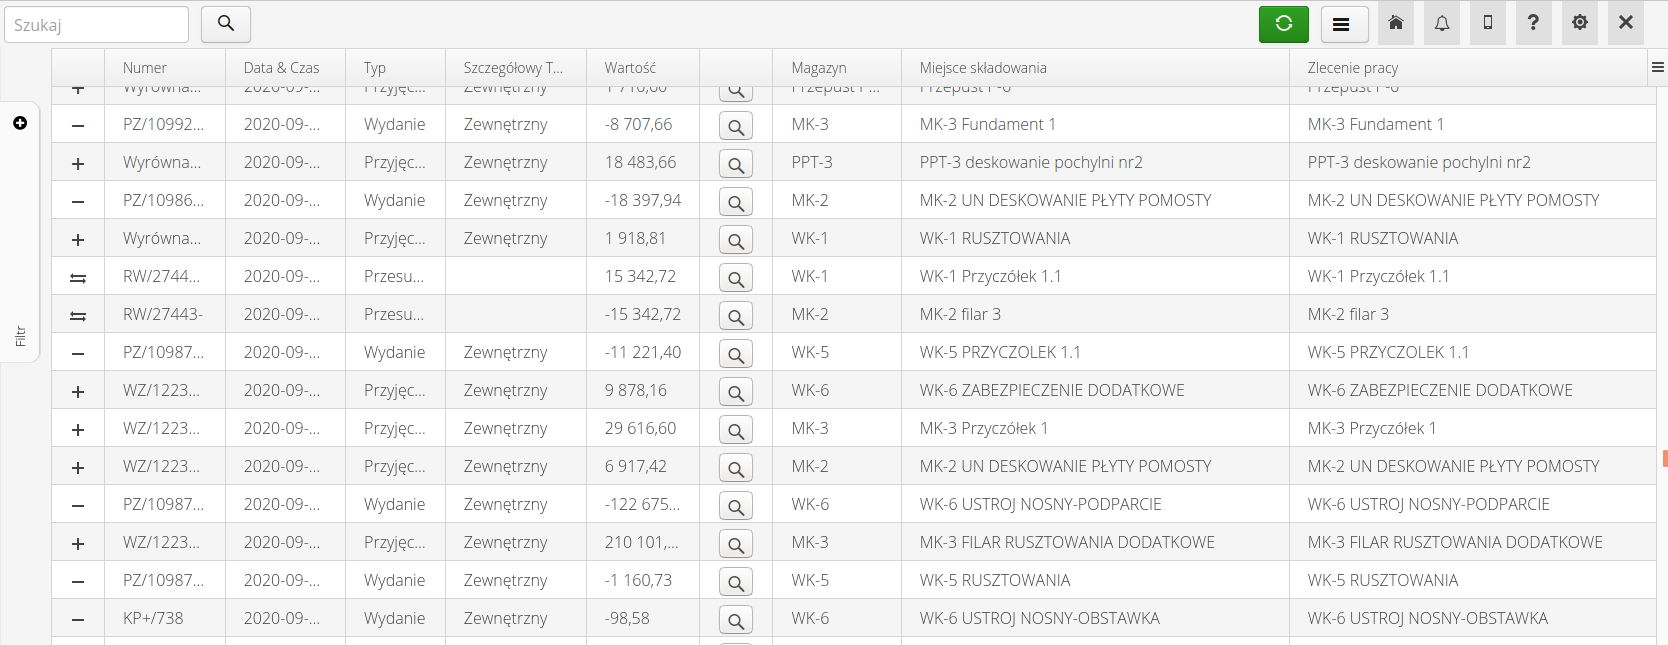
The list of warehouse documents presents a list of all warehouse documents, which are the basis for the generation of information about the current stock. After selecting this action from the main menu, the user is presented with a list of all warehouse documents ranked from the most recent documents (relative to the document creation date).
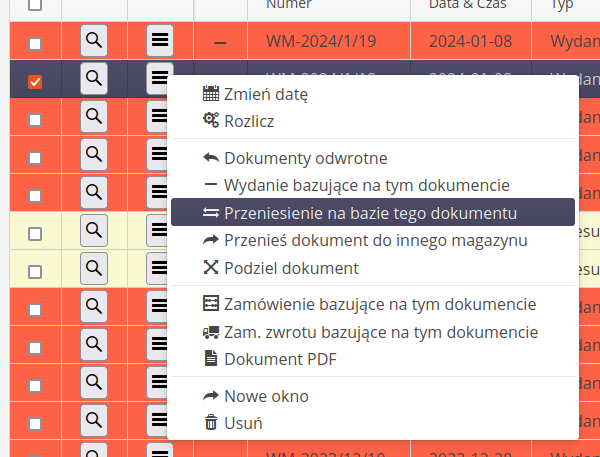
The _zoom button allows quick access to the content of the document. When you click it, a window with document details and buttons appear: close the window, open the document in a new browser window, or go to the document details in a given browser window.
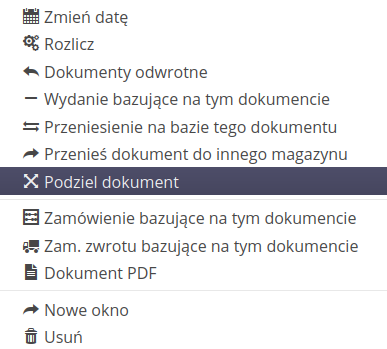
-
Change date - changes the date of the document. NOTE for transfer documents changes the date for both related documents
-
Settle - settle the document if it is not approved yet. It then updates stock levels.
-
Reverse documents - generate a reverse document. A return will be generated for a delivery, a delivery for a return.
-
Issue based on this document - create an issue from stock based on the material in this document
-
Transfer based on this document - create a transfer based on elements of this document
-
Move document to another warehouse - moves (without MM documents) the document to another warehouse
-
Split document - divides the document into parts - moves some to another warehouse
-
Order based on this document - generate an order for an assortment from this document
-
Order returns based on this document - create a return order based on this document
-
PDF document - generate a document for printing
-
New window - open the document in a new window
-
Delete - delete the warehouse document. ATTENTION. This will result in an appropriate correction of the given warehouse according to the type of document.
| Splitting the document and transferring it to another warehouse serves to correct the placement of documents in the system. They do NOT generate MM+/MM- type transfer documents but only transfer the document. To leave a trace of these operations, the system saves these operations in the document history (see details of warehouse documents). Based on this, you can trace the path of this document or part of it. Equivalently, when the document resulting from the split is deleted, the state of the warehouse and elements in the source document will be restored to their initial state. |
| Splitting a document creates a new document in the target warehouse with selected items and quantities from the original document. However, in the original document, the elements that were used for the operation still remain, but the quantities are reduced by those that were transferred to the new document. In particular, they can be zero values. |
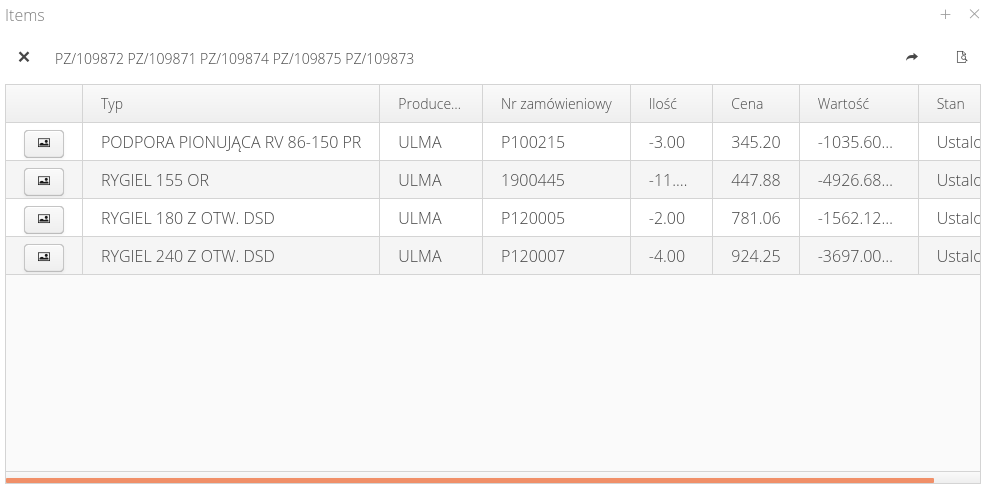
When you select any design element, you go to the document details view. The view is divided into two parts. In the upper one you will find document details. Numbering, types, warehouse/storage location, related delivery/return which generated this stock document, etc.
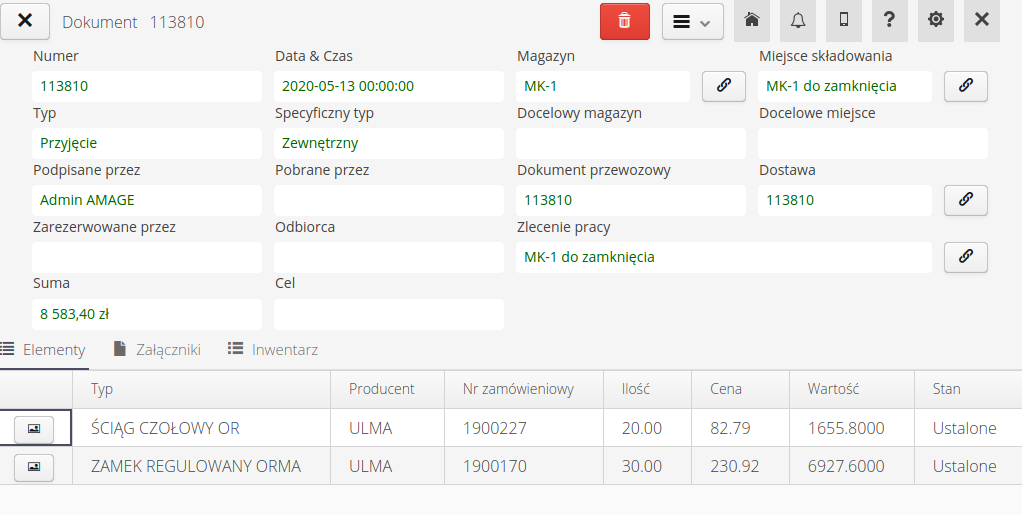
The lower part of the view contains detailed information about the components:
-
Items - a list of stock items that are included in a given stock document. In addition to general information, they have a status in relation to the stock (see below)
-
Attachments - a list of attachments e.g. supplier documents, etc.
-
Inventory - a list of objects inventoried during the execution of the warehouse release procedure (see below)
-
History - history of the warehouse document
Using the XLS button, we can export information about document elements to Microsoft Excel format and further work on this list in an external application.
|
The list of elements also includes additional buttons allowing access to additional information, e.g. registered parameters, saved serial numbers, etc.
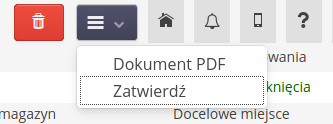
The context menu allows you to:
-
Generation of a PDF document with the contents of the stock document
-
Carry out the operation of reconciliation of items and removing them from the stock if the stock of items was marked as 'Unaccounted for'
Due to the fact that some operations do not generate an accurate trace of changes, e.g. changing the document date, moving a document without performing an TRANSFER operation, the system saves these operations and allows access to them from this view.

Document history data shows operations and connects the document with elements such as import, delivery, order, source and destination warehouses. In this case, it is easier to analyze the history.
Each history item can contain a list of related documents. If a document was created in the context of another document, e.g. by division, these documents will be included in the appropriate history entries for each of them. This allows for faster navigation and recognition of document sources.

Each entry can be supplemented with an additional comment or a new entry can be created just for the purpose of commenting. Comments allow you to describe possible actions performed on a given document.
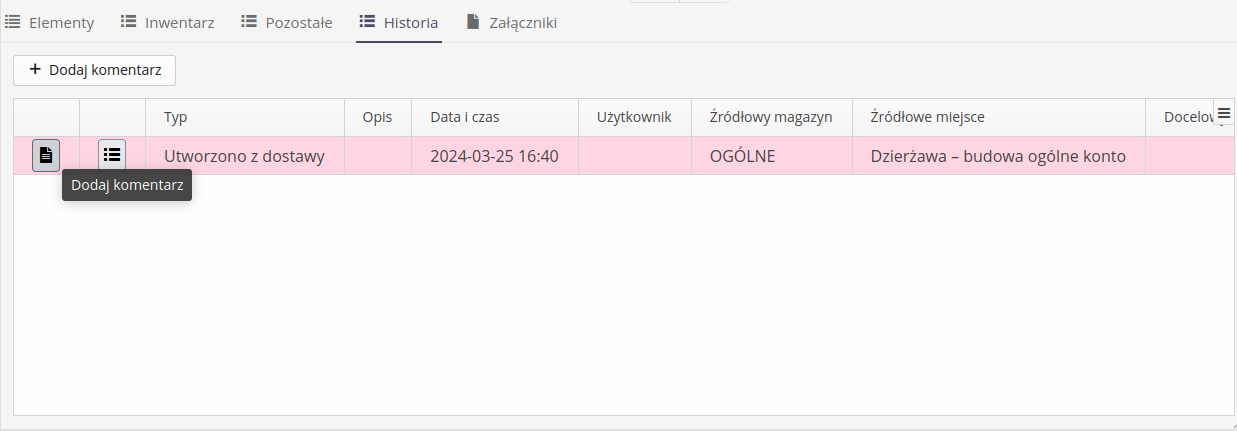
Status of warehouse document elements
A stock document in the AMAGE system can have a list of elements that constitute the main content of the document. Each of these elements has its own status:
-
Unaccounted for
-
Fixed
-
Rejected
Such a solution allows you to create temporary warehouse documents when, for example, carrying out service work. When a service technician takes items from the warehouse, he takes an excess amount of them. When going on a service action, it is usually better to have a larger assortment of spare parts so as to be prepared for all surprises. In this case, the retrieved items create a warehouse document but do NOT yet change the stock of the main quantity in the warehouse. The quantity appears in the reservation columns. When the service action is performed and the request is closed, the document is balanced. Unused items can be returned to the warehouse and only the actual items retrieved can be removed from the stock.
Inventory during warehouse releases
The AMAGE system allows, during the execution of a warehouse release, the execution of an inventory of objects. This approach is used in cases where the process of releasing equipment from the warehouse makes it necessary to continue tracking the released items with the identification of each item separately. Examples of use:
-
Release from the warehouse of equipment that is installed in the plant and must be labeled and entered into the AMAGE system with the necessary information so that the equipment can be linked to maintenance modules
-
In the course of construction/construction work, we are keen to track the progress of the assembly of items released from the warehouse. Releasing from the warehouse involves marking a given component (e.g., lighting) with a unique code. Then users in the course of assembly work report the progress of the work using the assigned unique code (barcode/2D) to uniquely identify the object.
Parameterization of warehouses, documents and deliveries
After enabling the detailed monitoring of delivery/warehouse parameters in the configuration flags section, the document interface changes.
To use the full functionality, we must specify in the element type definition which parameters (of many) will be important in the delivery and warehouse supervision process. In this case, we chose two, i.e. Certificate and Smelting.
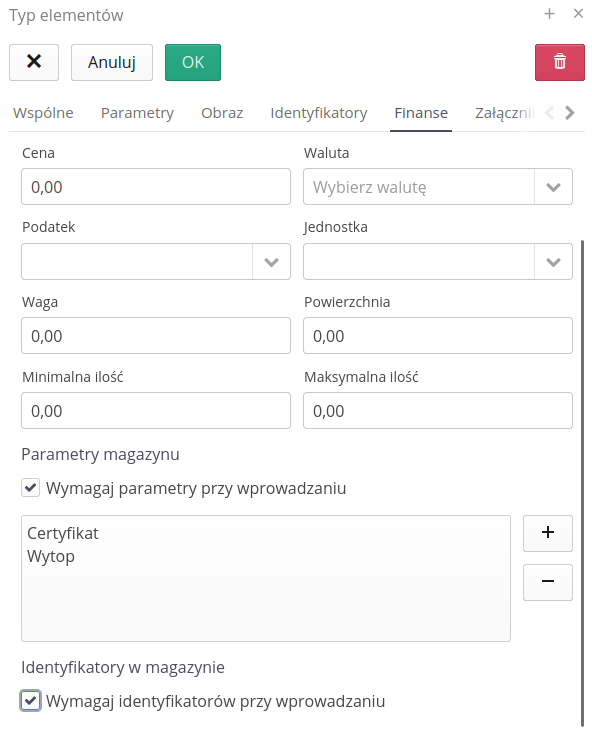
After such a definition, if we create warehouse documents (and deliveries/orders), we can enter parameters that concern the received material. An additional button appears in the Document View, which allows you to save parameters.

After selecting it, an additional window appears allowing you to enter the parameters of a given delivery.
| In the case of release documents, the parameters are only used for identification. They cannot be changed. |

After saving all parameters, the buttons turn green. Delivery items that do not require such parameters have buttons marked in a neutral color.

The parameters are then visible in the warehouse view and participate in further operations in the system.
When editing a warehouse document that was created on the basis of material reservations in work orders, the system detects the addition of identifiers associated with a different set of parameters of a given material type. In such a case, the system adds warehouse items in accordance with the scanned code, while correcting the quantities of material resulting from the material plan.

Warehouse - material conversion operation - issue/receipt with other parameters
In the case of materials in stock that have specific additional parameters, e.g. length, melting, certificate, etc., it is possible to convert the material after its use. Using the 'Convert OUT/IN parameter types' action, we can change the parameters. A new material with new parameters is created in the warehouse and two documents are generated - the release of the original material and the receipt of the new material in the warehouse.

Serial numbers of stock items
After enabling the tracking of identifiers of individual items in the warehouse, the system changes the view of documents and the way they are created. When creating receipt (and delivery) documents for items whose type has the option to require identifiers enabled, it is necessary to enter identifiers.
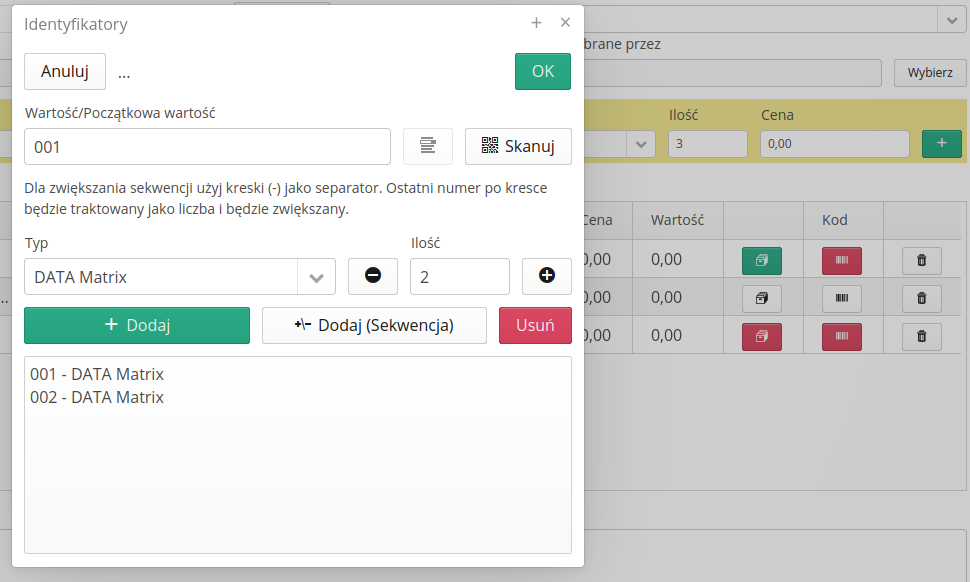
By selecting the identifier definition button, a window appears that allows you to:
-
definition of a single identifier - we enter it directly and add it
-
scanned using the attached barcode scanner
-
entering a sequence of identifiers - we enter/scan only the first code and enter the quantity. The system automatically adds the appropriate number of identifiers.
| The system treats the - (minus) separator as a separator that separates the last number in the code from other data. Only this number will be increased. |
After entering the appropriate number of IDs, the button color changes to green and the material receipt operation can be completed.

Attachments during warehouse operations
The function is available in the Delivery and Warehouse modules, which allows you to transfer files saved in the delivery to elements in the chain of operations
Using the implementation option, we can upload attachments to warehouse operations and delivery orders. Using the supervision module and code scanning operations, we can introduce these attachments to related resources that were produced from the material in these deliveries.
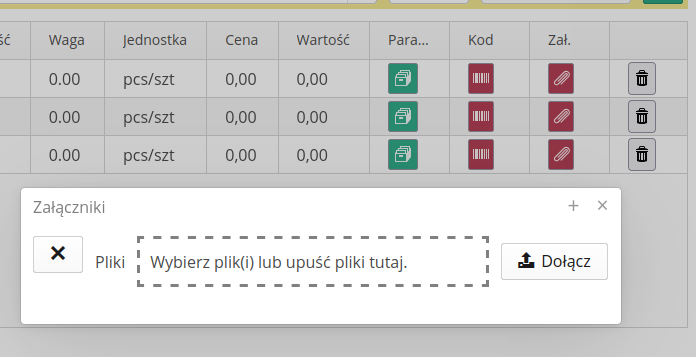
Using the implementation option, you can enable the additional function of storing attachments to individual warehouse items/delivery documents. This allows you to enter documents such as declarations and material certificates during the delivery procedure/warehousing operations using this function.
These documents are retained in the warehouse and in related documents. They can also be used in the supervision process to comprehensively track the circulation of materials in the system and generate accurate documentation.