Deliveries - declaration of delivery via the Supplier Portal
Introduction
The document describes the mechanism for creating delivery declarations by an external supplier. In this case, the Supplier’s Portal is used, where the supplier declares delivery to the order generated by us. The document shows how to activate notifications and communicate with the supplier. Then it goes through the next steps performed by the system user and the supplier’s representative.
Order without deliveries and supplier notification
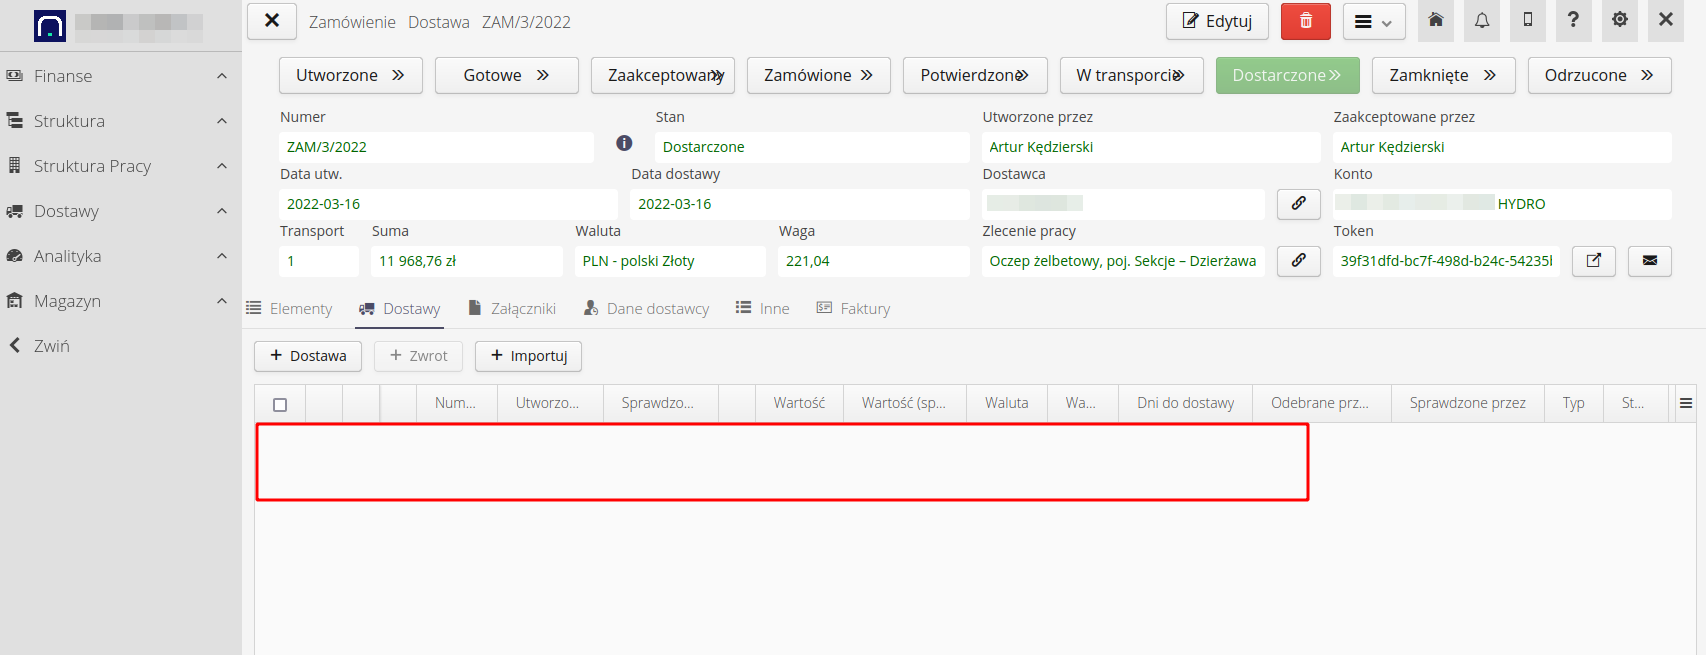
The order created in the system does not contain declared deliveries. In the event that we create an order, we may automatically redirect the supplier to the Supplier Portal to enter information about the delivery when it leaves their warehouses.
To do this, we configure an automatic machine in the system that will send orders to the supplier. We can (depending on) the settings of the machines freely configure the rules. In this case, we have set the order generation when the order is in the 'Accepted' state. Then, after sending the order, the system will change its status to 'Sent'. The address of the suppliers can be entered in the configuration of the machine or it can be taken from the definitions of addresses for the supplier, which we specify in the "Contractors" section of the main view. We can also specify the text of the title, content of the message, links available to the user and whether to attach the order in PDF / CSV form in the e-mail as attachments.
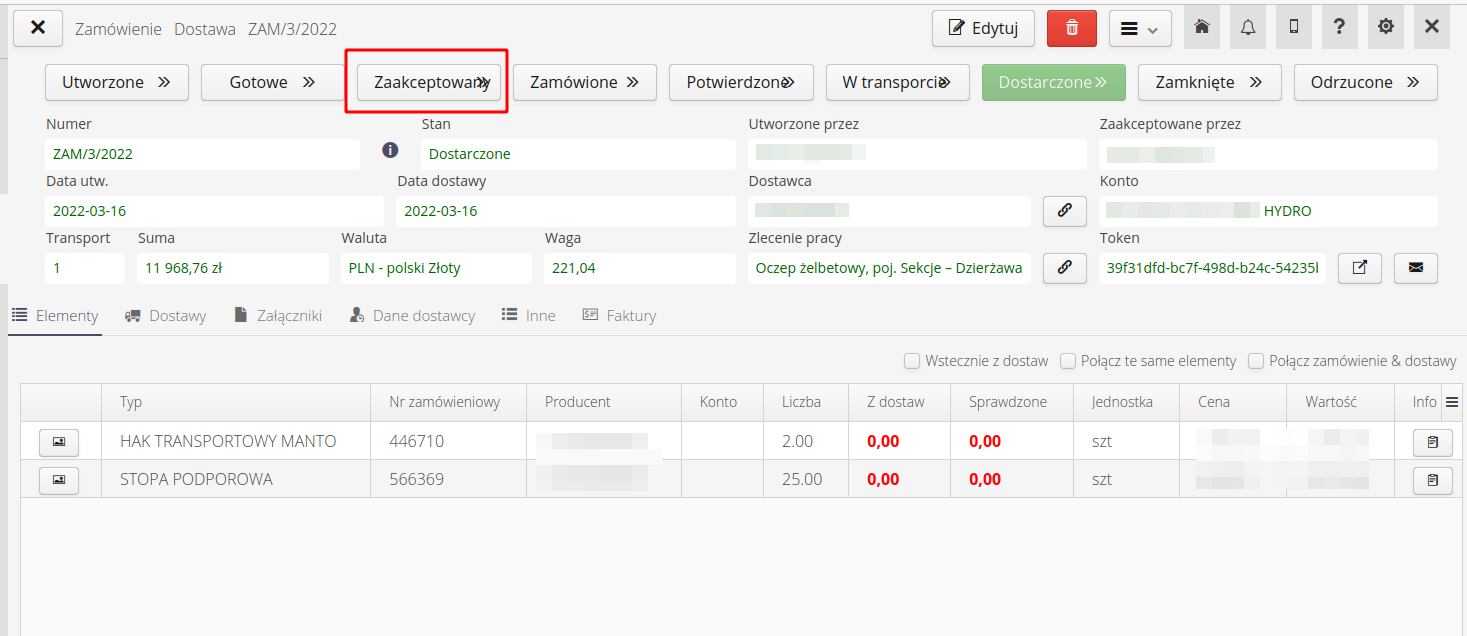
We change the status of the order to "Accepted". Within 1 minute, the system starts generating the order, email and sending it to the supplier.
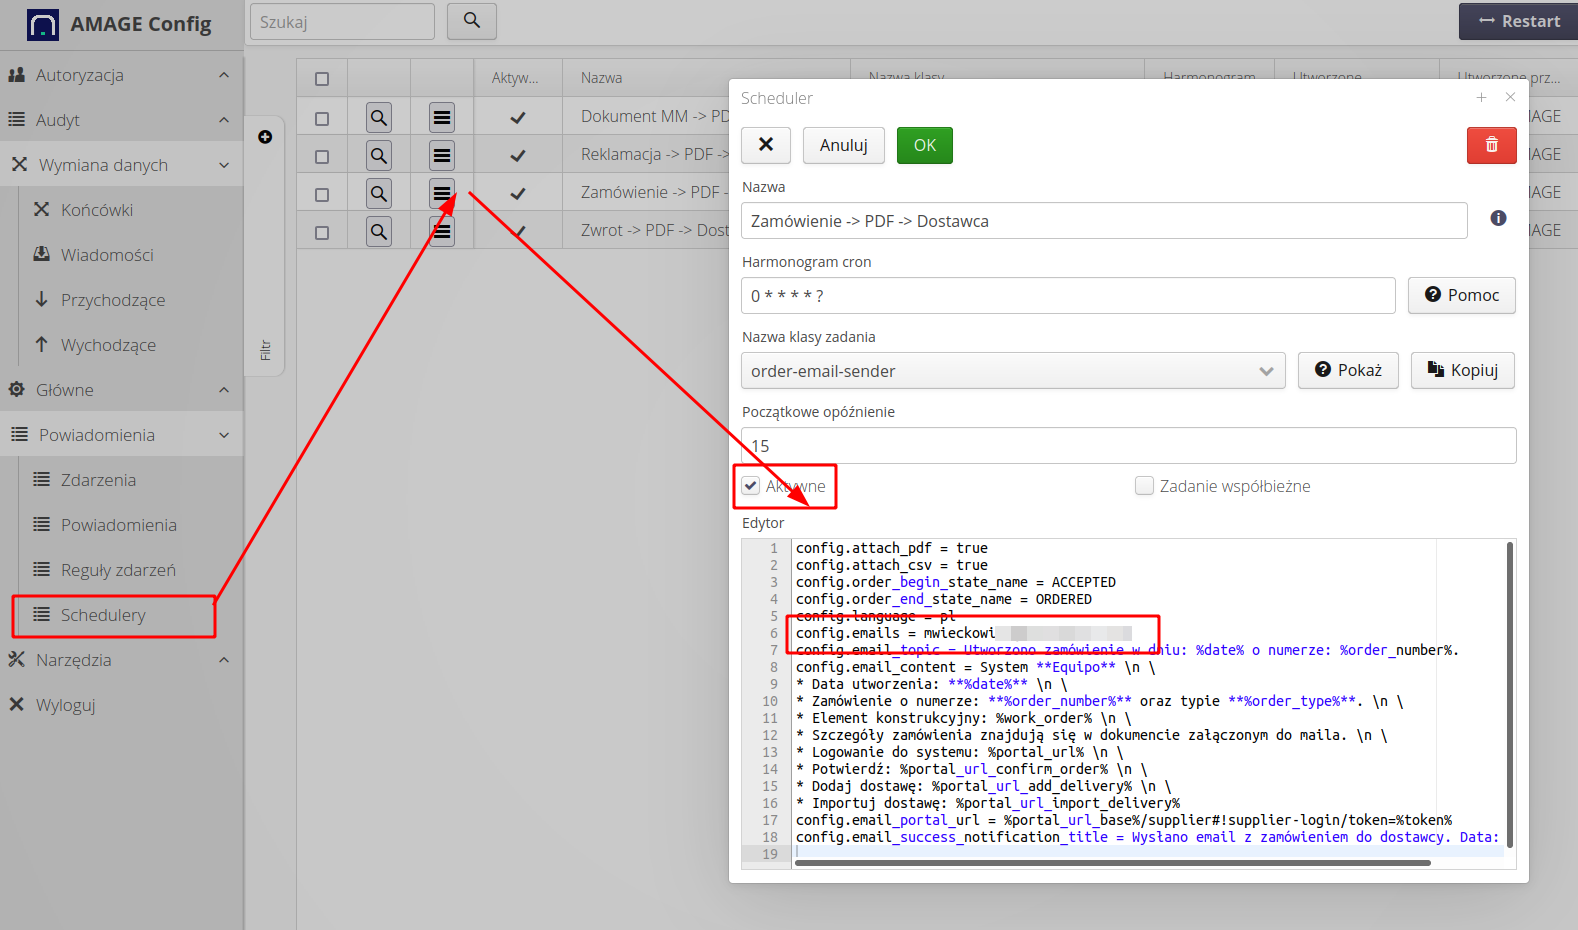
| People who are assigned as responsible for the work orders from which the order data originates receive a notification in the system when such an email is sent. You can always monitor the activities of such machines in the administration console. |
The provider receives an email. Content, content and title are modifiable.
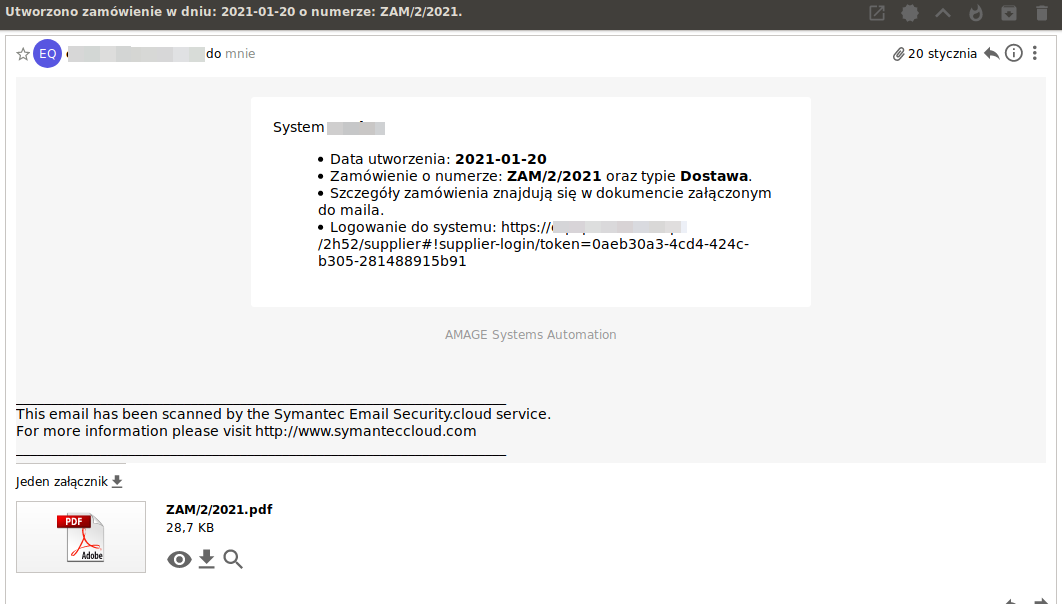
In addition to the order message, the email also contains a link to the supplier’s portal for a given instance. This is a special link with a login token, so that there is no need to create an account for the supplier’s representative for a given order. Anyone who has a given link can log into the system to the Supplier Portal section and perform operations, e.g. add/import delivery.
Provider access/re-notification
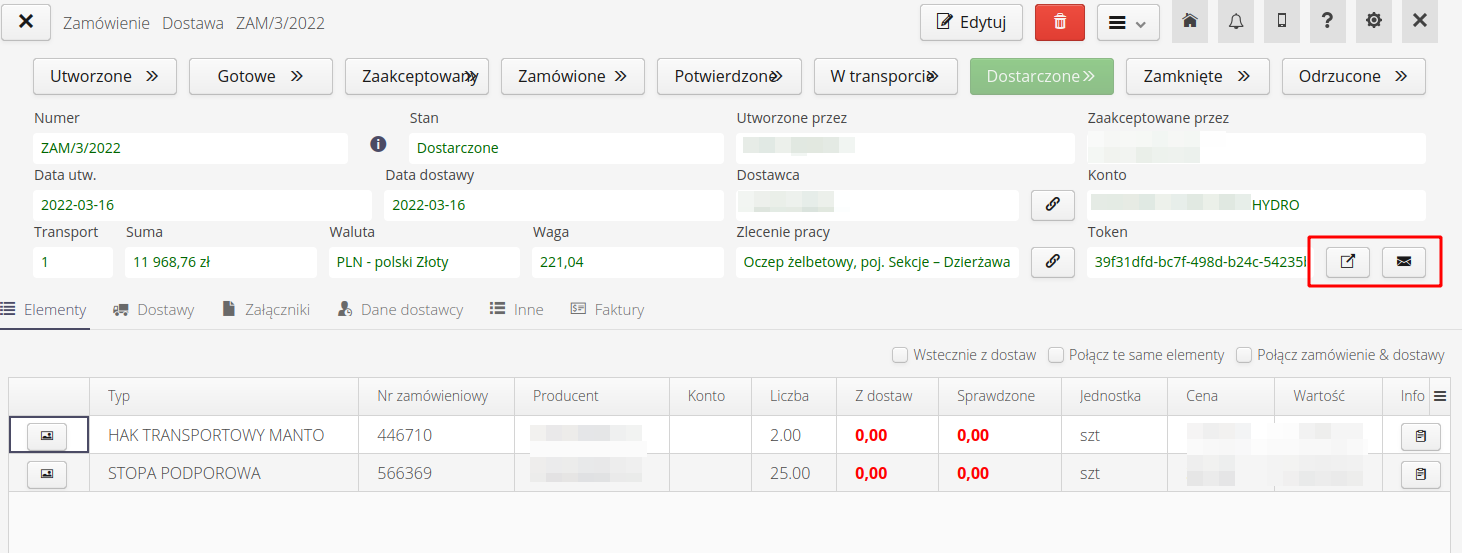
The main users of the system can log in to the supplier’s portal on their own directly from the view of a given order (or delivery/complaint). The buttons next to the information about the token number are used for this. The first button opens a window with the portal of the supplier already logged in to the given order. The second button (with a letter icon) allows you to resend an e-mail with a link to the portal (to a given order) to any recipient. This allows you to send a link to the merchant who lost the previous email or to another merchant. The window allows you to add an additional comment and enter an address or select it from the list of addresses assigned to the supplier.
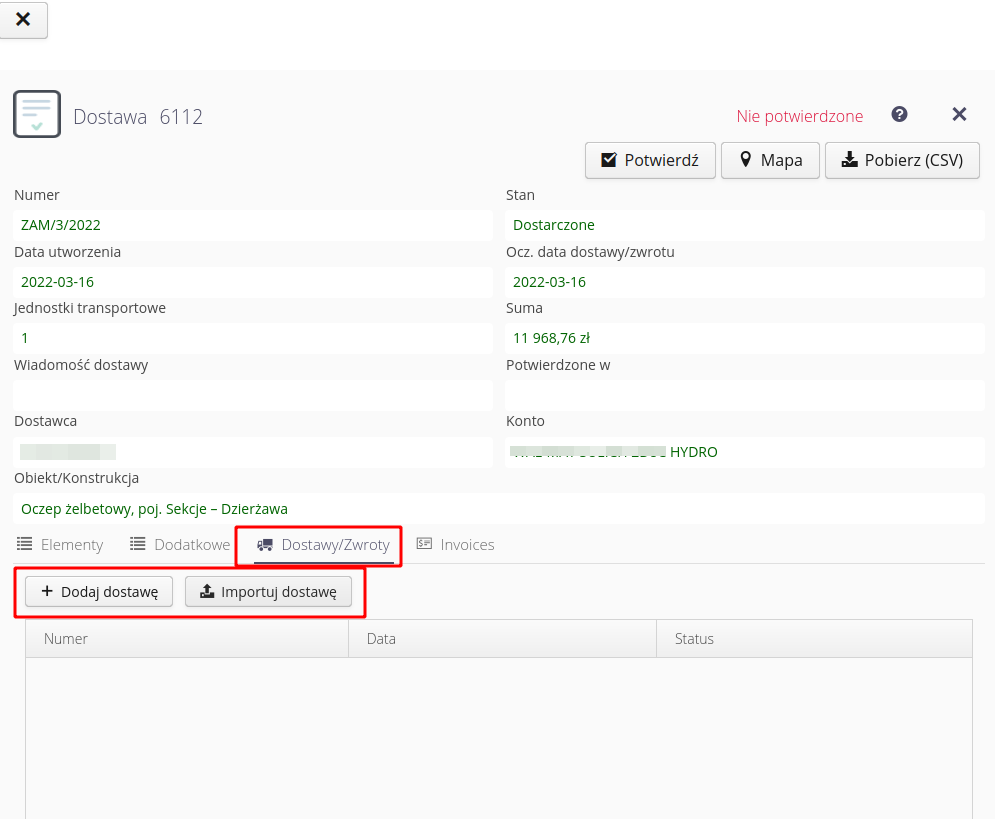
Supplier portal - order confirmation and delivery declaration
After selecting the link from the email, the supplier is directed to the Supplier Portal view. This is a simplified view of the system with information about a given order only. Here, the supplier can declare a delivery, import it from csv/xls files, confirm the order, etc. This is described in detail in the user’s manual for the supplier. This manual is also available directly in the supplier portal interface.
After the delivery declaration, the coordinator in the system (and, for example, people creating this order) receive notifications about transport on the way.
| The configuration of events and reactions can be freely configured in the system. This is the responsibility of the event mechanisms that are described in its user manual. With their help, you can freely configure the system and generate messages to system users. |
Operations of receipt of delivery and entry into the warehouse
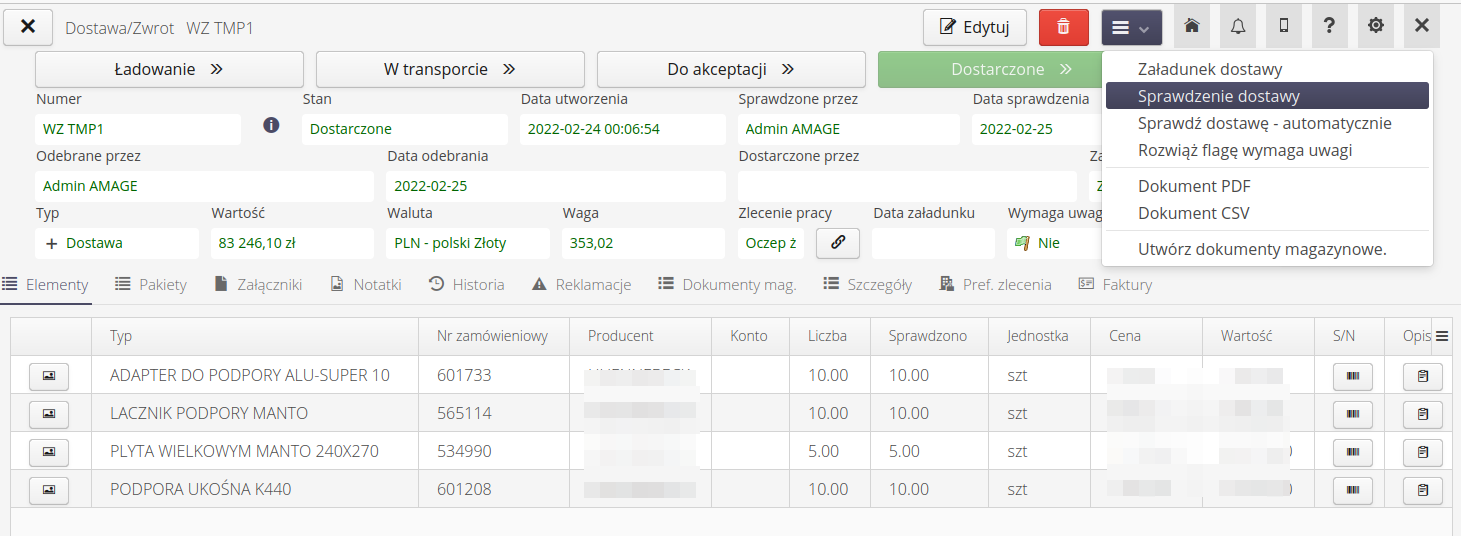
Once the delivery has appeared in the system (e.g. declared by the supplier), we can perform further actions. The most common is to check the delivery - verifying the contents of the delivery with the declaration. We can do it using a mobile device (we carry out delivery checks, photos or complaints in it) or directly from the Desktop system. These are the two buttons "Check delivery" and "check delivery - automatically", which are available in the context menu of the delivery. The first one calls up a delivery check window like on a tablet (you can add photos, make a complaint, etc.) or you can choose automatic checking - then we only provide the date of checking and the system approves all declared items as confirmed.
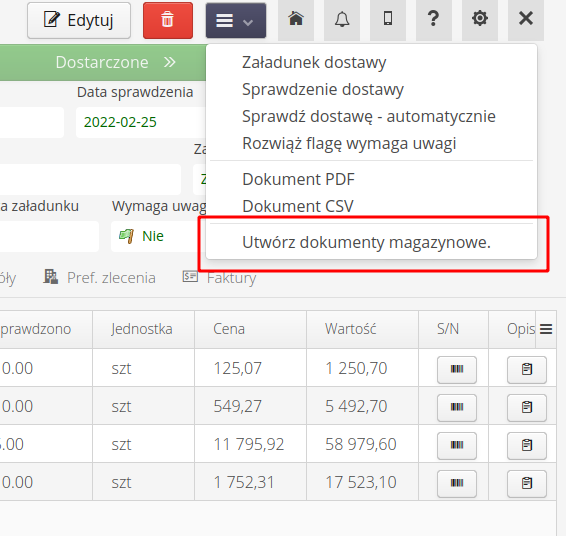
The last step is to put it in stock. This operation is an additional operation performed on the delivery, as it allows to separate the operation of checking the delivery and the actual entering/updating of stock levels. The check can then be performed by another person who performs it on behalf of the person responsible for the state of the warehouse. However, this person can check the result of the check, view photos, etc. in the next step. After selecting this action, we enter the date (important in the case of leases → we count the lease from this date) and document numbering. We approve the operation and the delivery goes to our warehouse. Stock levels are updated.
| If the user checking the delivery has the right to add items to the warehouse, then the system (if there are no complaints during delivery) will automatically ask whether to enter the document into the warehouse. Then this activity is performed during the check, which speeds up the operation. |
Stock levels updated, we have full control over what appears on our stocks.
| The Howto is based on system version 1.17.0.2 (03.2022) and presents features that may not be available in your system. Ask AMAGE about making this functionality available. |
| Due to ongoing development of the system, some screens or configuration files may look slightly different, but will still retain the full functionality described here. This does not affect the core functionality described in this document. |