Printing labels and reports
Introduction
The AMAGE application has a rich resource of internal report templates and mechanisms that automatically generate labels. However, label templates do not contain all label variants available on the market. Each client has its own possibilities of implementing the system and using its own methods of marking elements and devices. Therefore, the AMAGE application provides the ability to create your own label formats that will be used by the application to generate and print data labels.
This document describes the method of designing labels, required/available data for the client and the method of integration in the AMAGE application.
Software
Jaspersoft Studio software is used to design new label formats. The software is free software for commercial use. The software can be downloaded from the manufacturer’s website:
-
Jaspersoft Studio - http://community.jaspersoft.com/project/jaspersoft-studio
After downloading, installing and running the application, the report/label designer window appears.
Configure label designer report versions
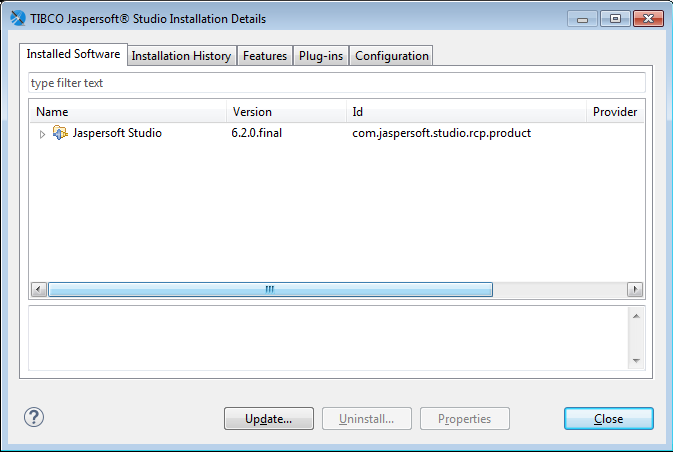
The current version of the AMAGE application uses the report engine version 6.2.0. To find out what version you have after installing the Jaspersoft studio application, go to the program information. Label designer version Figure 1. Depending on the version of the label designer application, select the library version compatible with the AMAGE application.
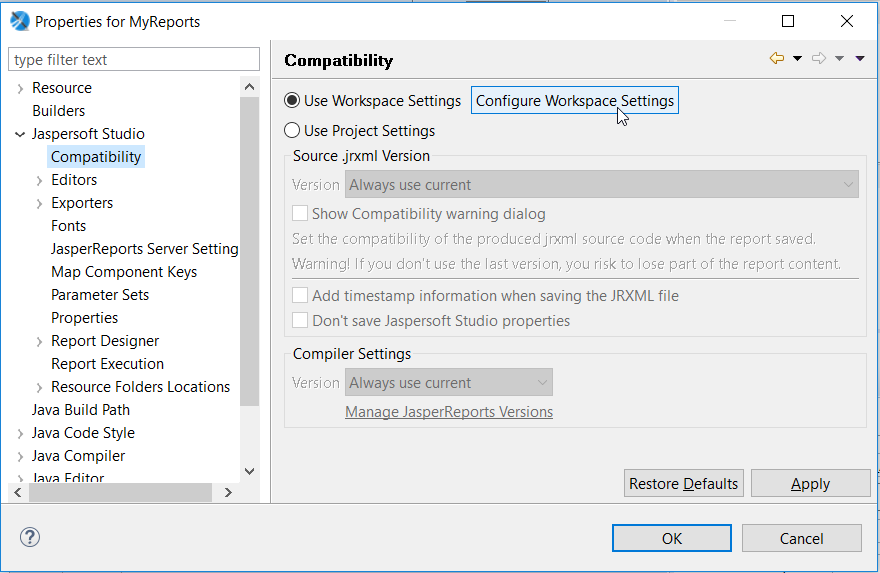
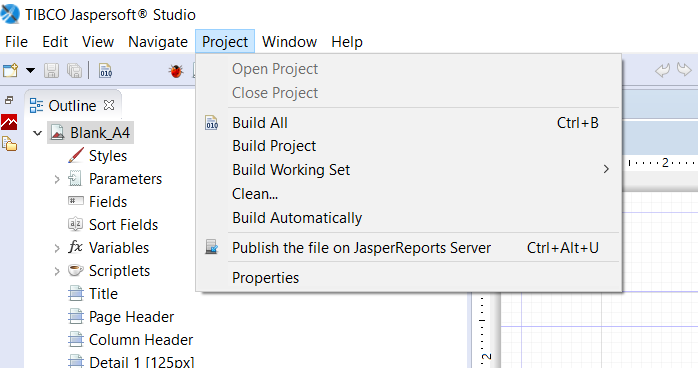
In order to prepare reports in accordance with the version required by the AMAGE application, it is necessary to determine the access path to the report library in accordance with the one used by the AMAGE application. To do this, select Properties from the "Project" tab. In the newly opened window, go to "Configure Workspace Settings" → "Manage Jaspersoft Versions" Fig. 2
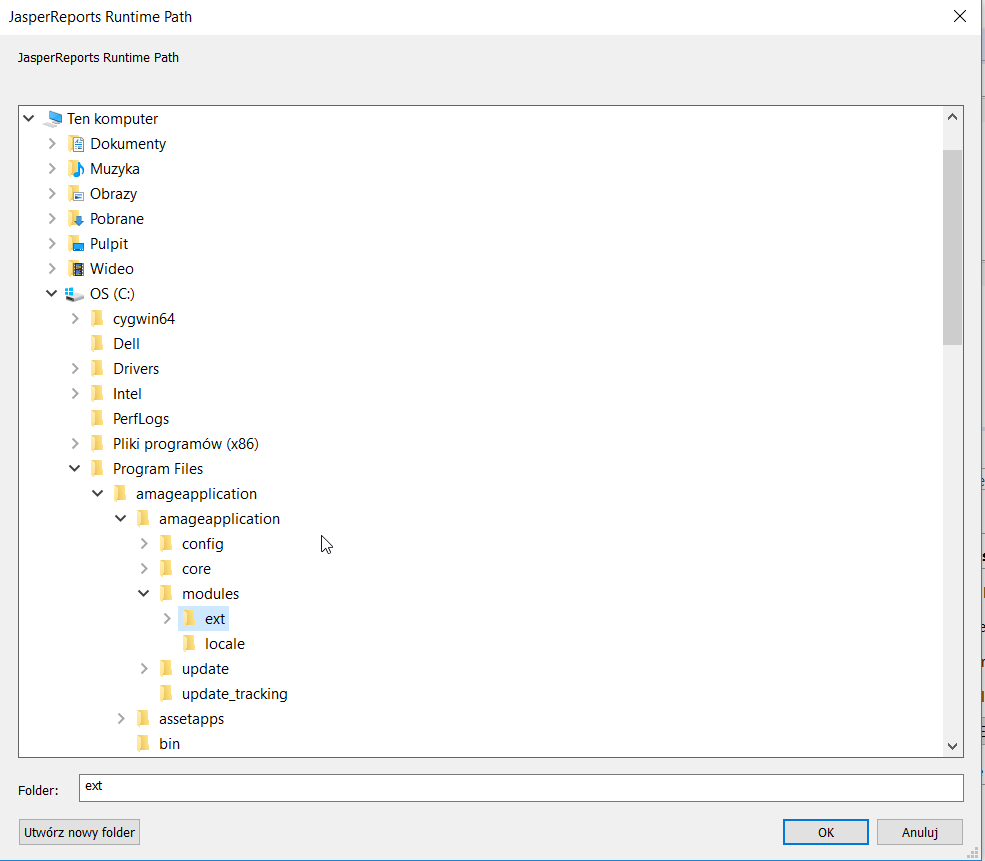
In Manage Jaspersoft Versions, click on "add from path" and then on "Browse". In the file browser window, look for the directory with the AmageSystems application installed. Go to the imageapplication → modules directory. In this directory, select the "ext" directory and press "Ok".
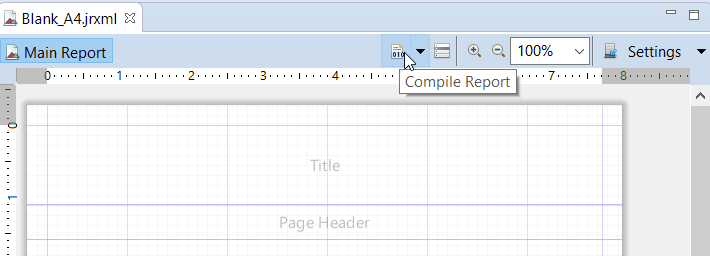
Report/label compilation after setting the report library version is available in the context menu of drawing compilation or in the "Project → build all" tab
Create labels
Printable labels for elements that require identification may have the following parameters:
-
CODE - 1D/2D label code in a simplified form, i.e. containing only the serial number, without the customer number and AMAGE instance, e.g. "0000001"
-
BARCODE – full 1D/2D code for printing as DATAMATRIX code. The code contains the object type, customer number and AMAGE instance number with the sequence number.
-
TYPE – object type. For items, this is the item type, for products, the product type. For locations and element groups, the field is left blank.
-
NAME – name of the object. As selected, this is the name of the location, product, item group, and item.
-
*SERIAL_NUMBER - serial number of the object
-
TEXT1 – additional text specified when generating labels in the AMAGE application
-
TEXT2 – additional text specified when generating labels in the AMAGE application
-
parameter_<parameter name> - any parameter can be downloaded additionally for the Product, Group of Elements and Element. The parameter name is given together with the prefix 'parameter_'
Fields in the label project are marked with FIELD variables and placed in the design area with $F{<field_name>} variables.
For 3x1 and 4x1 labels, the following parameters are available, which depend on the number of the label in the row. The description of the parameter is identical to the description from a single label.
-
CODE1, CODE2, CODE3, CODE4
-
BARCODE1, BARCODE2, BARCODE3, BARCODE4
-
TYPE1, TYPE2, TYPE3, TYPE4
-
NAME1, NAME2, NAME3, NAME4
-
SERIAL_NUMBER1, SERIAL_NUMBER2, SERIAL_NUMBER3, SERIAL_NUMBER4
-
parameter_<parameter name>1/2/3/4
| Only DATAMATRIX codes are used for identification in the AMAGE system. Only such a code will be correctly identified with the element by mobile terminals equipped with AMAGE Mobile/CE series applications. |
Defining parameters
Parameters can be freely edited in Jaspersoft studio. First, create a new field (fields → create field) and give it the parameter name "parameter_parametername". Then you need to select "text field" from the palette and place it on the "detail" area. Now all you have to do is give it the value of Expressions: $F+{parameter_parametername}+ and compile it. The program will convert the jrxml file to a jasper file which is the input file for the application.
Label template
An exemplary label template is shown in Figure 7. This figure contains all the necessary information needed to print a label with all the above-mentioned fields.
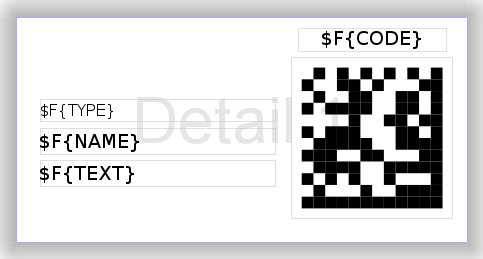
The label template is supplied with this documentation in the form of the file "label_50x25.jrxml". This is a 50mm x 25mm label format with the data provided.
In the label designer, you can open the delivered label project and adapt it to your requirements, including:
-
Changing the size of the label
-
By adding proprietary information, e.g. a logo
-
Changing the arrangement of elements
-
Removing visually unnecessary elements
| The detailed user manual for Jaspersoft Studio goes beyond this manual. Refer to the manufacturer’s documentation. |
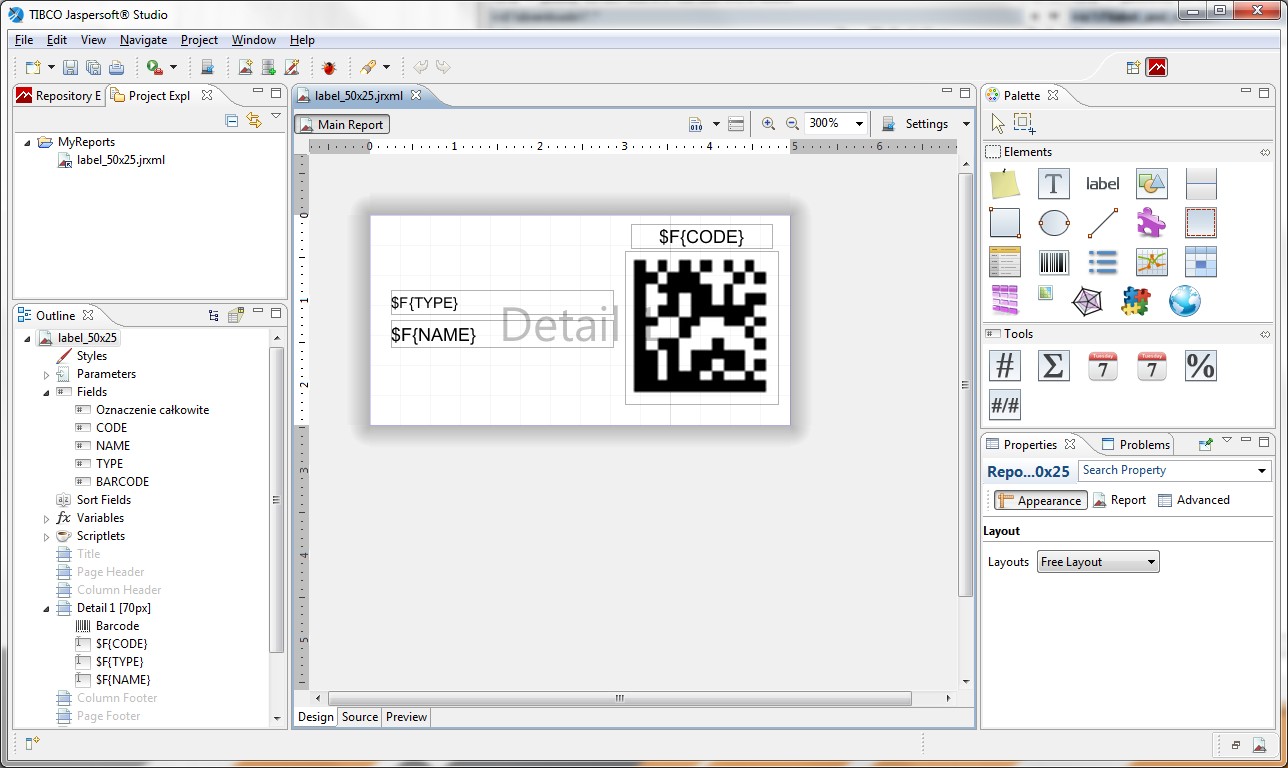
When the label design is finished, the original file should be saved for reuse and then select its compilation from the report option (context menu on the report in the project explorer). After compilation - if the whole project is done correctly - a result file of the report is created in *.jasper format. Such a file is an input parameter for the AMAGE application.
Application of labels
In order to use your own label design, select Label template: "Custom label" when selecting the label format for printing (Identifier printing wizard) and select the designed *.jasper file in the enabled selection field.
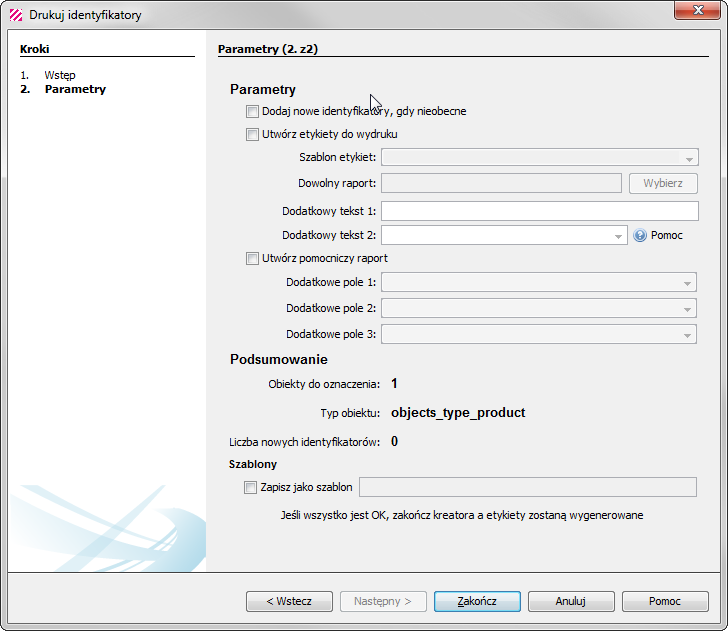
Then you can proceed to generation of labels and their printing.
Creating your own report layouts
The application has its own default templates for all reports built in. A user with the appropriate knowledge can freely modify the appearance of the reports according to their requirements. It is possible to change the appearance of the default report and to change the appearance of individual tabs (configuration) of reports. This allows you to have several views (own, internal, client, etc.) for each report.
In order to design any report, you must receive an initial (initial) report package for the current version of the application. For individual clients, IT departments usually have access to resources on AMAGE servers that store the current package of reports. On its basis, you can create any reports.
After downloading the package, select the report that is required to change the appearance/content. Then review the report documentation available in the "For Developer" section of the help portal. It contains information about the available fields and parameters that can be used in your own reports.
After unpacking the selected report, e.g. ''ReportProduct.jrxml''. It must be opened in the report designer. Then you just need to freely modify it as you expect (colors, appearance, tables, images, etc.). After correct modification of the report, it should be compiled to ''jasper'' format. Then all reports (main and possibly auxiliary subreports) in their original names (IMPORTANT!) should be compressed into a ZIP file. This file is uploaded in the main AMAGE application to configure the report or configure the tab.
To do this, we enable the main application. We display a list of reports in the explorer. By default, all reports that have the ability to view them directly from the explorer are displayed. Some reports are invisible by default, because they cannot be displayed independently, e.g. reports on the appearance of the order document - it is generated only in the context of a given order.
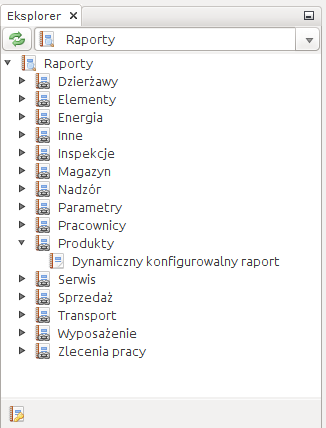
To display all report templates available in the application, a person with appropriate permissions selects the icon at the bottom of the panel (show all) and refreshes the view. In this case, all available report templates will be shown.
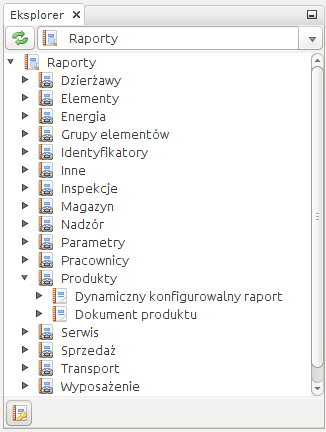
You can change the appearance of the report in two ways. Global change of the report template - it will always be available in a new look or adding a report tab with a change of look.
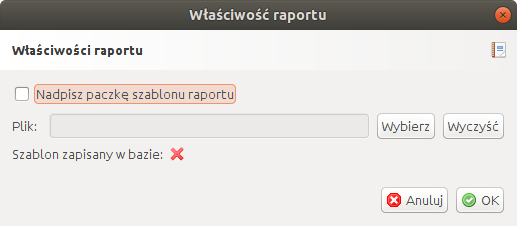
A global change of the report’s appearance is performed by a contextual action on the report and displaying its properties. In this window, we can mark the overwriting of the report’s appearance and select the set of appearance we have developed in the form of a ZIP file (see its development above). From now on, all reports generated from this report type will have the appearance we designed.
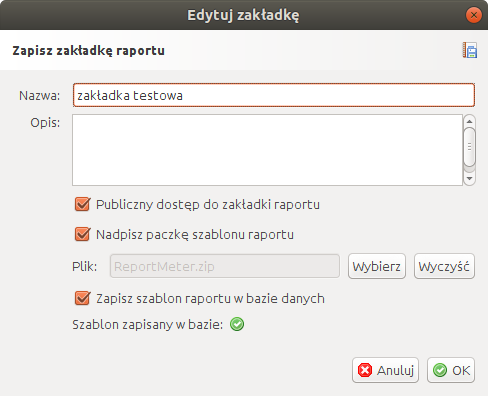
If you want to have several report views and/or additionally specify report parameters from the filter panel, you can create a report tab. The window for adding/editing such a tab has the ability to define an additional appearance as for a global report. The only change is the ability to specify whether the ZIP file with the new template design will be saved in the database (available to all users) or will be a reference to a local file on the file system.
| Choosing to save the template but NOT save to the database is useful for report design. Then it is enough to update the ZIP archive on the local disk and generating a new report from this tab will update the report with a new look. This speeds up design. |
| The files in the ZIP archive must have the exact same name as the original file. The application recognizes report files to be replaced just by their name. The ZIP file can already have any name. |
Generating reports on the server
The AMAGE Sync server from version 1.12 has the ability to generate reports directly from the server level and use it to, for example, send e-mail reports with the generated report.
| When designing reports, remember about the fonts available from the server level. Reports will be generated correctly only if the appropriate fonts are on the server. It should be agreed each time with the server administrator to ensure the availability of the required fonts there. |
Font set definition
If the designed labels/reports have their own fonts that are not the standard font used in the system to display PDF files (e.g. Helvetica), the system must be configured to use these fonts to generate PDF files. The main task of this action is to attach fonts to the generated PDF files so that they are used during the presentation of the generated label/report.
We use Jaspersoft Studio designer software to define a set of fonts. We enter the application settings and search for font options (Fonts). By default, the list is empty.
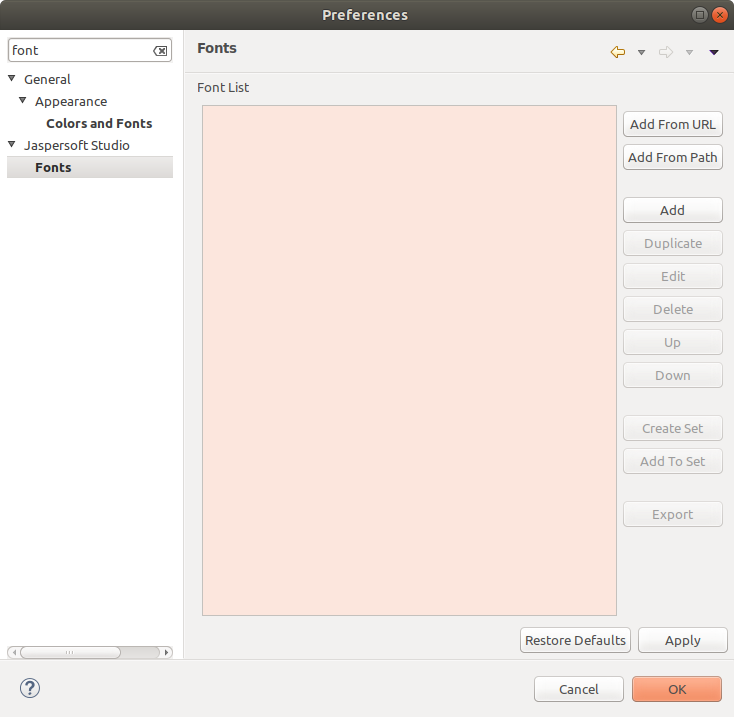
We load the fonts by selecting the appropriate options, e.g. indicating the directory where the fonts are located.
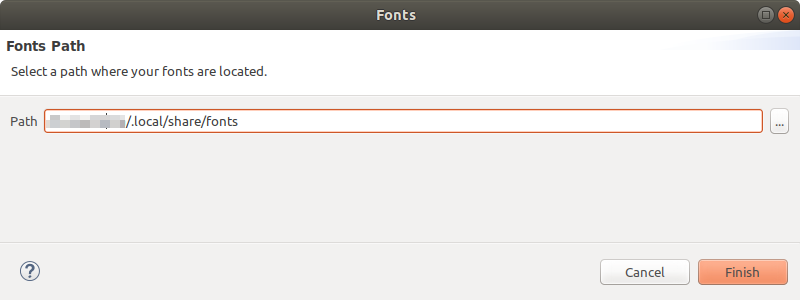
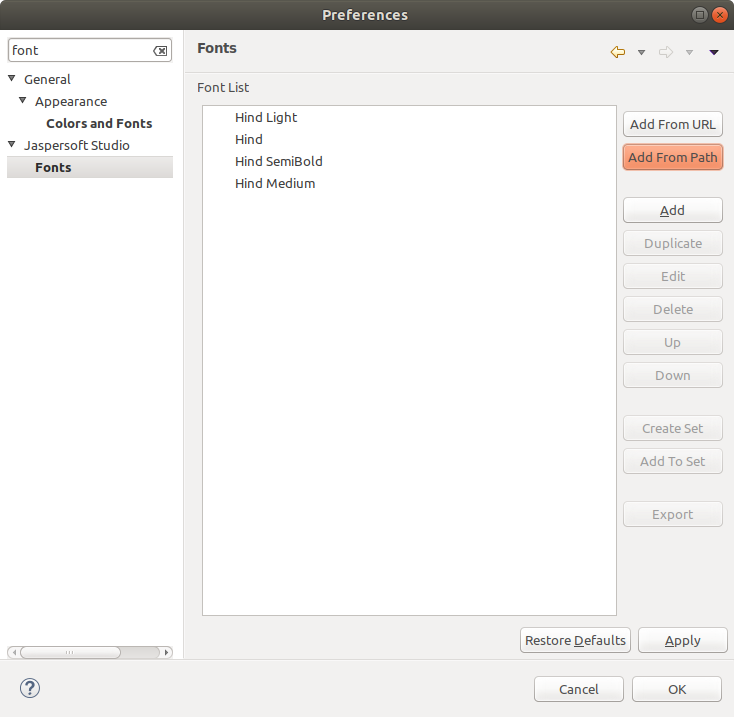
After the fonts are loaded, they will appear in the list of fonts that are available in the report designer. To make a set of fonts available in the AMAGE system, you must create a set of fonts (Fontset). We create it using the "Create Set" operation
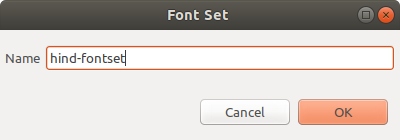
After selecting the name of the set - any name. A set is created that can be moved between the designer and other applications.
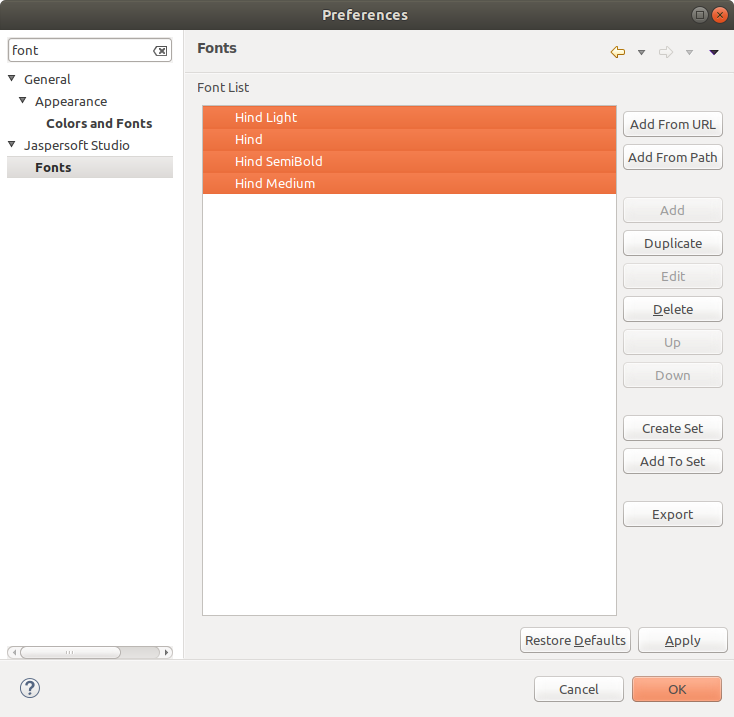
The list of available fonts and sets (fontset) is presented in the list. You can work on sets (add/remove) in any way you like.
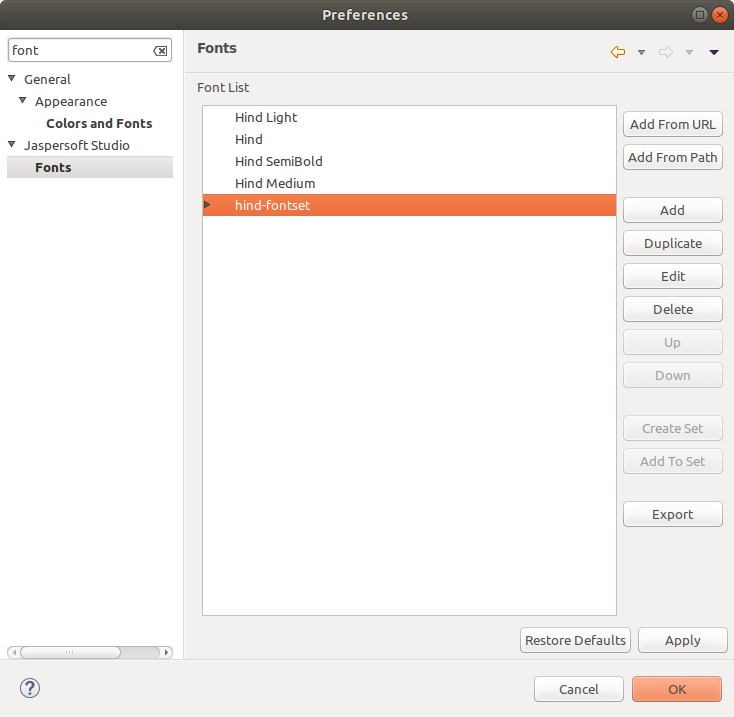
If the sets and the report(s) designed using them are ready, such a set of fonts should be exported. Select a set and select the "Export" function. The set will be saved in the <fontset name>.jar file. Such a file should be used in the AMAGE Desktop application and/or on the server.
| To transfer a set of fonts to the desktop application, use the application options and add the created set of fonts in the "Reports" section. In this case, it will be available on your computer and the export of PDF reports will use these fonts. |
| For the AMAGE Desktop version (installable on a computer): If we want to use fonts on the server (e.g. when generating reports automatically), the generated set of fonts (fontset) should be uploaded on the server to the application launch directory (so-called userdir) to the directory fontsdir. |
| In the case of AMAGE Web systems, the set of fonts must be located on the server in the appropriate directory. Please contact the managers of the AMAGE system in your organization to have a set of fonts attached to your instance (in the reports/fonts directory). |
Compatibility/Reporting
Due to changes in the system API or available libraries, in the case of errors in the generation of reports generated/prepared for older versions of the system, the following functions in the reports should be checked/changed:
-
No Base64 image decoding function Was:
new java.io.StringBufferInputStream( new org.w3c.tools.codec.Base64Decoder($V{logo}).processString()-
Should be changed to:
net.sf.jasperreports.engine.util.JRImageLoader.getInstance(new SimpleJasperReportsContext()).loadAwtImageFromBytes(javax.xml.bind.DatatypeConverter.parseBase64Binary($V+{logo}+))
-
-
images (e.g. captions) in report fields/variables should be of type
java.io.InputStreaminstead ofjava.awt.Image(orjava.awt.BufferedImage)