Authorization - Configuring Azure Entra ID for AMAGE system authorization
Introduction
The document describes the authorization and configuration mechanism of the Microsof Entra ID system to authorize AMAGE system users using the central Active Directory/Entra ID user mechanism.
Description of the issue
User authorization follows the OAuth2 scheme and Azure Entra ID mechanisms are used for authorization.
Required information to provide:
-
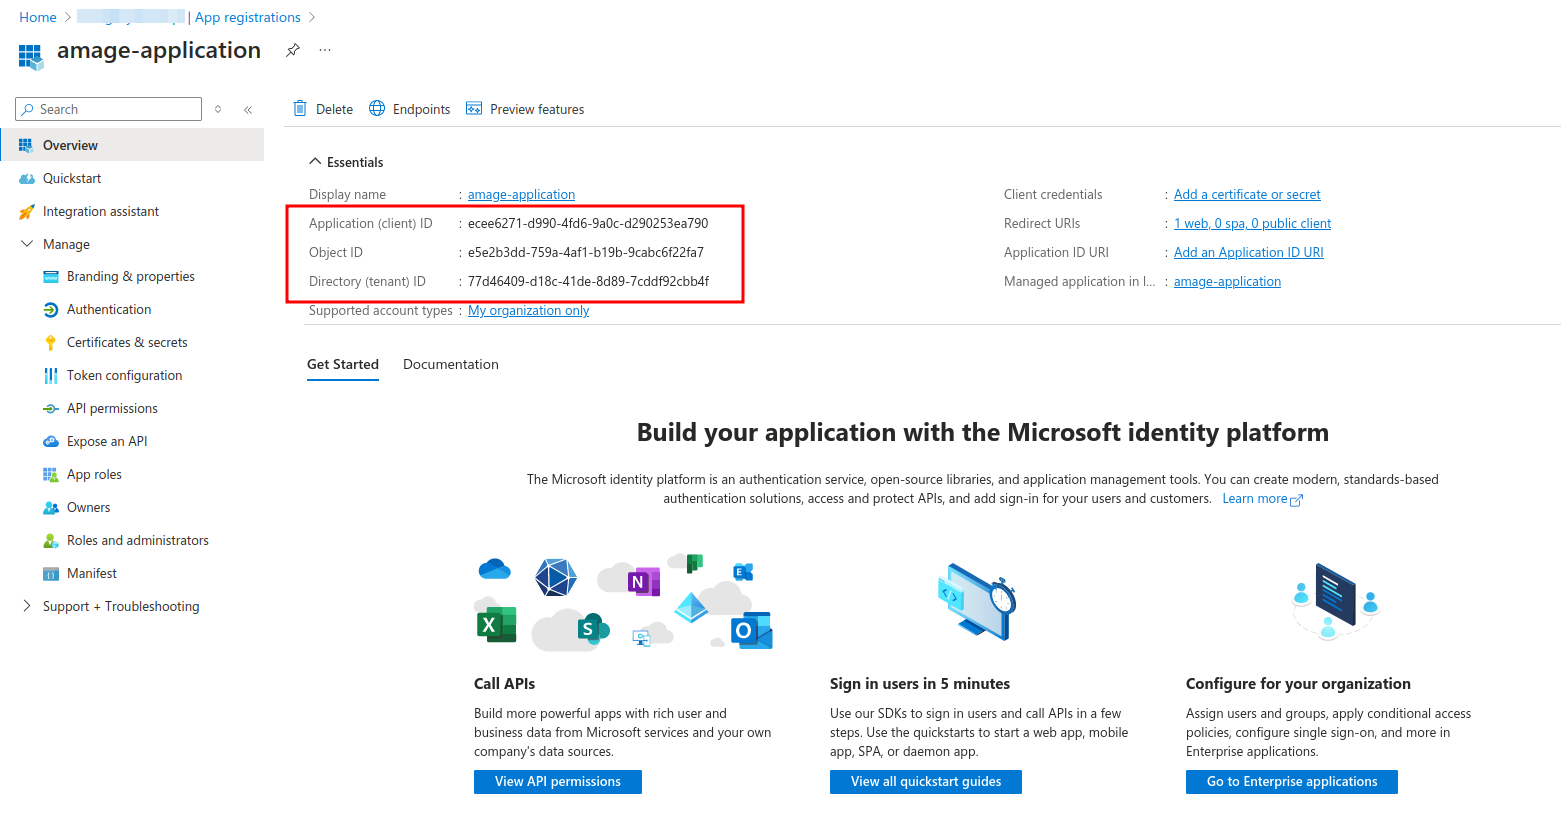
Tenant-ID – organization identifier
-
Client-ID – identifier of the created application
-
Client-Secret – authorization key (secret) used for data encryption
Sample formats for required information
tenant-id=ff6effd5-ffd7-ff7d-990d-ffe2e1e49eff
client-id=efeff56f-fff0-46ff-9ff2-2affeaffdff3
client-secret=tqq8Q~RUIfjkdlsjDIJkEIjKSJiJKD5HPtgHSnanm
Redirect URIs
The application definition on Azure Entra ID requires providing a return address to which Entra ID will send authorization information (token). We enter them into the Entra ID system based on data provided by AMAGE administrators/implementers. The address will consist of the address of the domain/instance on which the application is running and an additional OAuth2 authorization suffix.
<address>/login/oauth2/code/
Example:
We enter this address in the Entra ID in the RedirectURIs section
Azure Entra ID setup
| Information, screens and available features may change depending on the version and configuration of the Azure Entra ID server. In case of doubt, it is recommended to contact the system administrator. AMAGE is not responsible for changes to the Azure Entra ID server configuration. |
We go to the Entra ID section in the Azure management console:

Then we go to the "App registrations" section

We choose to add a new application "New registration"

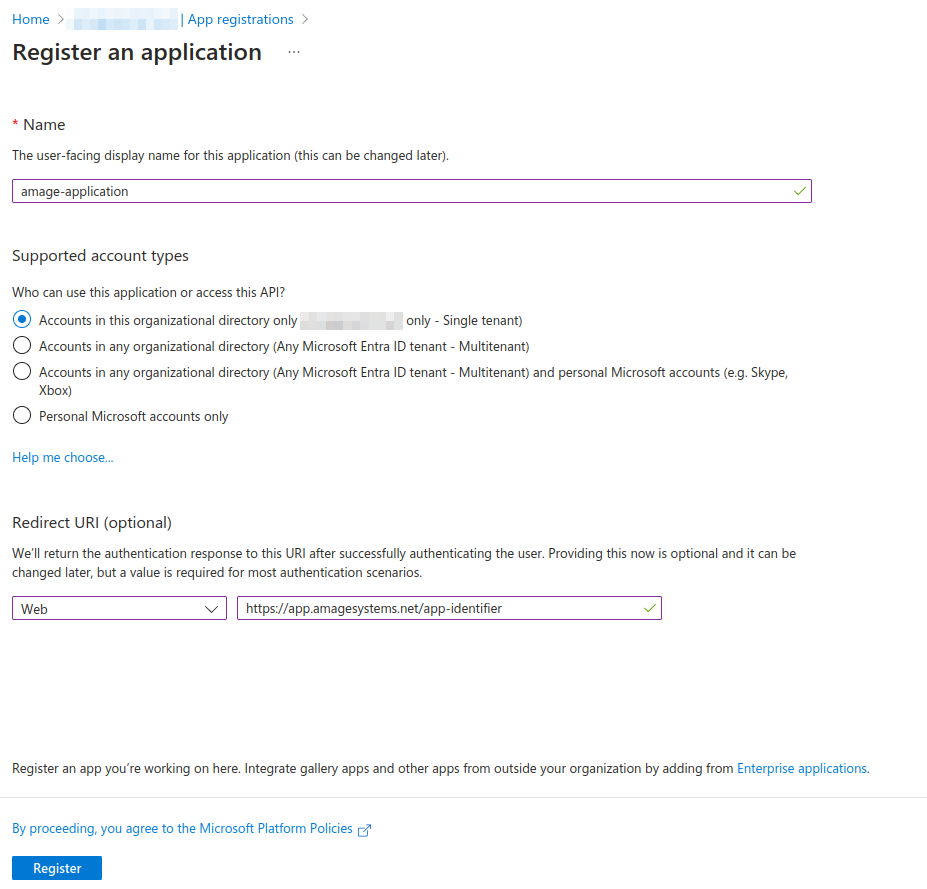
We fill in the basic information, i.e. application name (any) and enter the RedirectURI provided by AMAGE implementers.
After saving, detailed information about the created application is presented. We save/copy data regarding Tenant ID and Client ID.
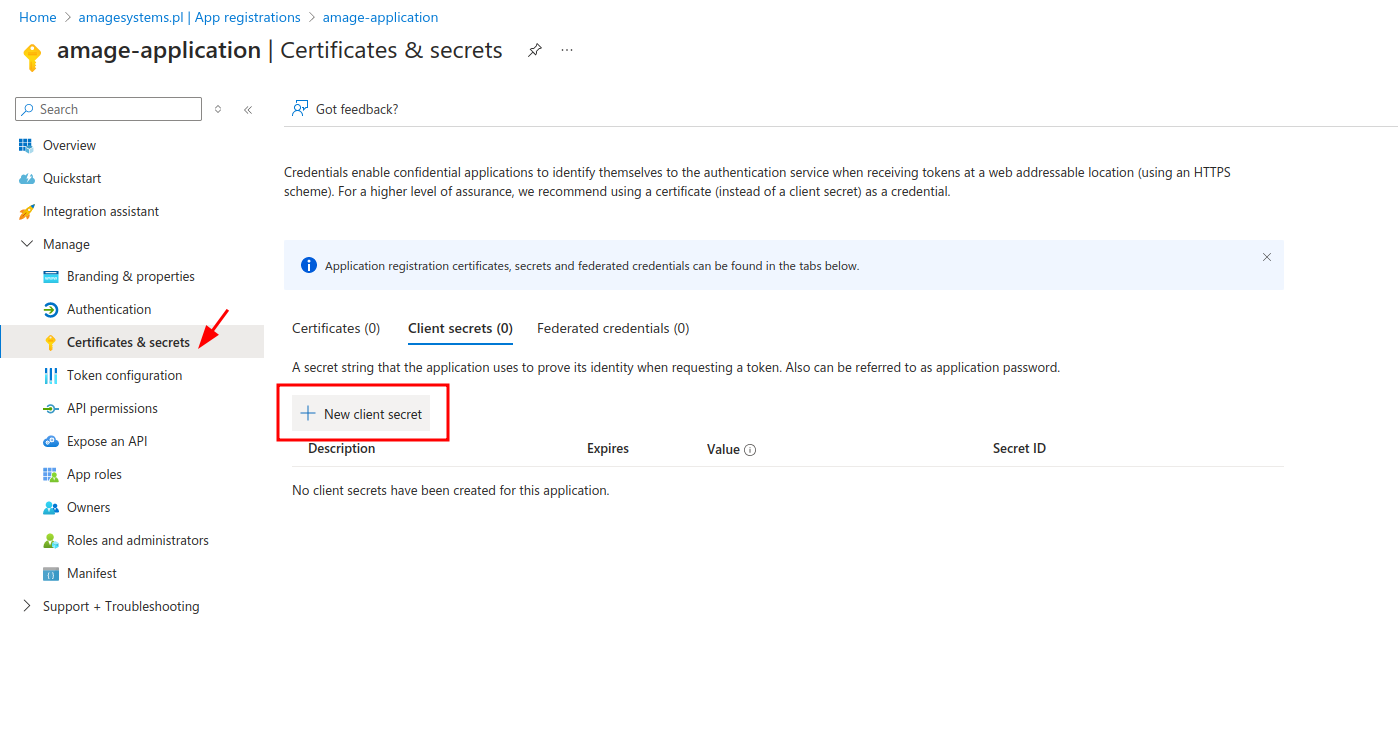
To authenticate correctly, it is required to create a secret that will allow for proper authorization and verification of Entra ID server queries/responses. We go to the "Certificates & Secrets" section. We are adding a new secret.
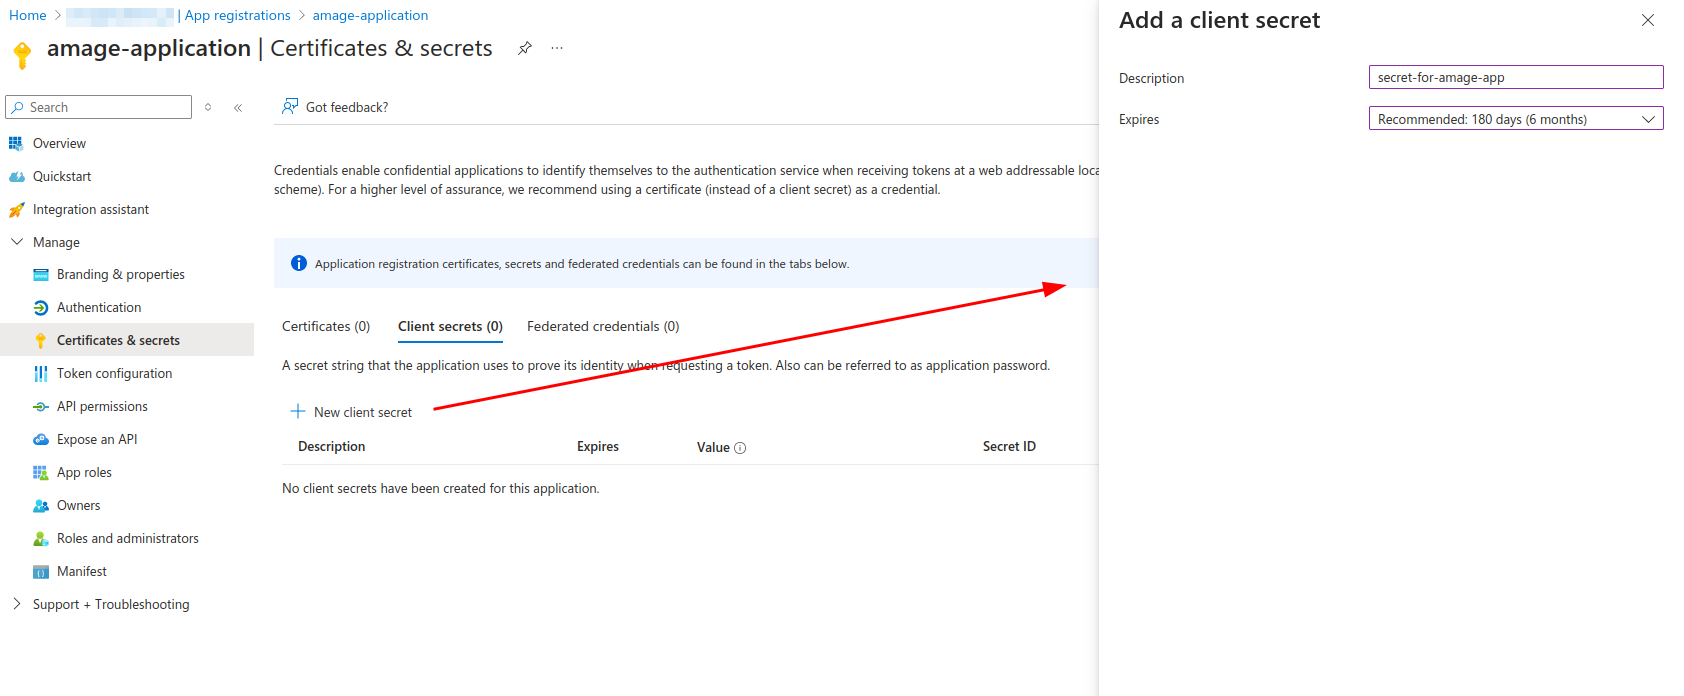
We enter the name of the secret to make it easier to recognize and set the appropriate expiration date.
After creating the secret, we copy (!) the "Value" of the secret. After exiting the configuration, it will not be possible to read it again. We write down the value of the secret.
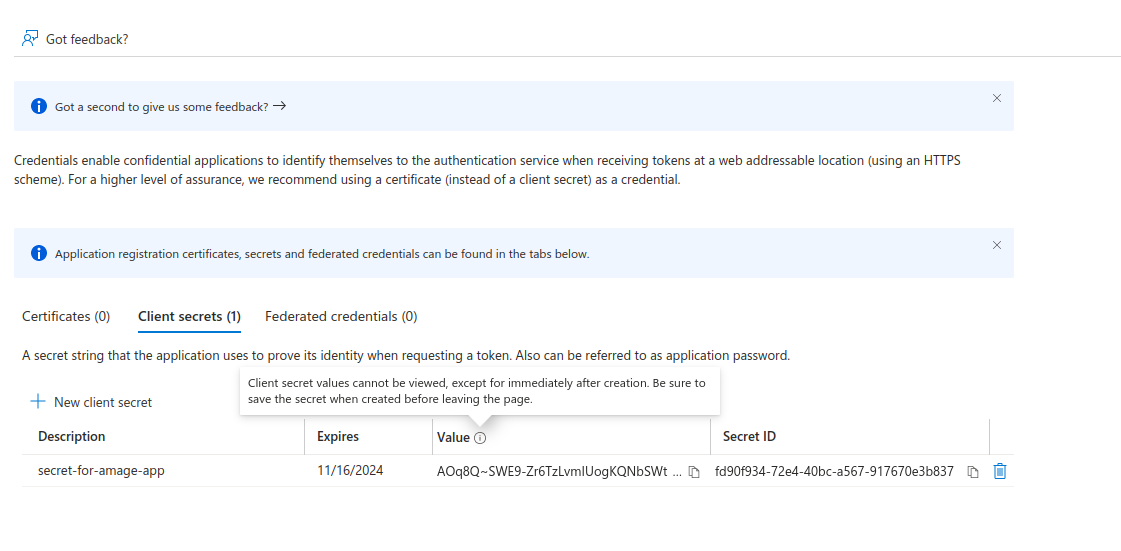
We have received all the necessary data for the definition of OAuth2 access in AMAGE. We copy the data and pass it on to AMAGE implementers.
ATTENTION. Depending on the configuration of Active Directory servers and access profiles in Azure Entra ID, it may be necessary to set additional permissions, e.g. access to Microsoft Graph to identify the user (after correct authorization). However, it depends on each client and its internal configuration. AMAGE will provide support and information about possible security measures and necessary changes.