Generating reports and sending them by e-mail
Introduction
Purpose: Ability to receive reports to your mailbox with a specified period of time
For there to be the possibility of receiving a report in your email inbox, you need to do two things. Define a report tab, which will store information about the configuration of a particular report, i.e., how to generate a report and from what data.
Then, such a tab is included in the automatic generation of the report at a specified time and sending it to selected e-mail addresses.
Report generation and a bookmark
Each report we generate from the view of the report browser (and available contextually in selected objects) has the option of defining its configuration. Those are sets of parameters that define the report and allow you to generate data in a specific way. To avoid the need to select report filter parameters tediously, each time a report is generated, it is possible to save the current filter as a bookmark.
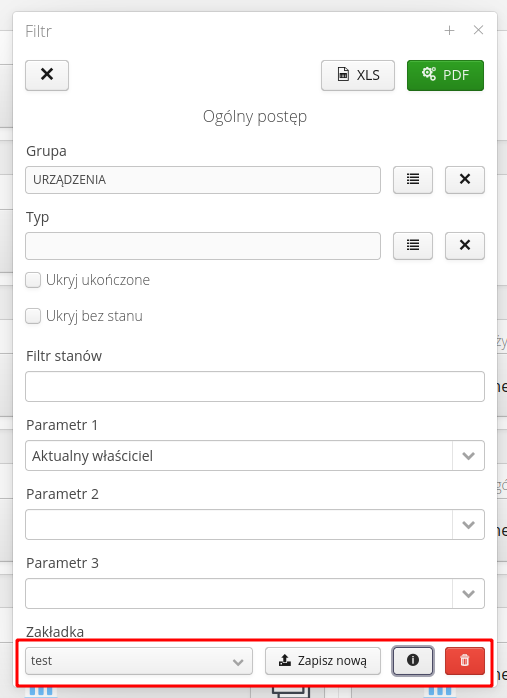
We use the bottom bar of each report filter for this purpose. At the bottom we have a list of existing tabs, the ability to save a new tab with currently selected parameters, a button displaying the identification of the selected tab and a button to delete the selected report tab.
After saving the current report configuration as a tab, we can display its identification. This is the ID of the record in the database and the unique UUID of the bookmark. We will copy this number to the clipboard and use it to generate a report machine.
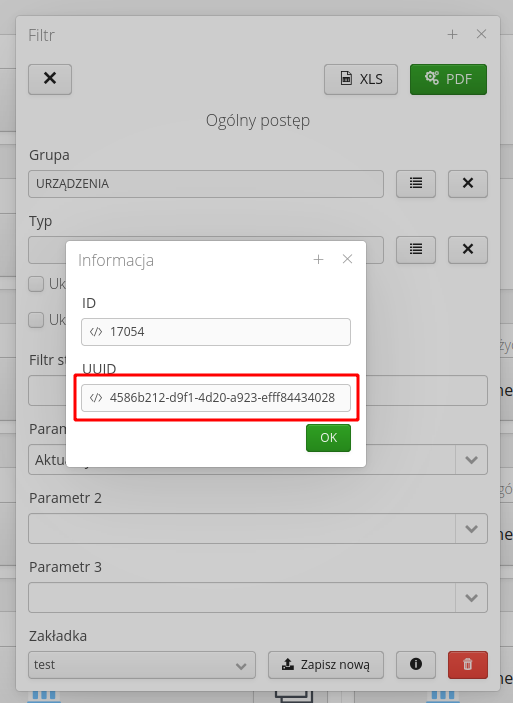
We save the UUID of a given report tab.
| The UUID of the bookmark is different and unique each time. |
Definition of an automaton sending an email with a report
We go to the system configuration section and select the Notifications → Schedulers menu section. We create a new machine (scheduler). We select "report-generator" from the list of available machines. To see its possible configuration, select the "Show" button. It shows the possible parameters of a given machine.
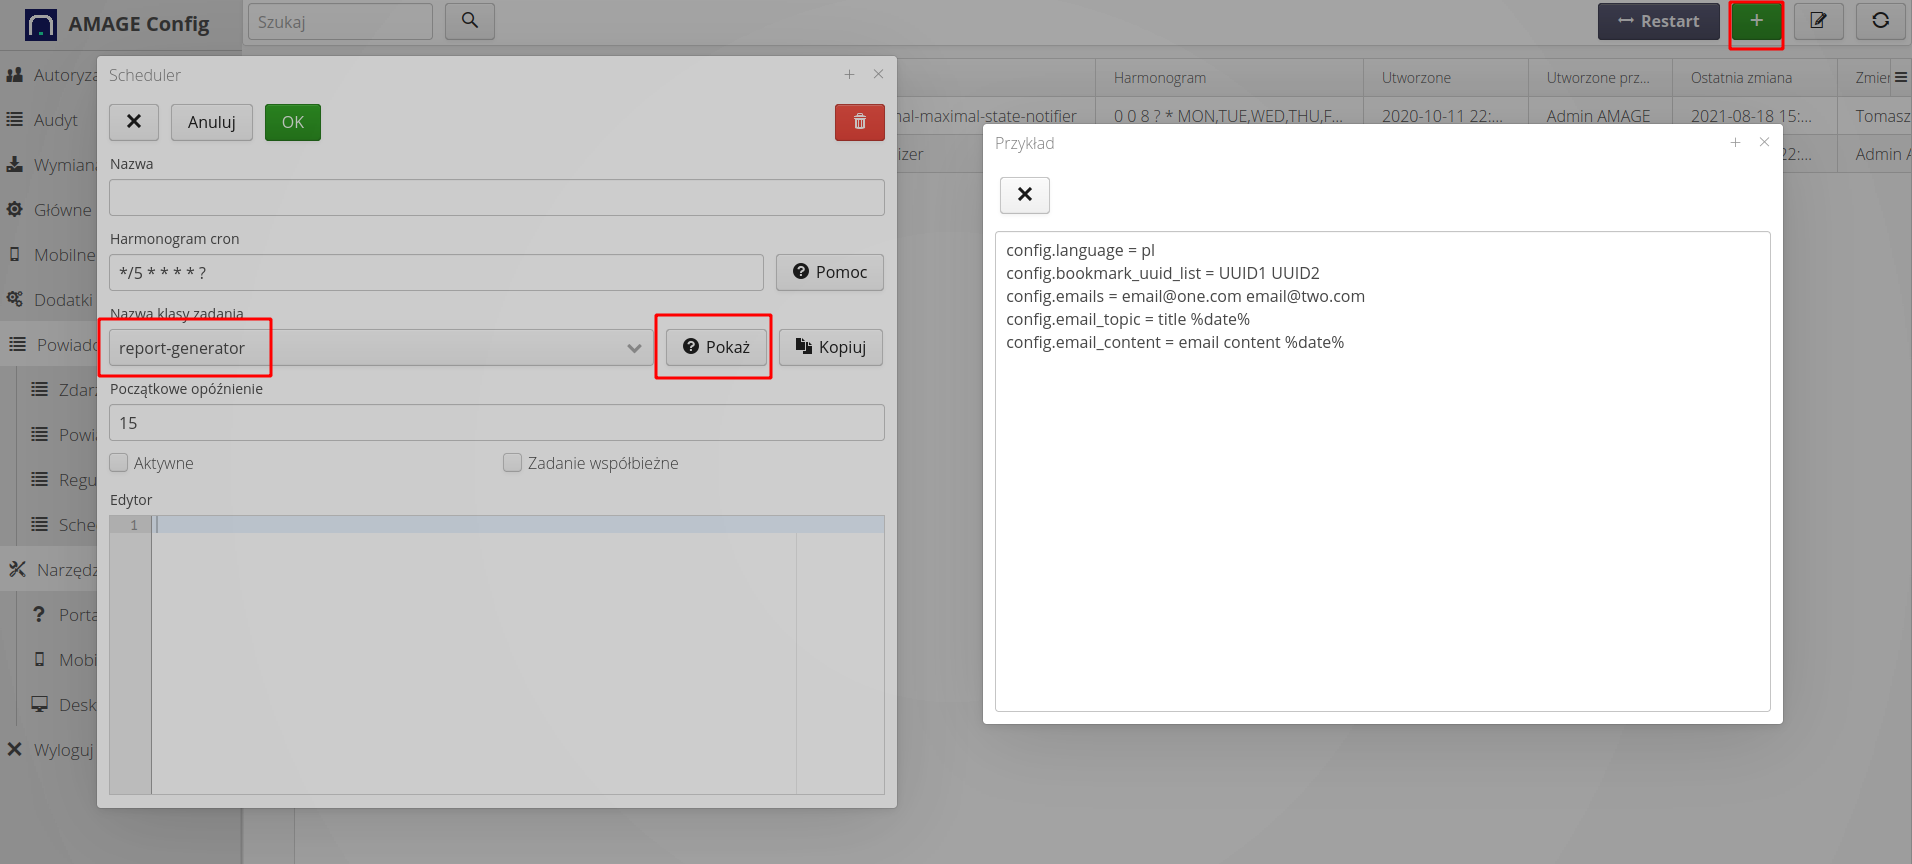
In the configuration, you can specify the language of report generation (e.g., to send a report with English-language texts to foreigners), a list of tabs for generating reports, a list of e-mail addresses for sending the report, and the content of the title and content of the e-mail. Content may have auto-filled parameters. The parameters depend on the selected scheduler.
To copy the configuration to the editor, select the "Copy" button. The scheduler template is sent to the editor. We are starting to fill the machine.
Turn on the scheduler with the "Active" flag, set the scheduler period - to get example setting options (e.g., every hour, once a day, every Monday) select the "Help" button.
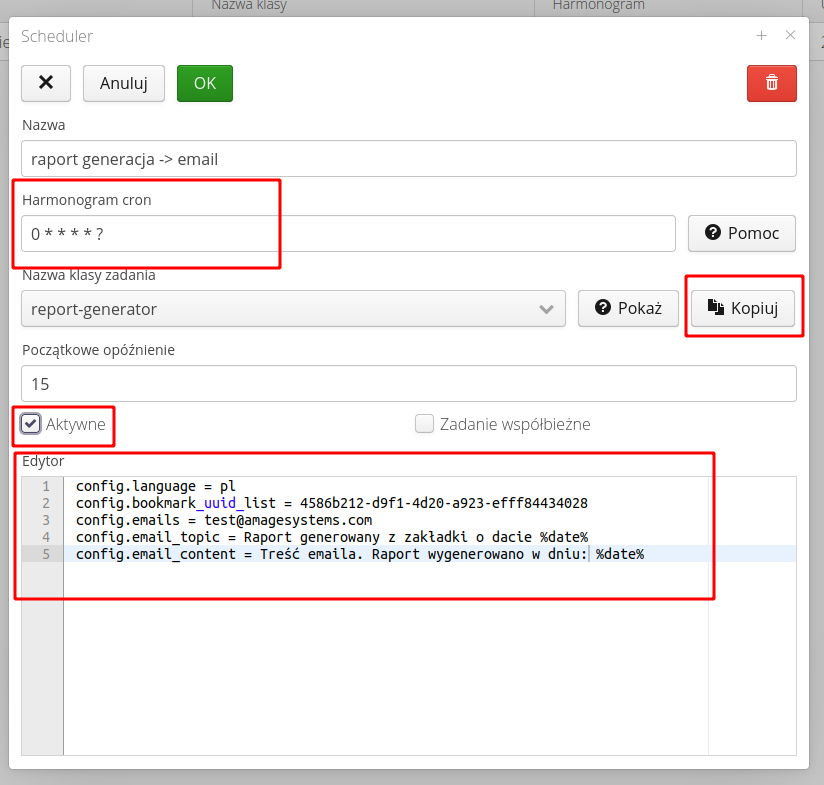
An example of a filled machine is presented as above. The UUID copied from the report tab was used as the UUID of the report. We save the scheduler and restart the machines.
CAUTION. This is an important step, because only in this case the system will load the new configuration of the machines (and stop the currently running ones and restart them).

The result of the restart is a message in the bottom bar about the restart of the machines.

Generation result - email
After restarting the machines, the system generates and sends a report to e-mail as below.
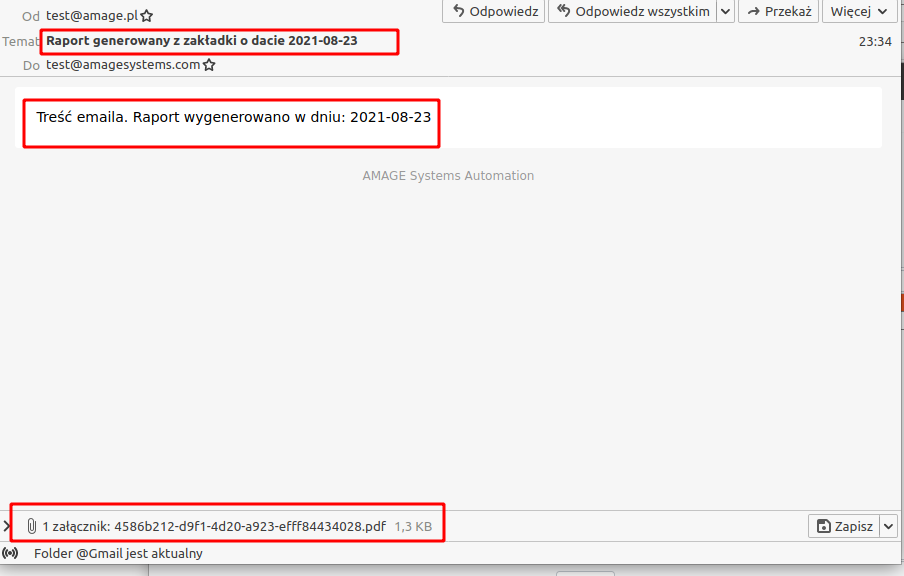
Verification of the operation of the machine
It is possible to check and verify the sending of the report by e-mail. In the system configuration, go to the "Notifications → Events" section. In the list, we find the "Schedule" event types and view the details. For example, report generation
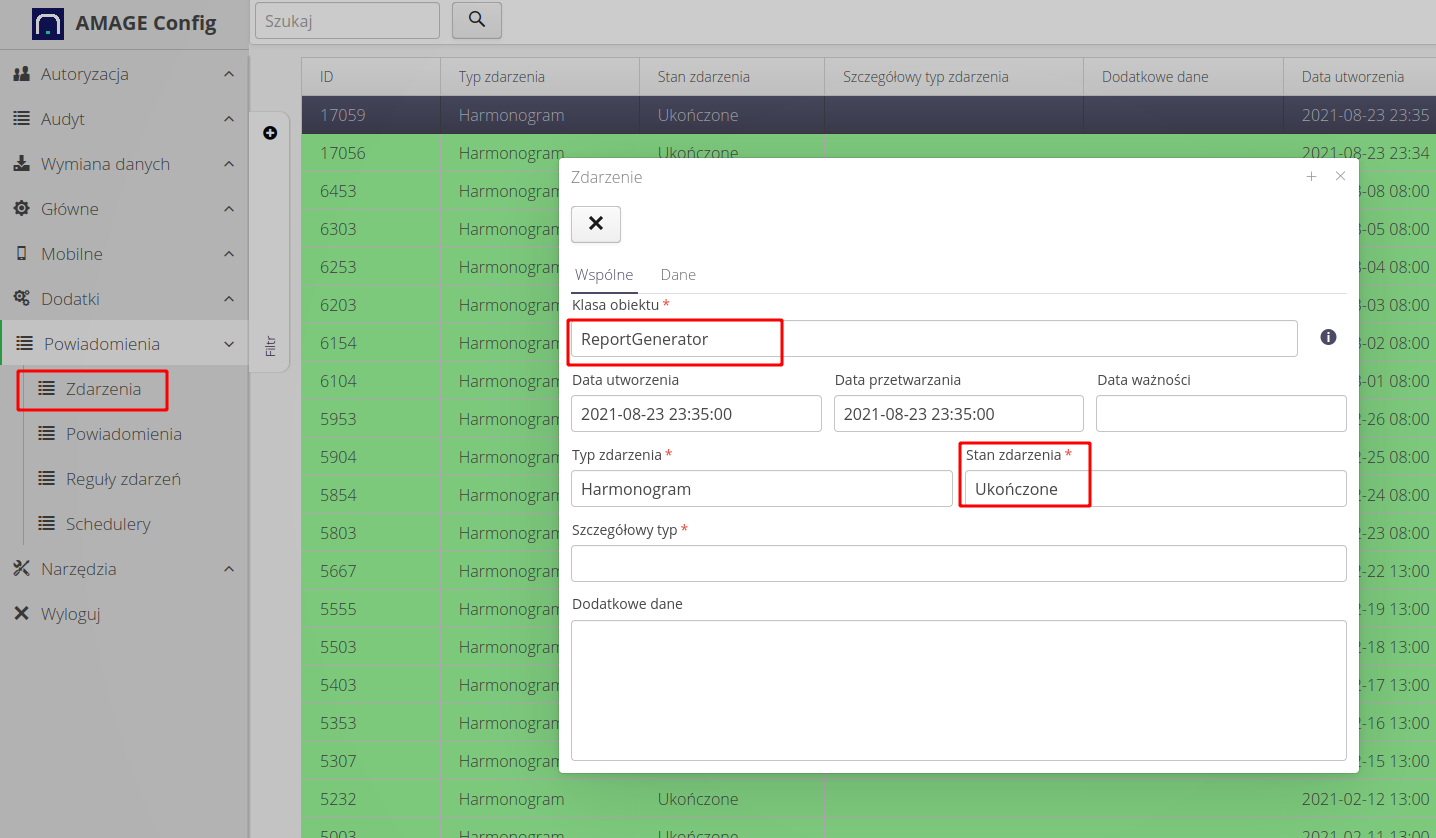
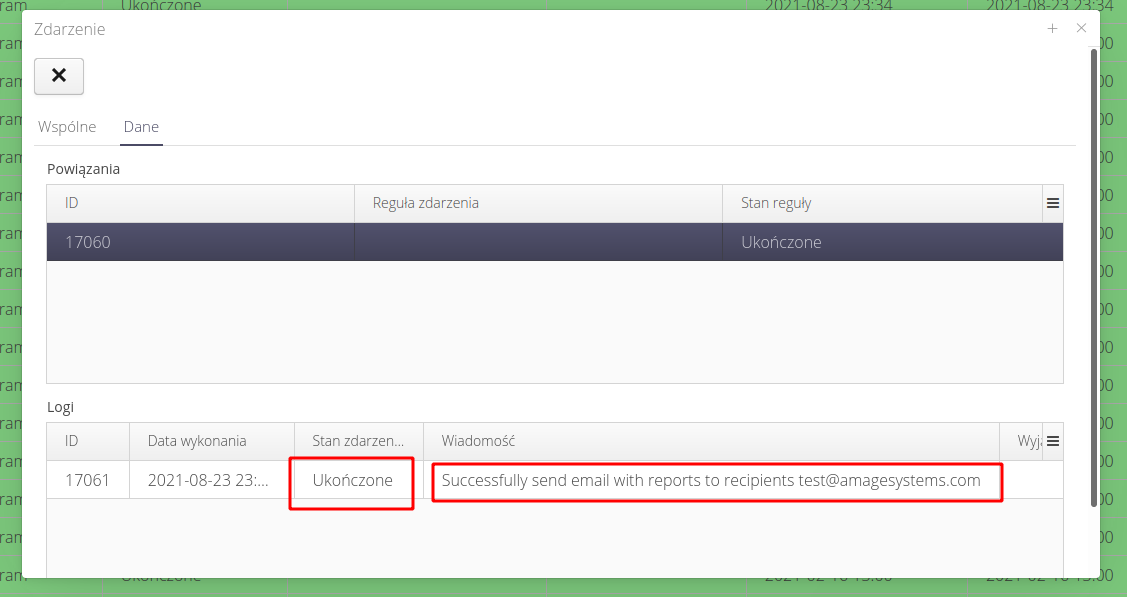
After selecting the data tab and selecting a specific rule (some machines generate several rules depending on the advancement of the scripts), we can see the status of sending the machine.
| The Howto is based on system version 1.17.0.2 (03.2022) and presents features that may not be available in your system. Ask AMAGE about making this functionality available. |
| Due to ongoing development of the system, some screens or configuration files may look slightly different, but will still retain the full functionality described here. This does not affect the core functionality described in this document. |