Deliveries, Orders - order from work order plan
Introduction
The document describes in pictures the mechanism of creating orders from the work plan. A work plan (bill of materials, BoQ, etc.) is a list of materials needed to complete a task.
So, in order to perform actions, we need input. What we already have from other sources:
-
we have documentation for structural elements
-
we also have prepared Excel spreadsheets in which we have design elements and order quantities. They may come from the design system or be an own elaboration based on other data.
Let’s go through the next operations related to importing this data to the system and then order fulfillment. In this document, we use the names Work order and Structural element (EK) interchangeably
Additional operations
-
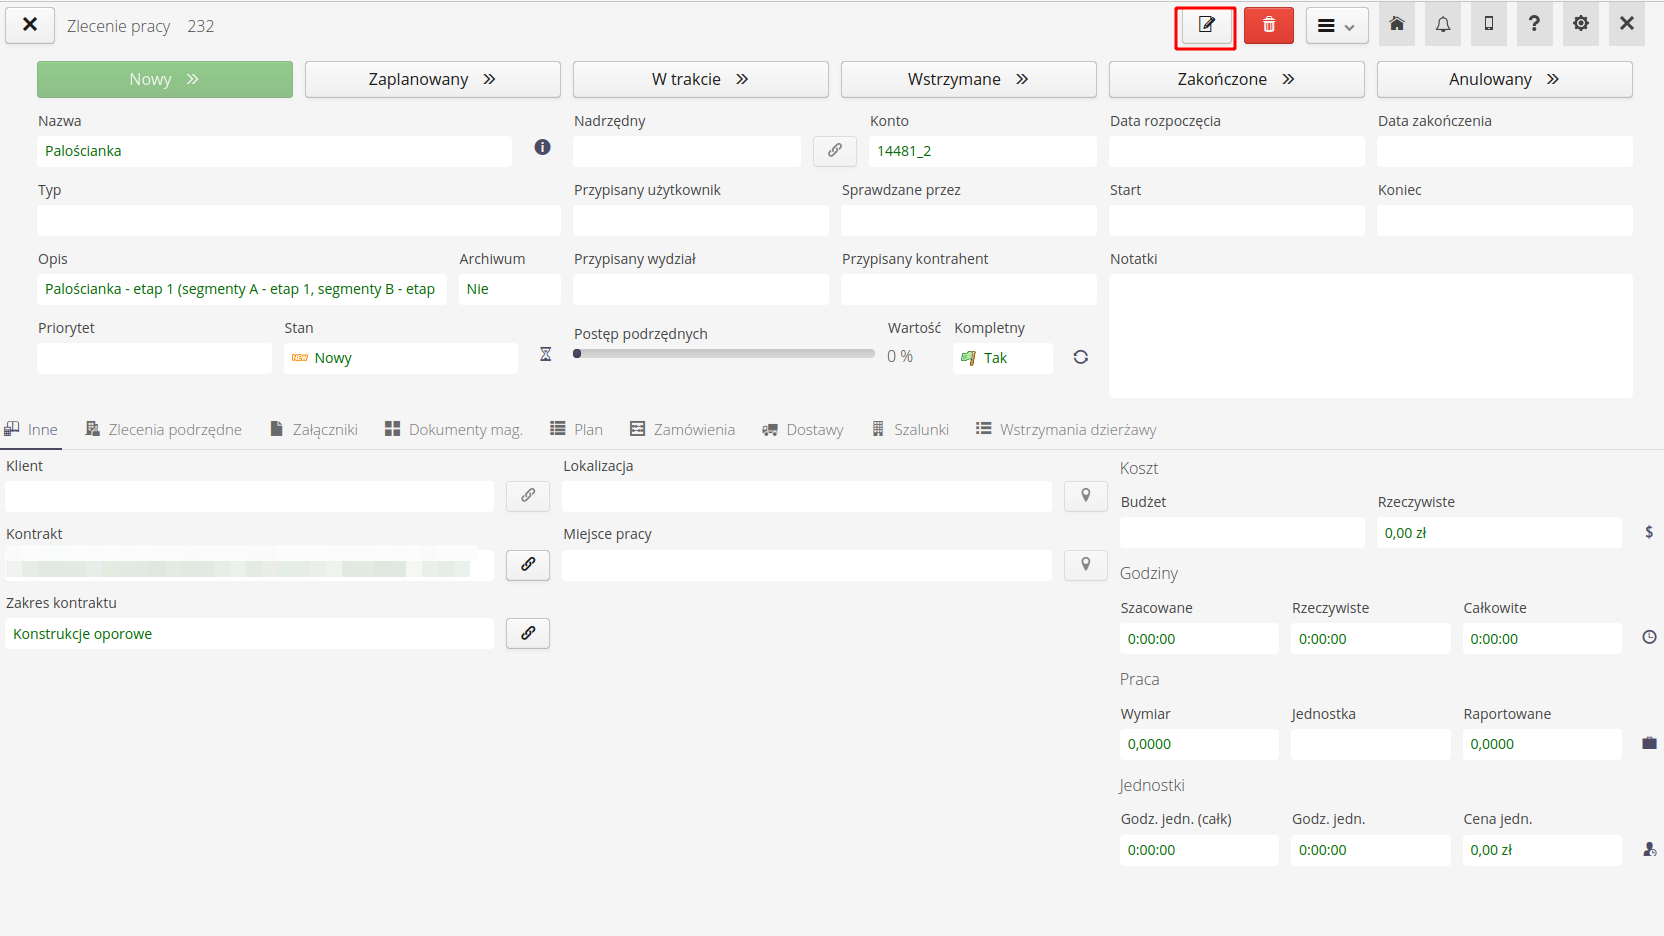
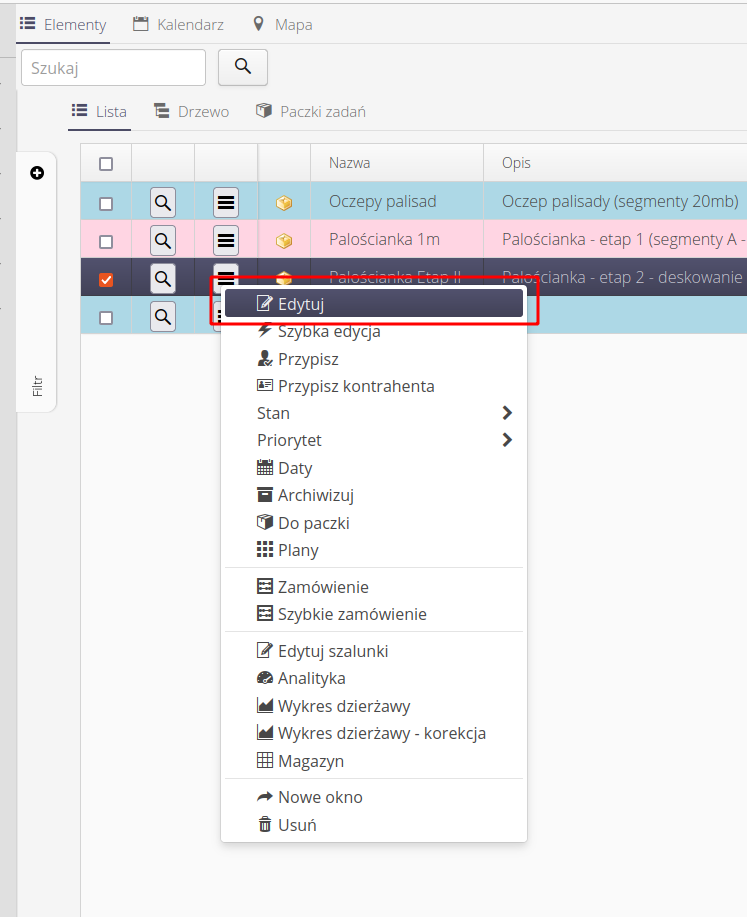
Firstly, changing the names of structural elements. We want to change the names of EK to correspond to our own arrangements with the supplier. Go to the EK list (work structure → orders). We have 4 construction elements there. We are interested in two. We can change the name by either entering the EK details (magnifying glass icon) and then the edit button or you can do it directly in the context menu from the list (menu button with three lines). Go to edit and change to "Wall m1" and "Wall m2" respectively.
-
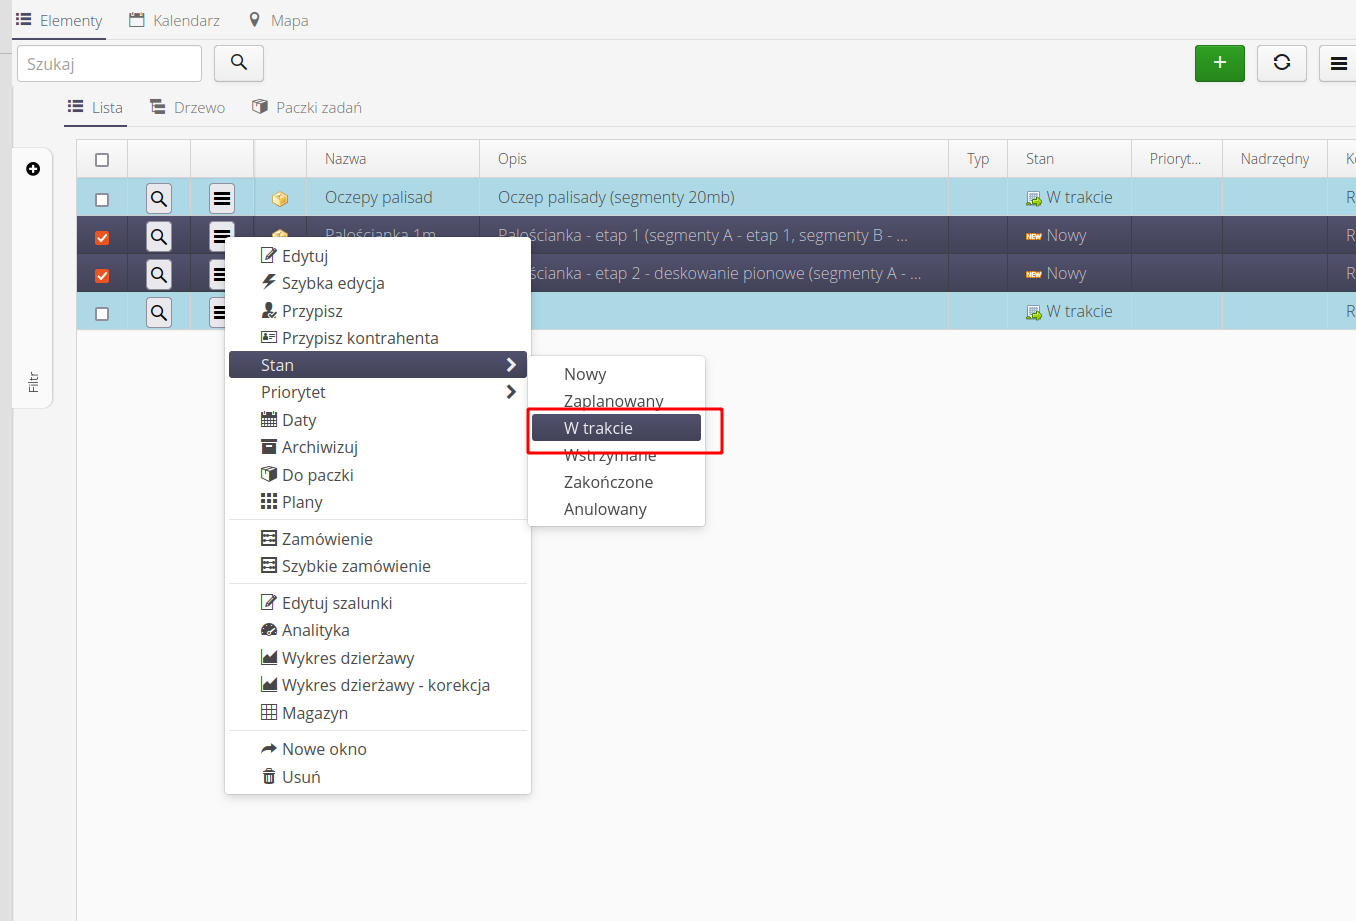
for the sake of order, I change the status of EK to "in progress" so that it is known that we are starting to implement these EK. We can then track the deadline for completing orders and have the ability to filter works. Each EK has a "Plan" tab in the details. This is a bill of materials (project). We will import lists from the material excel, which we prepared earlier, to it.
Material plans for work orders/structural elements
-
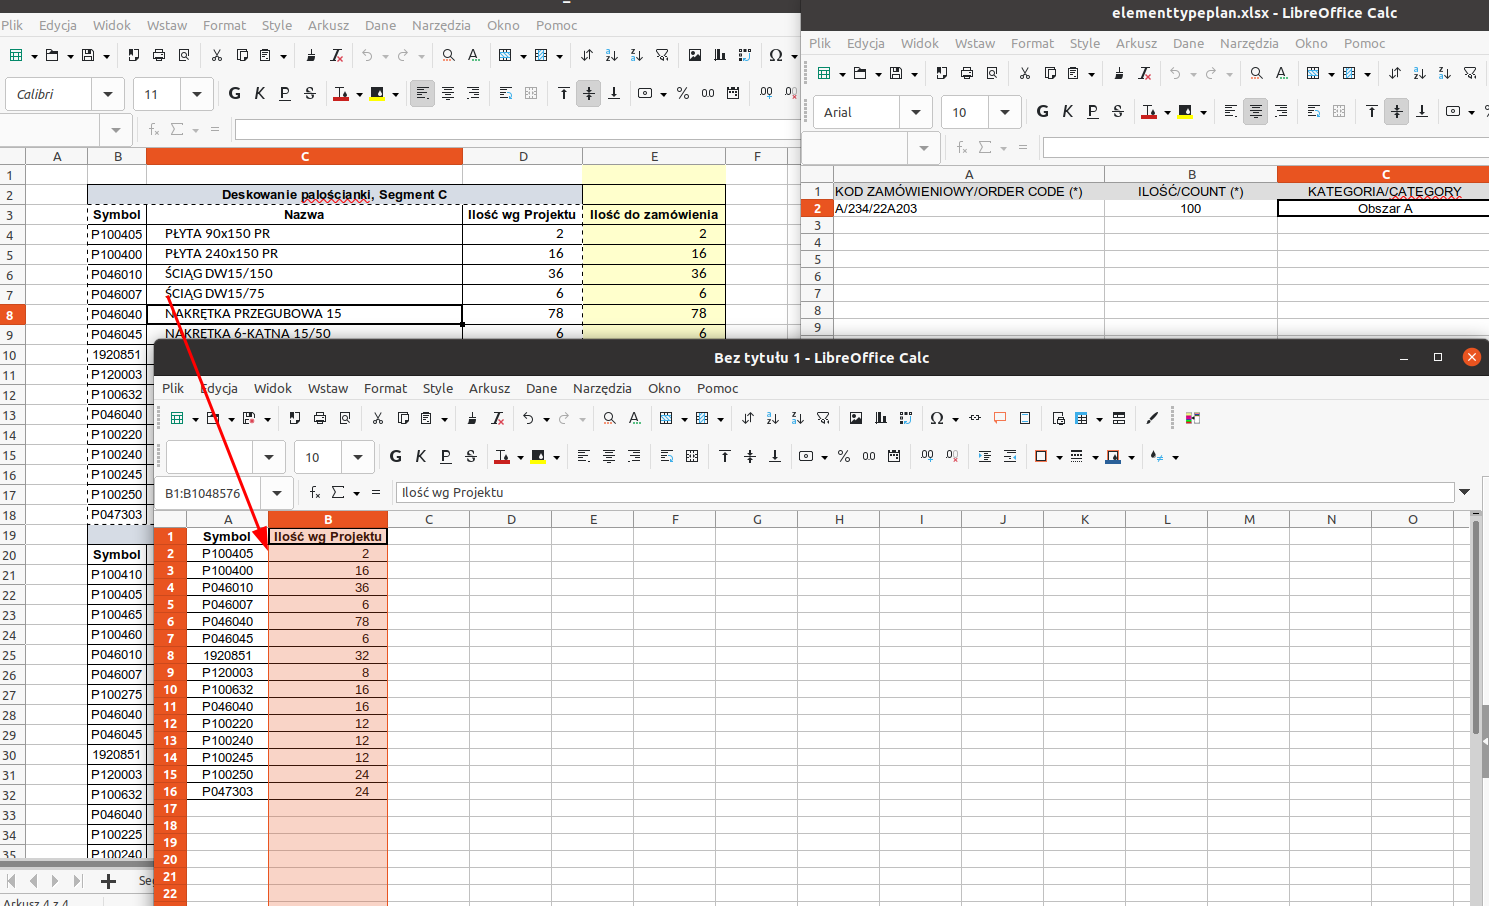
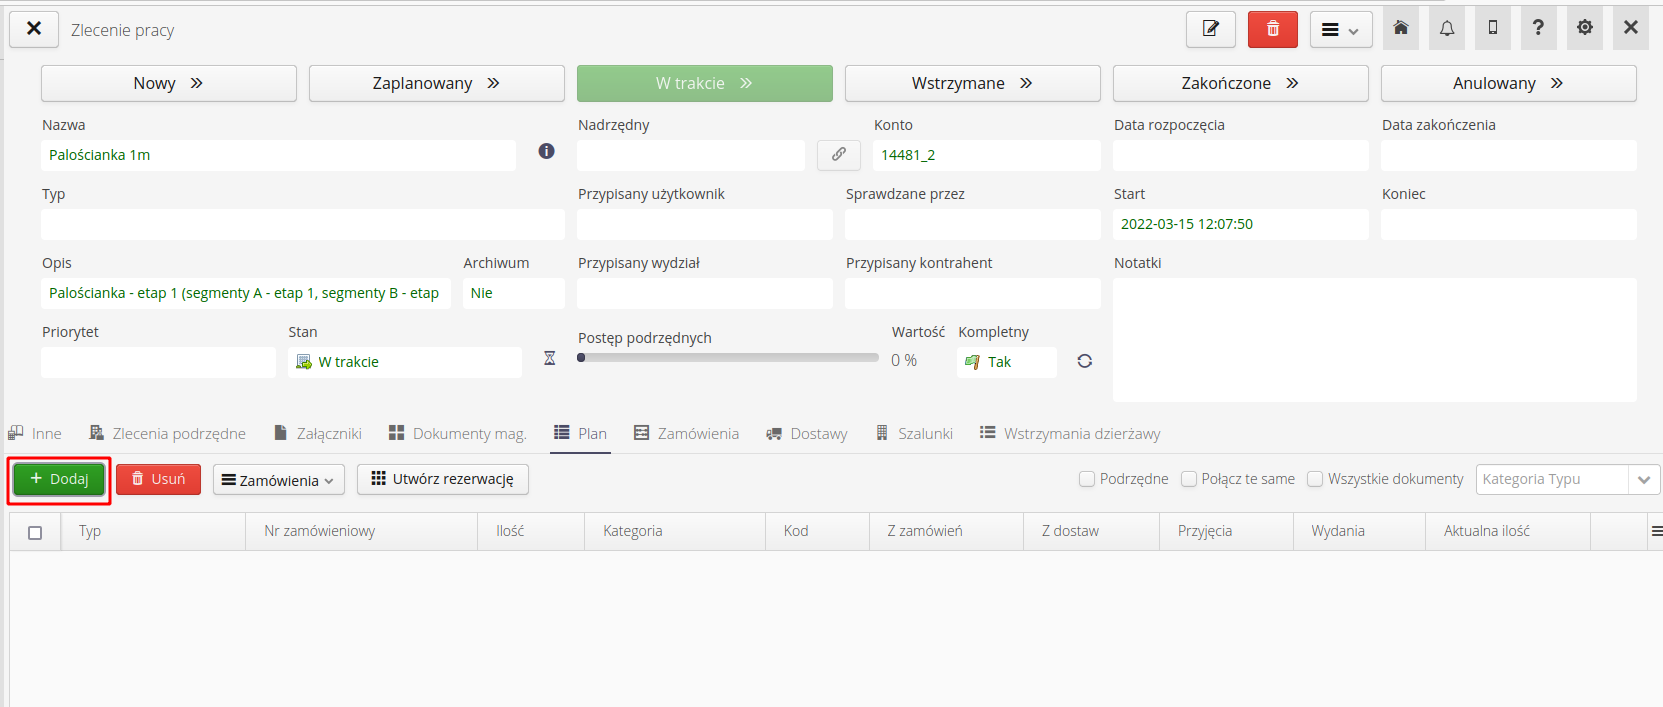
When we click "Add" in the plan list, the plan definition window appears. At the top, we have the "Template" button. When we click it, we will download a sample file that can be used to import the plan from any source. As we can see, there are two mandatory columns (order code + quantity). The rest is optional. So we open the design list and copy only the symbol/quantity columns to an empty excel. This will be used for import. We have 3 files according to excel. We have segment_b_stage2_plan, segment_c_plan, segment_b_stage2_additional. Simple excels with two columns ready for import.
-
Go to adding plan elements for a given EK and click add. The window for defining elements of this project opens
-
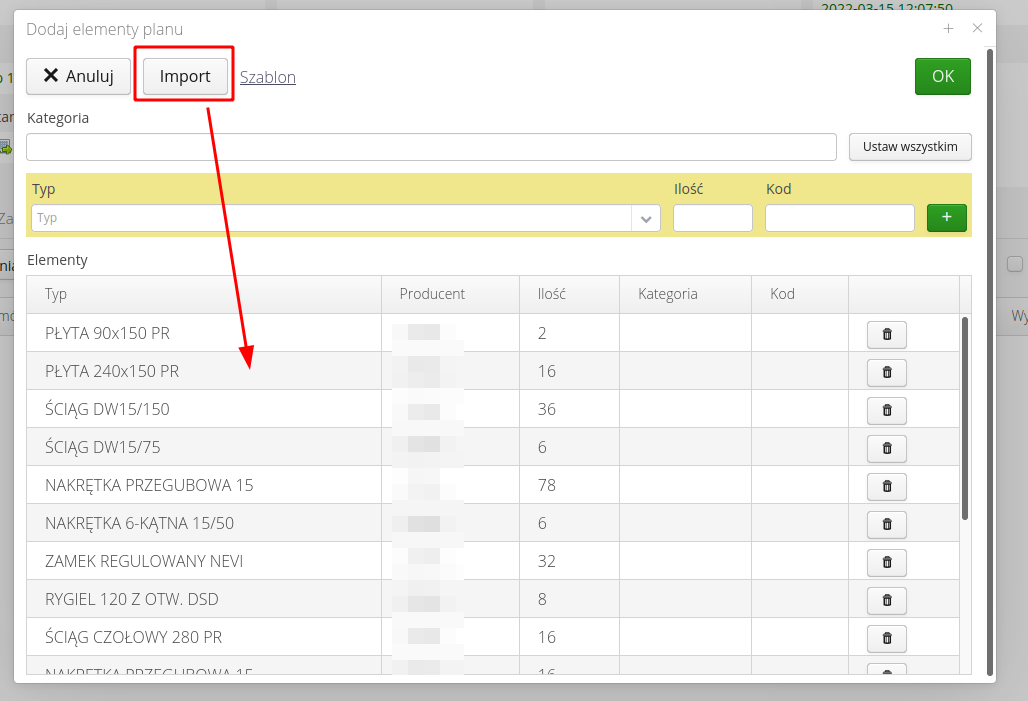
Select import and load the file - at the beginning to "Wall m1". Data is read from the file. We can take a look, re-edit, remove unnecessary elements, etc. If it’s OK, we approve.
-
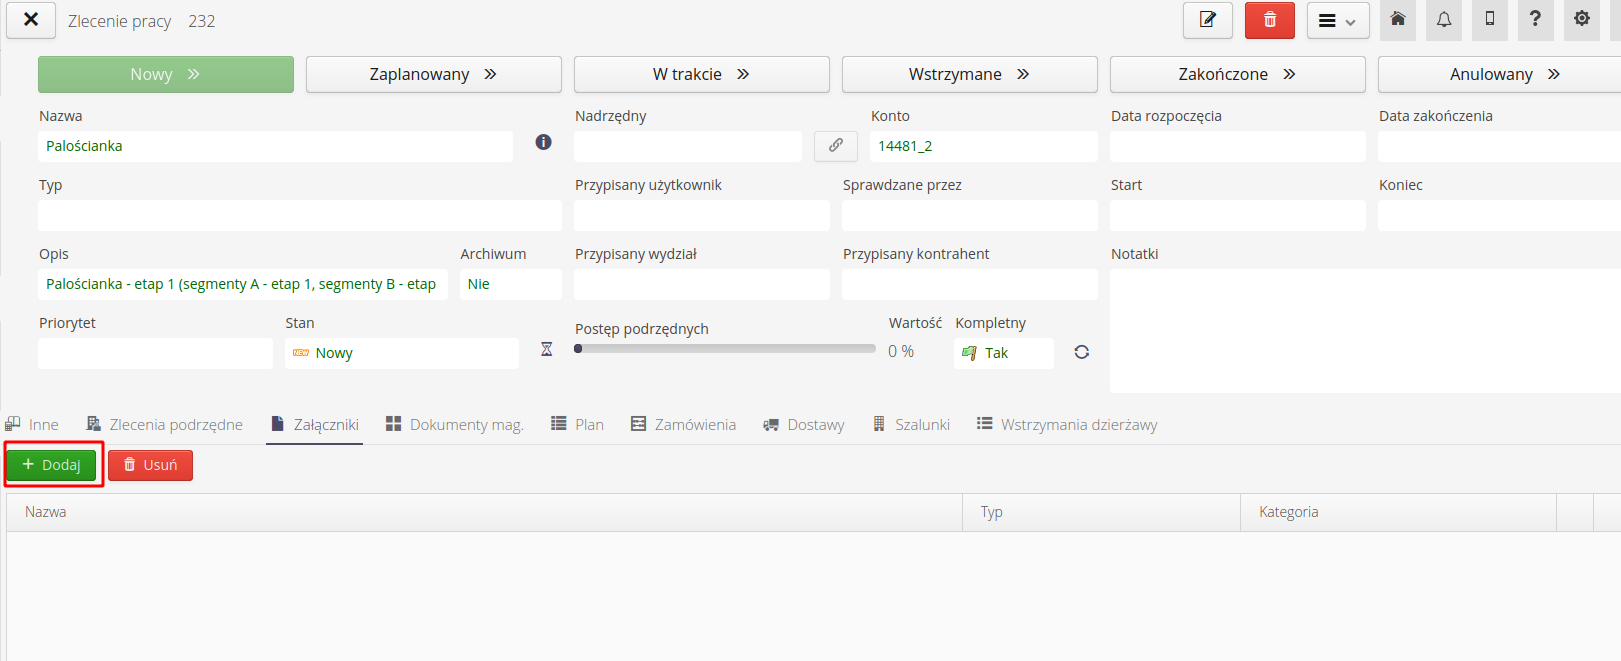
We can also add projects in PDF form here. They will always be there + will be available in the mobile version (on the phone) for all people who have permission to access orders.
-
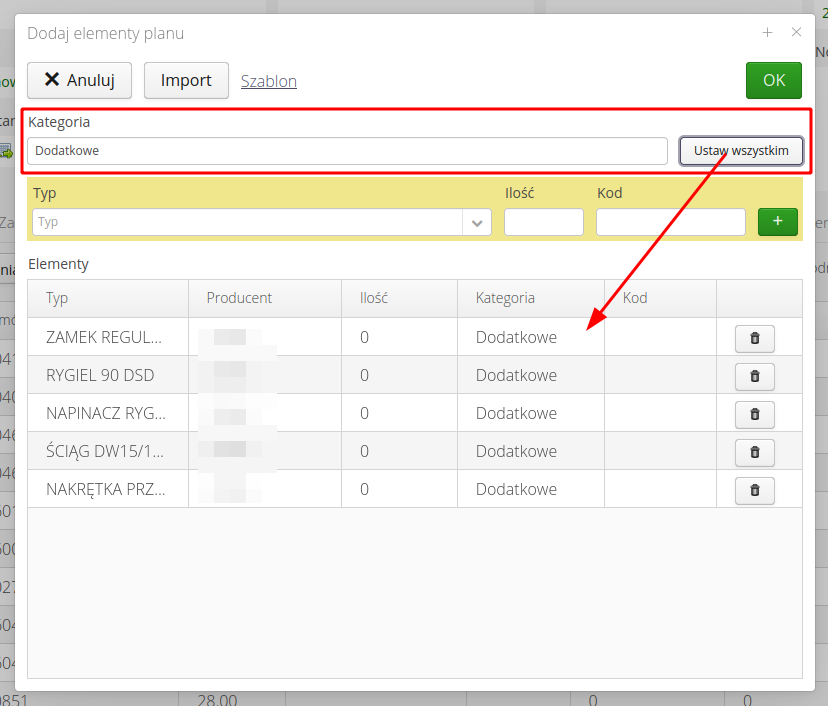
Import of additional elements to "Wall m2" can be additionally defined as additional elements. We will have zero quantities in excel. Let’s do it for the sake of order - you will see what is additional and results from our decisions (and not the deliveries themselves). Setting the category after importing elements from excel is done using the action in the upper part of the editor.
| When we finish the above-mentioned operations, the effect is to receive a project plan for a given EC. The system immediately shows what quantities of these elements are ALREADY in stock (column "Current quantity"). Now let’s move on to orders. |
Orders
-
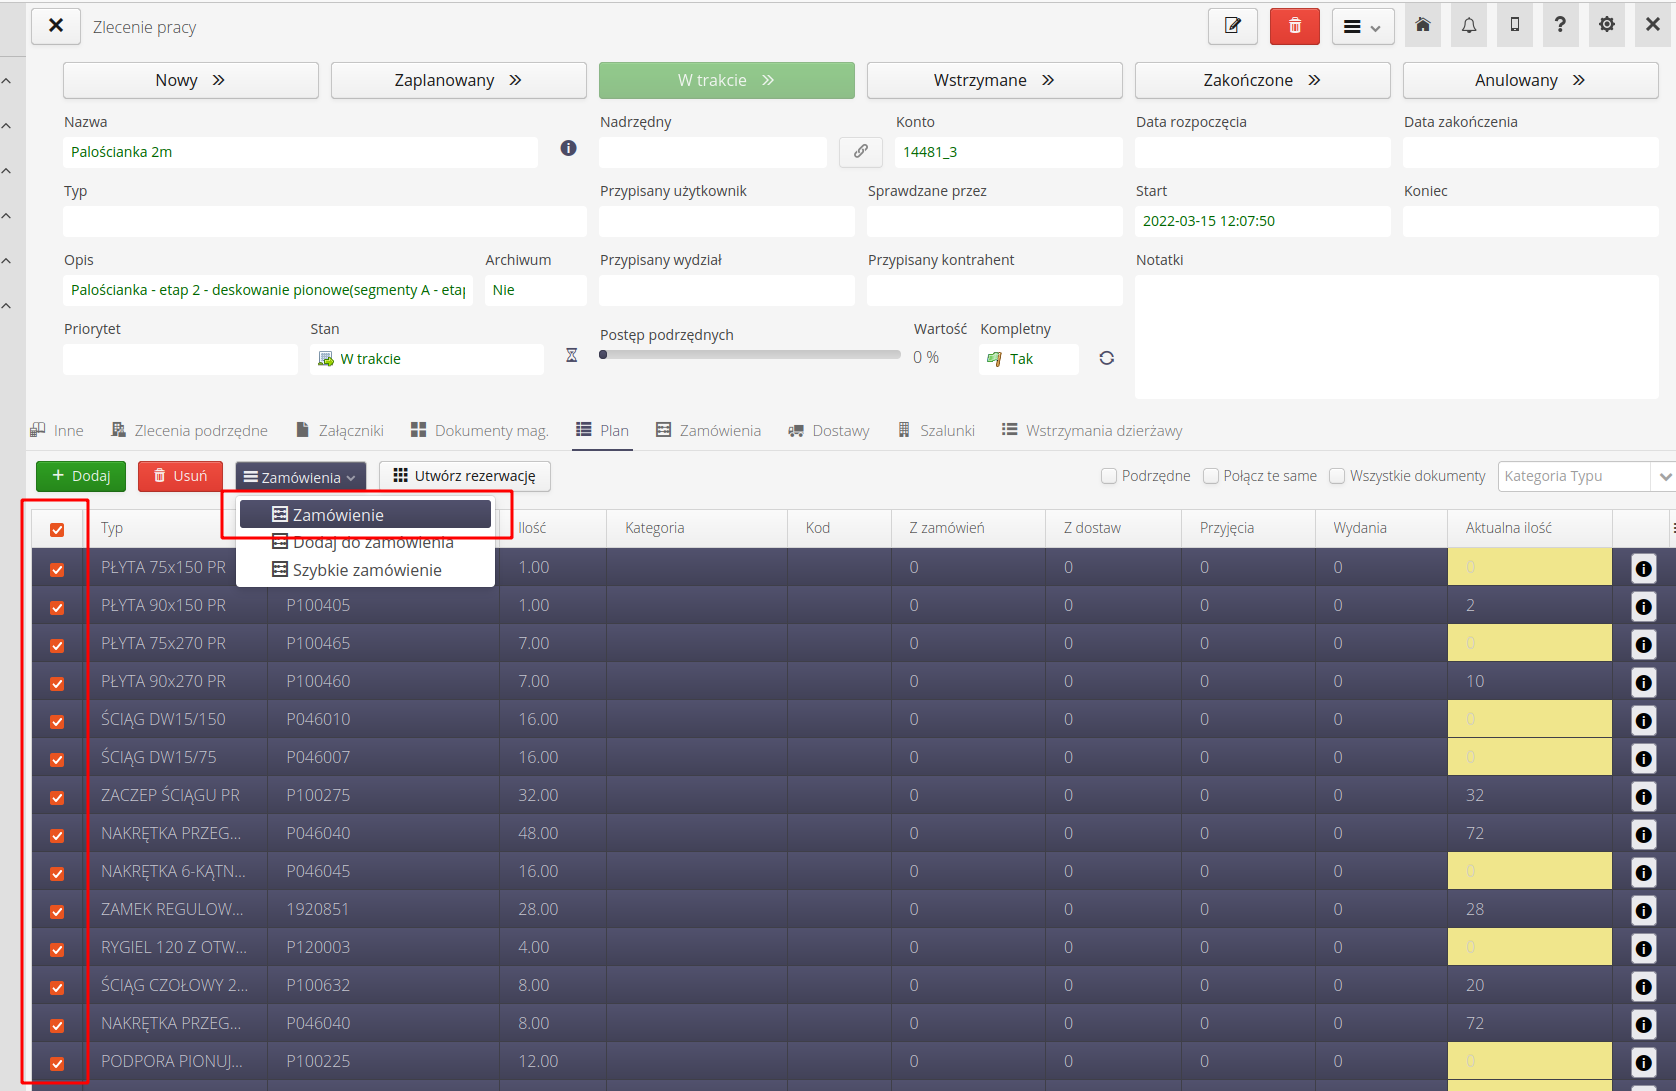
The order can be invoked from the plan - you can select the elements and select 'Order'. Then these selected elements will be added to the order (there we can possibly remove what is not needed or change the quantity).
-
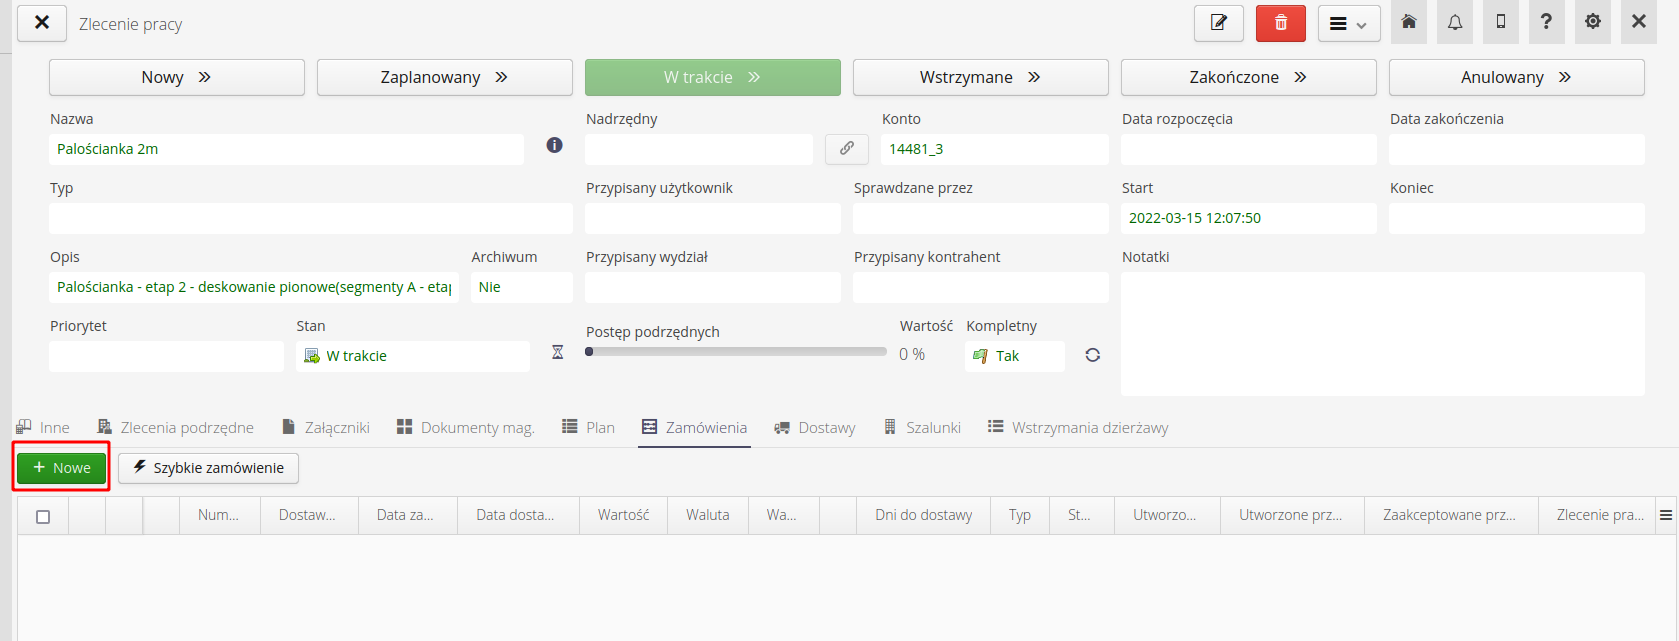
We can also go to the "orders" tab and choose to add an order for this EC. We will make 2 orders - one for "Wall m1" and the other (combined design elements + additional" for "Wall m2".
-
Select "New" in the orders tab.
-
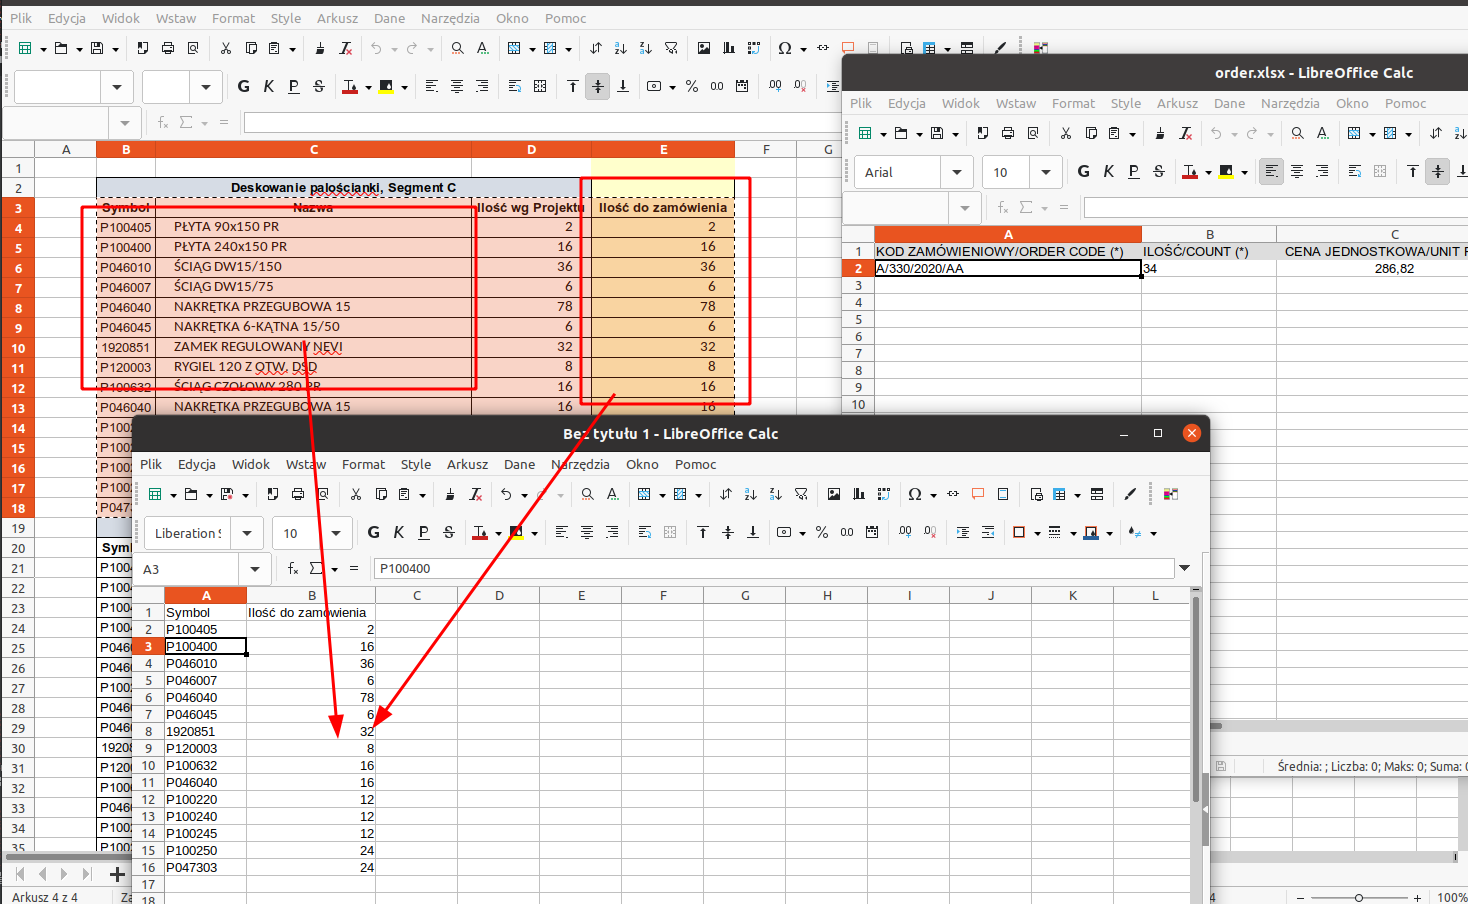
We do the same as for the plan - we create lists for import from excel from the order number and order quantity columns.
-
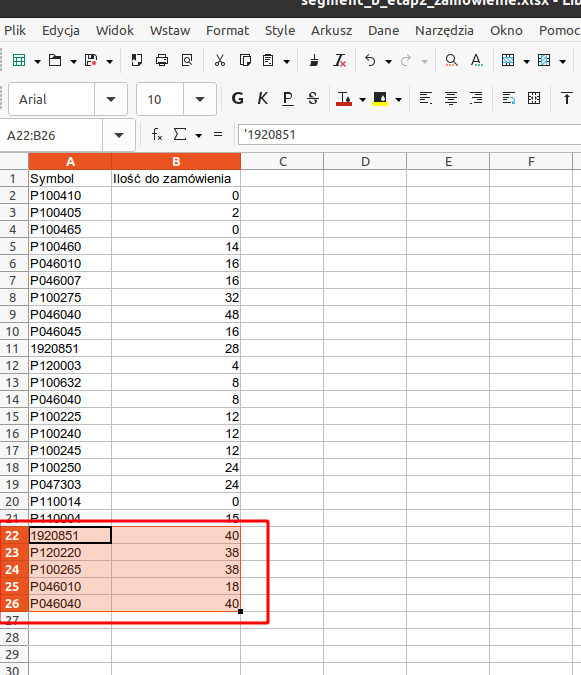
I add additional elements to one order list for Wall m2. Everything will be in one place for a given EK. In this case, we combine materials.
-
We import elements. They will eventually appear in the order list. We complete the supplier, we can specify other elements (scheduled delivery date, add a note, specify the recipient, contact him, etc.)
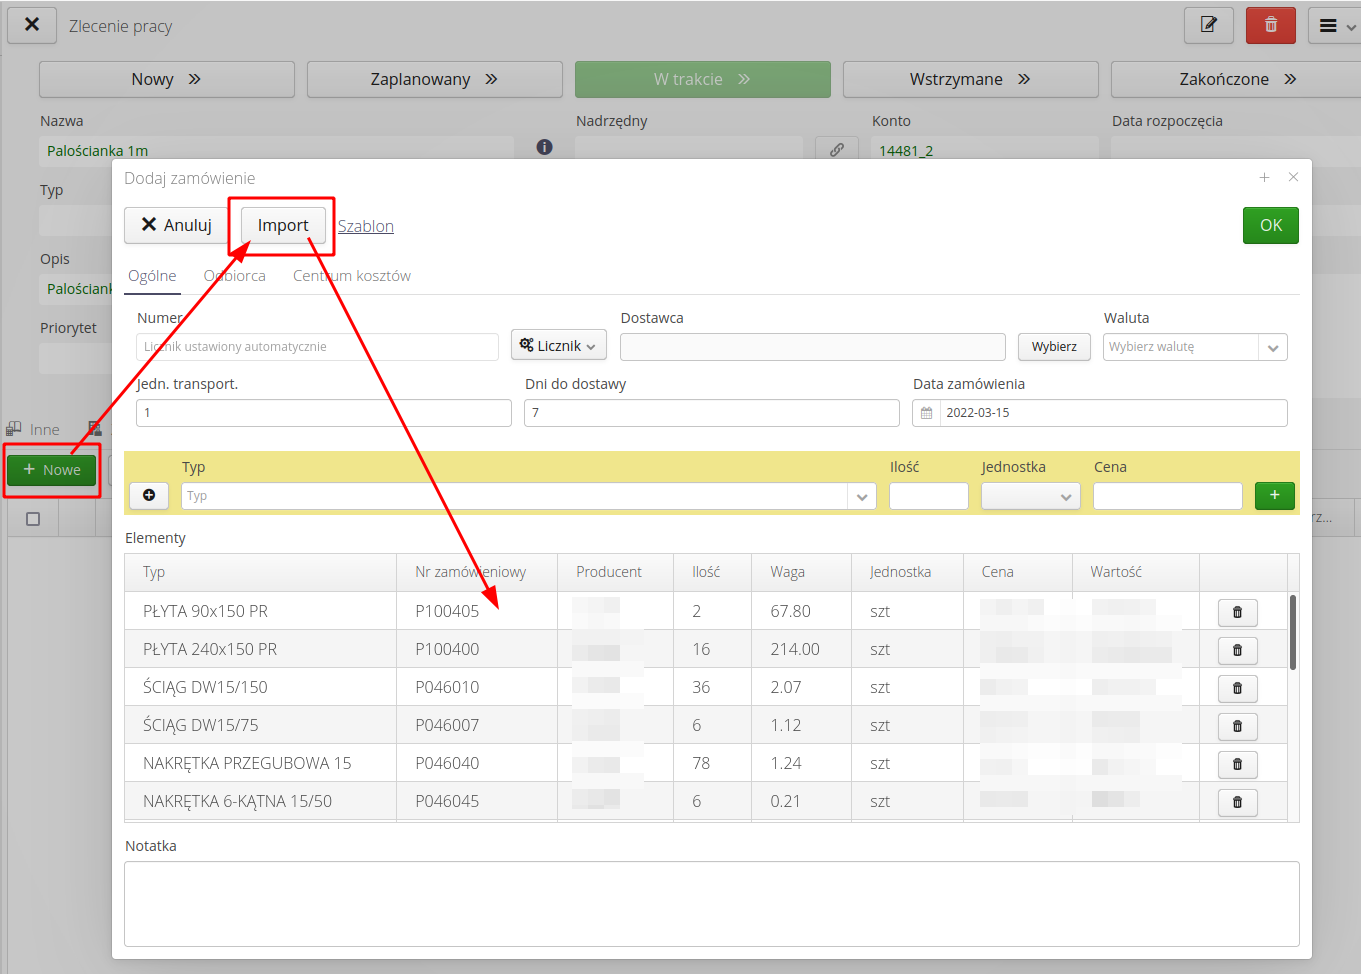
-
For EK with additional elements, we add a comment to the order.
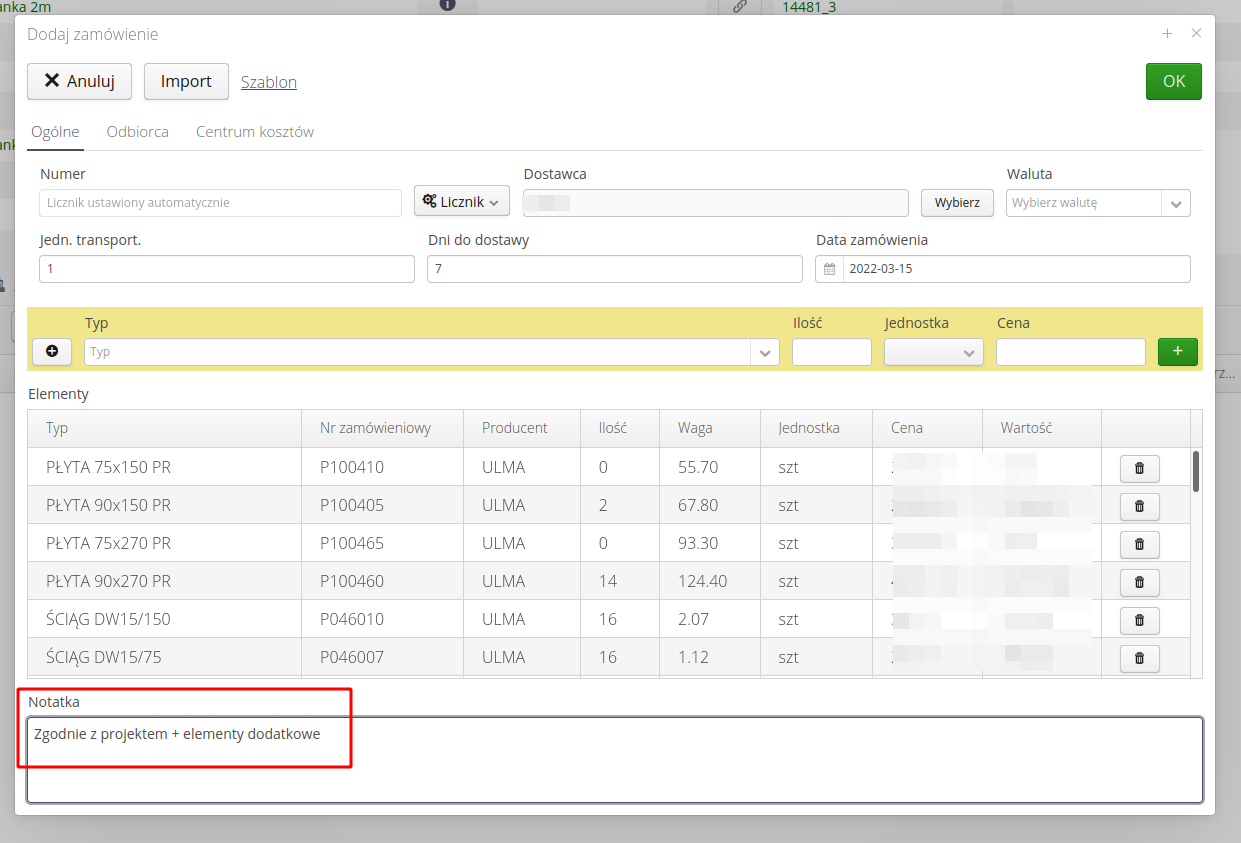
-
we approve.
-
We go to the order list. In addition to the old orders, we also have new orders for the two EKs we were currently creating orders for. Orders are in the "Created" state by default. This allows them to be edited, modified, etc. In order for the system to start "processing" orders, it needs to be told that the orders are
Acceptedand the system can continue processing them.
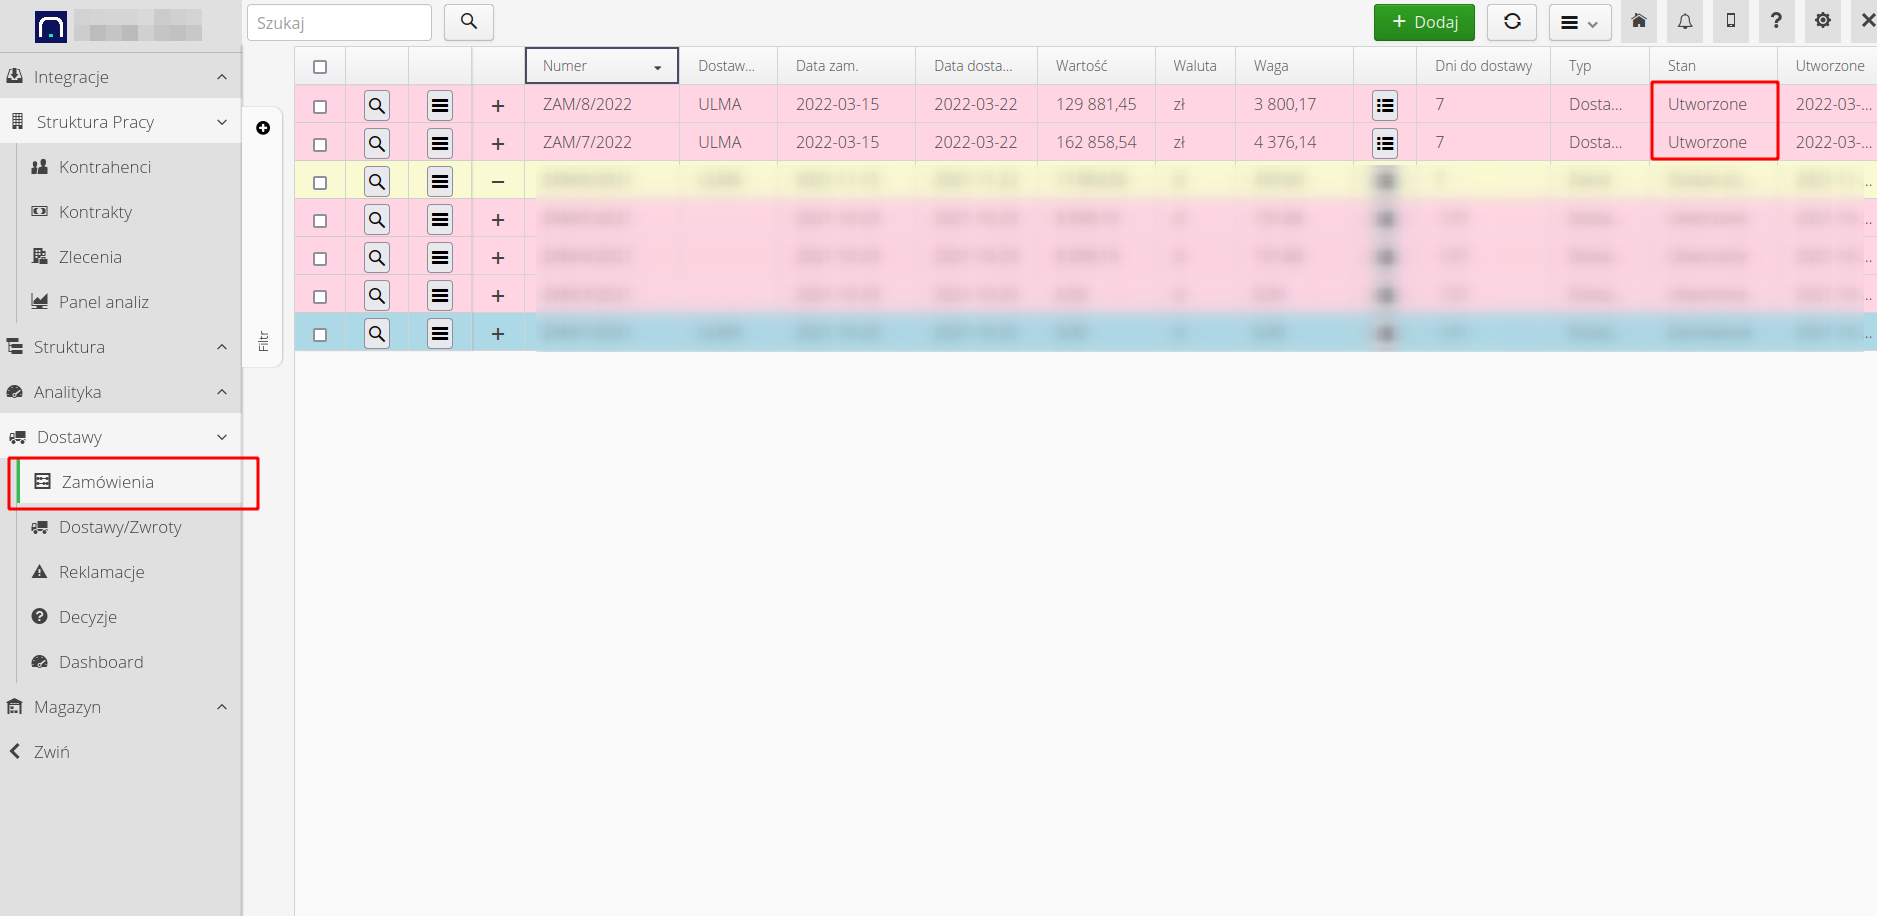
-
In this case, we change the status to "Accepted". The system then generates (up to 1 minute) a PDF, CSV file and generates an email to the supplier. It sends him all this along with a link to the provider’s portal.
| If we create a "quick" order, i.e. one that has no elements, only a description, then its status changes to "accepted" immediately. |

| Automations require separate activation in the system. This is done by defining the automation in the configuration section of the system. This is covered in separate tutorials. |
End
Done! Emails have been sent to the provider. The notifications will show that they have gone. The supplier can now confirm the order via the portal interface, add deliveries (or send delivery documents via automatic integration).
| Information about automatic integration of data from suppliers is described in other tutorials. The same applies to the supplier’s portal and the operation of the portal by people from the suppliers' commercial departments. |
| The Howto is based on system version 1.17.0.2 (03.2022) and presents features that may not be available in your system. Ask AMAGE about making this functionality available. |
| Due to ongoing development of the system, some screens or configuration files may look slightly different, but will still retain the full functionality described here. This does not affect the core functionality described in this document. |