Technical rounds
Introduction
The document describes in the form of use cases the use of the technical rounds module. The rounds allow you to register key information regarding the verification of the operation of the technical installation. With the round path, we define the activities to be performed during the implementation of these works. These activities may include answering questions, carrying out measurements and additional tasks, e.g. taking a photo, reading an RFID tag in a control place. All data is performed in a fully digital manner using mobile devices.
The principle of operation and organization of the structure
The technical rounds are to allow the registration of activities, measurements and tasks during the route inside the industrial plant, building and all other places where periodic technical inspections and gathering information during the rounds are required. This is usually important for enterprises in which a continuous production process is carried out - the observation of the correct operation of devices, machines and the building structure itself allows to detect irregularities at an early stage. These activities should be performed periodically and there should be a record of their performance. Ideally, the solution should additionally support employees in performing these activities.
This tutorial shows possible ways to configure the rounding system and possible solutions within the AMAGE/AMAGE24 instance.
Identification of devices using codes/RFID
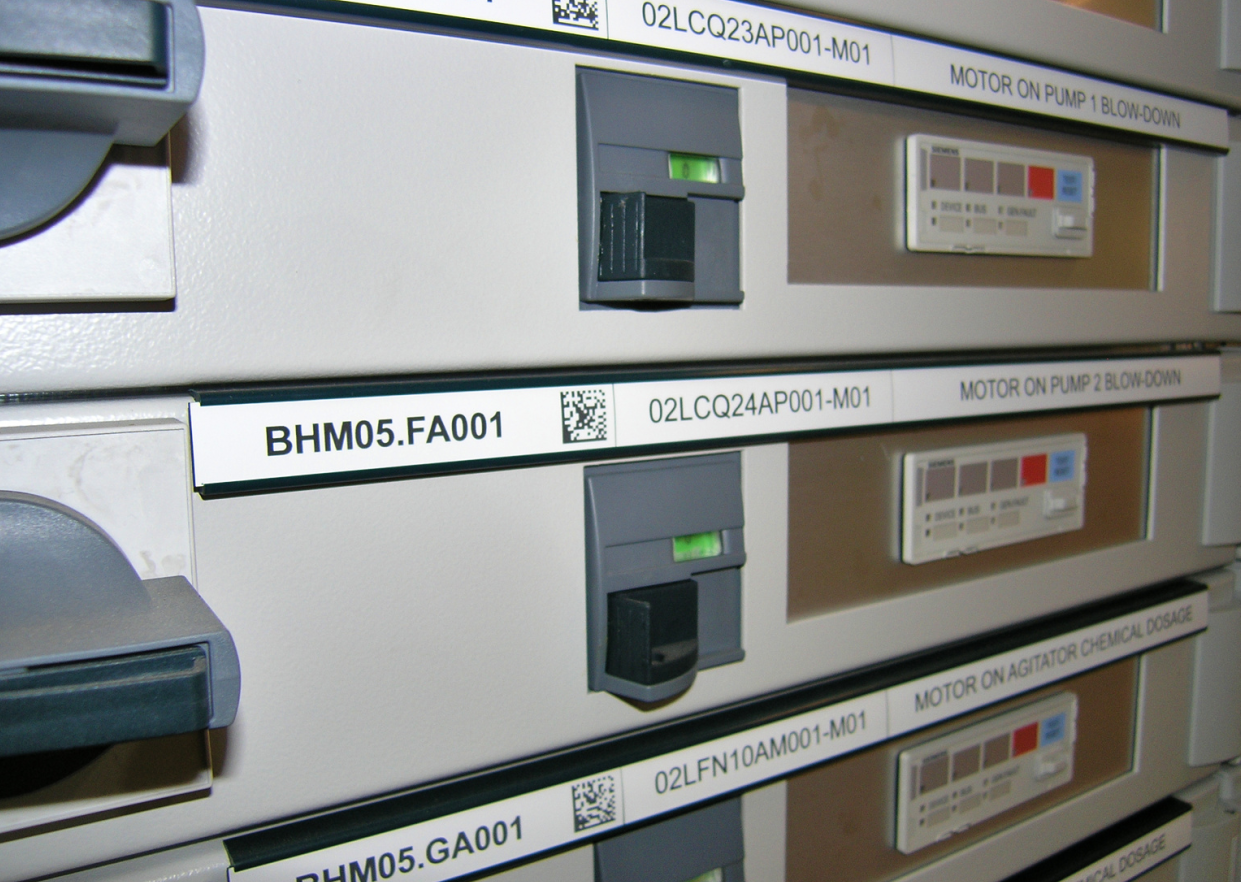
Devices can be identified by barcode/2D/RFID. This is used to quickly identify the item/resource. In the case of the round trip system, they are used to quickly filter out questions/measurements related to a given device from the round path.
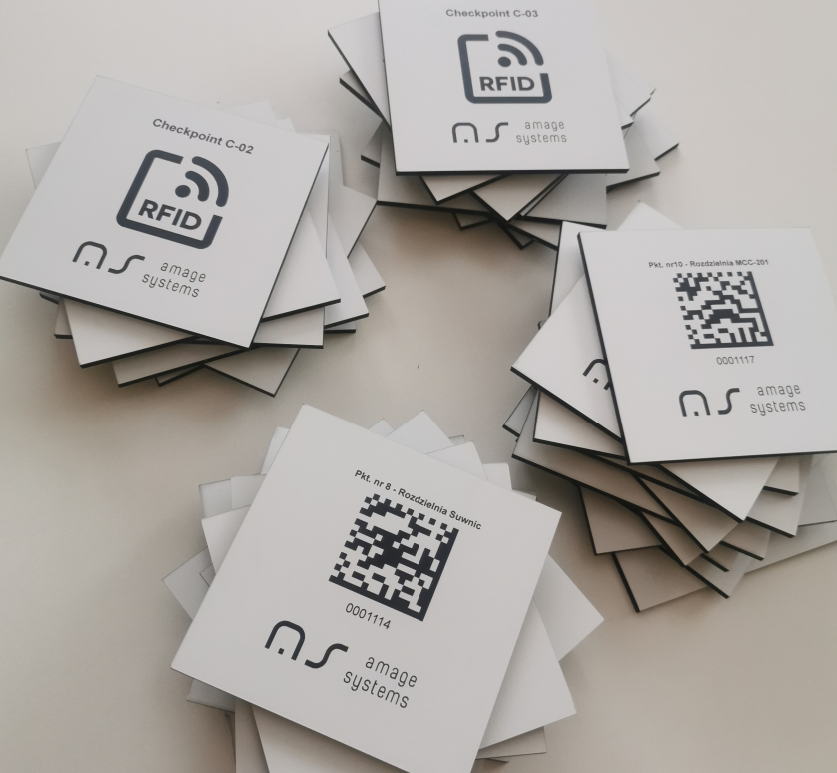
Checkpoints and their identification
Usually, during the inspection round, it is required to confirm the presence of a given person on the inspection round route. This is done using checkpoints in the form of RFID tags. After associating this tag with one of the inspection round tasks, the employee will be required to scan this tag during the inspection round for the inspection round to be marked as completed.
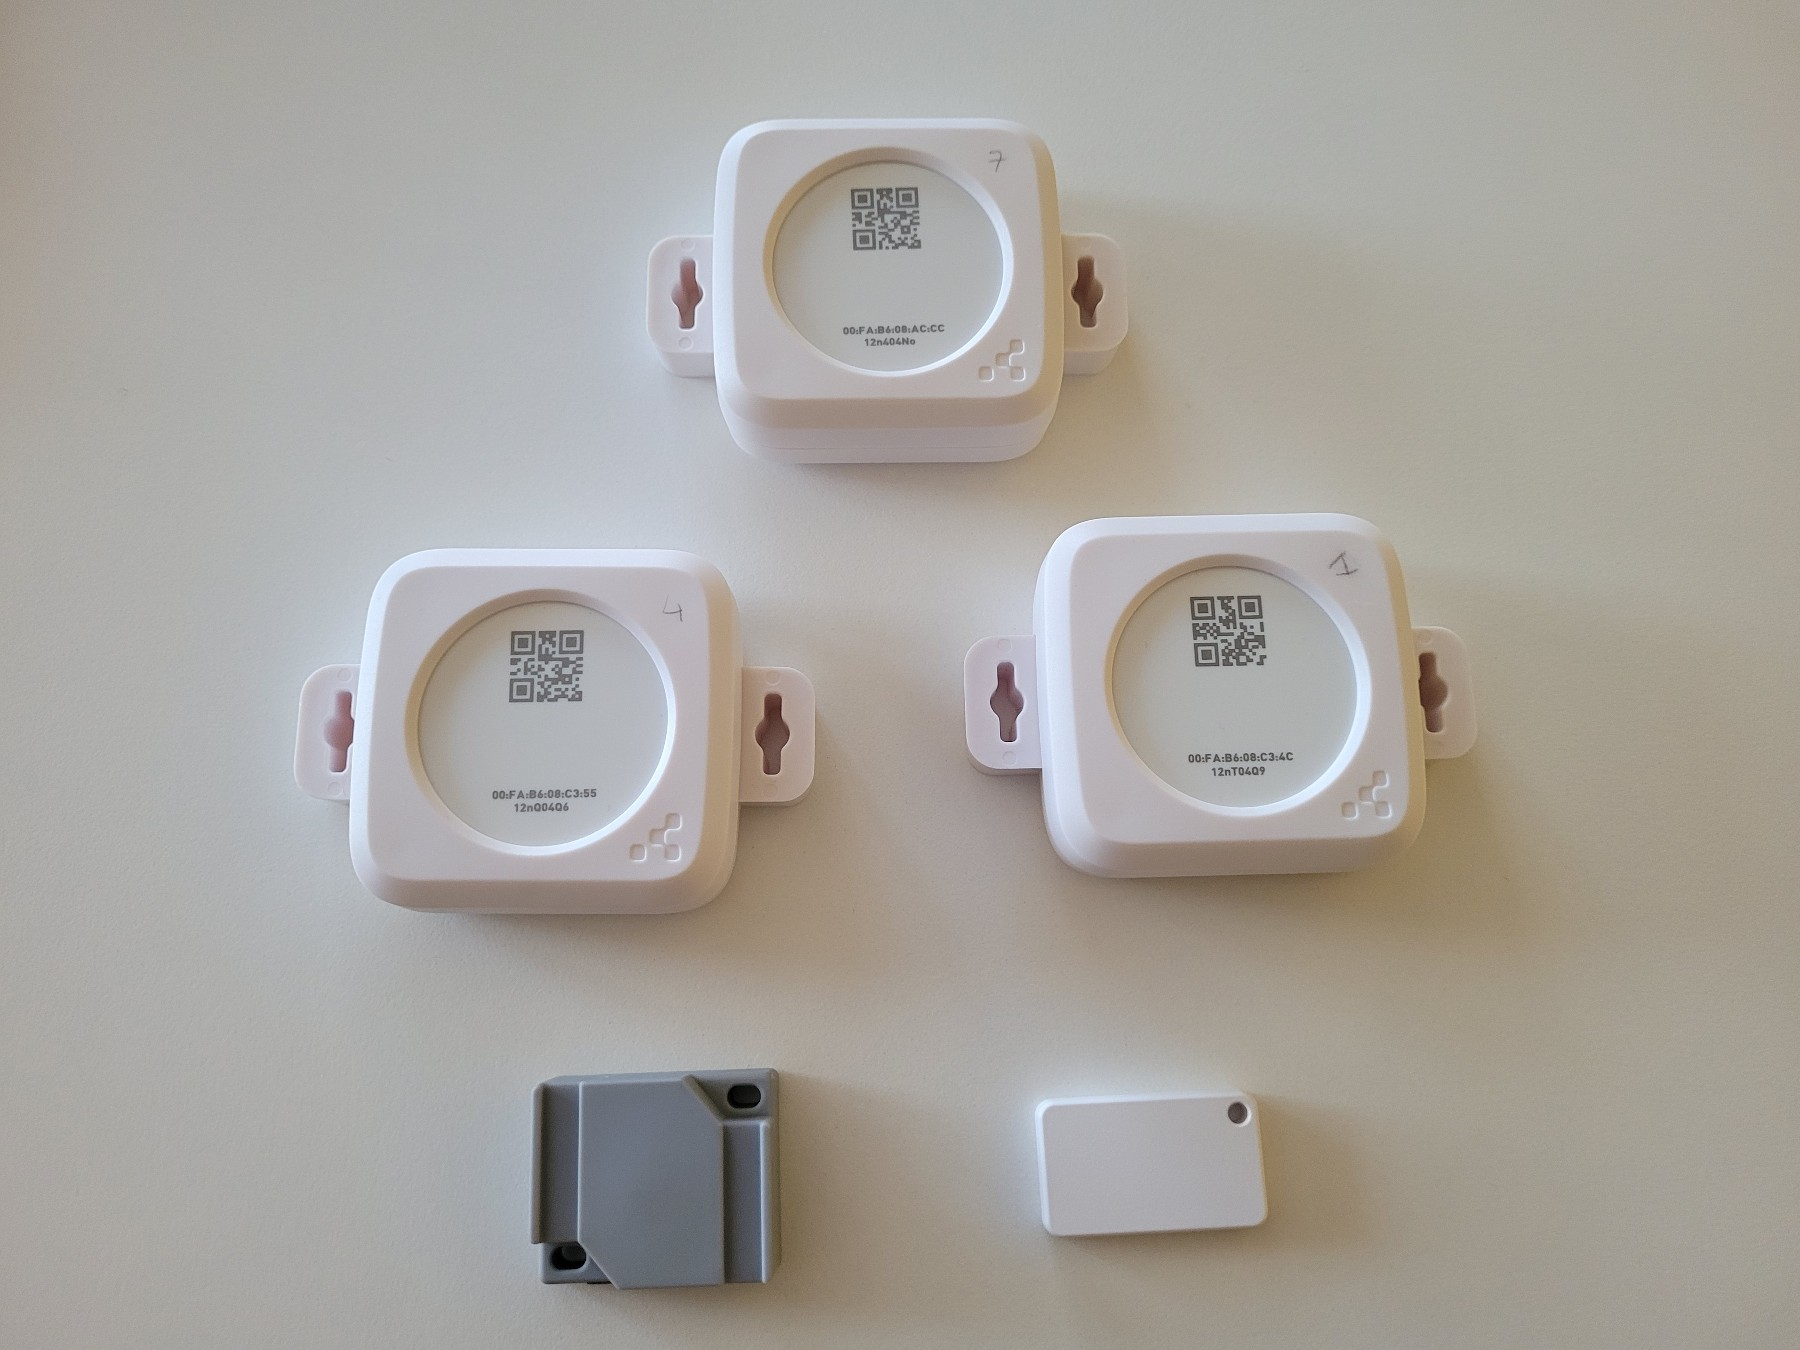
Bluetooth beacons as checkpoints
An alternative solution is to use bluetooth beacons to verify the employee’s presence. These are active devices that periodically send wireless information about their presence. In the rounding system, they can be used for contactless confirmation of the employee’s presence in a given place (instead of RFID tags) and as an automatic filter of the rounding list. After approaching the range of a given tag, the employee receives a list of devices that we have indicated that he is in the vicinity of this tag. This allows you to quickly optimize your rounds.
Final and daily reports
The final result of the inspection round will be recorded data on individual checkpoints. The system automatically creates a record that can be viewed inside the application, but also generates a set of final/daily reports as a summary of the activities performed.
Integration of service requests
If the instance has the service events module enabled, it is integrated with rounds and allows you to register events/faults during the rounds.
View of the application in a inspection round configuration
After switching on and logging in to the AMAGE/24 instance, we have two views available - one for the computer, laptop and the other for mobile devices. In order to take full advantage of the trade functions on a mobile device, we must have the AMAGE Shell application installed.
| All general functions of the application, functions of the AMAGE Shell application can be found in the relevant documentation for these applications in the Help Portal. Refer to them to learn more about each of these features. Also use the video tutorials available on our YouTube channel and the Help Portal. |
Structure of devices and locations
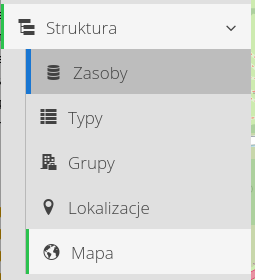
In order to define a round trip path, we first need to have a defined plant structure - a list of devices, a list of locations. We can do it in the Structure section in the main menu of the application
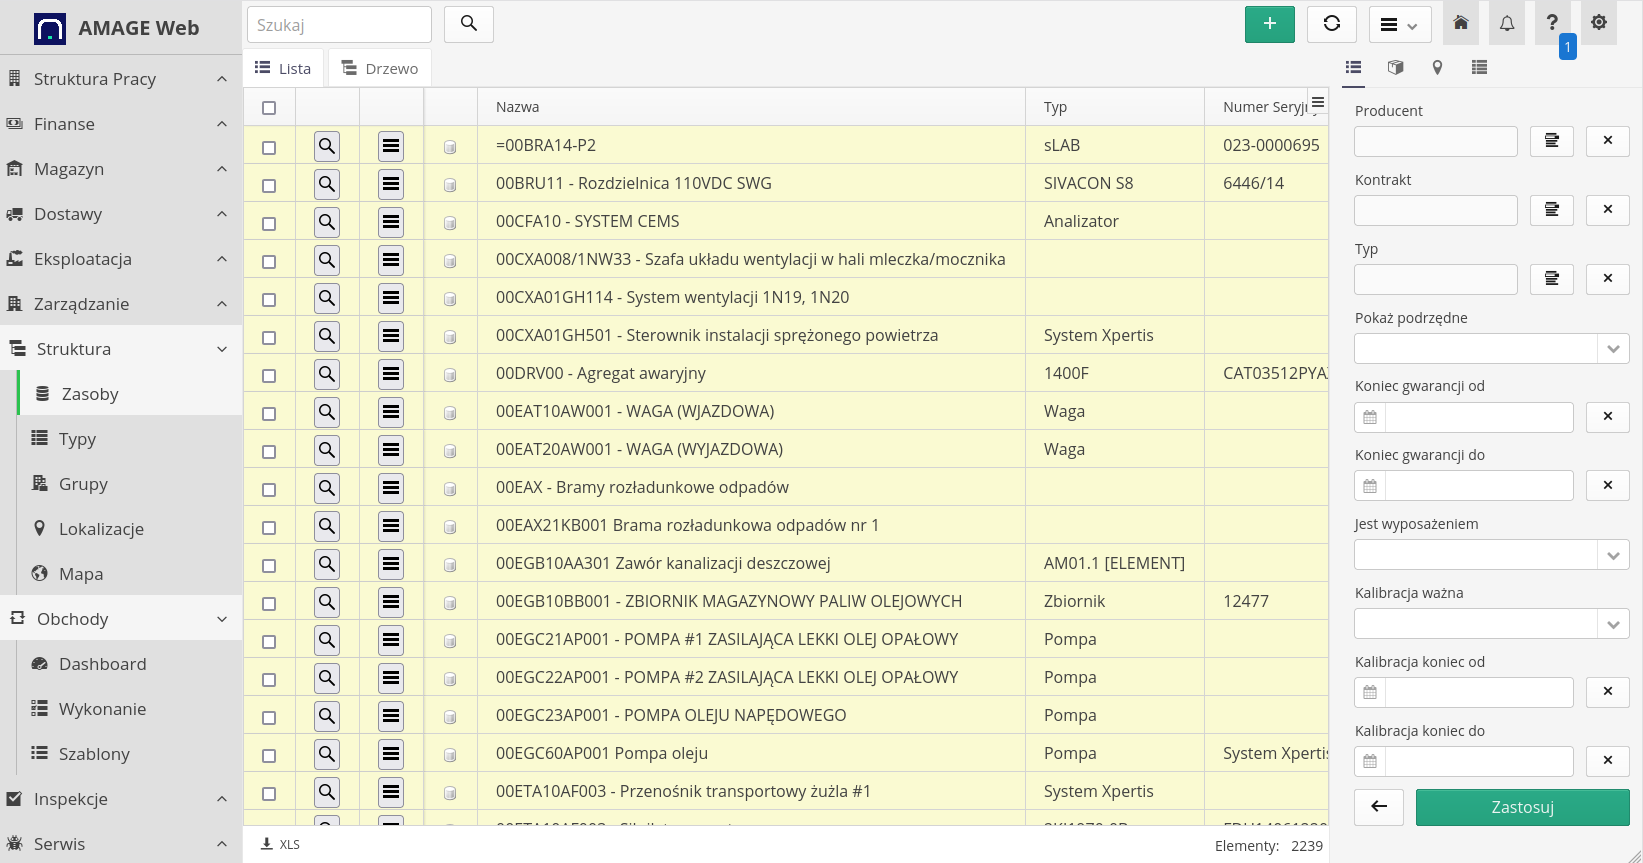
The list of resources/devices allows you to define or load into the system a list of devices that you want to monitor.
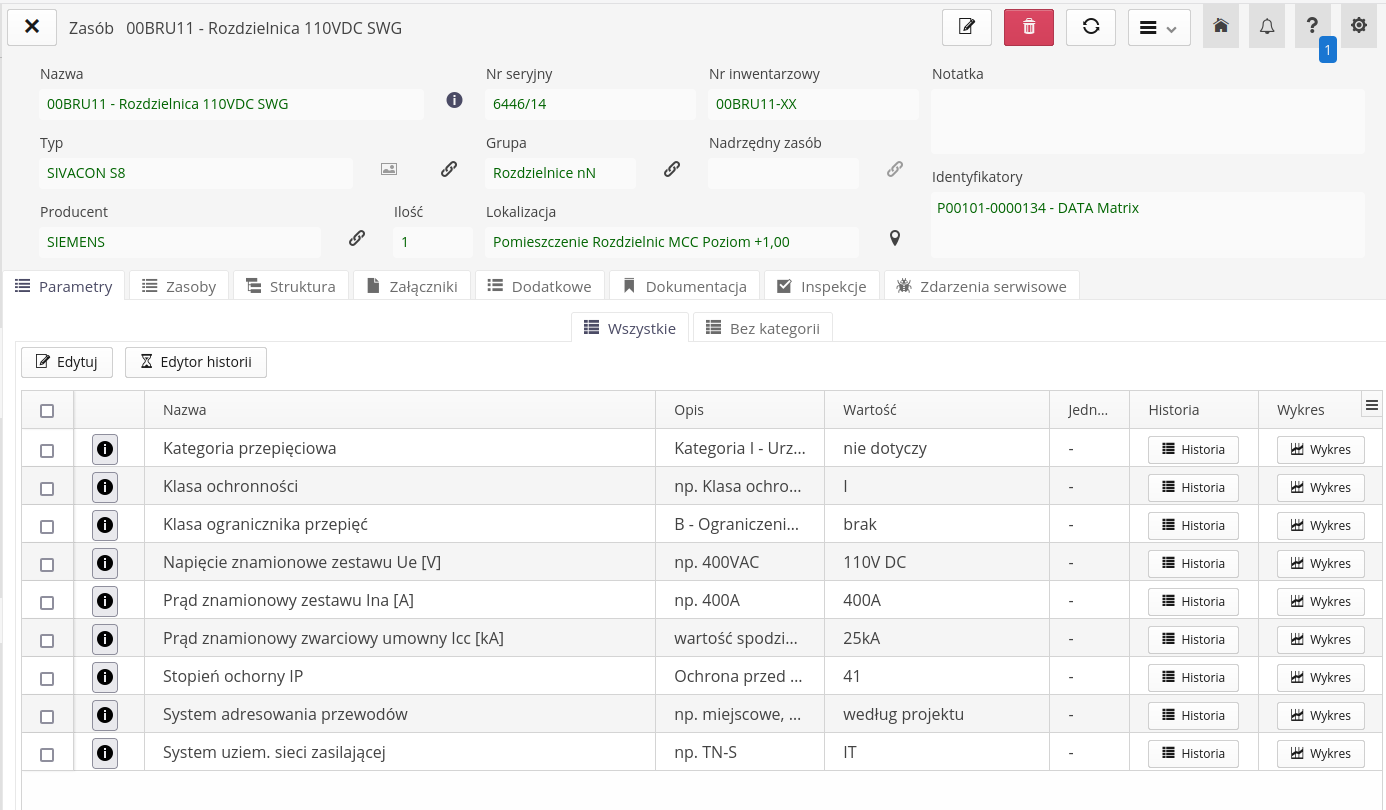
Each resource can have a freely definable list of its parameters. Each of these parameters has its own measurement history.
| To enter data into the resource structure, we can use importers from XLS/CSV sources, which will allow you to define the file structure and then mass import of resources with all parameters. See the import tutorials and main documentation to learn more about the import procedure |
In addition to the device structure, we can also define, for example, a location tree in the system. Here in the example we have a location tree with defined control points that we will use in the round.
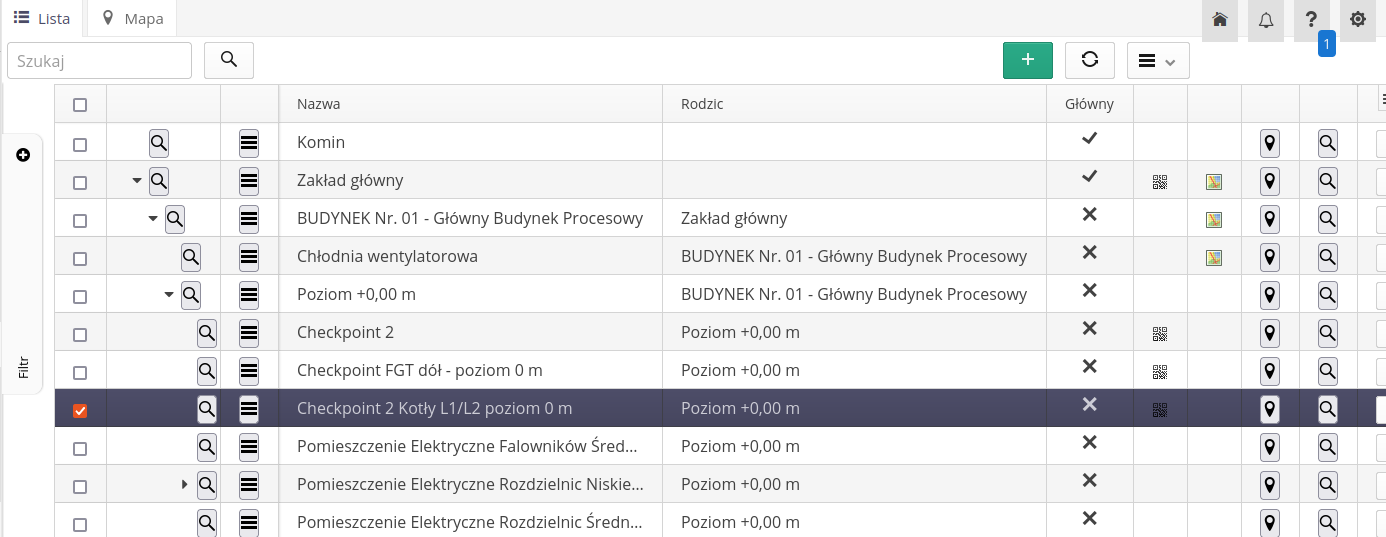
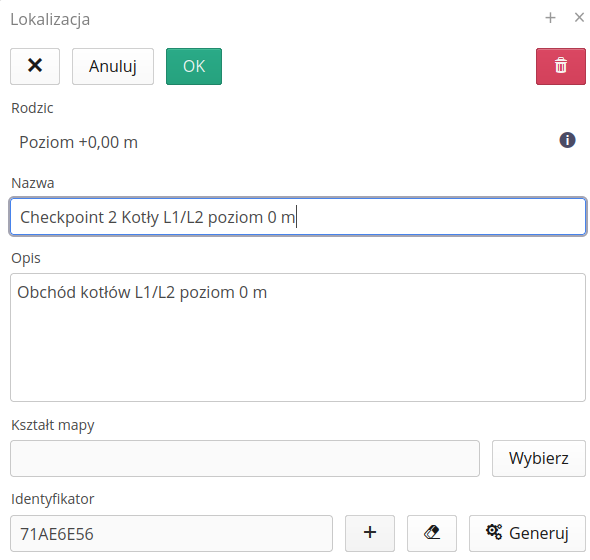
Location points (but also resources) can be identified using RFID tags and 2D codes. An example of a control point with an RFID tag is shown in the screen below.
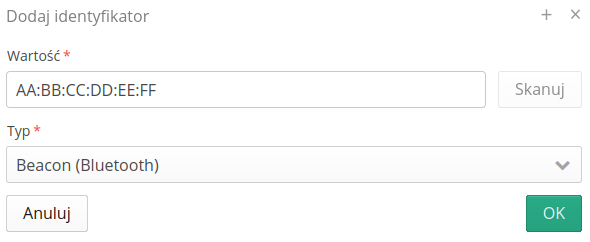
We can also add a bluetooth beacon as a location identifier. In this case, enter its unique identifier, i.e. the MAC number in the form of six pairs of hexadecimal digits (0-9/A-F). An example of adding such an identifier below.
After adding these elements, i.e. resources and locations, we can go to the main section, which will allow us to define the round path and its schedule.
Definition of inspection round
We manage the inspection rounds from the "Inspection round" section of the system. It contains several elements that allow you to define and view the event.
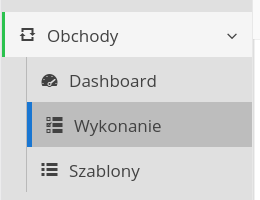
First of all, we need to define the round path itself, i.e. specify what data we are interested in to be collected during the round. To do this, go to the "Templates" section and create a new inspection round template there.
The inspection round definition contains basic information that will later be used in descriptions/reports. If the system has the work orders module enabled, we can group rounds under a specific work order.
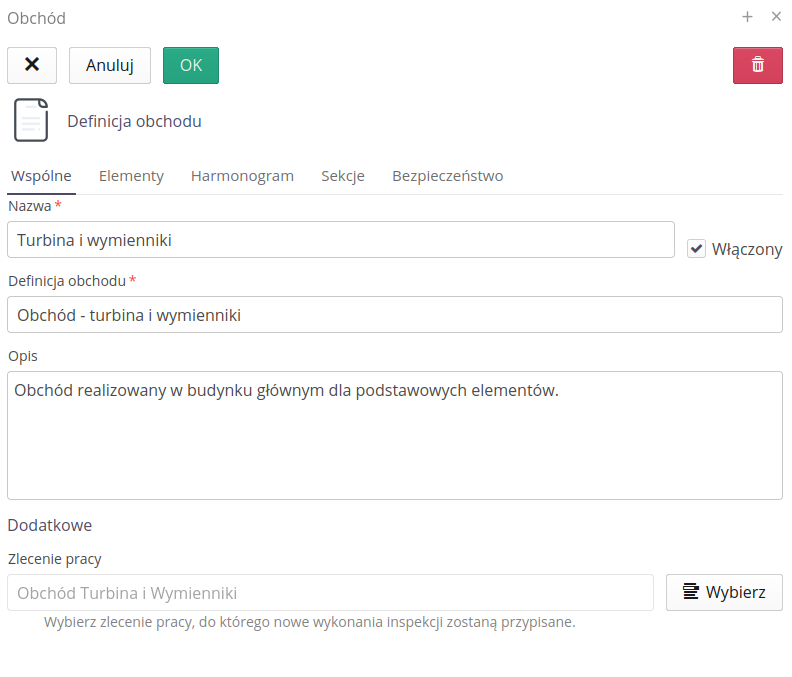
The main element of the inspection round is to define the inspection round path, i.e. the list of points to complete the inspection round. The item list view allows you to select a question/measurement template or create one.
Then filter the list of round items by device/resource or defined path section (see below).
The item list contains all the tasks in the specified order. Items can be added, reordered, edited or deleted.
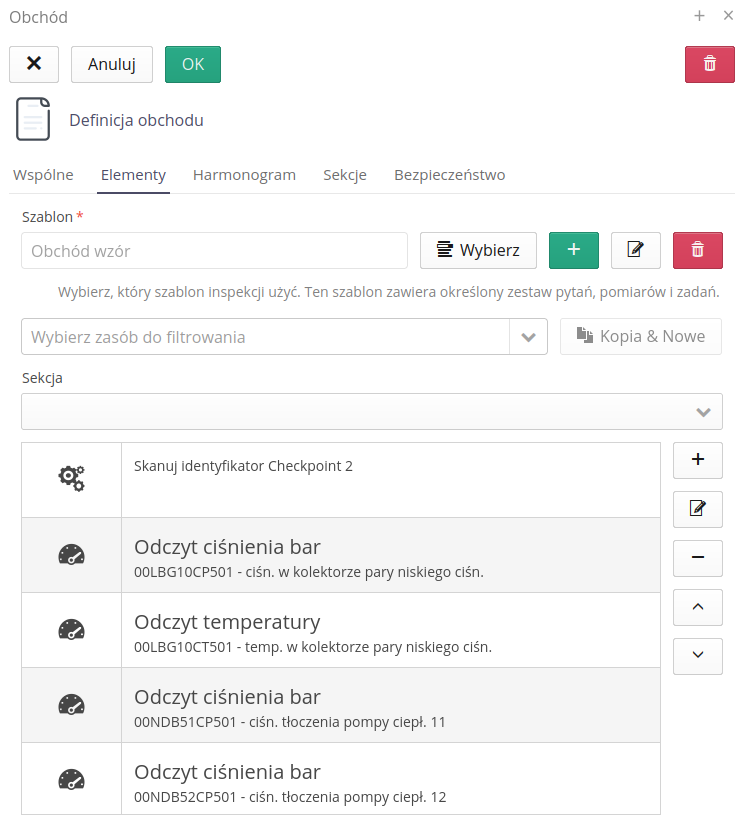
| The measurement question template includes a user-defined list of "Temperature Measurement" questions that can be used at any point in the round. Having predefined questions allows you to quickly add new resources and select questions that are usually repetitive instead of adding them every time. |
Inspection round sections allow you to divide the entire inspection round path into ranges. The user can then filter out only those elements of the inspection round that apply to a given section, e.g. "main building", "power supply devices", etc.
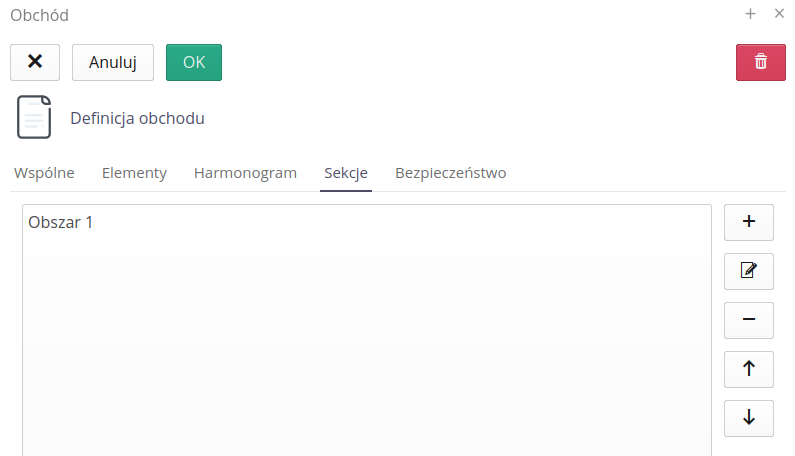
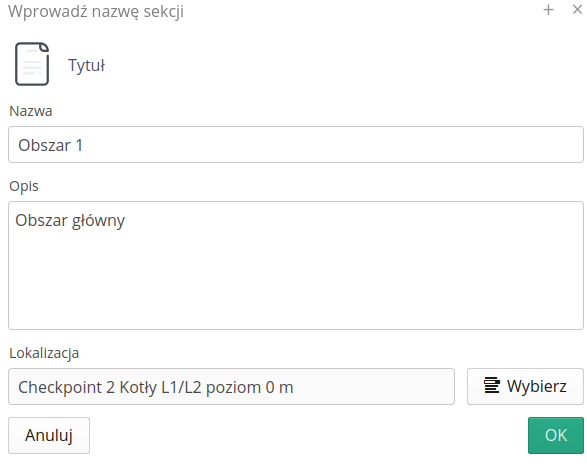
The section definition has its own descriptive data, but what is important, we can also attach a location to the section. If we include here a location that has its RFID/Bluetooth Beacon tag, then the system will be able to automatically filter (select) a given section based on the presence of a given identifier in range.
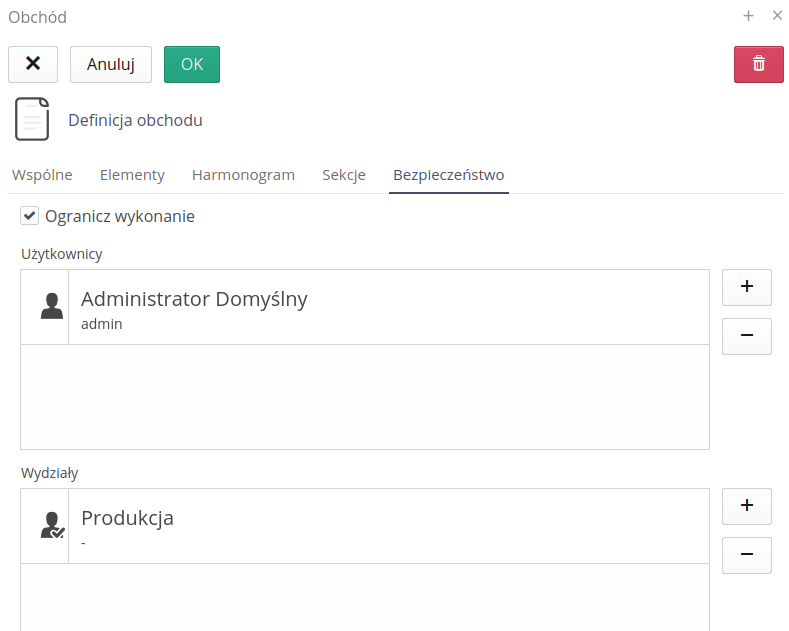
The last tab is the security tab. With its help, we can limit the performance of a given inspection round to a list of people or to a group of people assigned to a specific organizational department in the company.
Trade path element
We define each element of the trade with a few pieces of information. First, we indicate the type of activity we want to perform - whether it is a question, a measurement or a task. These steps are described below. Then, we indicate what this action concerns - is it a resource, e.g. a device, or does it concern a location.
For example - for a device we may want to save a measurement, e.g. temperature, we may also want to have information whether a given device works without vibrations - this is the question. We may also want an employee to scan an RFID tag that is mounted on a wall in a specific location. Then it is a task of scanning an identifier that is assigned to a location.
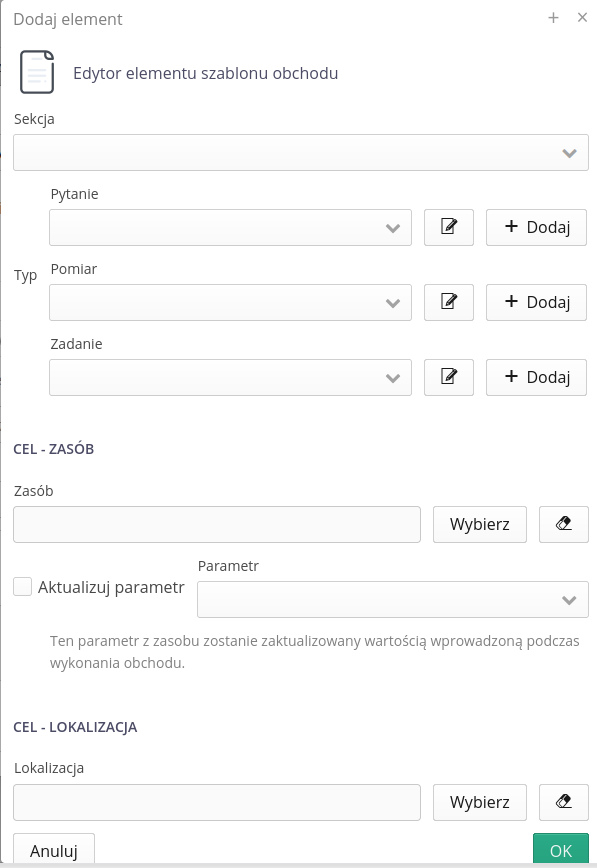
If we select a resource/device, then additionally, after performing this action (question, measurement), we can save its result to the constant parameter of this device. Then, in addition to saving this information in the inspection round history, we will have this value constantly saved in the resource parameters and quickly available there.
Questions
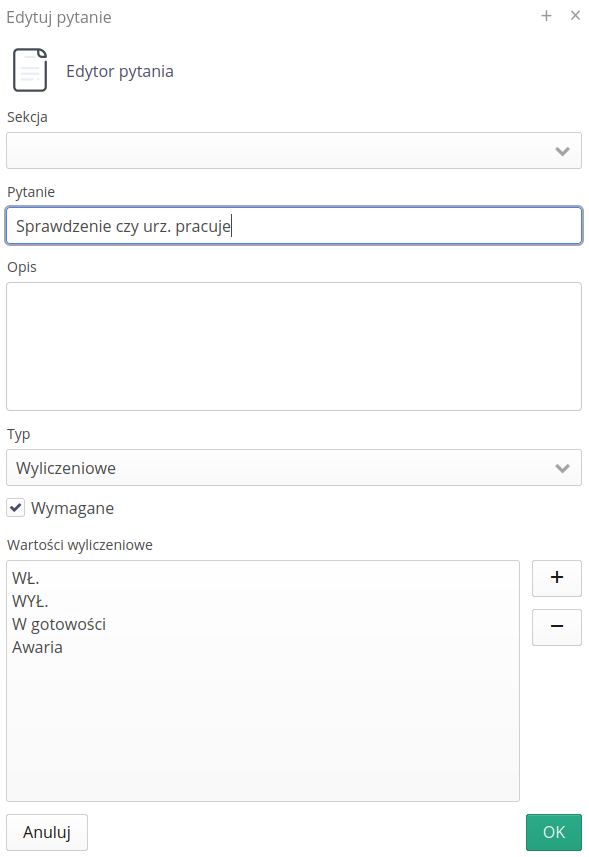
The question allows you to define the content, type (yes/no or a list of answers). Marking a question as required will force the employee to choose the answer to this question.
Measurements
Measurement allows you to measure some physical unit.
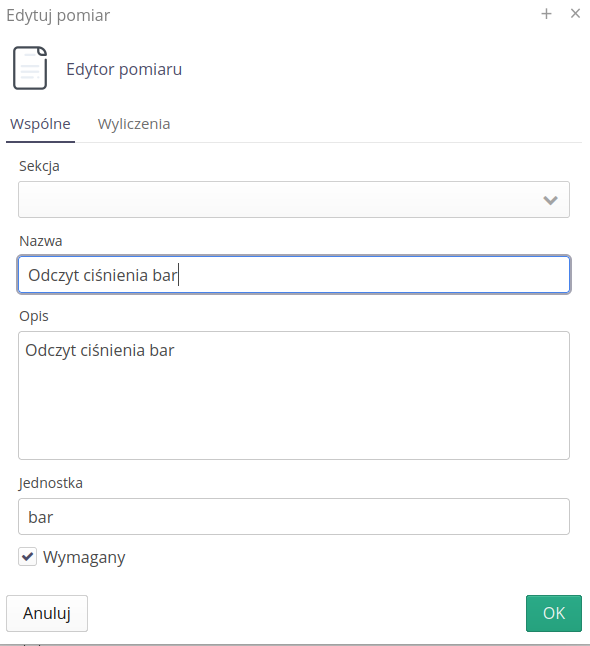
In addition, the measurement allows you to verify the measurement value while entering it. We can link the check with the parameters of the device, e.g. if the device has the "Max pressure" and "Min pressure" parameters, we can set the check rule so that it checks whether the entered pressure value is between these limit values.
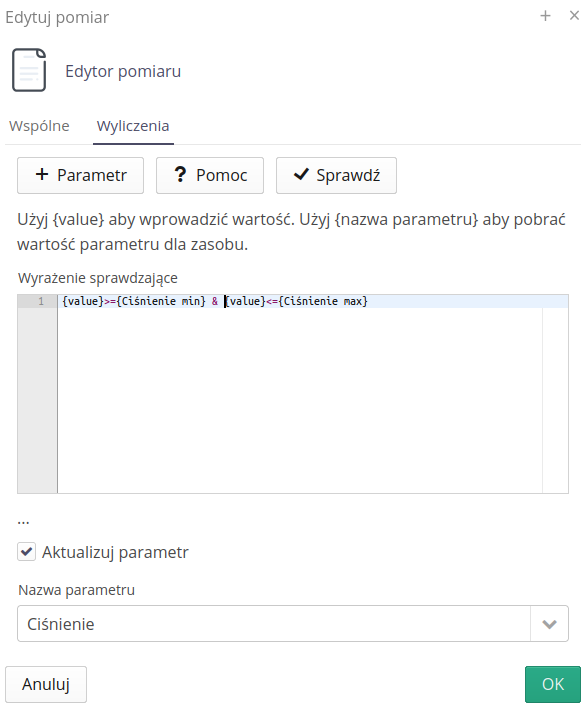
Finally, we can also force a parameter update in the associated device. ATTENTION. The parameter must exist in the resource for this value to be saved.
Tasks
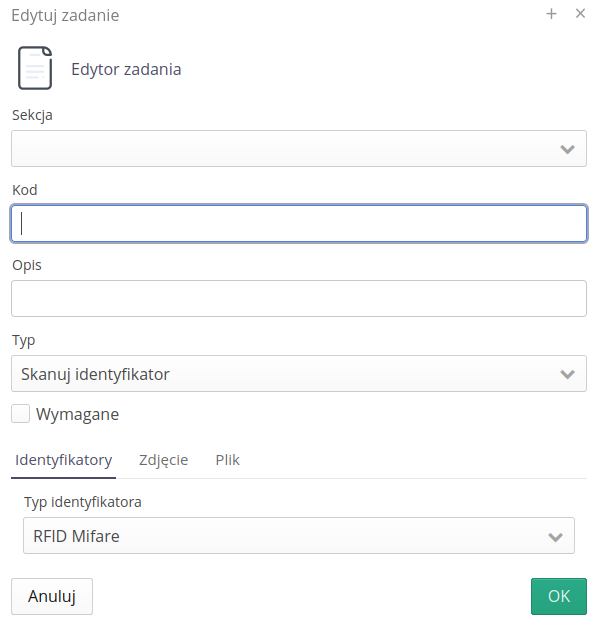
A task is an additional activity that can be performed during the round. Available task types:
-
Taking a photo - take X photos as described
-
ID scan - force scanning ID, e.g. RFID. This will force the employee to scan the RFID tag mounted, for example, in the control cabinet of the device, i.e. he will have to open it
-
File upload - upload X number of files, e.g. read device configuration/controller configuration
Trade execution schedule
The last element of the definition of the inspection round is to define the execution schedule. With its help, we determine when a given round should be performed. We can specify the time range and days in which the inspection round should be performed.
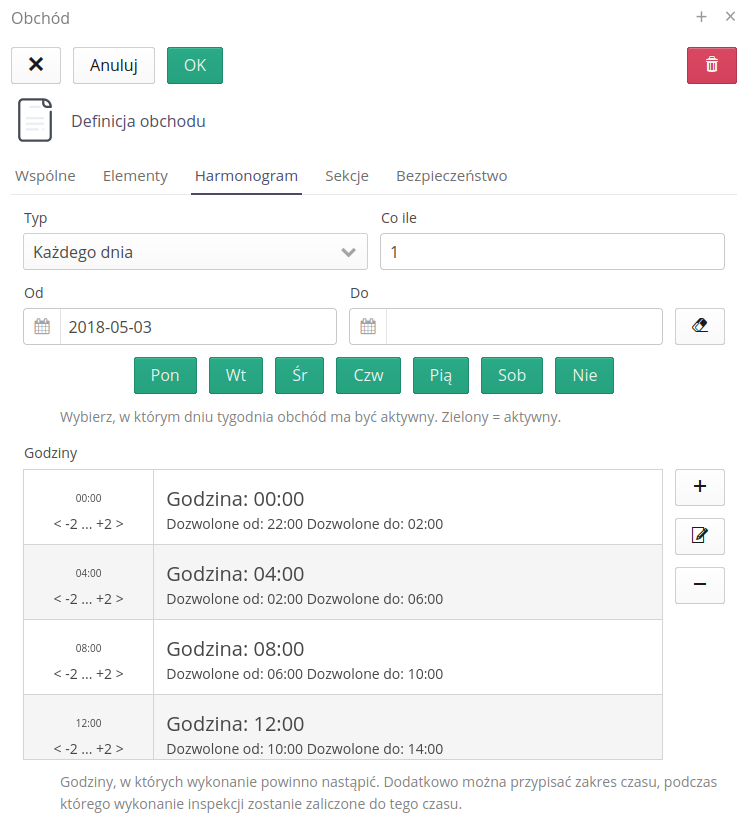
To the performance list, we also define a list of hours in a day when the round should be performed. We define it to take the hour and the range of acceptance in relation to this hour, i.e. we can specify that the round should be performed at 4 o’clock but we give +/- 2 hours for the execution. So the employee can do it from 3 to 5 and then the round will still be marked as correctly performed at the given time.
| We already have everything defined. We can proceed to the trade. |
Inspection round execution
We make rounds using mobile devices. We can define a start panel that will allow quick access to system sections.
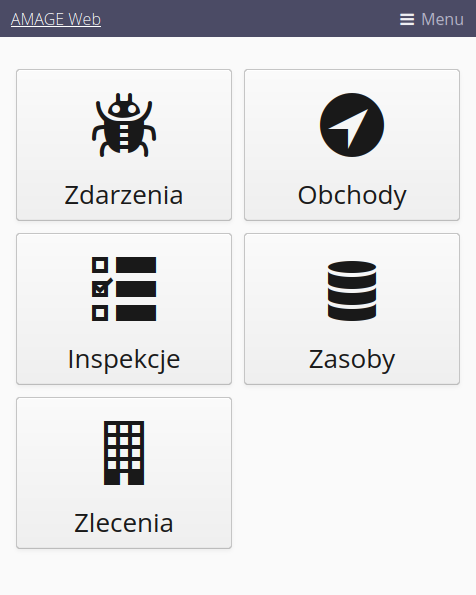
| How to configure the start panel refer to the application user manual in the system configuration section. |
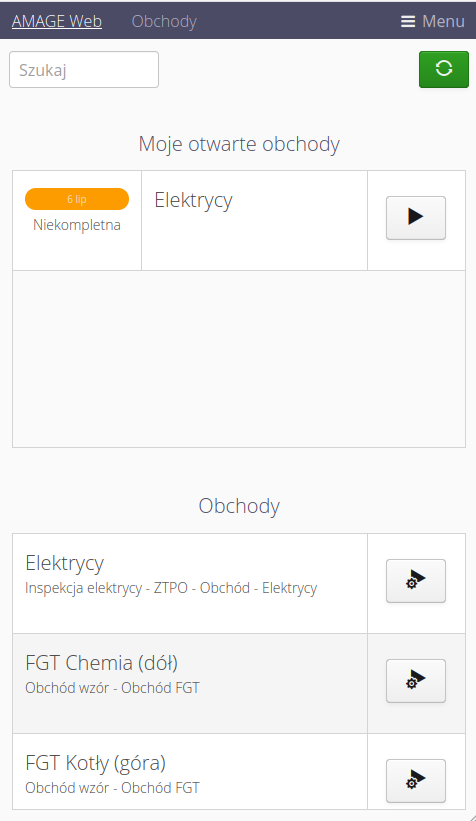
After selecting the inspection round (from the start panel or from the menu), we go to the list of inspection rounds. In the upper part we have our open inspection rounds and in the lower part we have inspection rounds templates available for us. In the system, we can have only one round open for a given employee. To start a new one of this type, the employee must first close the previous one.
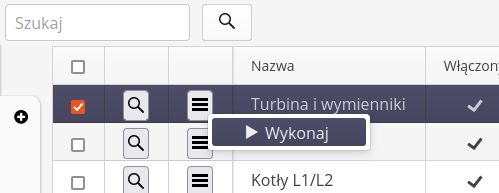
Inspection rounds can also be performed using the desktop view and directly from its list of inspection round templates.
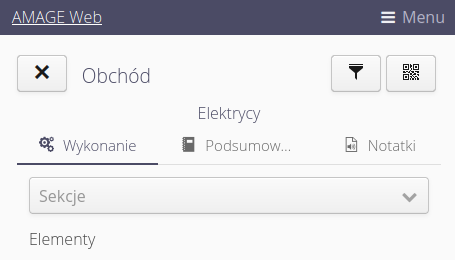
By selecting the inspection round from the list of unfinished (active) or from the template, we proceed to the inspection round. A round list and additional actions that can be performed appear.
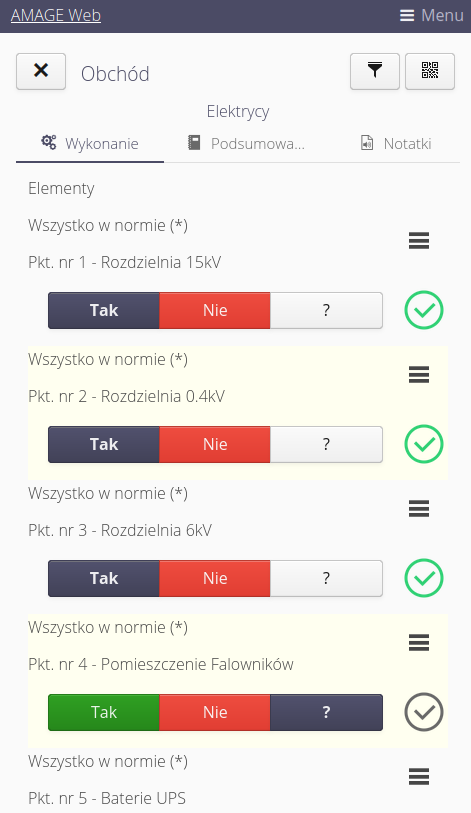
Using additional filters (filter button) we can filter the view - hide already completed tasks, filter by section - manually or automatically using the proximity of available bluetooth beacons.
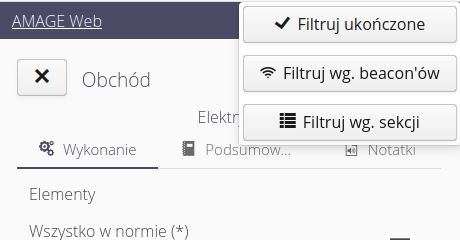
If we choose to filter by section, a section selector will automatically appear, with which we can manually limit the visible data.
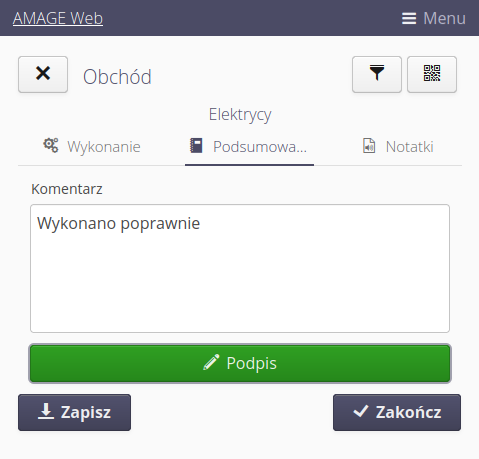
After completing the inspection round, we can go to the summary tab. Here you can add a comment and your electronic signature. This data will be included in the summary of the event report and in the overview of the event in the main view of the application.
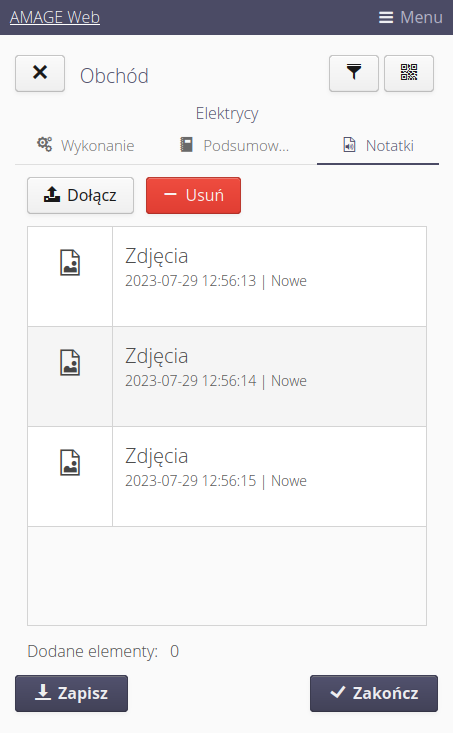
We can also attach photos/other attachments during the inspection round. They will be visible in the history of the inspection round execution.
| The application periodically saves the status of the inspection round. It saves the current state every 30 seconds. This allows you to recover all data in the event of damage to the mobile device, power failure, etc. |
Round result
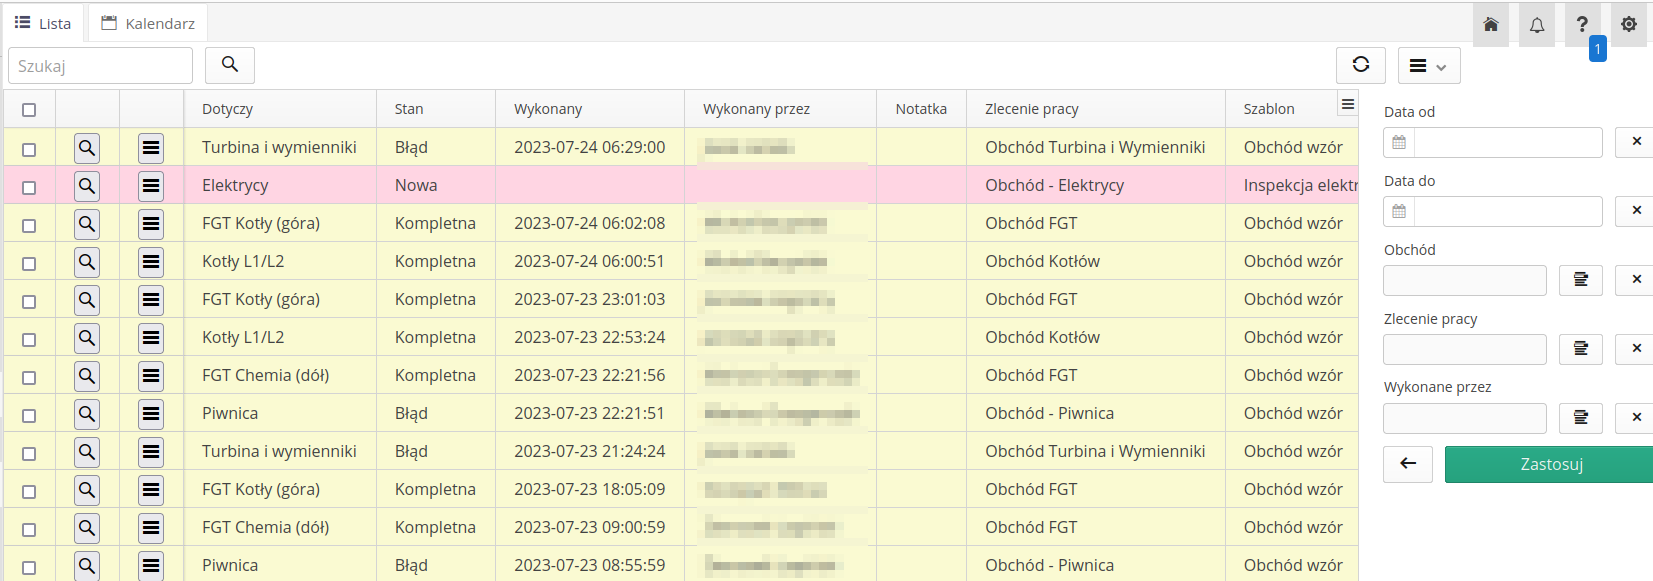
The result of the round can be viewed using the round list.
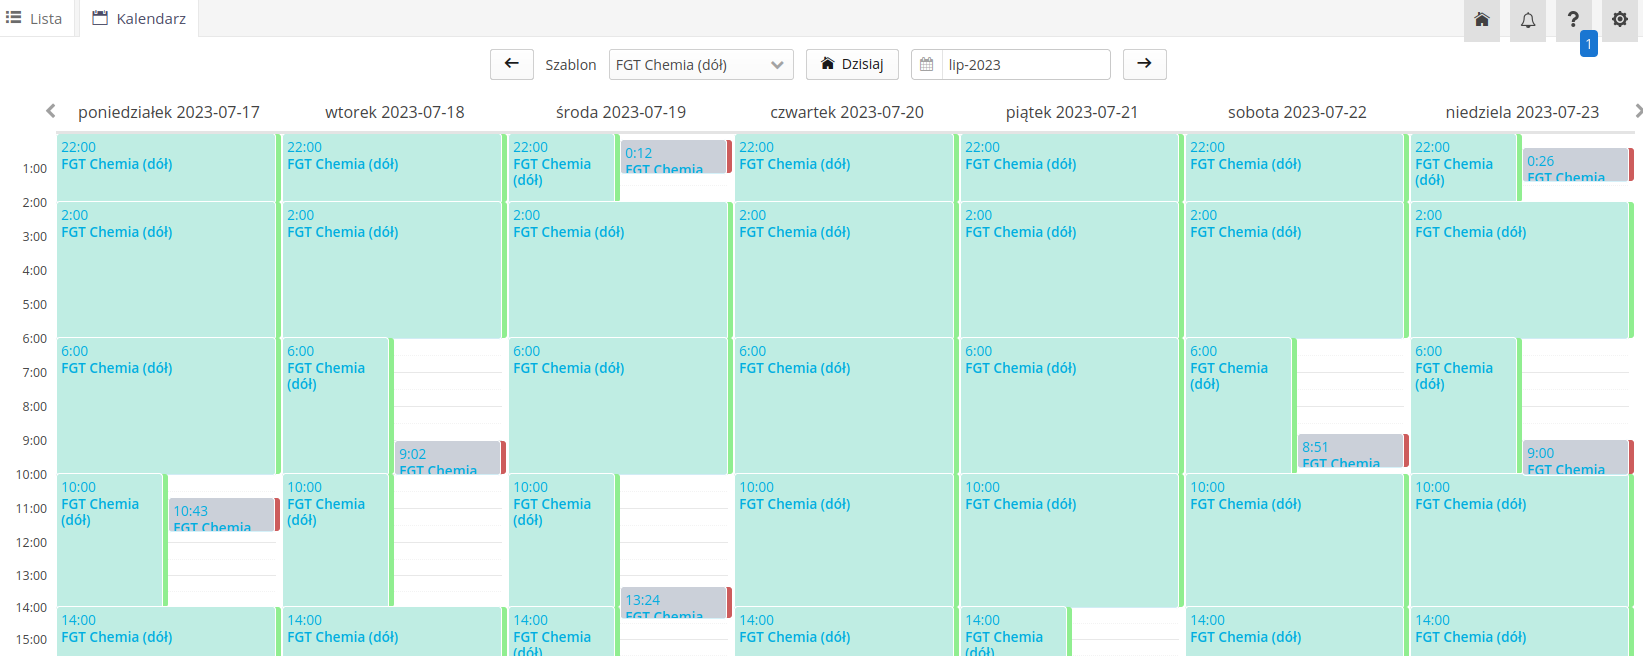
We can also see the plan/execution of the inspection round visually using the calendar view.
The details of the inspection round show the answers to all elements of the inspection round. From this place, we can go to a given resource and see aggregate analytics.
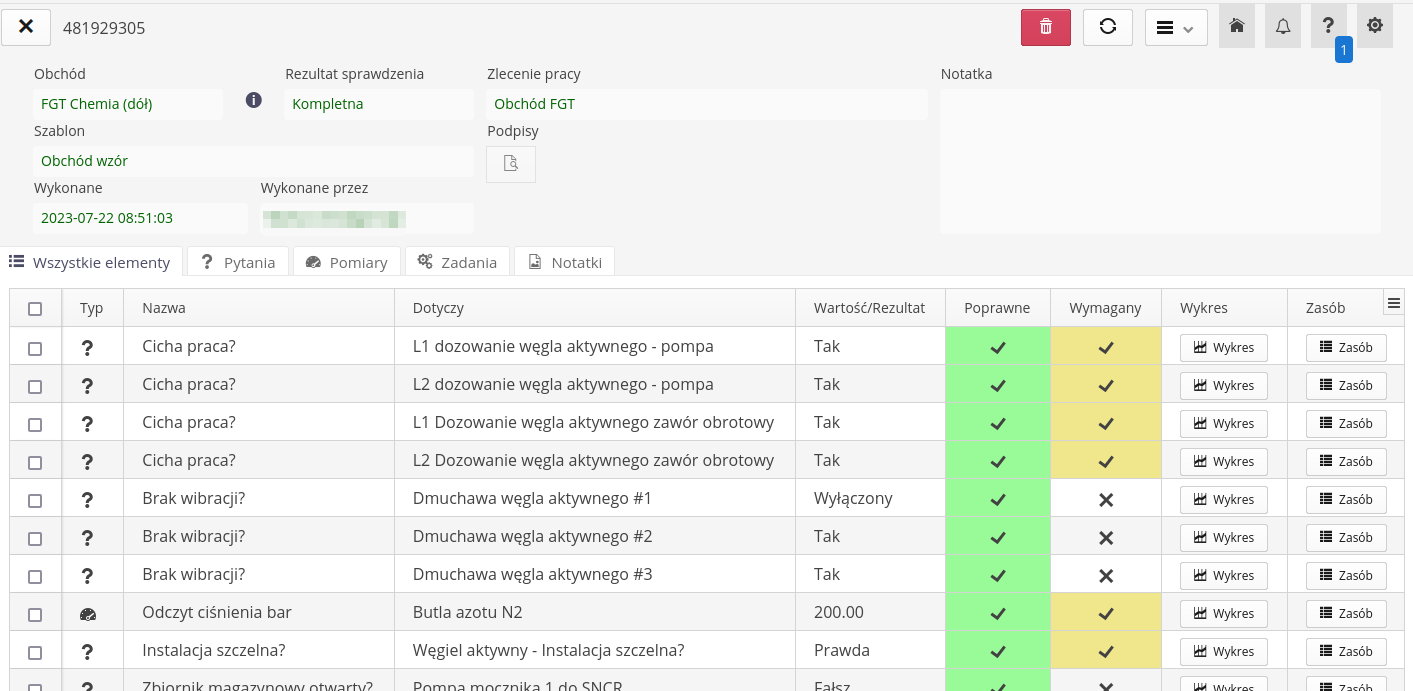
We can also view detailed items broken down into questions/measurements and tasks.

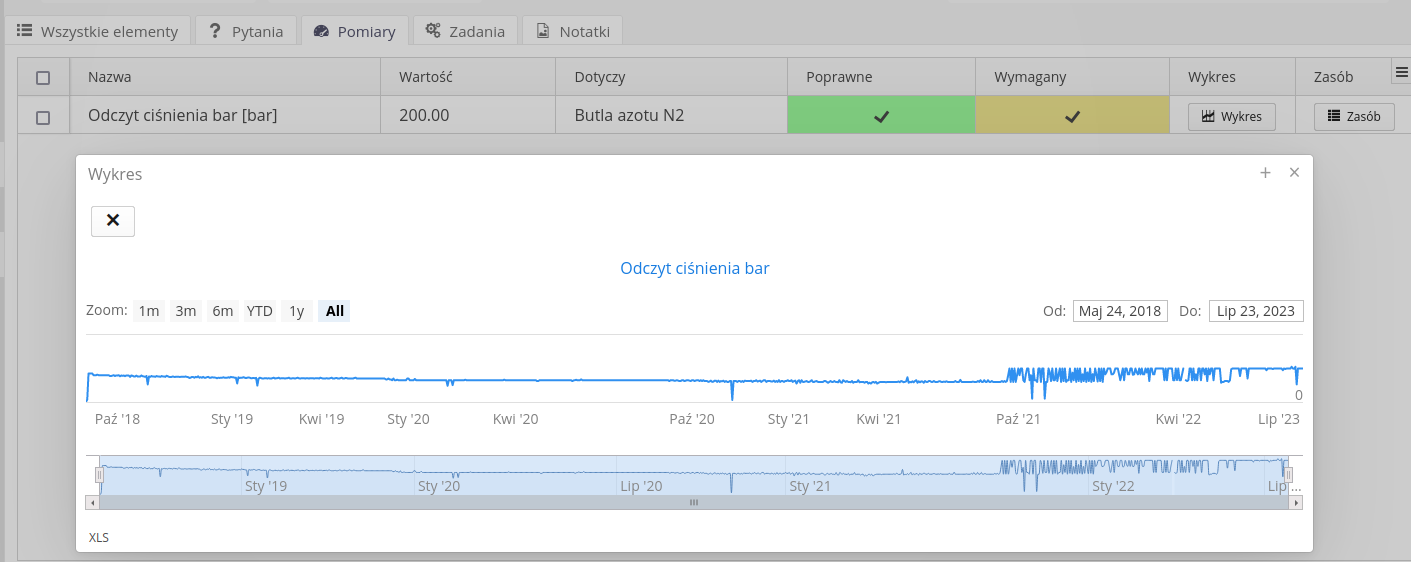
For measurements, we can display all measurements made during all rounds with this measurement using a time chart.
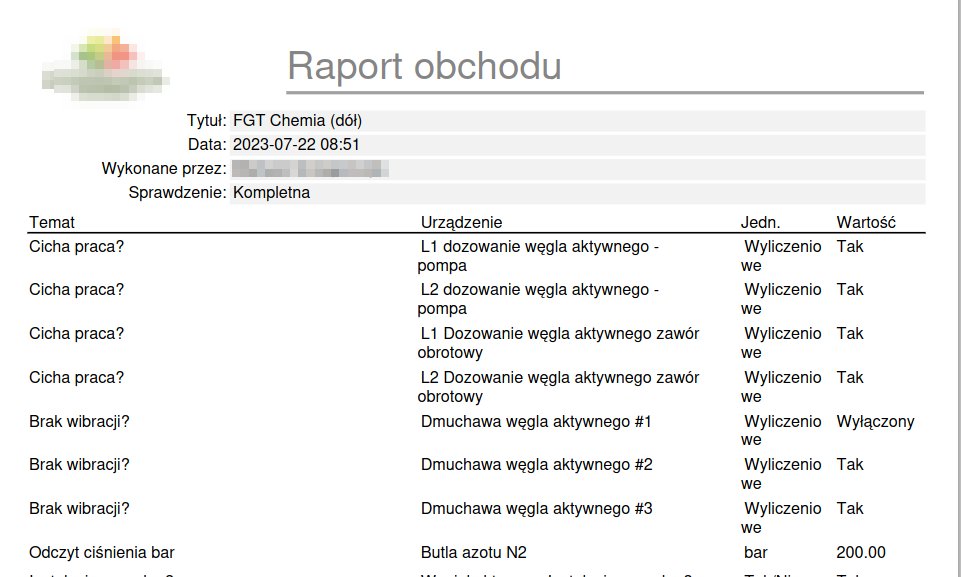
Inspection round reports
Reports are available that generate aggregate information on a single round, a group of rounds (e.g. daily) or comparative information.
| It is possible to automatically send reports to selected email addresses, e.g. a round comparison report. Refer to other tutorials or automation documentation to see how. |
Inspection round dashboard
A summary dashboard is also available, which visually shows planned inspection rounds, dates and already completed inspection rounds.
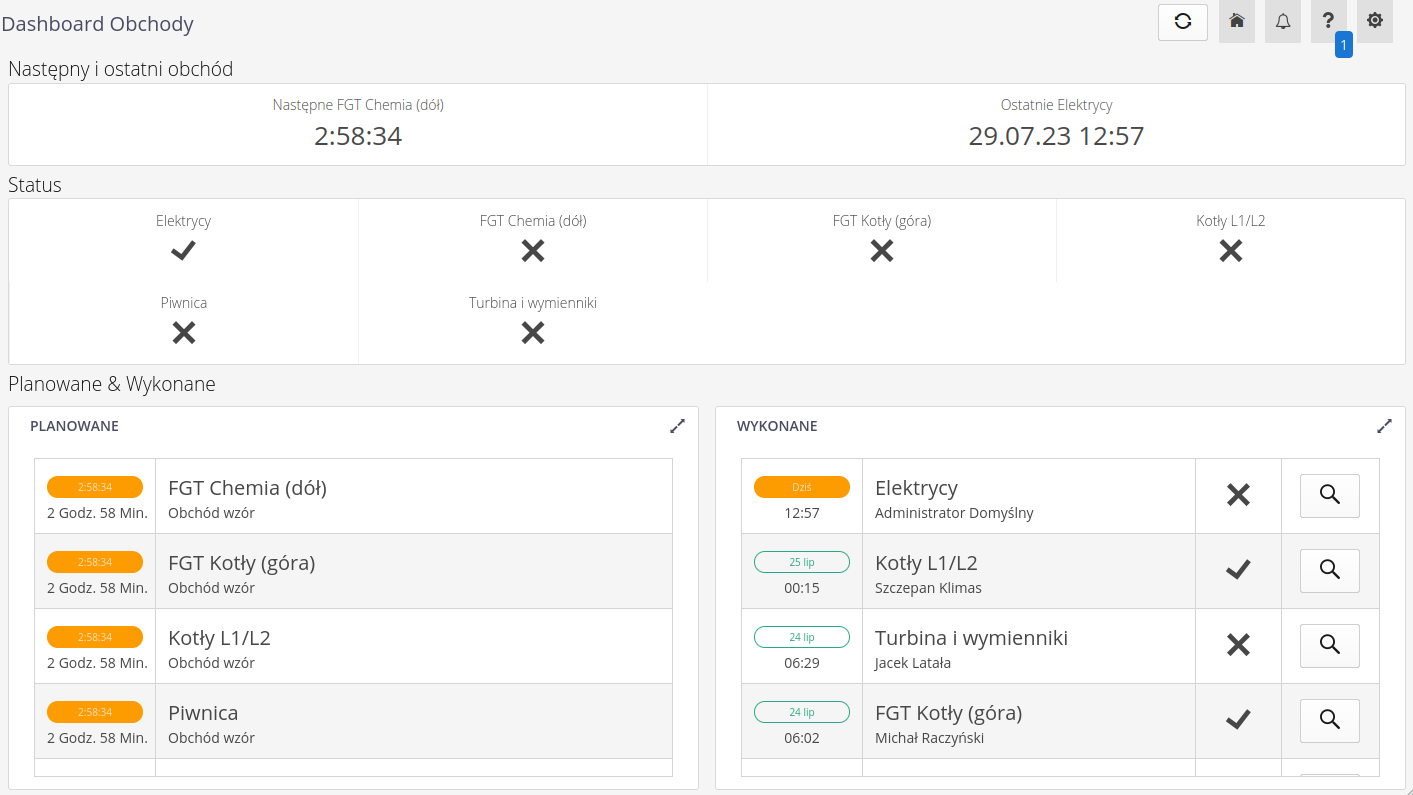
| The dashboard can also be accessed on synoptic panels (screens on the wall or constantly available monitors). See how to do it with other tutorials. |
Service events
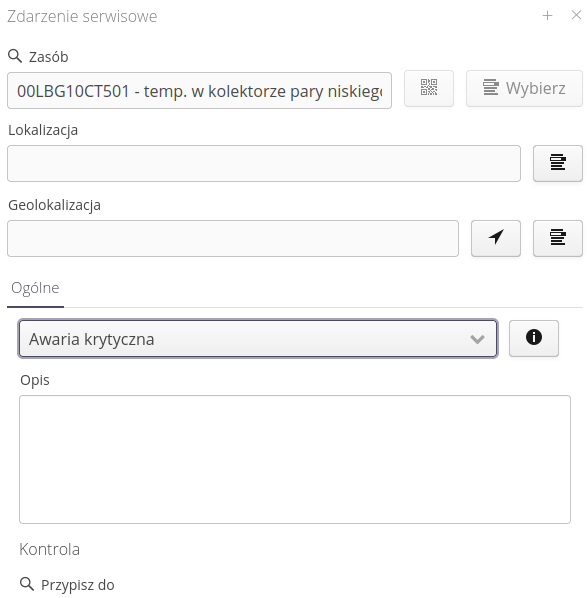
If the instance has an integrated service module, then during the round in the context menu of each item there is a button that allows you to automatically create a service request related to a given device/location.

The editor allows you to save all service information. Refer to the service module tutorials and documentation for more information.
Summary
This tutorial showed an overview of all elements of the definition and implementation of the inspection round. To learn more about the individual components, see other tutorials or refer to the main user manuals.
| This Howto is based on system version 1.21.1.0 (06.2023) and presents features that may not be available on your system. Ask AMAGE to provide this functionality. |
| Due to ongoing development of the system, some screens or configuration files may look slightly different, but will still retain the full functionality described here. This does not affect the core functionality described in this document. |