Configuration of label printing and printing from the system
Introduction
The document demonstrates the system’s capabilities in the area of label printing and design using built-in print customization mechanisms.
Print directly from the app
The system allows you to assign identifiers (barcodes, 2D, RFID identifiers) for a number of objects in the system. These facilities include: resources, employees, types of elements, locations, etc. This allows you to store information about a given object in the system and then use the identifier to quickly identify a given object using mobile devices, e.g. a telephone. If a given object (e.g. a device) has this identifier, reporting a service event will be much faster because you only need to scan the code instead of searching for the device on the list.
In the case of barcodes and 2D codes (QRCode, DataMatrix), the system allows the generation and printing of predefined label templates on a label printer. To do this, we use built-in functions that allow us to define additional parameters and data printed on these labels.
| The system also allows you to prepare any format of labels designed using free software. The method of their design and integration into the system is described in the "How to Do" document on designing reports and labels. |
Appearance designer for predefined labels
In objects that allow you to store identifiers, there are actions that allow you to print labels. They are available in the context menu in lists or in the details of a given object.
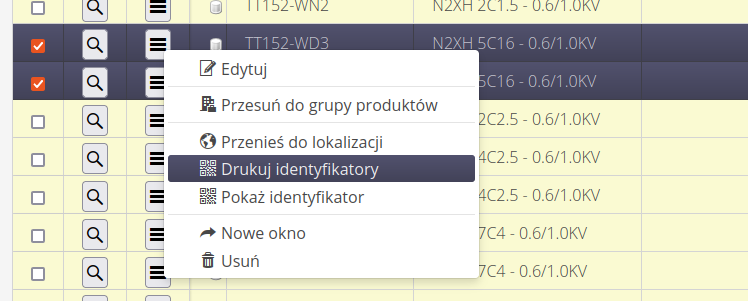
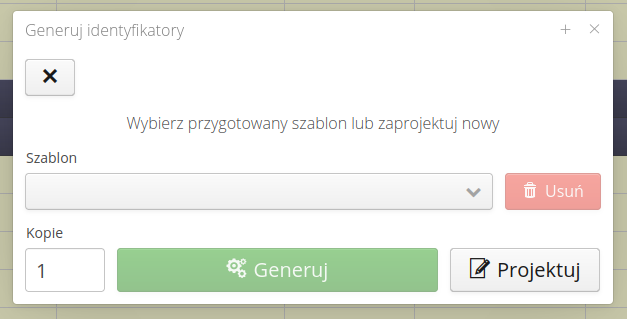
After activating this action, the quick print window is displayed. If we already have saved print configurations (described in later sections of this document), we can use this interface to quickly select a given configuration and generate labels. The Template selector and the Generate button are used for this purpose, which is activated when a saved label configuration template is selected.
Here we can also delete the existing label template configuration.
If there is no template or you want to create a new print configuration, select →" design". After selecting it, go to the template configuration designer.
In the designer, we can choose a predefined label template. They correspond to the most common label formats, whether printed on paper/plastic/PVC labels or specialized labels, e.g. PPQ cable labels. Using the selector, we select an available template or select 'Your own template', which allows you to upload a template designed in the label designer in the next section (see the note above and the 'How to' documentation). For our own label design, we need to determine how many elements a given label design has in one row. The system will then automatically provide subsequent label numbers in appropriate groups for printing.
In the next element, we can specify the number of copies of a given label or determine what parameter (in the case of resources) the print quantity will be taken from. This allows, for example, to make the number of labels dependent on the parameter of a given resource. In the case of cables, we can have a parameter that will store the number of required labels for the length of a given cable along with additional ones, e.g. This data comes from the design system and is imported into the AMAGE system. Then, through this mechanism, we can automatically print the appropriate number of labels, different for each resource.
Then we can define up to three predefined places to place additional texts. Depending on the label design (size), we can place up to three places on it for any text. Using these fields, we can configure the text that will appear in them. Using the (?) button you can display the available fields (depending on the object you intend to print). We can combine these fields and enter both the serial number and, for example, the inventory number of the resource in one line.
Additional options allow you to automatically add missing identifiers to given objects. This is used when, when printing a group of resources, some of them do not have identifiers assigned. To avoid the need to independently navigate to these resources and assign them identifiers, the system automatically tags such resources and generates labels with these new codes.
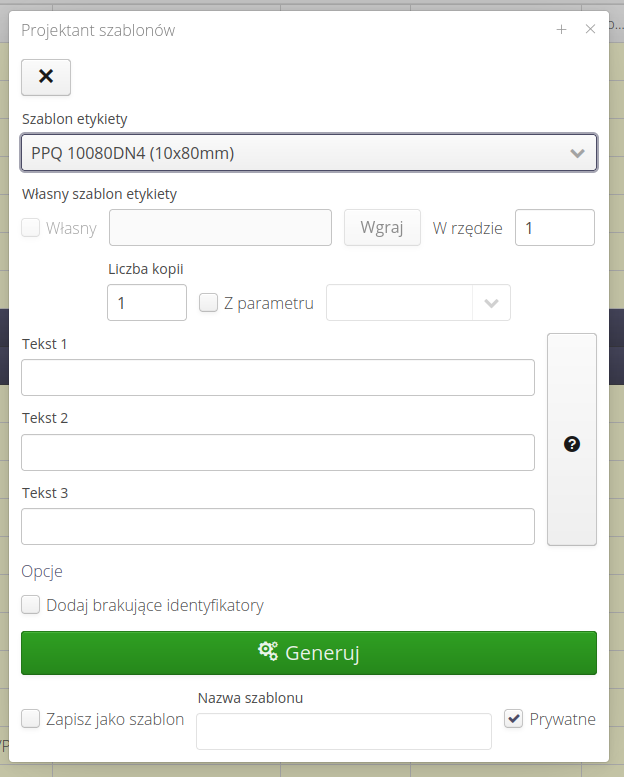
The user can immediately generate labels using the Generate button, but also save the template in the above configuration under any name. Marking a configuration as `private' will hide it from other users.
In the above-mentioned printouts, the system relies on a given object having a common type of identifier to be printed. This type allows maintaining the unique identification of objects globally within the AMAGE system (even between enterprises and system instances). The code consists of an identifier of the type e.g. P → resource. Then, the client and client instance numbers are saved, followed by a unique resource number generated automatically in the system. Example numbering is P02123-0000001. Automatic code generation and printing is based on these identifiers, because a given object can usually have any number of any codes and types (e.g. barcode, QR code and RFID tag at the same time).
|
Example
Example of generating labels for wiring elements:
-
labels with such an A/B code are often generated for cables - the idea is to identify the "beginning" and "end". It is not always clear to everyone (source/target), so you can immediately see on the label which end of the cable we currently have in view. Therefore, two label configurations will be used for printing - one for cable end A, the other for B.
-
Additional fields can include: the KKS of the cable, type of cable, any parameter (e.g., KKS identifiers of the source and target), and you can add the current date/day/month. Then you can store information about the date of laying (month/year), or you can store any other parameter that you import into the system for a particular cable. You can also store static text "company name" etc.
| Can drawings/logos be placed on labels - in general, you can (if this is the case), but you need to remember about the printer’s resolution and color (black or no color of the printed foil), so remember that halftones and transitions in the image will be poorly reproduced. You need to have a logo prepared for the black/white format and for low print resolution (the arcs come out "stepped"). This is due to the limitations of thermal transfer printers and printing technology. |
-
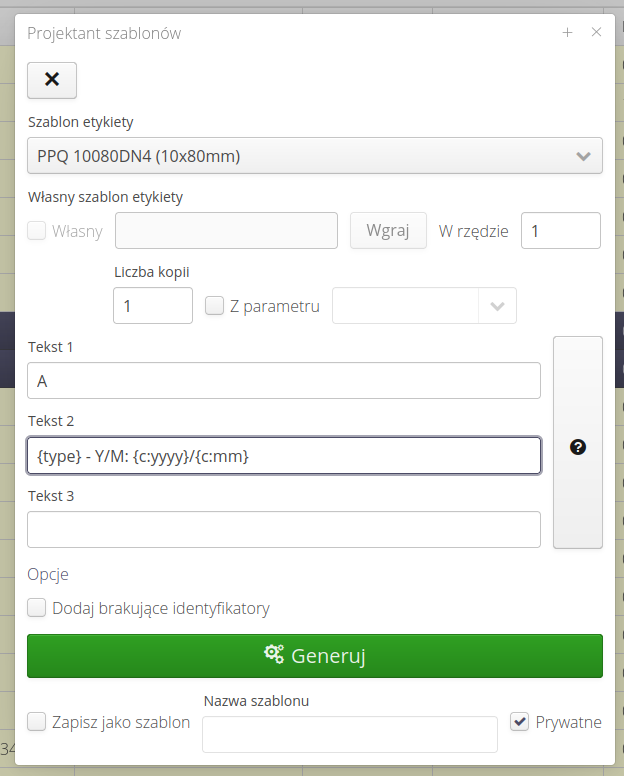
configuration example. PPQ10 labels (10 mm wide), in the second line first the type and then the text "Y/M" and then the current year/month
-
the result of generating such labels

Additional information
There are articles/tutorials on labels on the Help Portal (in addition to the main user manual on this topic).

Final remarks
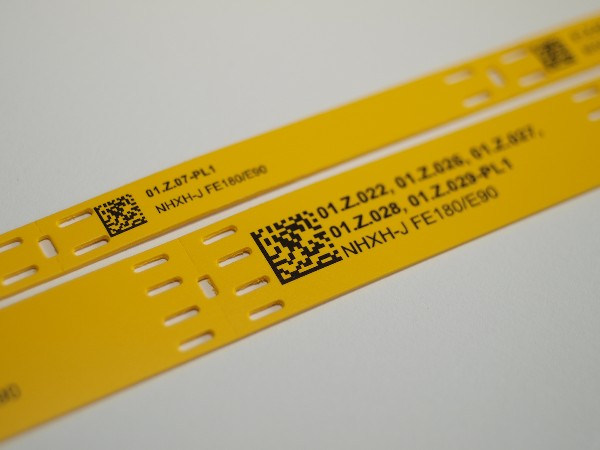
Photos - examples of cable labels and device labels printed using the printing method directly from the system. Some of them are labels for cables. Mainly PPQ+ from Partex.
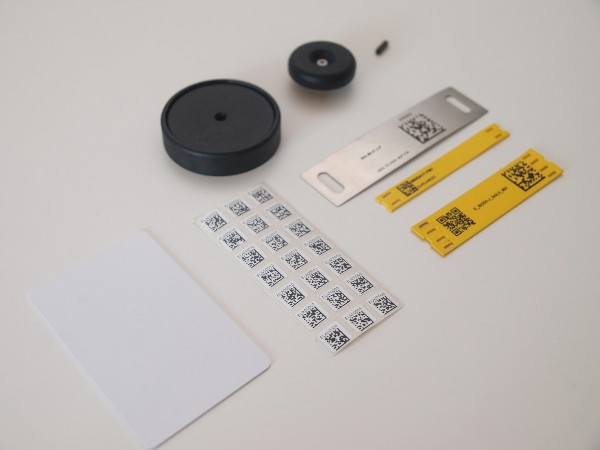
A photo of various labels from which the system used identification (some are RFID codes, others are QR/Barcode codes, etc.)
| The Howto is based on system version 1.17.0.2 (03.2022) and presents features that may not be available in your system. Ask AMAGE about making this functionality available. |
| Due to ongoing development of the system, some screens or configuration files may look slightly different, but will still retain the full functionality described here. This does not affect the core functionality described in this document. |