AMAGE Mobile CE Lite
Launching the application
Installation and updates
How to install the application and successive updates of the application to the latest versions are described in the document AMAGE - Installation Instructions.
Preconfiguration
When you turn on the application by selecting the icon from the start menu or the icon on the desktop, the application is launched.
After the initial initialization, reading the database, the application login window is presented to the user.
If you have a list of users and a previous login, the last user is remembered and is selected when starting the application. During the first launch of the application, the database is empty and there is no possibility to log into the application. To make this possible, the first data synchronization with the AMAGE system must be performed to retrieve the login data.
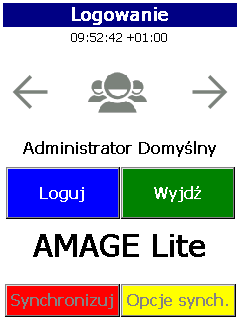
To change the settings, select the Sync Options button, which will redirect you to the AMAGE Sync application access data definition location. Information on how to configure these options can be found in later sections of the manual.
Using the application
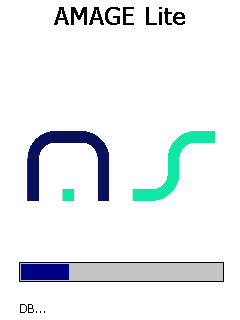
When the application is turned on, the user is presented with an application loading window showing the version number and the progress of loading the various components. During initialization, functional modules are loaded, the database is read, and all the necessary functions needed for the application to work.
The user is then presented with a login window, where the following options are available:
-
User selection - by selecting the right/left arrows we can change the active user from the list of available users in the application.
-
Log in - log in to the application when selected goes to log in to the application for the selected user
-
Cancel - exit the application.
-
Synchronize - synchronization. This option is active only in the case of the first startup, when there is no data in the internal database and synchronization is necessary.
-
Sync options - entry to synchronization options. Option also available only if there is no data in the internal database and you need to configure the application.
| Access to operations is also available directly from the keyboard. The colors of the keys on the screen correspond to the colors of the function keys on CASIO production devices (e.g., DT-X200). |
Logging into the application
After selecting a user and confirming the selection via the "Login" button, the user is presented with a window for entering the user’s PIN. This PIN is defined in the AMAGE application and sent to devices for local authorization of users.
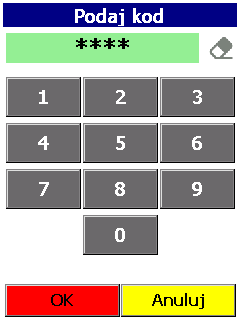
If the PIN is entered incorrectly, the user will be redirected back to the login window. After entering the correct PIN, the user will be redirected to the application’s main menu window
Main menu
The main menu is divided horizontally into individual entries. You can navigate through the entries using the touchpad, the up-down, right-left navigation keys, or by selecting the numeric abbreviation contained in each menu field, such as "(3)". For entries with an arrow pointing to the right, this information shows the availability of a nested menu. This menu can be accessed by selecting the right arrow (return left arrow) or by selecting the arrow on the touch panel.
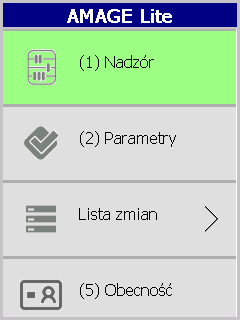
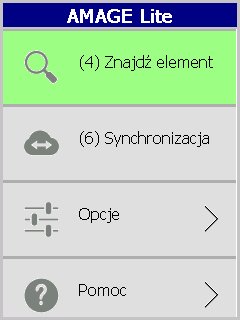
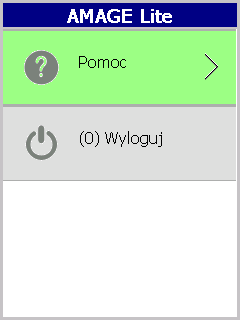
Available menu functions:
-
Supervision - implementation of the functionality of supervision of elements.
-
Parameters - saving new parameter settings for elements.
-
List of changes - view of locally entered data. Nested menu.
-
Supervision changes - list of locally implemented supervision changes.
-
Parameter changes - list of locally implemented parameter changes.
-
Attendance list - a list of locally entered attendance records.
-
-
Presence - attendance registration process
-
Find Item - search for an item by identification code and information about the item found.
-
Synchronization - synchronizing data with the AMAGE server.
-
Options - access to options. Nested menu.
-
Communication - settings for communication options with the AMAGE server.
-
Automatic functions - automation of terminal behavior.
-
Online mode - selection of application mode.
-
Language - application language
-
Visibility - visibility of functions in the main menu.
-
Base Cleanup - clears the local database of unnecessary data.
-
Deletion of database - deletion of local database.
-
-
Help - nested menu.
-
About the program - information about the version/license of the application.
-
-
Logout - logs out of the application to the login window.
Supervision registration
By selecting supervision registration (1) Supervision in the main menu, the user is redirected to the implementation of the supervision function. This function (like any other) consists of screens. You can move between screens using the functions visible at the bottom of the screen. This information is associated with function keys F1-F4 and on some mobile devices with function key colors:
-
F1 - red
-
F2 - blue
-
F3 - green
-
F4 - yellow
In addition, navigation for screens that have a simplified decision (forward/reverse) is also realized using the ENTER (forward) and ESC/CLR (back) keys.
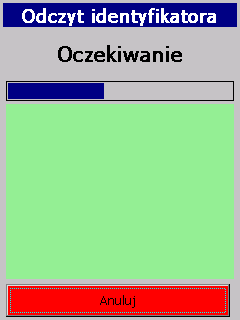
Once the supervision registration is entered, identifier reading is enabled and the application waits for the identifier to be read using the hardware keys responsible for reading the codes. Reading an item that is in the device’s internal memory will take you to the item view screen with supervision options.
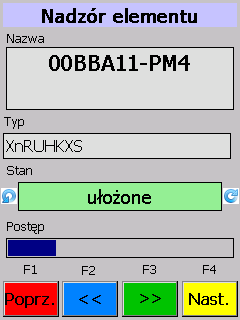
When the user identifies an item, he or she can see the item name and the item type. In addition, information about the current status of the item and the current progress (in the form of a 0-100% progress bar) is displayed. The user can change the current progress of an item by selecting the or buttons (and F2/F3 keys respectively). The progress changes according to the list of states defined in the AMAGE system for the item type. If the current state is correctly selected, the user can proceed to the next step of the function or return to reading identifiers by selecting the "Next" (F1) key. After confirming the selection by selecting the "Next" key. (F4), the information is stored in the internal database and the operation is completed, or the user can proceed to the parameter recording screens in case the item has forced parameter entry.
Saving the information in the database in this case will be done at the end of all operations. If there are no required parameters to enter, the application will go to the main menu and save the record. The title bar will show the information about the performed saving.
Registration of parameters
The parameter registration function can be accessed directly from the main menu or is linked to a change in supervision status. In each case, the element is identified by reading the code. The user is then presented with a parameter with the possibility of entering it. The number of parameters to be changed is specified in the upper right corner indicating the current parameter and the number of all parameters "(1/2)".
Information available during parameter entry:
-
Parameter name
-
Previous value of the parameter
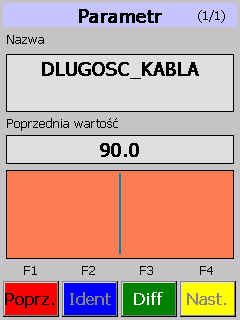
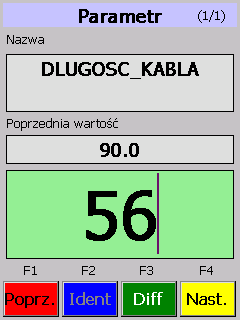
The AMAGE system during the definition of supervision parameters can specify that the parameter in addition to entering values directly, the user has the opportunity to enter parameters by:
-
Read 1D/2D code - the "Ident" button (F2) is used to read the code. After selecting this option, the code is scanned and after a correct reading the value is written to the edit field.
-
Save the difference - in some cases, the user cannot enter the value of the parameter as a whole, but can only specify the change from the previous value. In this case, the user has the option to select "Diff" (F3) and enter instead of the full value only the difference from the previous value. This is signaled by a different background color of the edit box. In the case of recording differences, the color is blue for a correct difference value and rusty in the case of an incorrect parameter value for the difference.
The background of the parameter value determines the correctness of the data entry. In the case of a correct entry, the background is green/blue, in the case of an incorrect entry, the background is red/rust. Approval of the entry with the "Next" key (F4) moves to the next parameter to be entered or, in the case of the last parameter in the list, approves the entry in the database and moves to the main menu. It is not possible to move to the next parameter when incorrect values have been entered. Move to the previous parameter entry by selecting the "Back" (F1) key. In the case of the view of the first parameter, it is possible to go to the window for changing the supervision status (previous window). This is realized by double-pressing the "Back" button while being at the beginning of the parameter list. This approach allows you to return to the previous window in a controlled manner, without possibly losing the saved parameters in the current window.
Attendance Registration
By selecting attendance registration (5) Attendance in the main menu, the user is redirected to the implementation of the attendance registration function.
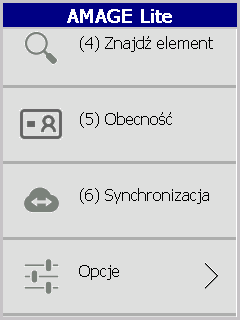
The next window displays the types of registration that can be selected by the user:
-
Begin - the starting date of the employee’s working period
-
End - the end date of the employee’s working period
-
Holiday - 8-hour employee period (8 a.m. - 4 p.m.)
-
Sickness - 8-hour employee period (8am-4pm)
-
Other
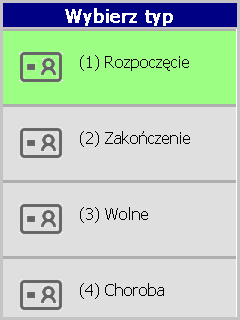
After selecting a certain type of registration, the ID reading window will be displayed. If the ID is read correctly, the information will be displayed on the main screen in the form of the name of the read employee.
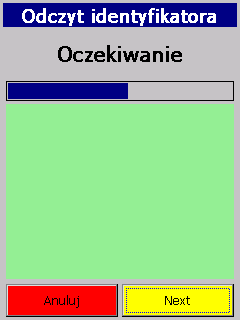
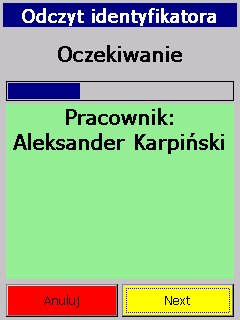
| Reading another identifier adds it to the memory, so it is possible to perform registration for any number of users simultaneously. It is not possible to select the same identifier, repeatedly. |
After reading the employee IDs, proceed to the next window. A window with information about the recorded attendance will be displayed.
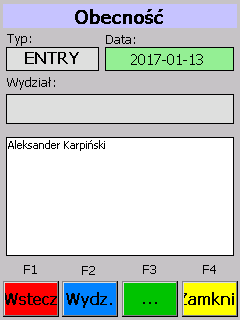
If you want to add the department concerned to the registered attendance, select the Department button, after which the department selection window will be displayed:
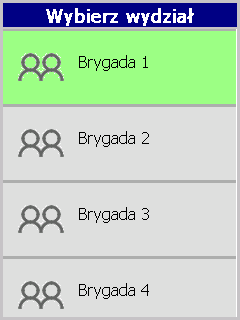
After selecting a specific department, a window with information on the registered attendance completed with the selected department will be displayed. If all data has been entered for the registered attendance, select the Close button
Viewing and deleting created records
After entering the "Changes List" menu, you get a list of shift selections. Depending on the registration of supervisors, parameters or presence, you can choose one of the three views of the registered changes in the terminal.
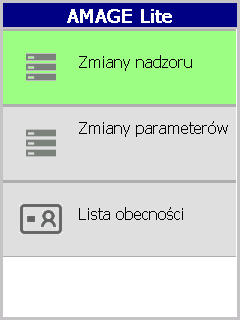
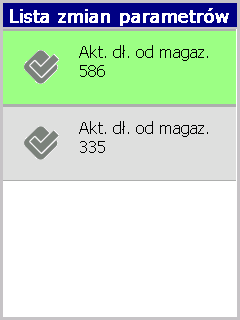
When the list of supervision changes is selected, the changes are presented with the date of execution and the current status.
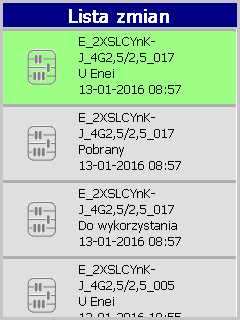
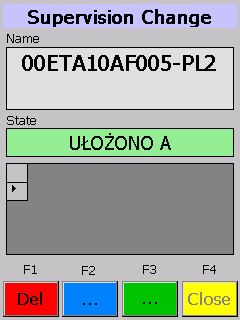
If the data is entered locally in the terminal, it is possible to delete the selected entry. The data may have been entered in error or by mistake. When an item is selected by selecting it on the touch panel or by using the keyboard and the ENTER key, it goes to the details window. The information contained there stores information about the change, status and all changes made.
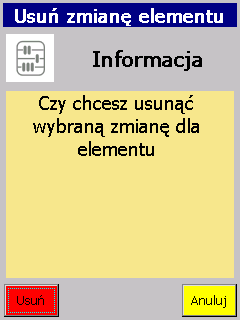
In the case of incorrectly entered data, after selecting "Delete/Del" from the context menu (F1), you will be prompted to delete the change record. After acceptance, the change will be deleted.

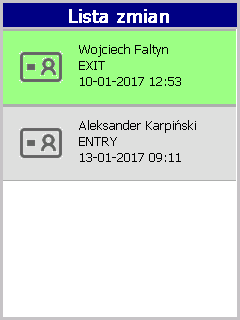
Attendance entries are reviewed and deleted in the same way:

Item preview
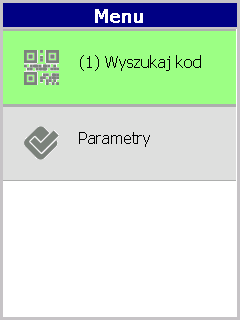
Item preview - the (4) Find Item option allows you to search for an item in the internal database and enables you to perform operations related to that item. The function starts by reading the code from the physical element. If the reading is correct, it goes to the item view screen. The screen displays information about:
-
Item name
-
Element type
-
The state of supervision and progress
-
ID number used to visually identify the item
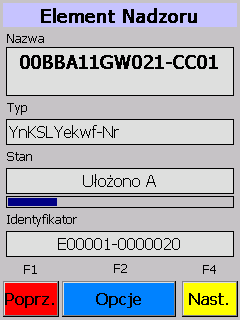
In addition, by selecting the Prev (F1) button, we go back to the code reading screen, the Next (F4) exits to the main menu. In addition, the Options (F2) menu provides contextual options for the item. Available options:
-
Search code - search for an identification code that is the same as the code of a given item. This allows you to search for identifiers with the same code in the list of codes for marking (e.g. sticked on a given device)
ID search
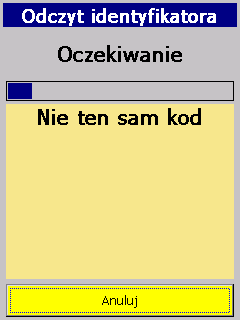
When you select the option to search for an identifier code, you go straight to the identifier reading window. In case of reading a code that is not the same as the item code, the information "Not the same code" is displayed. In the case of reading the same code, the window closes and information appears in the title bar that the code has been found.
Display all parameters of an item
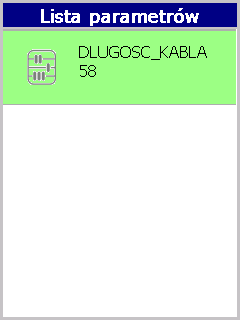
When you select the item parameter list option, you are taken to the parameter list. The list shows all parameters synchronized with the main server (not only parameters entered/edited in the application). The list shows the name of the parameter and its current value.
Sync
The AMAGE CE Lite application can operate in 3 modes. Due to the operating conditions of such terminals, off-line mode is often used. This is related to the requirements of the operating environment of mobile terminals. It is not always possible to communicate directly with the AMAGE communication server. Therefore, if the terminal works in offline mode periodically synchronized in order to:
-
downloading data to work locally
-
to send data that originated locally on the terminal or represent a change from the data downloaded from the AMAGE server
These operations are disconnected so that data uploads can be performed multiple times for a single data download. This is due to the fact that most often you download a certain range of data and work only on a slice of it. The working system also requires that changes to objects be sent as often/quickly as possible to the central server. Synchronization in the other direction can be done much less frequently.
| Downloading data from the AMAGE server deletes all local information along with information on changes made. Therefore, if there is local data (new/changed) then the application will force a double operation i.e. upload + download so that all local data is uploaded. |
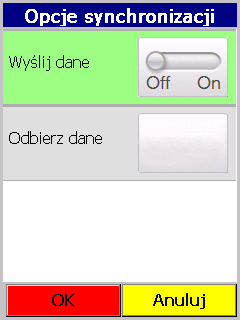
After entering the "(6) Synchronization" function from the main menu, the user will be presented with a screen for selecting the direction of communication. This allows the user to choose whether they want to just send data or download a new set of data.
Synchronization of data sent to AMAGE
If the upload option is selected, the application will immediately go to the data upload window. The user must independently select the "Connect" button to start synchronizing data with the AMAGE server. This allows the user to select the appropriate place and time to perform the synchronization. The progress of the synchronization is shown in the text box of the synchronization window. Once the synchronization is complete, you can continue with the normal operation of the application.
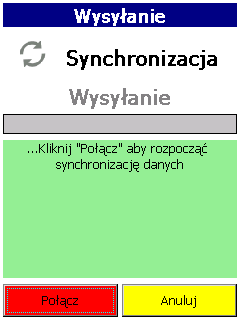
Synchronization of data downloaded from AMAGE
If the download option is selected, the user will be presented with a download window and a list of available tasks displayed
| The task is an elementary data package in the AMAGE application and is made available to mobile terminals. Due to the vast amount of information available in the AMAGE application, only a slice of it is sent to mobile applications such as AMAGE CE (lite), limiting transfer time, memory requirements, etc. Tasks are created by users of the AMAGE application and allow the mobile user to select the current data context. |
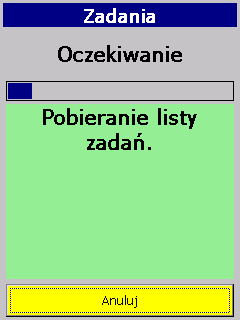
After selecting a task, the user is taken to the synchronization window (download or upload+upload). The user must accept the start of synchronization. The data will be downloaded (and sent) to the AMAGE server. At the end, a summary of the synchronization work will be presented telling what and how many objects have been downloaded to the mobile terminal’s internal memory.
| Once the upload synchronization is complete, the data located locally (changes, records, etc.) is reset to zero and work with the last downloaded data set begins. |
Options
Changing the options is available only to users with terminal administrator status. After entering the options, the end user is presented with the following options:
-
Communication - options for communication with the AMAGE server. Contain data to start communication via TCP/IP protocol with AMAGE server.
-
Automatic functions - a group of functions performed automatically by the application as a result of reactions to events.
-
Online mode - selection of application mode. Online or offline with local data downloading
-
Language - options related to the current language displayed to the end user.
-
Visibility - the ability to hide some of the functions not needed in the current work.
-
Base cleaning - cleans the database of outdated data.
-
Delete Base - an administrative option used to delete the current base and allow synchronization with the initial values.
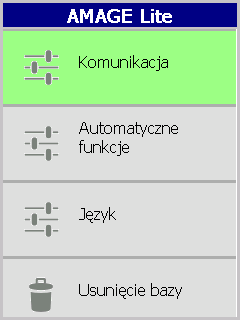
| The configuration options are available only to users who have mobile device administration privileges. You set this data in the main AMAGE system. |
Communication options
After entering the communication options changes, the user is presented with options and parameters for configuring access to the main server. The user has the option to enter the settings manually:
-
Server address - AMAGE server address.
-
Command port - communication port for sending commands.
-
Binary port - communication port for binary data transmission.
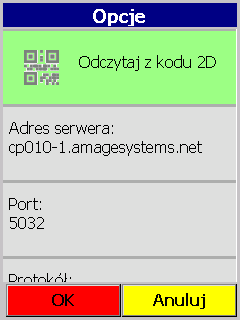
Enter the values specified by the System Administrator in the options.
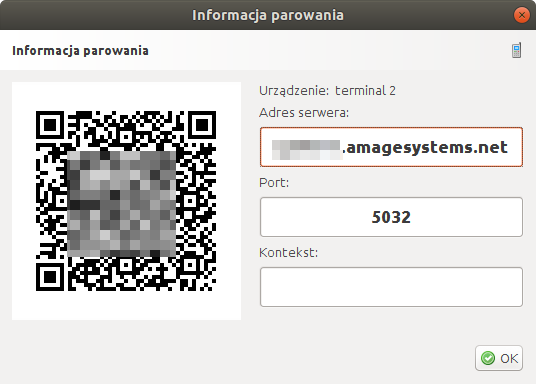
It is also possible to automatically configure these settings directly from the AMAGE application. In the AMAGE application, after enabling local communication, it is possible to select the option to display the pairing parameters (mobile device view), showing the current parameters of the communication server with the associated 2D code for reading by the mobile terminal.
For this purpose, the first option from the communication options is used, i.e. "Read from 2D code". After selecting it, the user will be asked to read the code from the computer screen defining the connection parameters. After reading the code, the rest of the data is automatically filled in.
Application mode
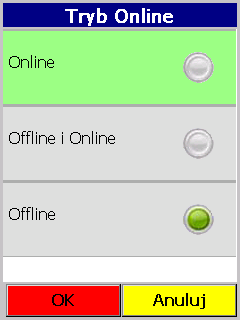
There are three possible modes of operation in the application.
-
Online - during this mode, it is possible, thanks to the network connection, to perform operations without downloading data to the terminal, in order to send data to the database, it is necessary to synchronize the data by sending it.
-
Offline and Online - a combination of online and offline properties.
-
Offline - during this mode, the execution of operations is possible only after downloading data by synchronization. Operations are performed on downloaded data, while to send data to the server you need to synchronize it.
Automatic Options
The automatic options section is responsible for controlling, the execution of functions performed automatically by the application. The options window is shown in the figure below.
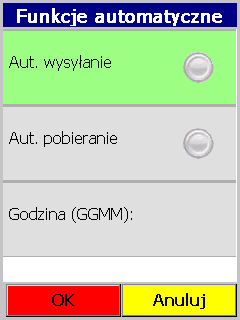
The available options are:
-
Automatic upload - when enabled, the application will automatically upload the data created in the terminal during terminal charging operations. For this to be possible, the terminal docking station must have a network connection to the AMAGE Sync server or the terminal must have a Wi-Fi connection enabled with available communication to the server. Additionally, the user must log out of the application (to the application start window). In this case, after detecting the start of battery charging in the terminal, the system will automatically turn on the synchronization window and perform data upload. When the synchronization is correct, the window will automatically close. In case of an error, the information will be left for the user to analyze.
-
Automatic download - enable automatic download of data from the server. When enabled, the application will download data from the server after leaving it on power and logging out the user at a specified time. The synchronization hour is specified in a separate parameter
-
HHMM time - time format type 2300 which means that at 2300 hours data will be downloaded if this option is enabled
| The auto upload and download functions are disconnected due to the fact that when multiple terminals are working, the data automatically downloaded at the time of upload may not be up-to-date (not all terminals have uploaded their local data). In this case, the automatic synchronization of local data TO the server when connected to the power supply is enabled and the synchronization of data FROM the server is set to night hours. In this case, employees put the terminals away for recharging at the end of their shift. All data are sent to the server. After all terminals are put away, they are recharged and at night, when all terminals are put away to the docking stations, data is downloaded. This allows the terminals to be fully synchronized when employees start work the next day. |
Language options
Entering the language options allows you to set the current language in which the application communicates with the user. After selecting the appropriate language and confirming the option with the "OK" (F1) button, this information is saved in the database.

| The selected user interface language is initialized when the application starts. After changing the language, restart the application to see the changes. |
Visibility
The application has the ability to disable some sections in the menu. This allows simplifying the terminal interface for only necessary functions and making it easier for employees to use. The definition allows you to enable specific sections on the main menu:
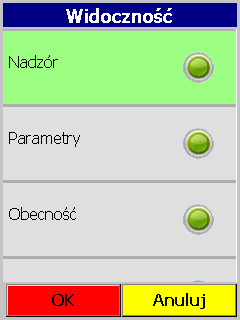
Cleaning the database
If the application is used for a long time, the local database may contain unnecessary information (a peculiarity of the database engine). This may manifest itself in the inability to read some identifier despite the fact that the identifier is in the local database. Selecting the database cleanup option allows after restarting the application to physically correct the records and reduce the size of the local database.

Deleting the database
For rescue purposes (erroneous data, corrupted database) or to restore the AMAGE application in the terminal to the initial settings, you can perform a delete database operation. After selecting the option, the user will be asked to approve this operation. The database will be marked for deletion. The deletion and creation of a new database will be performed when restarting the application

