Data integrations
A set of functions and modules responsible for exchanging information between the AMAGE system with external systems or other data sources.
Importer
The data exchange provides access to mechanisms that allow you to transfer data to the AMAGE system or transfer data from the AMAGE system to other sources.
Data importers available for a number of areas allow the import of data from Excel™ spreadsheet type sources along with the ability for the user to define all necessary configuration data. This allows flexible configuration of parameters independently by all users.
After entering the options through the main menu, the user is presented with a list of available importers.
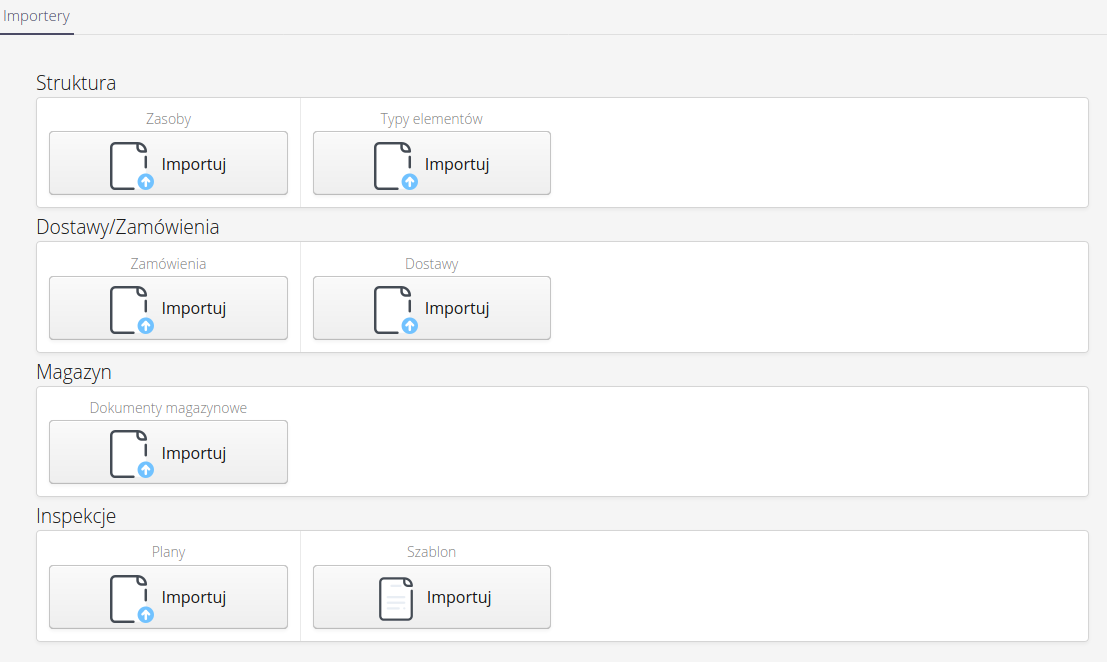
| The list of importers depends on the modules active for the instance and is variable for each instance type. |
Importers are divided into bulk - i.e., they allow the import of multiple records from sources such as XLS sheet or single i.e., those that allow the import of a single item in dedicated formats (XML, JSON, etc.). Mainly used to move configuration data between instances (e.g. access profiles.)
Mass imports available in the system include:
-
Structure - resources - the ability to import resources into the system structure with the creation of all necessary additional data (types, product groups, locations, etc.).
-
Structure - item types - import of assortment types into the system.
-
Deliveries/Orders - orders - import list of orders.
-
Deliveries/Orders - Deliveries - import list of deliveries.
-
Warehouse - warehouse documents - import of warehouse documents.
-
Inspections - plans - import of inspection plans.
Single imports
-
Inspections - Inspection Template - Import Inspection Template.
Definition imports
Bulk imports have a unified interface with the additional ability to configure specific options for each individual importer.
Imports are divided into several stages:
-
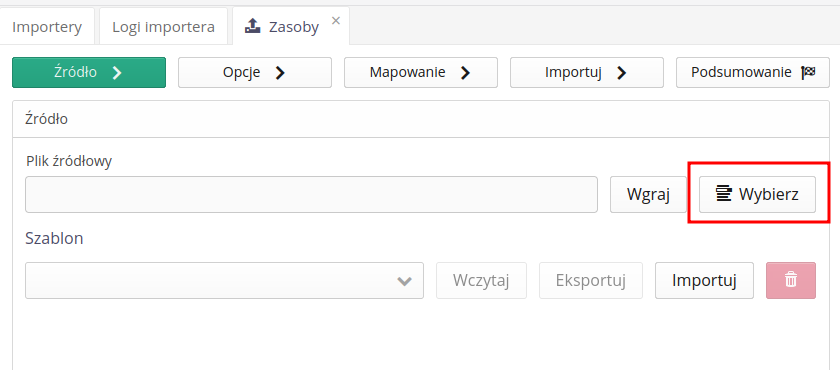
Data source selection - selection of the source file for import. The system loads this file and allows further operations on it. We can select a file from the user’s local disk or select files from the file archive in the system.
-
Selecting a saved mapping - column mappings in the source file and options specific to the selected importer can be saved for later use. This allows you to repeat the import multiple times using the saved data in the system.
-
Options - options specific to the selected importers. If an importer does not have specific options, this step is skipped. The options are described below by selected importers.
-
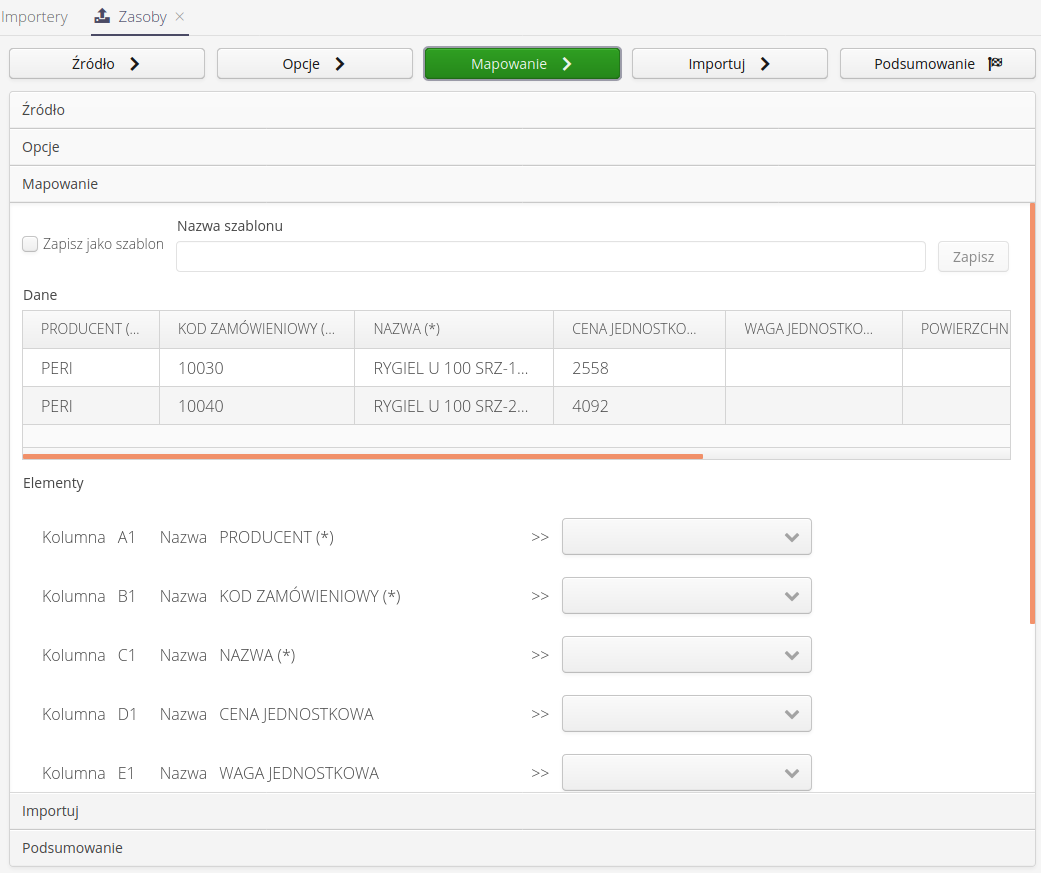
Data Mapping - Data mapping is a key element of the importer. The top part of the window displays the first two records and column descriptions (from the first row of the source file), which allow you to more easily visualize what the system sees in each column. The bottom part is a list of all columns appearing in a given source file, with the ability to indicate what each column means to the importer. If any key data in the mapping is not specified, the system will display a message to that effect when trying to move on. Here the user has the option to save the mapping for use in later import executions.
-
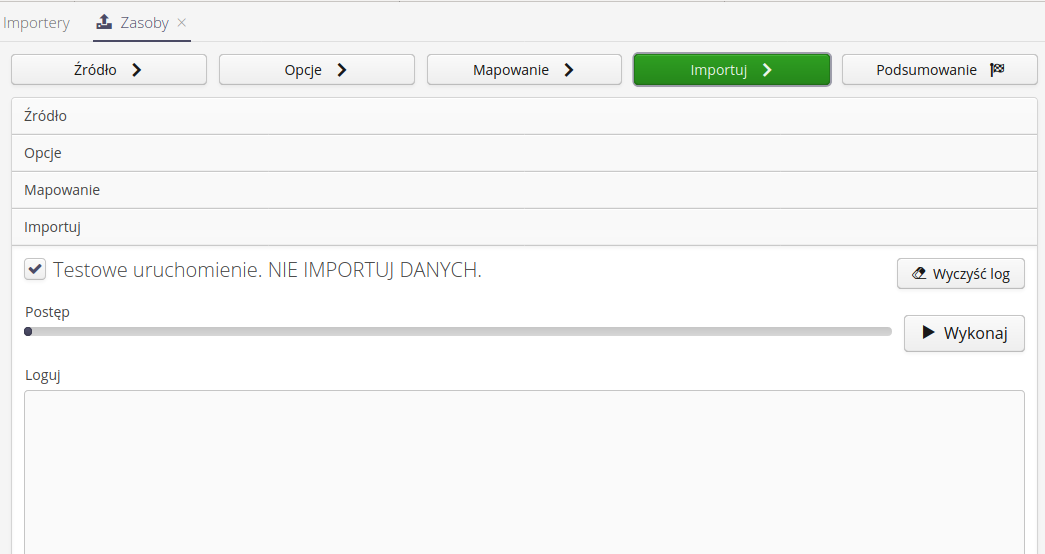
Import - when you get to this step, all data is available and the system allows you to perform data import. The data is started by selecting the Execute button. The operation is performed on the server and the result is presented in the log window. The log window can be cleared by selecting the Clear log button.
-
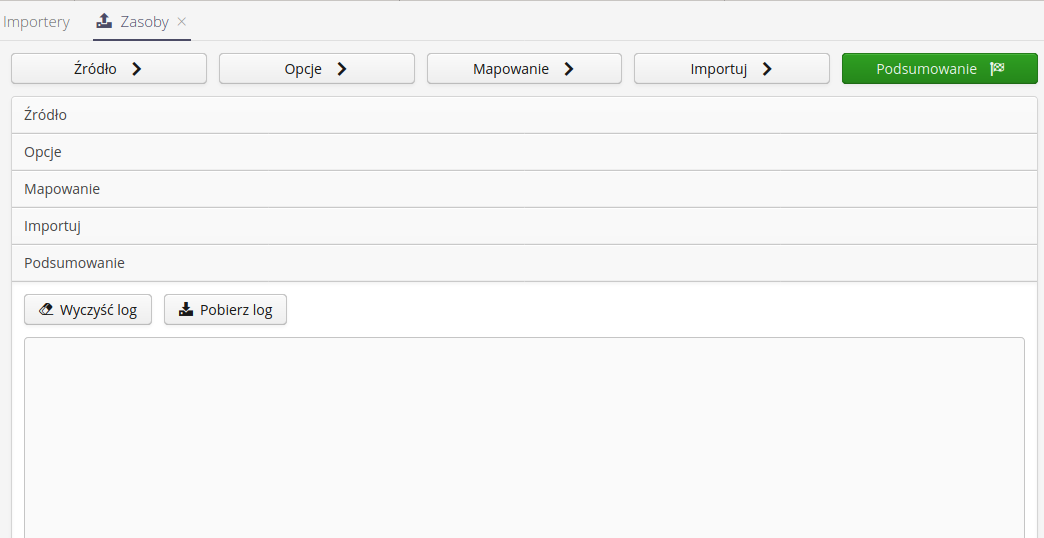
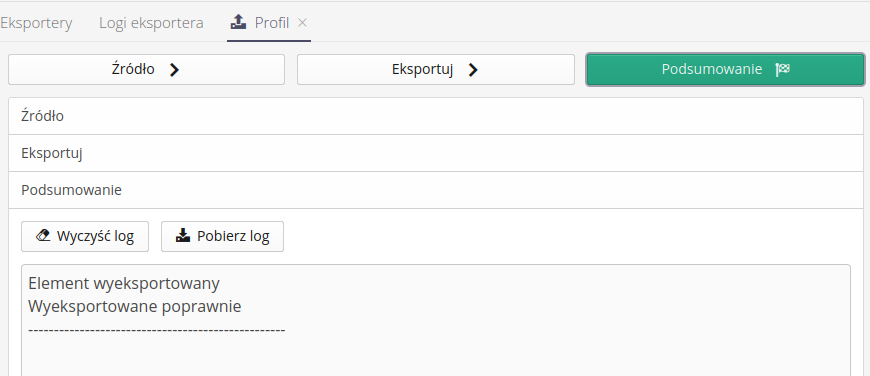
Summary allows you to review the logging data throughout the process, view a summary of the number of records handled throughout the process. The user has the option to clear the log by the Clear log action or to download and save the log text locally by selecting the Download log action.
| Each import is additionally saved in the system in a dedicated table in the database, which allows later access and analysis of performed imports by all users of the system. |
Warehouse - options
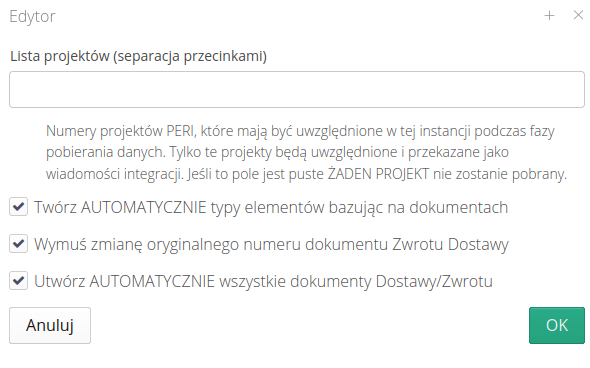
Options when importing warehouse documents allow you to select the destination warehouse and storage location for imported documents, and allows you to create missing item types in the assortment during the import procedure.

Function - import of documents with parameters
| Functionality available when tracking materials in the warehouse/deliveries is enabled using additional parameters. |
The warehouse document importer has been extended with the ability to import warehouse elements for specific materials specified using additional parameters. This allows you to introduce/issue material from exactly a specific type of elements along with its parameters, e.g. certificate, melting

Inspection plans - options
Options when importing inspection plans allow you to create assortment types and dedicated parameters supervised by inspection plans.

Resources - options
The options for importing resources are the most extensive and allow you to configure many additional features during the import adapting to the source import file.
-
General options allow you to define basic import options and indicate import locations and parameters, which are used to search the system for whether a resource already exists in it (then only the parameters of the resource are updated instead of creating it anew)
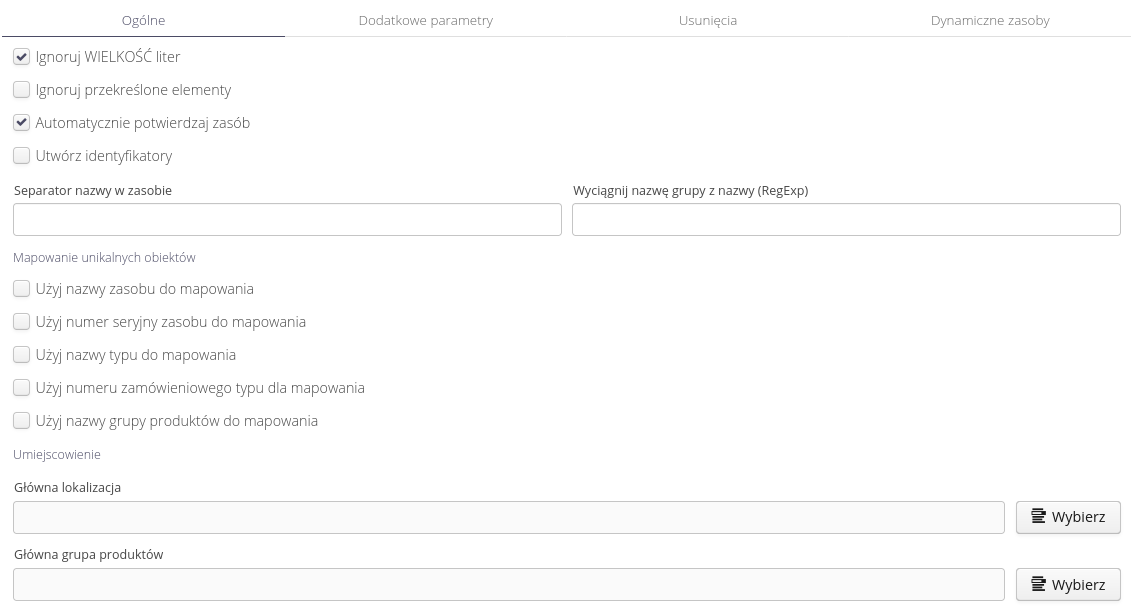
| If a device serial number is specified in the input data, a search for an existing resource against the serial number will be AUTOMATICALLY enabled and the existing resource will be updated instead of creating a new resource. This must be taken into account in the data import and definition procedure! |
-
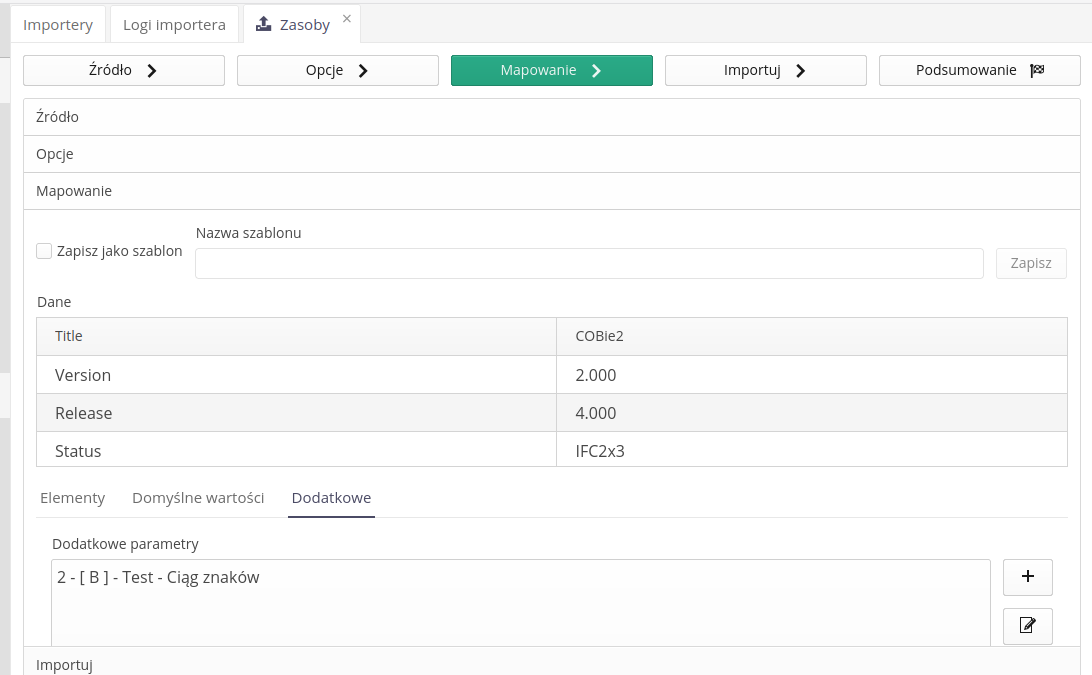
Additional parameters allow you to define additional parameters in the type of elements and values in the resource. This allows you to import any data into resources that are not predefined by default in the system.

-
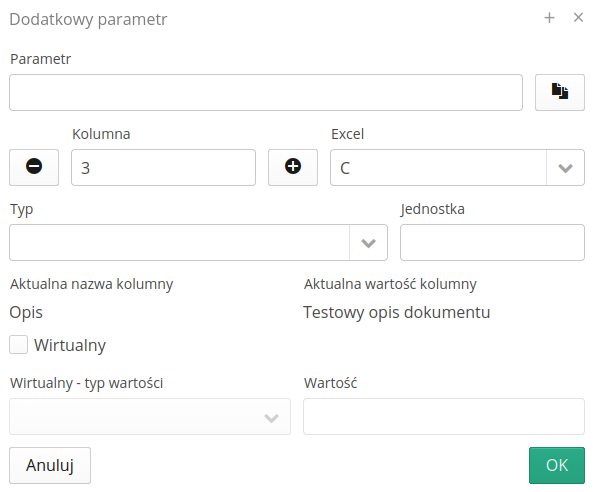
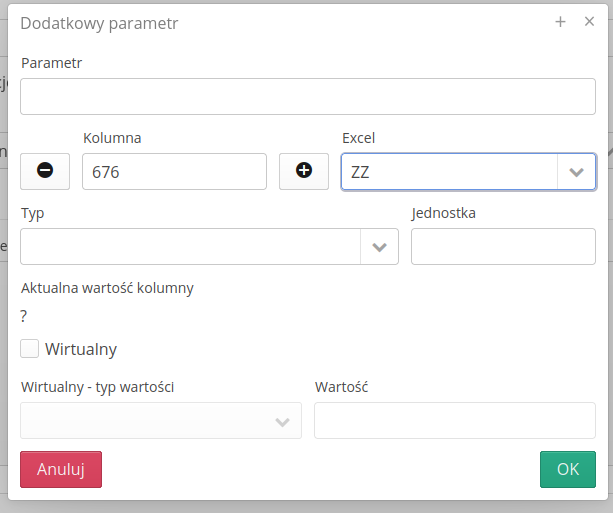
The definition of an additional parameter allows you to specify the column in which this parameter is located, or to specify a parameter as a virtual one, i.e. one that does not exist by default in the source file, but you want such a parameter to appear in the imported data. The value type of a virtual parameter can be specified as either a direct text value or the current date & time or the date/time itself. This allows you to enter into any virtual parameter the date and time when the data import is performed.
The Current column value field shows the value of the selected cell in the first row of data. Current column name is the name of the column in the first row of data.
-
Resource deletions allow you to define the behavior of the system when there is a resource in the system that does not exist in the source data. This allows you to correct the list of resources in the system based on the provided data source. For security reasons, the importer never deletes resources, it only moves them to the selected product group. We also allow you to create in the selected group - a subgroup with a name that is the current date of execution of the procedure.

-
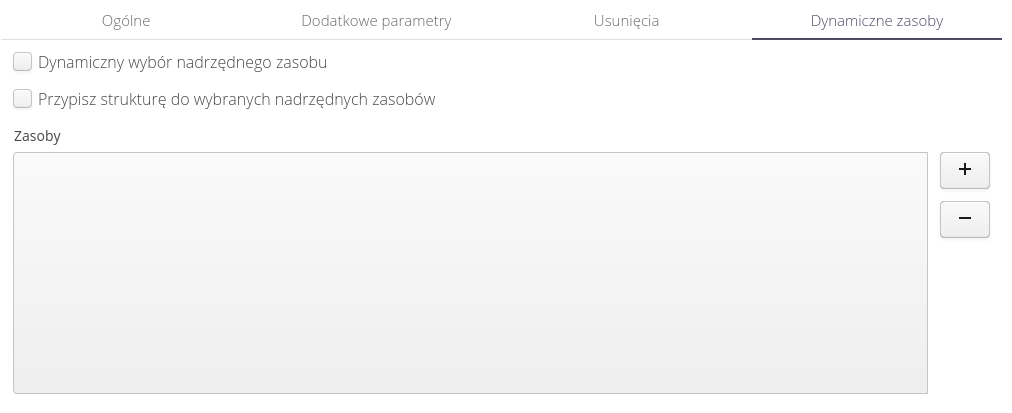
The importer allows you to import data as a slave resource to existing resources in the system. These options allow you to specify to which existing resources to import data as a slave resource.
In the resource importer, the ability to define additional parameters directly from the tab (stage) of mapping imported fields has been added.
In the parameters, it is possible to provide the parameter code according to the Excel nomenclature and the parameter unit
The ability to enter additional parameters in the resource importer has been added by providing code consistent with the Microsoft Excel nomenclature, i.e. column A-ZZZ. Using this form of specifying a column, the system automatically converts it into a column index.
The ability to import identifiers and specify the type of the imported identifier has been added to the resource importer.
Supervision History
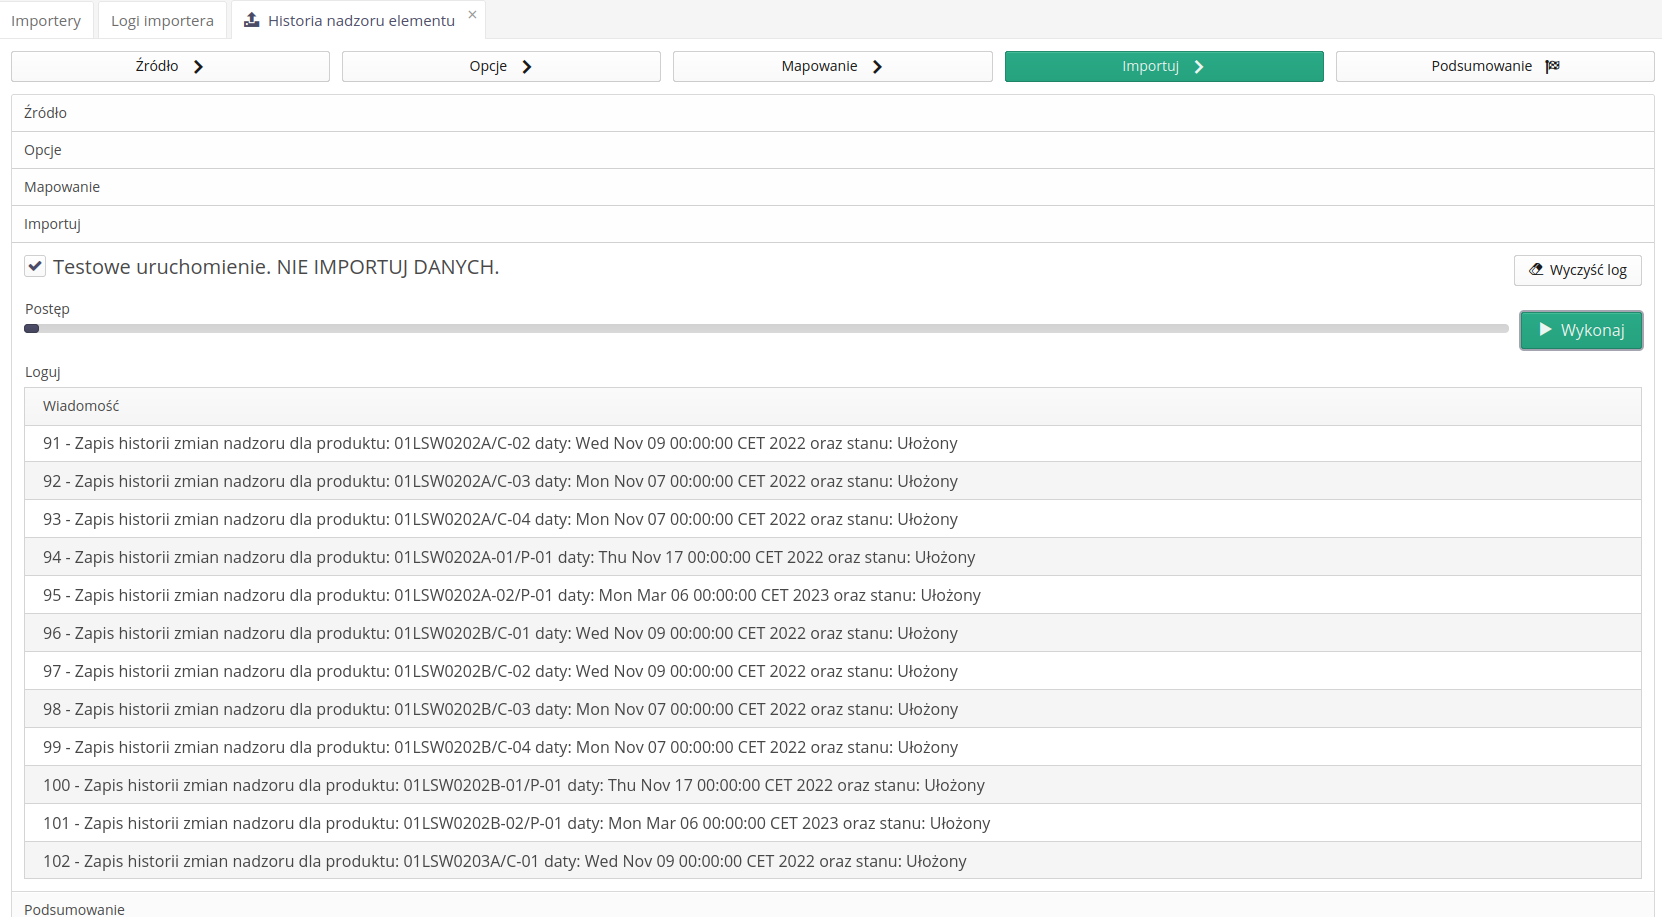
The Supervision History Importer allows you to import records of changes in states from an XLSX file. With the importer we define:
-
parameters that allow you to select the resource - name, serial number, inventory number
-
additional parameters to be imported together with the change of state (supervised parameters)
-
column mapping - state change definition, state names, dates, people
After defining this data, we import everything with a single data import.
Importer - element types
For the item type importer, the ability to import all financial and warehouse data contained in the information extension from the warehouse, delivery and lease modules has been added.
Importers - importer of parameters into types (separate)
A separate importer type has been added. Parameter importer for element types. It has been added in addition to the already existing ability to define parameters in the general element type importer. Using it, you can import parameters to types in a simplified way using a separate, dedicated importer.

Type parameters importer
Importers - documentation mapping importer
Added documentation mapping importer. Using it, we can import additional documentation mapping, i.e. indicate for a specific resource where in the attachments a specific part of the documentation is located, e.g. single-line diagrams of an electrical device on pages 11-23 in a documentation of 1,000 pages. This facilitates navigation and quick access to data.
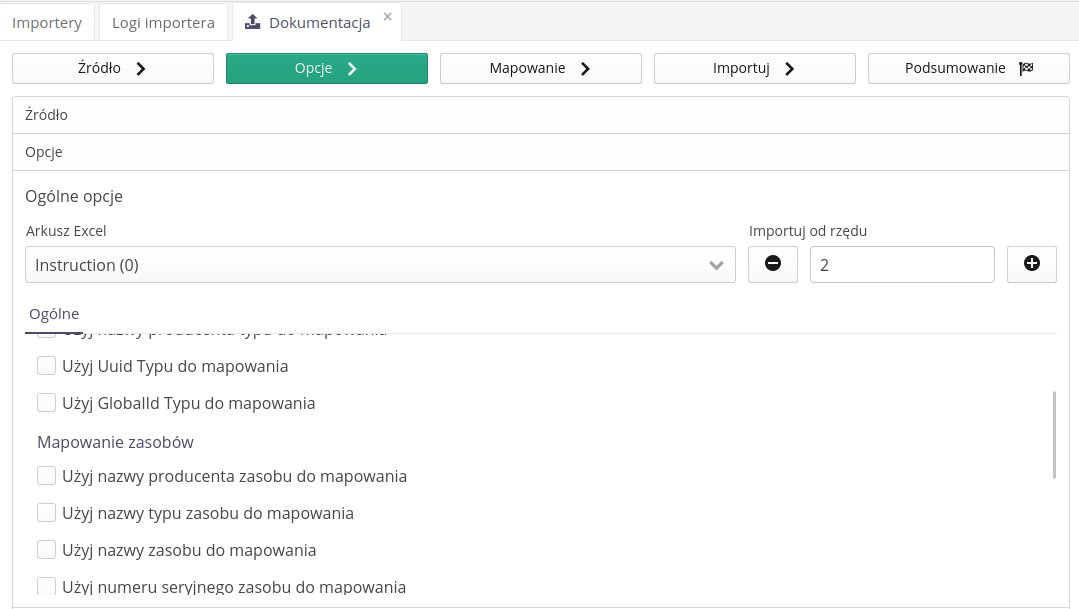

Importer - importer of inspection executions
An importer of inspection executions has been added to the system. Using it, we can import the history of inspections or inspections performed by external people/companies.


Importer - service events
The service event importer allows you to import service events from external sources. This makes it easier to import data from external systems to the AMAGE system, e.g. when transferring data from other CMMS systems.
In the case of the importer, we can define:
-
Mapping existing objects - determining how we find resources in the system to which a given service event will be attached.
-
The field mapping importer allows you to specify columns containing, among others: event status, description, event type, person, date,
After importing, the events are associated with a resource in the AMAGE system and contain all the necessary information to maintain the history of service events.
Single imports
Single imports allow you to import individual records from external systems. This is most often used to import configuration data from other instances, such as access profile settings, templates and data definitions.
Import is divided into four stages.
-
Data source selection - selection of the source file for import. The system loads this file and allows further operations on it
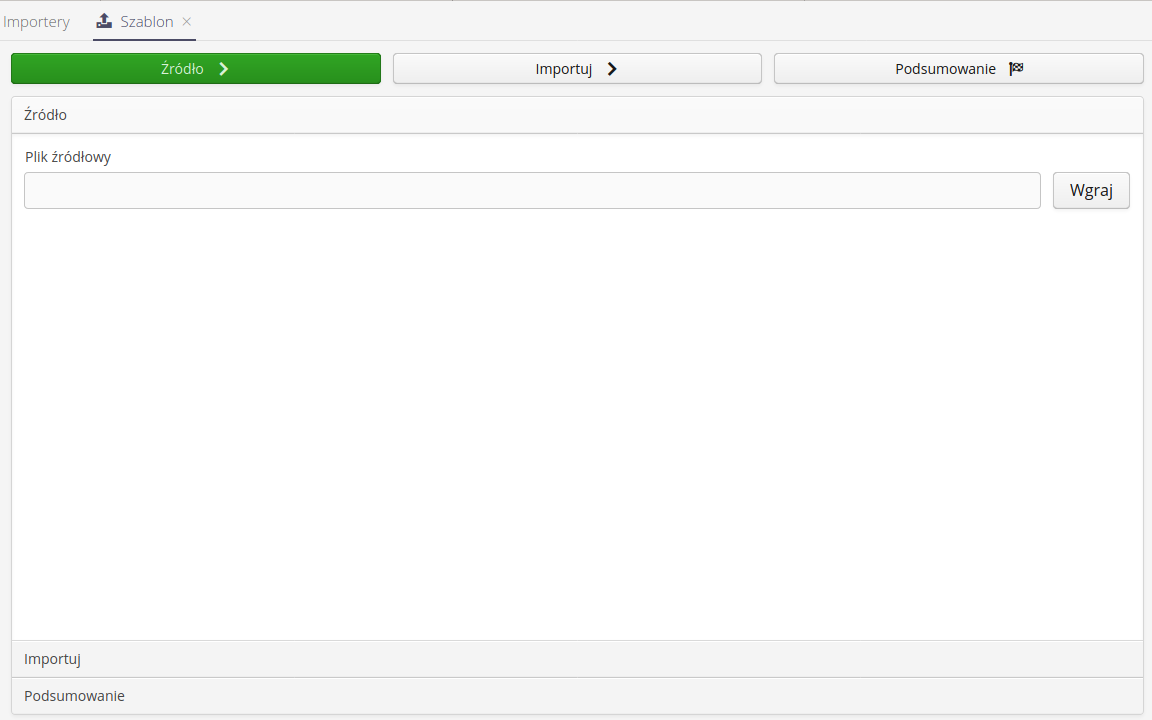
For single importers, it is possible to define additional parameters of such import. There is an additional step 'Options' in the import wizard.

-
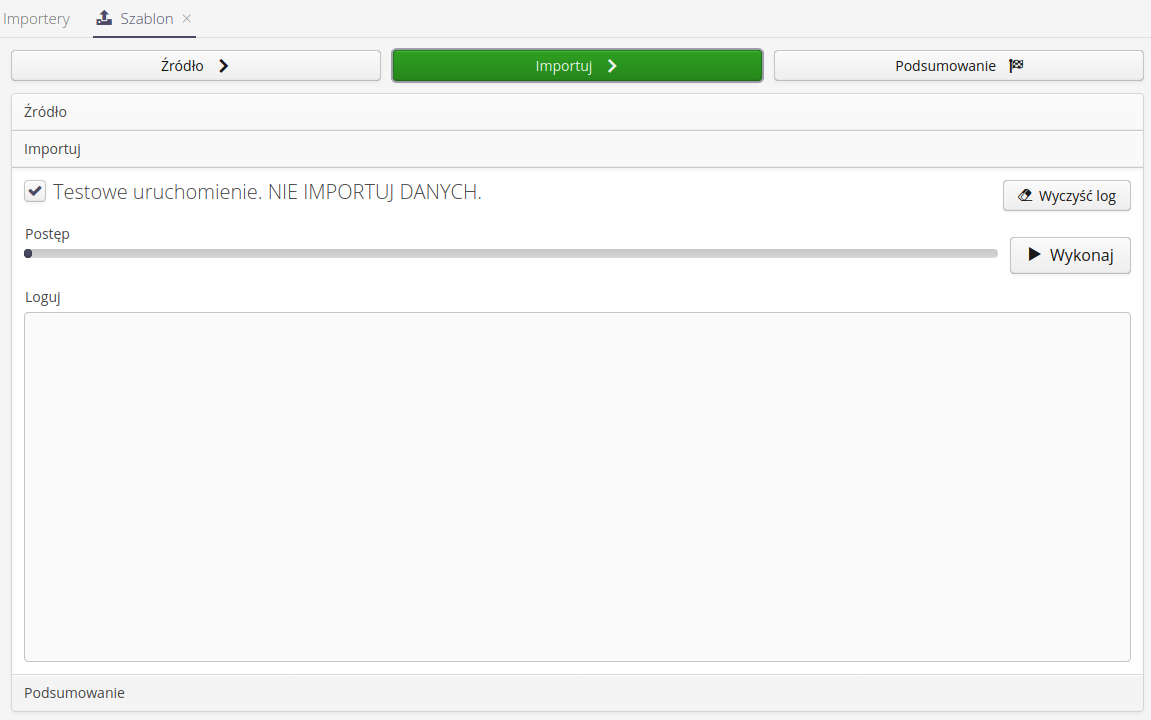
Import - when you get to this step, all data is available and the system allows you to perform data import. The data is started by selecting the Execute button. The operation is performed on the server and the result is presented in the log window. The log window can be cleared by selecting the Clear log button.
-
Summary allows you to review the logging data throughout the process, view a summary of the number of records handled throughout the process. The user has the option to clear the log by the Clear log action or to download and save the log text locally by selecting the Download log action.
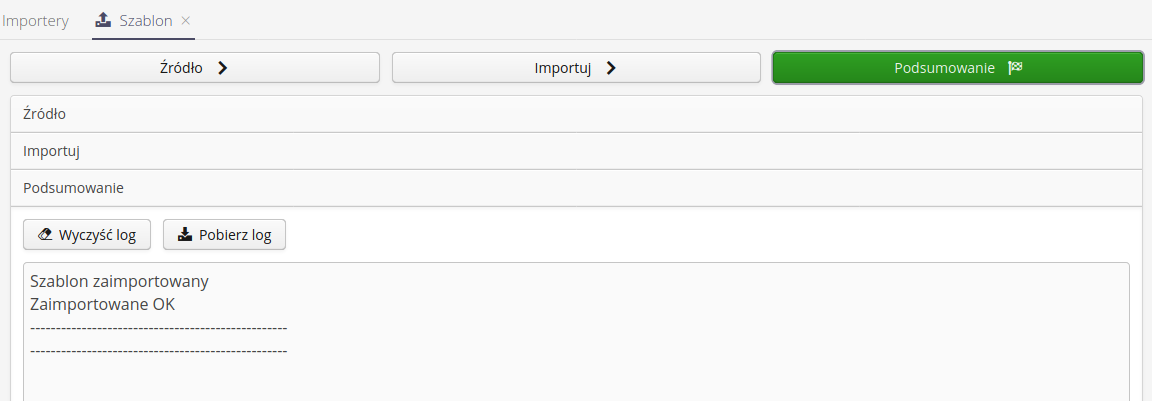
| All logs from the process of importing individual items are also saved for later viewing. This data is available in the log viewer with information about the time/person performing this import. |
The import log list allows you to view all operations and access logs.

If the import was a test or ended with an error, this data is displayed in the window accordingly.
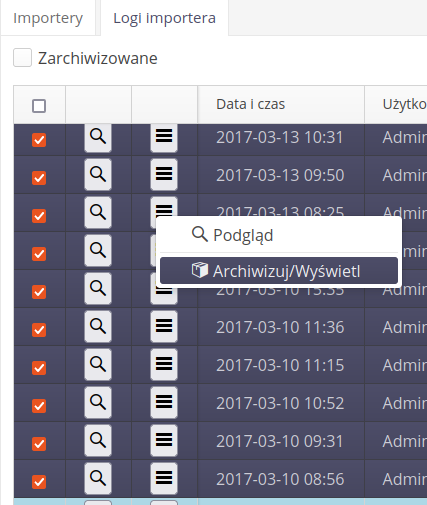
Detailed logs resulting from the import/export activities performed appear in the list of importers/exporters. Added the ability to archive selected logs. In this case, the logs disappear from the list, but are available in the archive.
Importer - IFC
The IFC importer allows you to import data into the system, i.e. resource structure directly from IFC files. The system tries to automatically detect the data structure in the IFC file and, on this basis, creates resources in the AMAGE system along with locations, element groups, systems and element types. Not all IFC files have direct and complete information. Often, in additional parameters, designers store information about the main fields in the AMAGE system, i.e. resource name, element type, manufacturer, etc. This is because IFC files are usually created in CAD programs and do not contain complete information about resources or contain general information about standard structures, e.g. a window, and only the parameters contain detailed information about the type, manufacturer and additional parameters of a specific window. In the case of import from IFC files, we can define additional options in the importer, such as:
-
Update resource - by Global ID - allows you to search for a resource in the system based on its GlobalId, not its name. This is important when updating element names while maintaining the same GlobalId in the design system.
Additional parameters and mapping
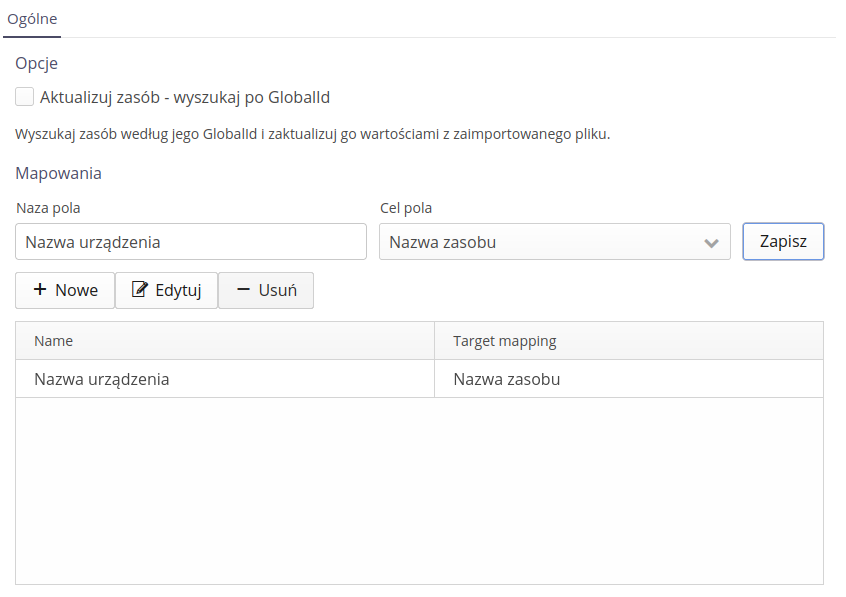
The importer imports all parameters into resources. However, using this mapping, we can determine the additional meaning of a given parameter, e.g. manufacturer’s name, element type or other key information that we want to use in the AMAGE system.
We define the mapping by specifying the field name and the target element in the resource.
Importer - COBie
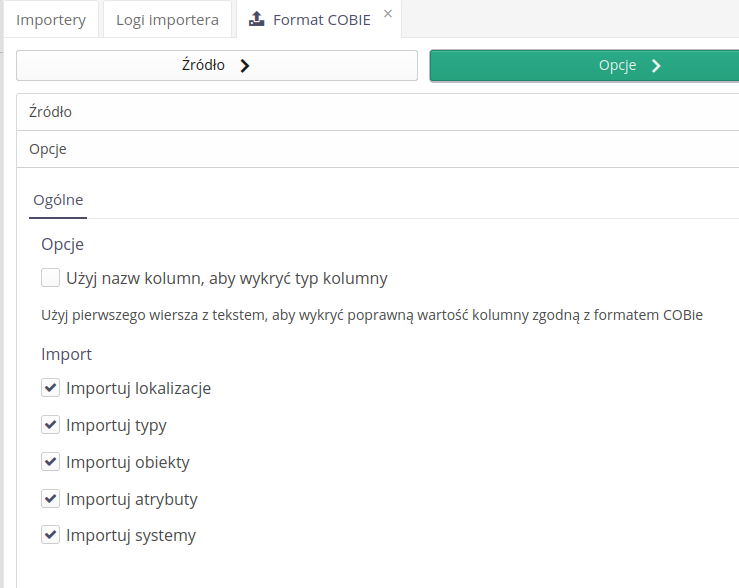
The COBie format importer has been equipped with additional options, one of which allows you to define dynamic detection of data position in individual data sheets. By default, the system detects the location of data based on its arrangement in reference templates. For the COBie data importer, the ability to define the scope of imported data has been defined. You can choose what elements (sheets) will be imported into the AMAGE system based on these
If you change the format and enable this option, the system dynamically detects data in the columns based on the text in the header.
| The header text must match the text in the COBie import template data. |
For the COBie format importer, the ability to import a sheet of attributes and their values has been added. All data contained there is imported to related resources (components).
| Attributes are imported only for resources (components) from the COBie sheet. |
Importer - COBie - Documents sheet importer
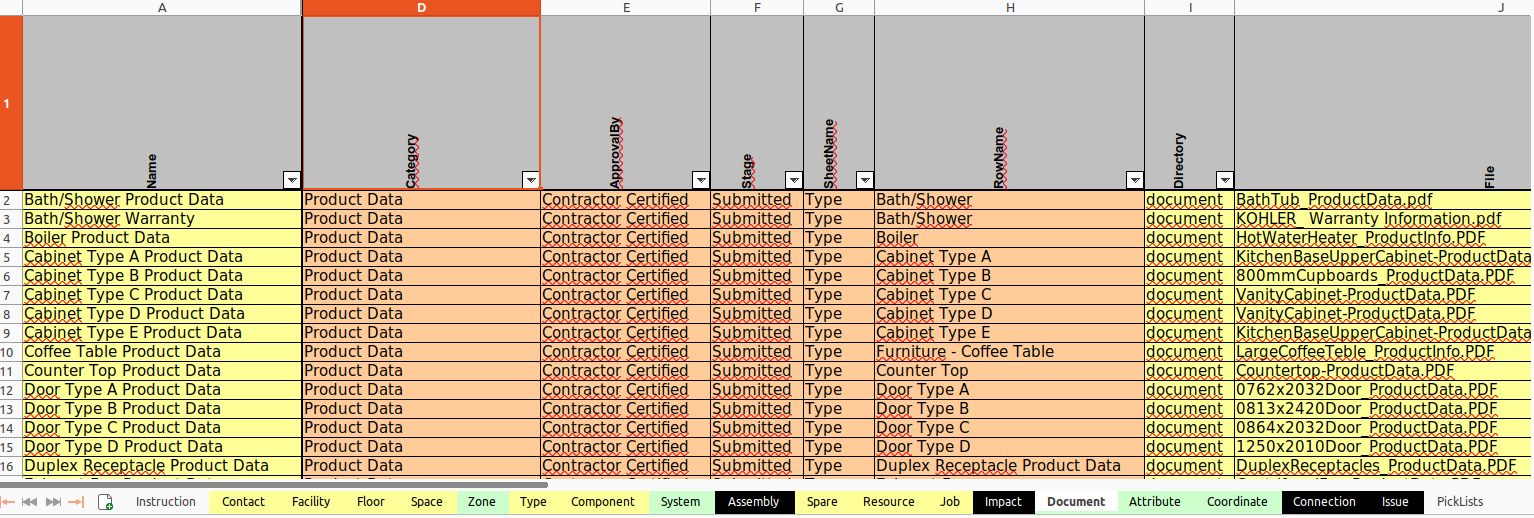
An additional import mechanism has been implemented for the COBie format, allowing for importing files from the Document sheet of the COBie standard.
Files along with the COBie spreadsheet are sent to the AMAGE server, which automatically imports them to specific resources/components.

Exporter
Exporters are a reverse mechanism to imports, whether they allow you to export selected data from the AMAGE system to an external data file. Exporters can be accessed from the configuration view from the Data Exchange section.
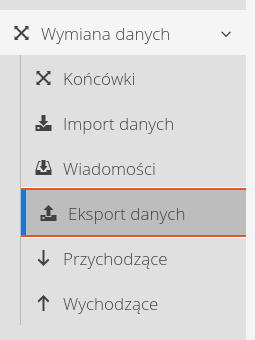
When exporters are selected, a view with a list of all possible exports in a given system instance loads. Available data formats and ranges depend on the system configuration and available/implemented functional modules.
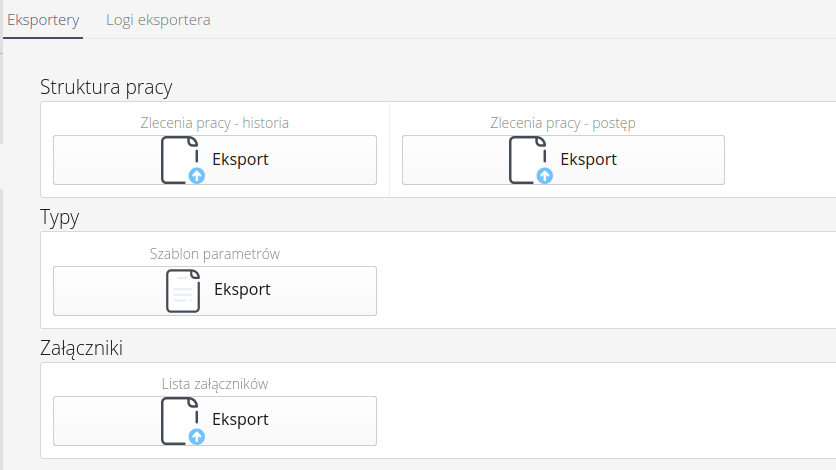
Exporters in AMAGE are divided into two types:
-
Bulk - i.e., export all/selected records from a given range, e.g., attendance registrations
-
single - where we provide the ability to export a selected record in a format specific to it (e.g. XML). This is usually used in migrations of specific system configurations to another instance (e.g. another build) using already created data in the previous instance.
After selecting any bulk exporter, you are taken to the standard - unified - view of exporters. The process is divided into four stages - indication of the data source, mapping of available fields in the object to exported fields in the resulting sheet, the actual export process with progress monitoring, and summary of the whole process.
Moving to the first step Source, we have the option to select the target format of the exported files. Currently available formats are:
-
CSV - according to RFC4180 - CSV format according to the RFC standard describing the data separator and other format specifics.
-
XLSX - XML format compatible with Microsoft® Excel XLSX format
| Character encoding always in data exported from the AMAGE system is in the UTF-8 code page. |
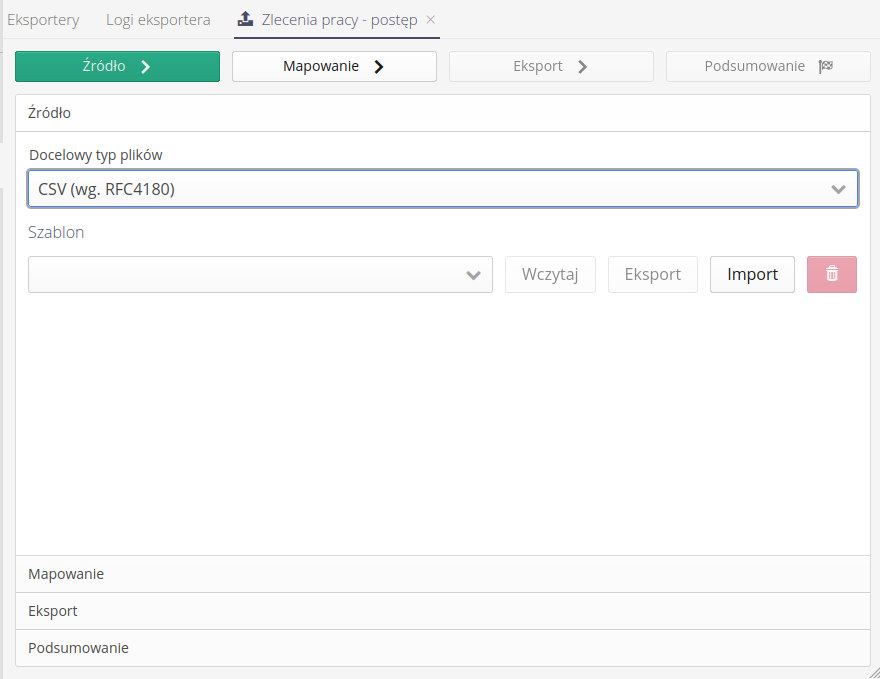
In this section we can also load a saved export template. The mechanism is identical to the data in the data import module. We can load the template from the internal database, export it to JSON format and transfer it to another or import it from another instance.
The next step is to map the export fields. With it we can specify which fields will be exported and in what order. They are available in the options view:
-
Add all - adds all available items to the export fields
-
Add element - adds one empty export element, which we will specify in a later step.
-
Up/Down/Remove - move the export order or remove a field from the exported data.
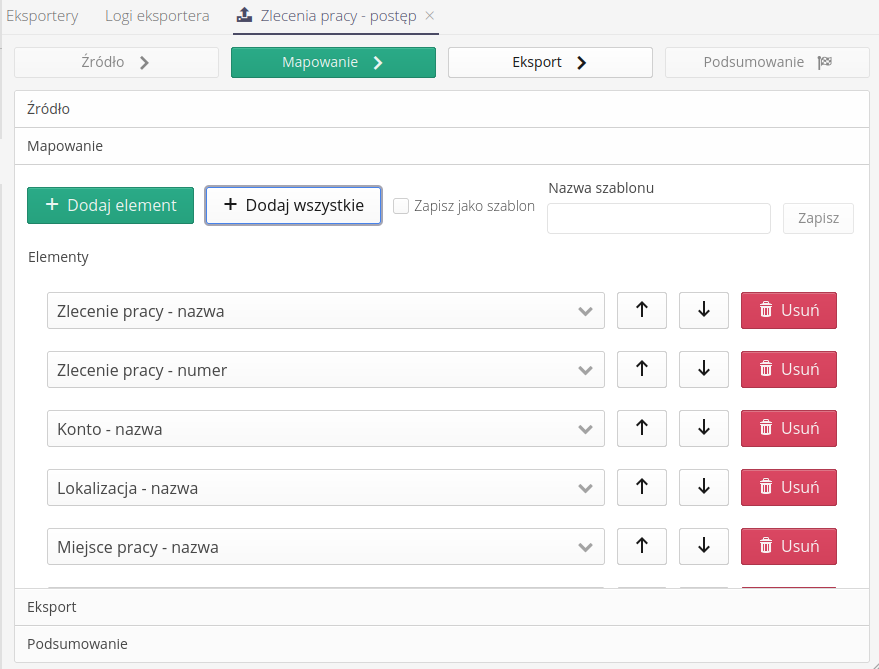
In this interface, we can define what and in what order will be in each column of data. We can save the created mapping as a template ready for later use.
| We can also use the existing export mapping in export automation. By defining an export stub, e.g. to an email address, we can automatically export a selected range of data and send it automatically to an external recipient. |
Moving to the next step, we perform data export. The log shows the details of the performed steps. If the process is successful, the Download result button is enabled. Using it, we can download the file that is the result of the export.
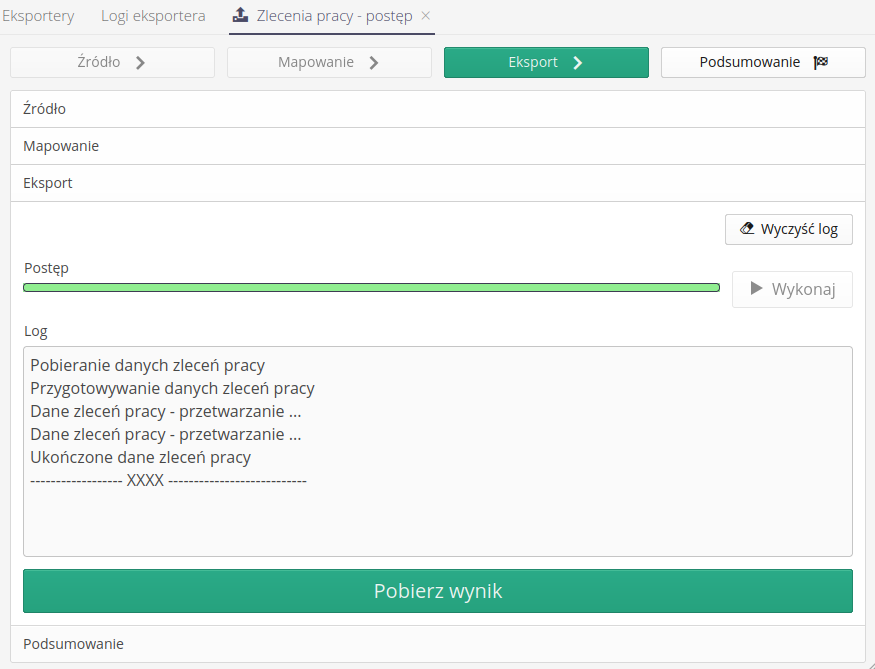
Actions available in this view:
-
Execute - perform the export, collect the data and format it according to the mapping
-
Clear log - clear progress log
-
Get the result - download the export result (file)
When the operation is complete, we can go to the summary, view the detailed export log, save it locally.
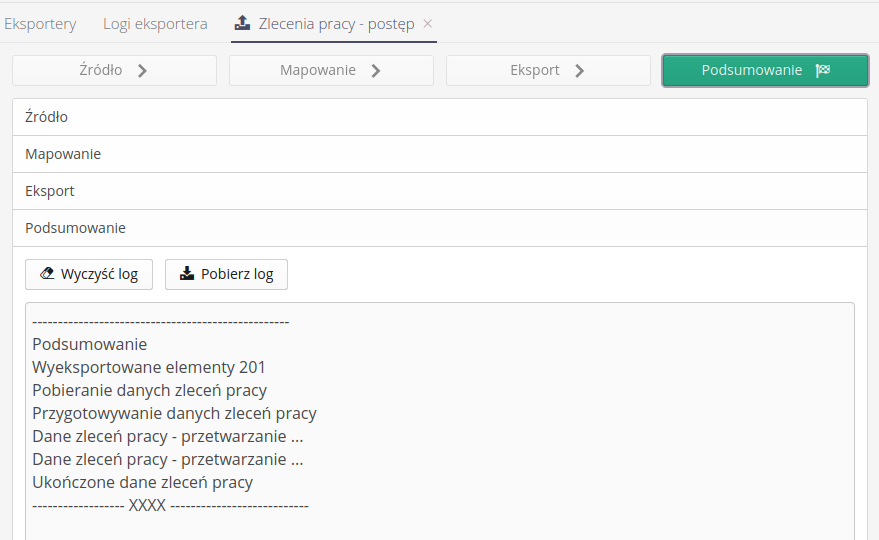
All export/import procedures are available in the form of logs stored in the database. We can review them and check the mechanism and functions called by users.

If the export was a test or ended with an error, this data is displayed in the window accordingly.
Single export
Some items in the list of possible objects to export have a different icon. These are so-called single exports. In this case, we export not all available records of a given type in the system, but a single record/object.
| Single exports were created because of the need to export data from the AMAGE system in a specific format such as XML, JSON. The transferred data should be of a singular nature i.e. we transfer only one of the elements instead of all records. In addition, such export format can be much more advanced and combining multiple tables in a single file such as inspection templates. |
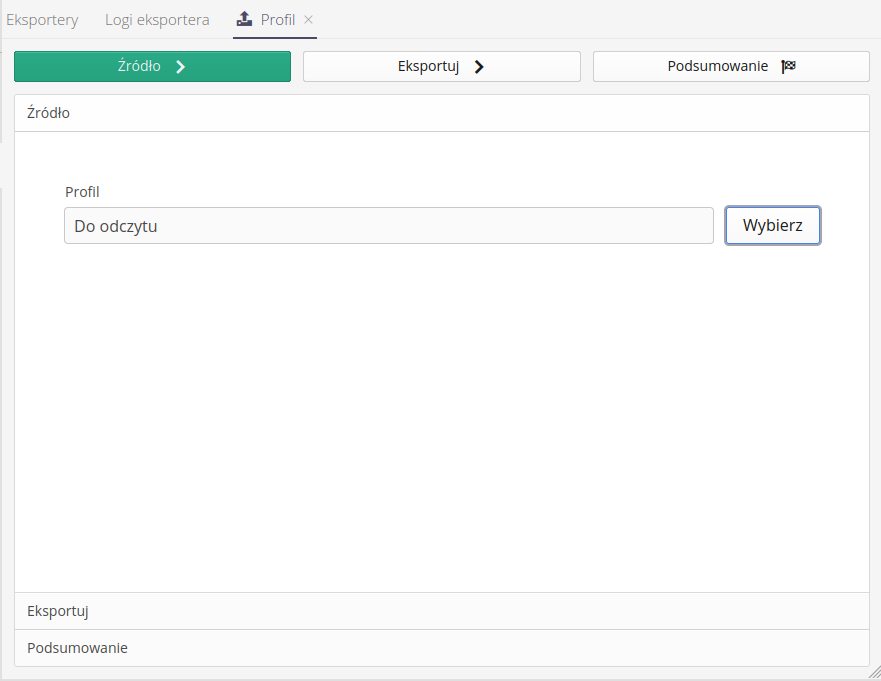
After selecting any object with a single export format, the export process window appears. It differs slightly from bulk export. In the first window Source we usually select the object we want to export. In the case of this figure, we select one of the templates of the authorization profiles in the system.
Then we proceed to the export process. The execution of this action is identical to the bulk process i.e. we perform data generation with the Execute button and then download the generated file with the Download Result action.
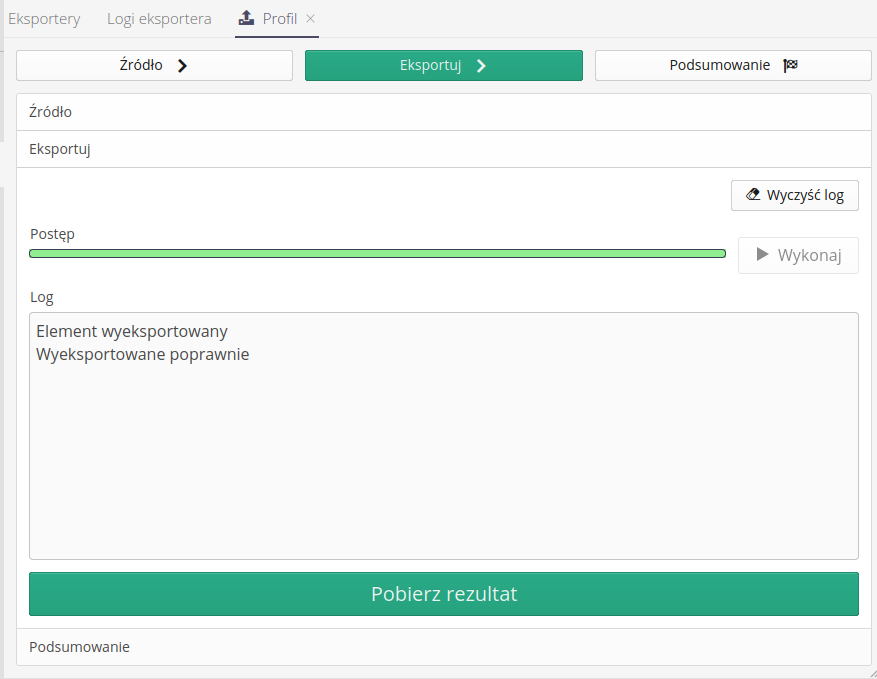
The final step is to summarize the entire process and be able to view all the data created during the export process.
Automated integrations
The AMAGE system allows us to automate data exchange activities between external IT systems and other data sources. Using this mechanism, we can automate the transfer of information to/from the system. To use this functionality, open the Data Exchange group in the system configuration section.
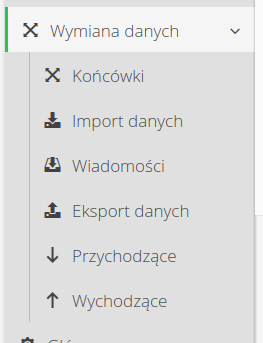
The menu contains both the already discussed mechanisms for exporting and importing data, but also a number of views that allow you to create a so-called integration tip and monitor data transferred to/from systems
Available views:
-
Ends - definition of points and communication mechanisms
-
Messages - list of all general messages received from/to external sources
-
Incoming - identified and handled incoming messages
-
Outgoing - all sent messages from the AMAGE system as a log of outgoing changes
Integration endpoint
An integration endpoint (Endpoint) is a list of integration sources/targets defined in the system. The mechanism allows for the definition of any number of endpoints that provide data to the AMAGE system (so-called incoming) as well as export data (so-called outgoing).
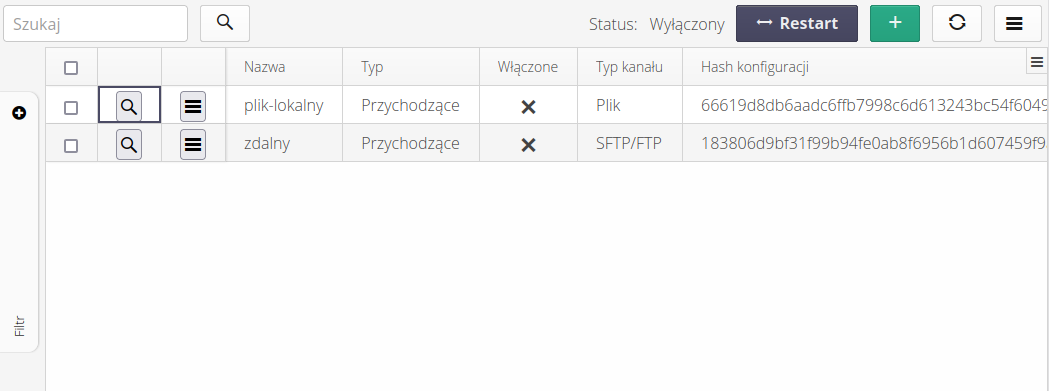
Each such definition has a defined data source/purpose. Supported by AMAGE are sources of the following types: local file (on the server), emails, FTP/SFTP server, relational database (SQL) tables and others depending on the implementation.
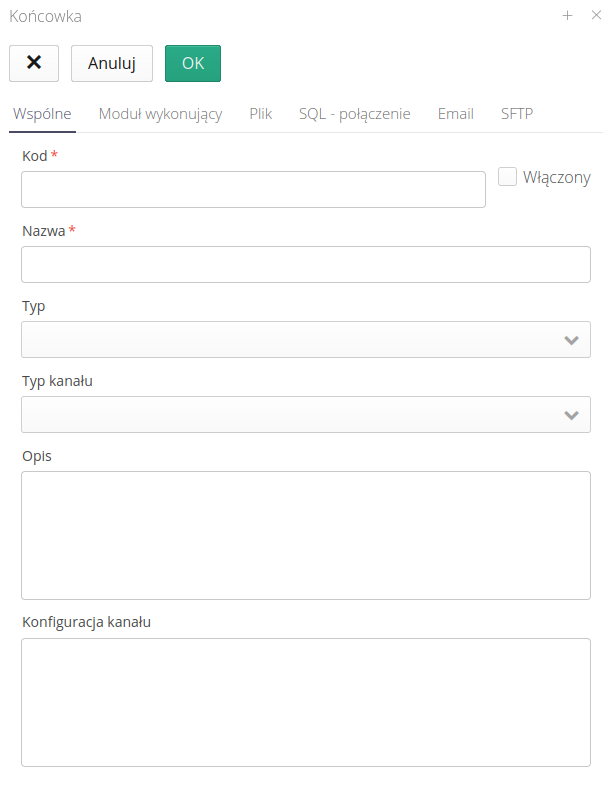
The definition of a new tip is divided into several sections. The `Common' data defines the general handling and integration mechanism
-
Code/Name/Description - descriptive data of the tip
-
Enabled - to enable/disable a particular endpoint from working
-
Type - Incoming/Outgoing - Data type. Incoming is the data that is the source of messages for the AMAGE system
-
Channel type - File, SQL, Email, SFTP - selected channel for communication (receiving) data
-
Channel configuration - the aggregate configuration of the communication channel - allows you to send/transfer information between instances.
| Depending on the selected channel (incoming, outgoing), the endpoint forms change the view and show only those options that are appropriate for a given communication direction. |
The second tab defines the source/purpose of the integration and allows you to configure it.
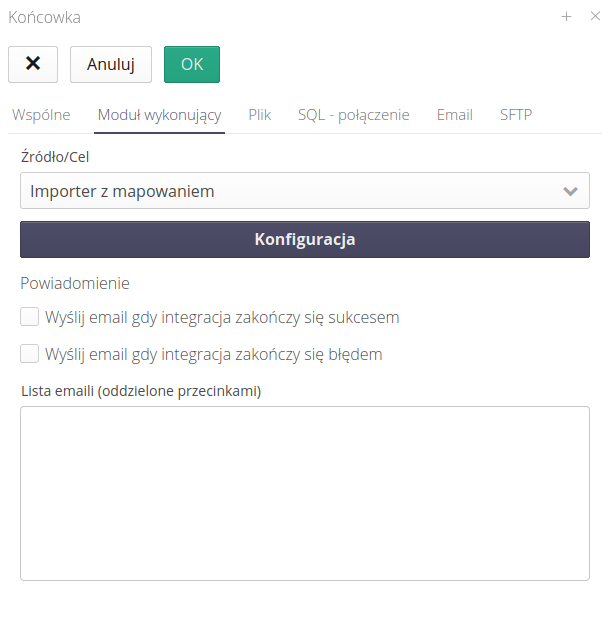
Configuration and source determine how received/sent files should be handled. We can use a number of functions that depend on the main parameters of the system. For example, we can choose as a data target the mechanism for importing data into the AMAGE system, and indicate with which mapping template the files that will be received from the defined communication channel will be imported.
Notifications allow you to send information in case of correct or incorrect integration. We choose the list of email addresses and how to send information and types of events:
-
when successful - we send when the integration is done successfully
-
when an integration error occurred - we send when an integration error occurred
-
email list - a list of email addresses that will be the recipients of communication
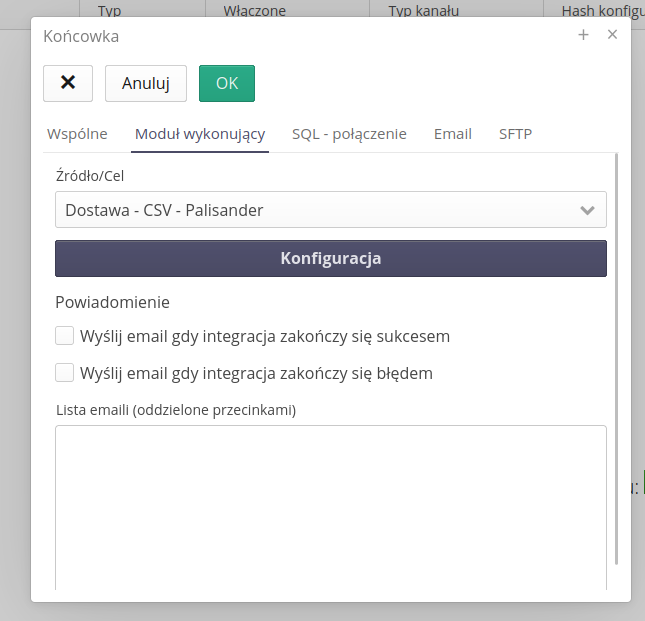
The example configuration of the executing module allows you to specify that you are using the import of deliveries into the AMAGE system as the target, and select with the lower checkbox the appropriate mapping with which to interpret the received csv/xls file.
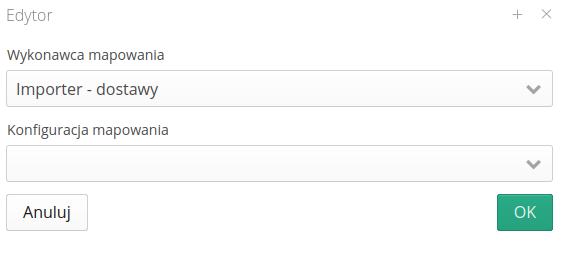
Each tip has its own configuration. Depending on whether you have selected the mechanism for importing data into AMAGE or exporting, selected fields from the definition of a given module may be active
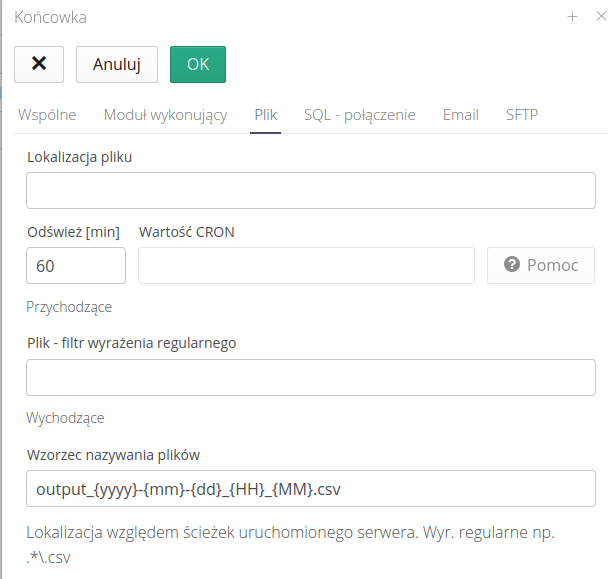
Integration through a local file (uploaded to the server where the AMAGE system is running). Configuration parameters
-
File location - the location of the file on the local system, e.g. /opt/import/data/.
-
Refresh [min] - every how much to refresh the status and look for new objects
-
Help - Help button indicating how to configure calls using CRON syntax
-
File - regular expression filter - an additional filter with which we can import only selected files corresponding to a given pattern
Outgoing * File naming pattern - for outgoing communication we define a naming pattern for the resulting files with the option of using timestamps.
| During inbound integration, the original data after integration is archived in the data warehouse. |
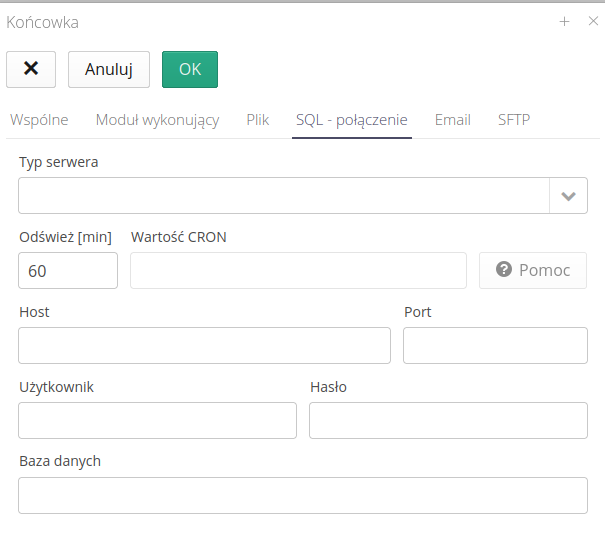
Integration with SQL servers
-
Server Type - the type of the target server, e.g. PostgreSQL, Microsoft SQL Server
-
Refresh [min] - every how much to refresh the status and look for new objects
-
Host/Port/User/Password - database and server access data
-
Database - the name of the database
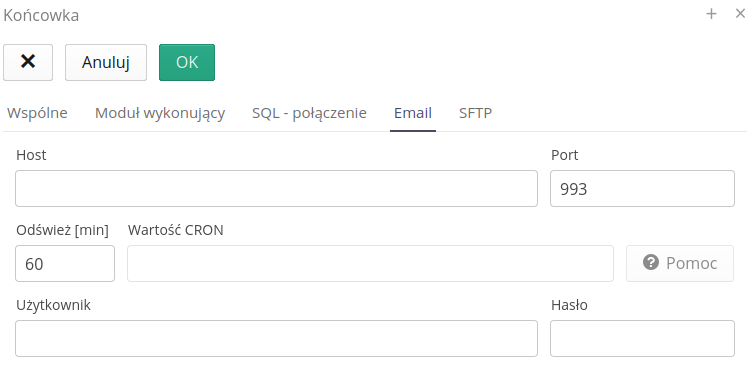
-
Host/Port - host/port of the mail server
-
Refresh [min] - every how much to refresh the status and look for new objects
-
User/Password - user and password for mailbox authorization
Additional filters allow you to edit and limit the transmitted data. Filter limits email based on defined filters.
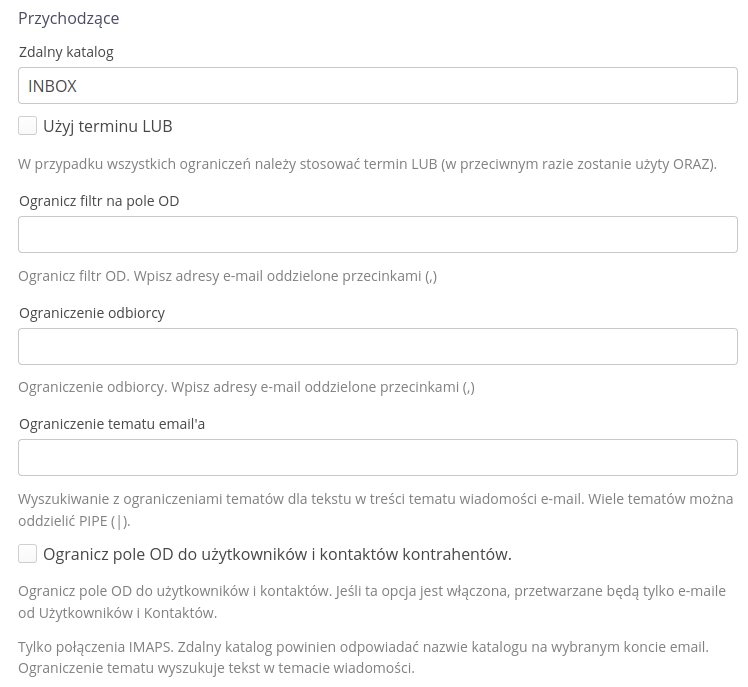
Incoming:
* Remote directory - INBOX - name of the remote directory for synchronization via the IMAP protocol * Use the term OR - allows you to select one of the given filters, which allows you to select one of the filters instead of all conditions at once * Limit the filter to the FROM field - accept only emails with specific addresses sender * Recipient restriction - allows restriction based on the target recipient. In the case of email systems such as Google, which allows adding additional characters to the address name, e.g. +, we can use this filter to specify that we only accept e-mails with specific sender addresses.
* Limiting the email subject - only handle emails that have a given template in the email title * Limit the FROM field to users and contractors' contacts - limit accepted senders only to the list of emails from users and contractors' contacts
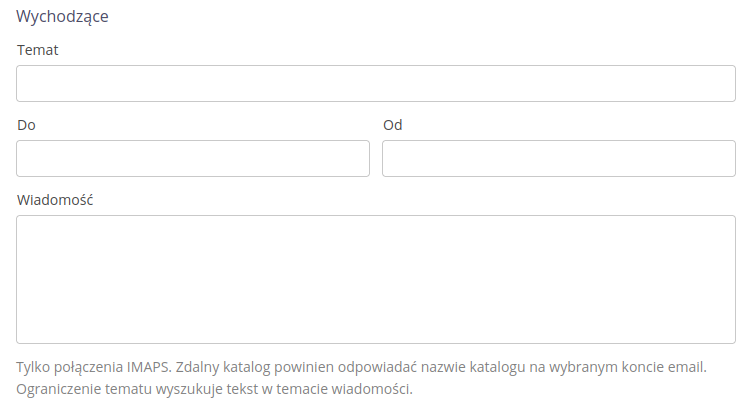
Outbound:
-
Subject - the title of the email message
-
To - as/when defining an email, i.e., the addressee of the message
-
From - an indication of who the email is from
-
Message - the full text of the message. The export result will be attached to this email as an attachment.
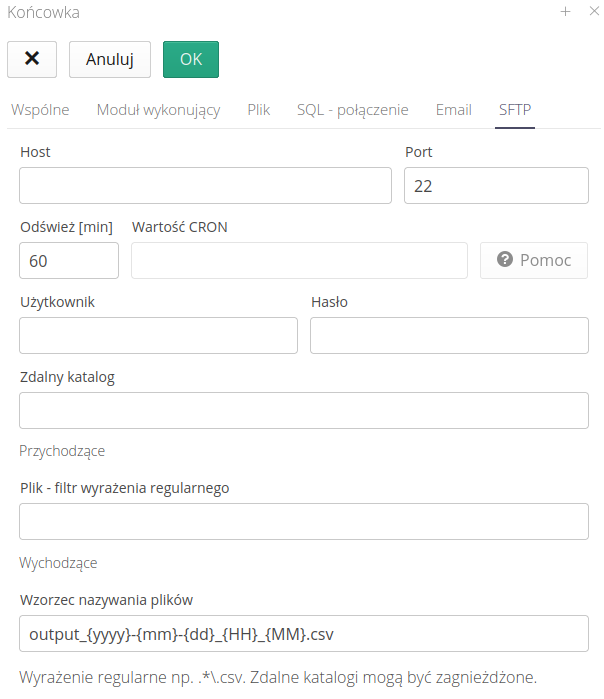
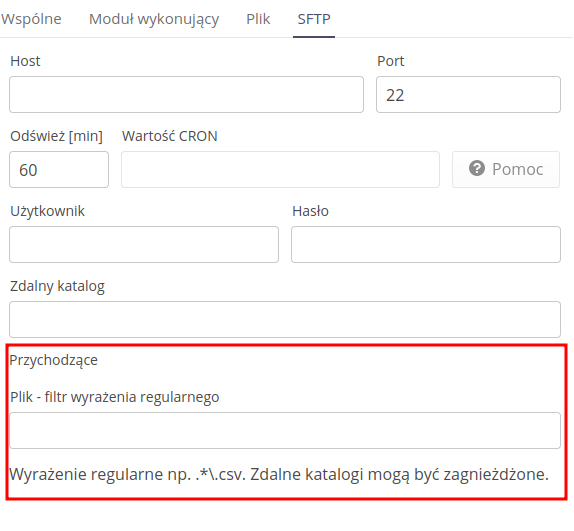
Integration via SFTP/SCP/FTP servers
-
Host/Port - address/port of the server
-
Refresh [min] - every how much to refresh the status and look for new objects
-
User/Password - user/password for login
-
Remote directory - remote directory for searching source files
Incoming:
-
File - Regular expression filter - the name of the file that will be accepted and imported into the system
Outbound:
-
File naming pattern
{yyyy},{mm},{dd},{HH},{MM}- naming pattern for files exported using this mechanism.
| During inbound integration, the original data after integration is archived in the data warehouse. |
Executors
Execution modules are automatics defined in the system that will use any connection (SQL, Email, File, FTP) and perform operations on the data obtained from this channel. Depending on the channel and data, we can use a set of functions and activities that will introduce data from an external source to the AMAGE system.
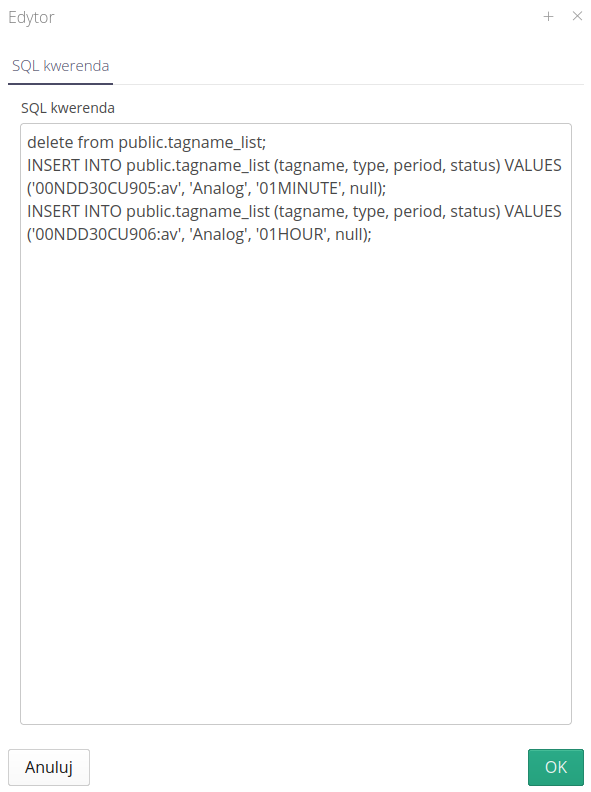
SQL - any INSERT query (export)
The module allows you to perform any operations on an external database system. This allows you to perform one-time/periodic queries of a permanent nature, e.g. configuration.
In the data definition window, we enter any set of SQL queries that will modify the external system.
SQL - production parameters/data (import/export)
The module allows imported data to be transferred to resource parameters or production data. For example, external systems may provide information in exchange tables. These data should be read and then entered as parameter values in the resource (along with the history) or entered into any production parameter.
After enabling the configuration, we get two tabs. One for the operation of the SQL query and the actions to be performed after the import is completed - also for the SQL query.
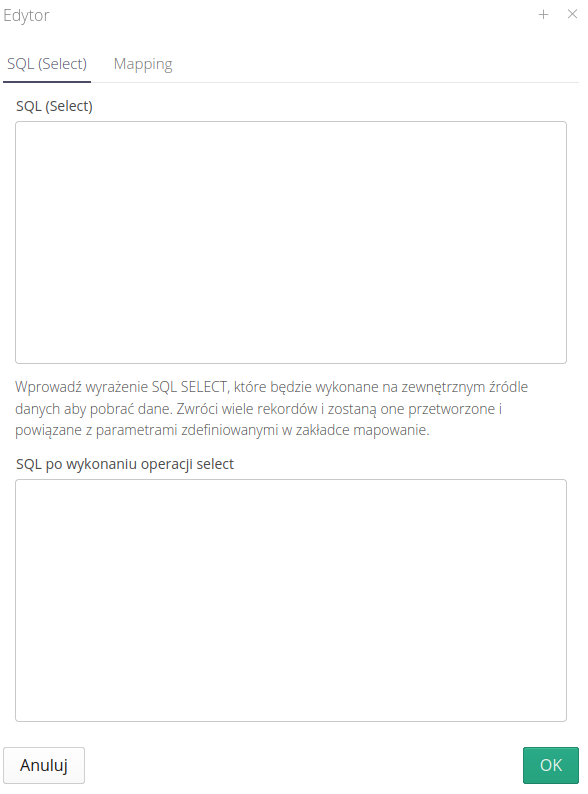
In this case, the first query may be to retrieve data from any tables of the remote SQL system and organize them into columns with appropriate names. On the other hand, the finish query can be used to delete already read records from the remote exchange table.
In the case of remote tables that cannot be cleaned, we can use the functionality of remembering a field in the AMAGE system and treat it as an identifier for subsequent queries. For example, the SQL query and the field may look like the picture below.
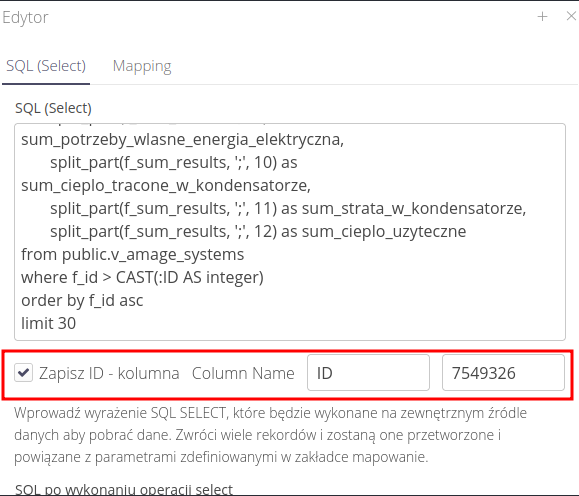
In the query, we use the ID field to limit the data to only those that are newer than the last time we processed them. After the query is completed, the system will automatically save the last processed record ID.
| In the initial case, set the field to a selected value, e.g. 0 |
The second section allows you to define the mapping, i.e. the destination where the data will go. We do this by adding more mapping records. The mapping links the columns from the SQL query result to the destination to store the data.
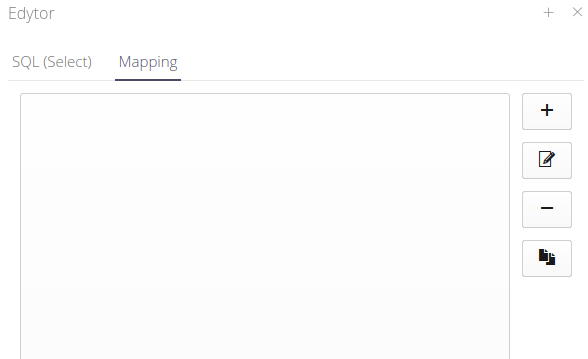
The configuration allows you to specify:
-
The name of the column that contains the date and time of data recording
-
The name of the column that contains the value to retrieve
-
Ability to specify a mathematical equation to process values, e.g. when we want to multiply the downloaded data by 1000
-
Mapping description
-
The destination where the data will be located. You can choose between resource parameters and production data
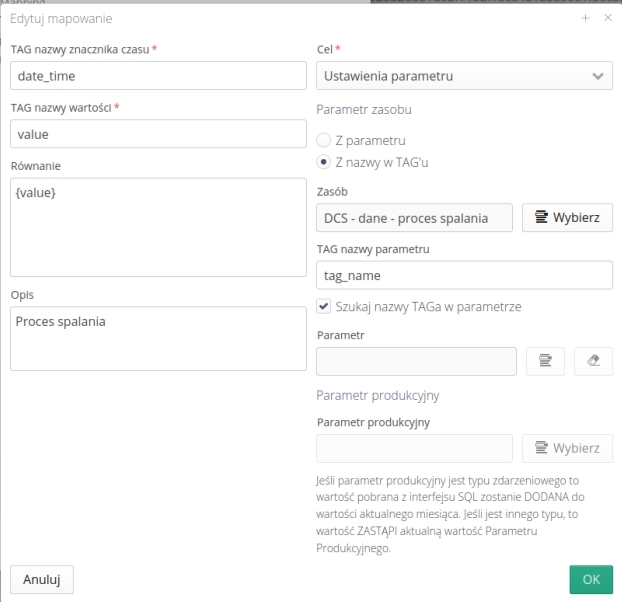
In the case of a production data, we specify a specific data to record the downloaded value.
In the case of a resource parameter, we have the option of either indicating a specific parameter or indicating which column from the SQL query result stores the parameter name (limited to the selected resource). This allows us to dynamically enter data for several parameters based on the data in the source system. Using the Search TAG Name in Parameter option allows us to search for the name in the name/description field of a given parameter without the need for an exact comparison, i.e. the field, e.g. KKS number, can be included in the longer description of the parameter and the system will link them correctly as well.
| For outgoing integration, i.e. sending data to the system, another field appears with an INSERT query. |
Here we can enter a query that will save all values defined in the mapping, e.g. the current parameter value in the remote SQL system.
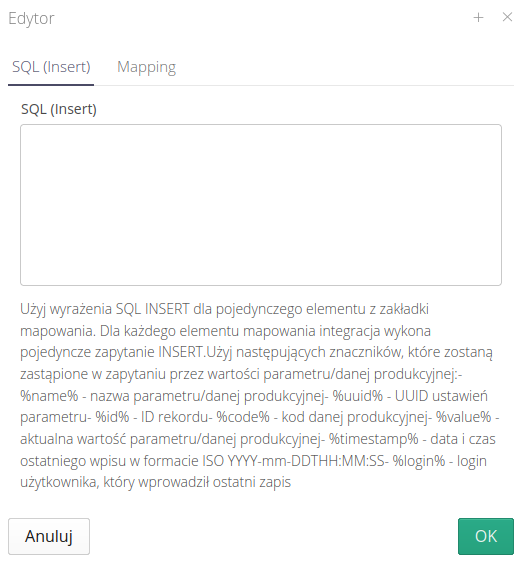
The window contains information on which tags to use so that appropriate values of the source data appear in their place - value, time, user, etc.
Importer with mapping
The module allows you to import data from a CSV/XLS file, e.g. downloaded from an FTP server. We designate the import function and parameter mapping.
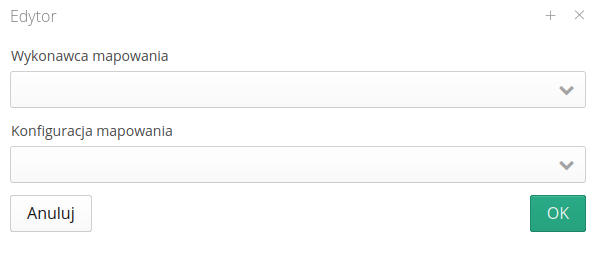
| Refer to the importers' documentation to configure the data mapping. |
Exporter with mapping
The module allows you to call the data exporter according to the selected mapping and send the resulting xls/csv file to an external channel (FTP/Email)
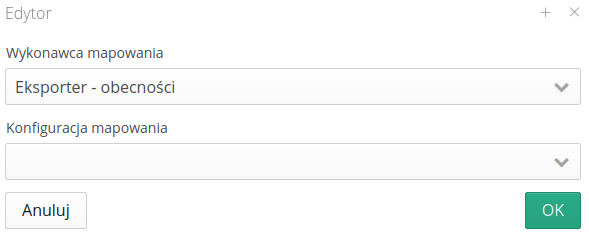
| Please refer to the exporters documentation to set up data mapping. |
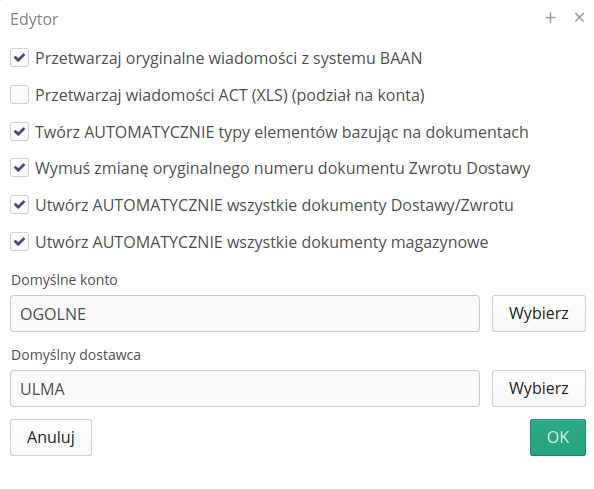
EDI - Delivery - CSV - Leases/ULMA
Module for importing data in ULMA CSV format.
Integrations - Palisander - automatic integration of transfer documents
For the lease and settlement system, the possibility of importing data in EDI format from Palisander has been added. Delivery and returns data are automatically integrated in the system.
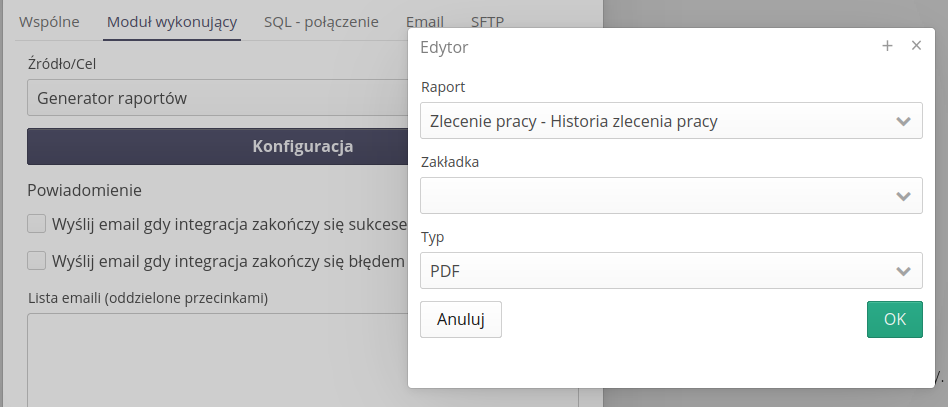
Data exporter - integration endpoint for report from the bookmark
For automatic integration systems, the ability to generate a report from a selected report template and a defined bookmark (data/filter definitions) has been added.
After selecting the 'Report Generator' option, when invoking the machine, it will select a report with a specific data range and generate a report in the selected XLS/PDF format, use it in a defined data extension and send it as an email attachment or send it to a specific SFTP server.
Email content
Reading the email content and saving it in the system. No configuration required. The integration mechanism has been expanded to include additional transfer/reception of files from email addresses. Using this mechanism, we can determine which email documents will be downloaded from the server (from the recipient, with title, location). These emails are loaded into the system into the integration module and all their contents are made available in the system (attachments, content).
This also allows e-mail correspondence regarding a given project to be stored in the system. Just send an email with a specific filter to the target email address and the system will take care of everything automatically.
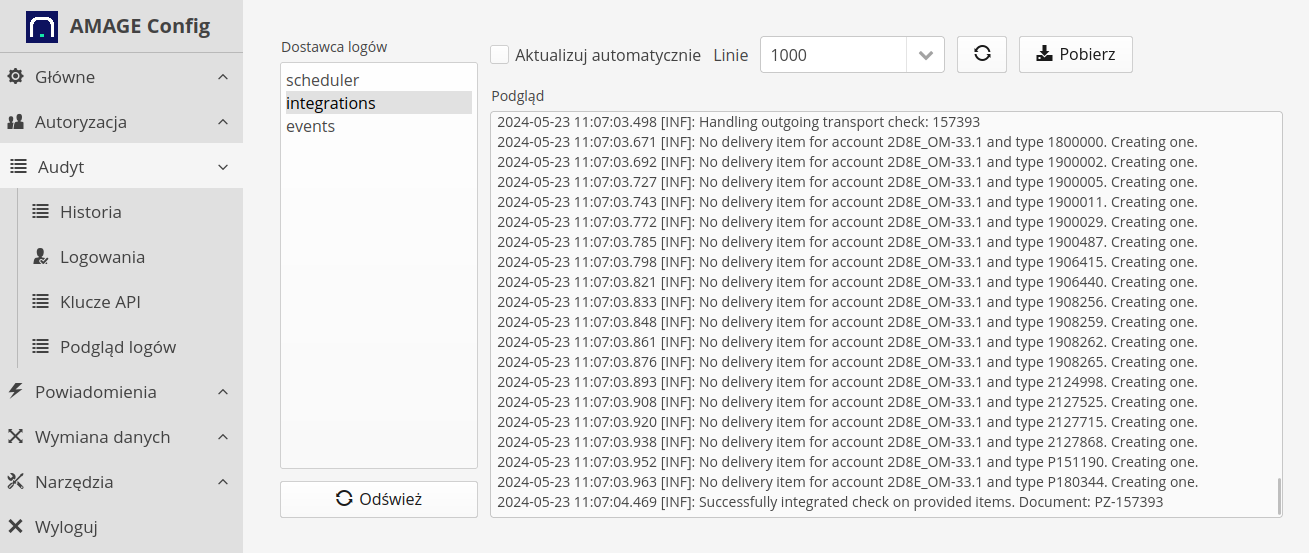
Operation logging and preview
All information regarding integration machines is saved in system logs. We can view detailed information about operations that have been performed in the system. In the configuration section of the Log preview menu we have access to all operations that have been performed in the system. By selecting the integrations logger, we can view detailed activities performed by these machines.
News
The message list contains all messages received by any data end. The mechanism for handling data from external sources is as follows:
-
Receive files/objects according to the defined pattern in the stub definition
-
We transfer the objects to the AMAGE system, save them to local storage and create a
Messageobject -
We review the stub configuration and check whether the received object can be processed by the defined receiving module (e.g., we accidentally downloaded the wrong file type, the files are corrupted, the files do not contain relevant data).
-
If we correctly identify the files, the corresponding incoming messages are created and the handling procedure is passed there.
-
NOTE: If the object is not processable, it only stays at the message view level.
The message list just contains all such messages received from external systems.

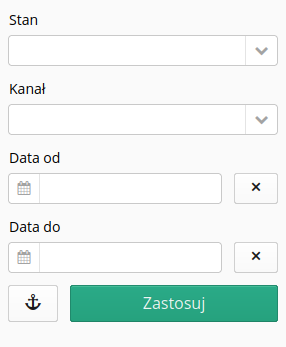
Using message filters, we can limit the data and be able to analyze all records collectively.
Message details include all identified properties of this message and information about related incoming/outgoing data
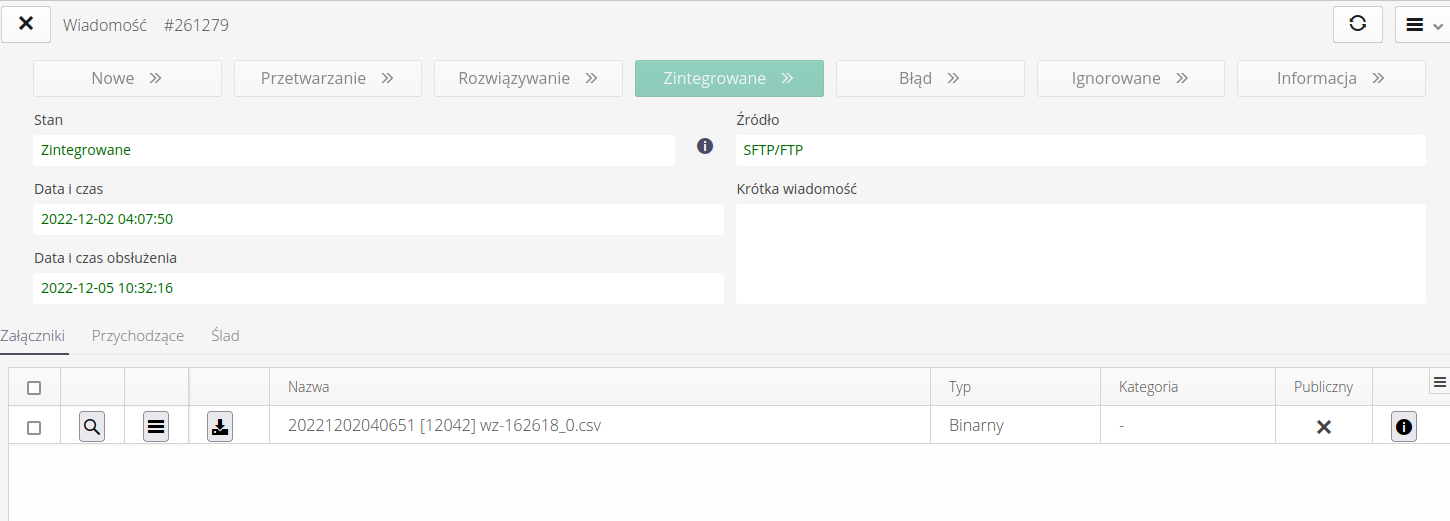
The message may be in the states:
-
New - a new message, just received from a specific tip
-
Processing - message under processing
-
Resolution - the message (and its effect) requires a decision by the operator
-
Integrated - message integrated in the main tables of the system
-
Error - integration error
-
Ignored - a message openly ignored, e.g., sent again by accident
-
Information - an information message. Correct in syntax, but at the moment not supported by the appropriate mechanisms.
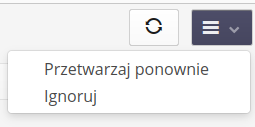
The context menu for each message allows you to start reprocessing (e.g., when the error that caused the integration to stop earlier is corrected) or ignore that message
-
Reprocess - repeat processing from the beginning
-
Ignore - ignore the message and do not process it.
For example, in an incoming message to the AMAGE system, a correctly identified delivery file appears and an incoming message is created and then further processed.

Incoming integrations
Incoming messages are all messages that have been correctly identified as processable. The list of all messages allows you to review the data and access all the information available there

In the view, we can use basic filters to display only the main incoming messages we are interested in.

Available filter states:
-
All - all integrations in one view
-
Active - only active messages, i.e. those that are currently being processed by the user or those that are waiting for decisions
-
Ignored - messages ignored (either by the system or by the user)
-
Information - messages treated as informational i.e. not affecting the structure of the system
-
Integrated - messages already integrated into the system
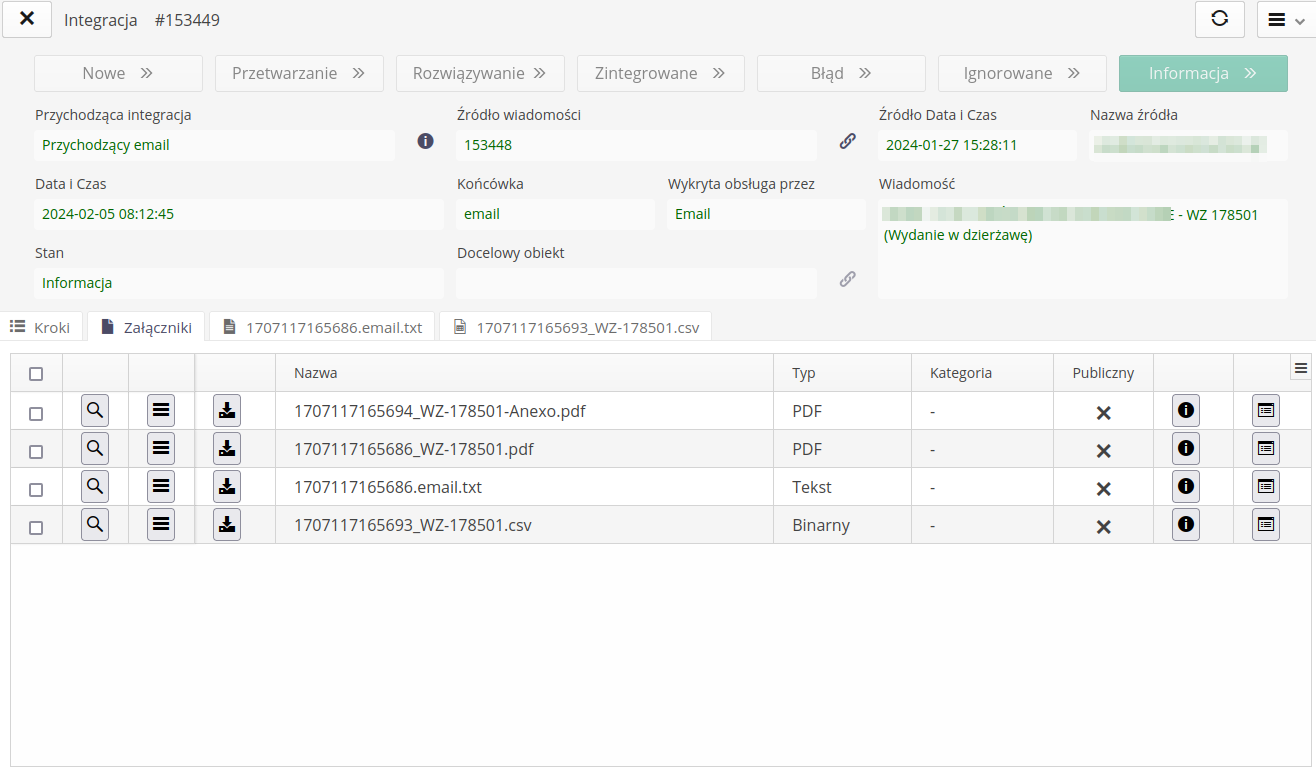
After selecting any incoming message, we go to the integration details view. The top section contains basic information about the integration, the data and an extract from the information contained in the source data.
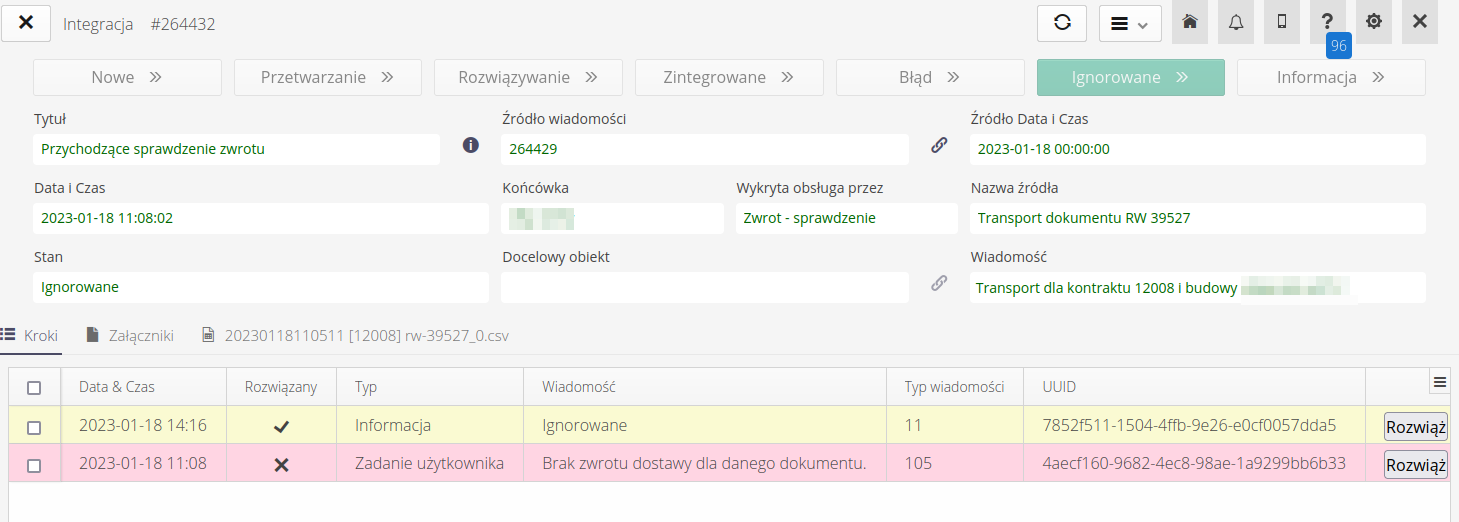
The attachments panel contains all data in the form of files attached to the message. These are source files, companion files (e.g. PDF) or similar files. From here you can always download the file for further analysis.

If the system can interpret and display the contents of the files, there is an additional tab for the contents of the files. Here we display the contents of the CSV file and the contents of this document (in this case, the delivery document).

The system automatically detects the formatting of separators in the CSV file and divides the data into columns accordingly. In case of errors in the CSV file, the system returns error information.
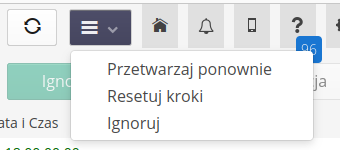
In the message detail view, we have the option to start reprocessing the message (when we want to run it again for some reason), reset the integration steps, or mark the message as ignored and not deal with it again.
Each message at the bottom has an additional table with integration steps. Integration steps are the various stages of processing such a message. For delivery documents, these could be searching the system for the relevant target warehouses, supplier, assortment, pairing and creating an order, etc. Each such relevant step appears as another step.
Sometimes the system is unable to solve a given problem on its own, e.g., a billing account number is given in the document, which is not in the system. In such a case, the integration stops at this step and asks the supervisor to make a decision.
We also have buttons in each line:
-
Resolve - goes to the integration troubleshooting dialog box
-
History - shows the history of this step - who solved it and when, and what parameters were given
-
Delete - remove the given step
When you select an action to solve any problem, the system presents it in the form of a dialog box. In this case, an order document has not been previously created for the delivery document. Using this dialog, we can indicate the order that should be associated with the delivery in question. After approving this data, the system proceeds to the next steps and, if it does not encounter any further problems, automatically continues the integration.
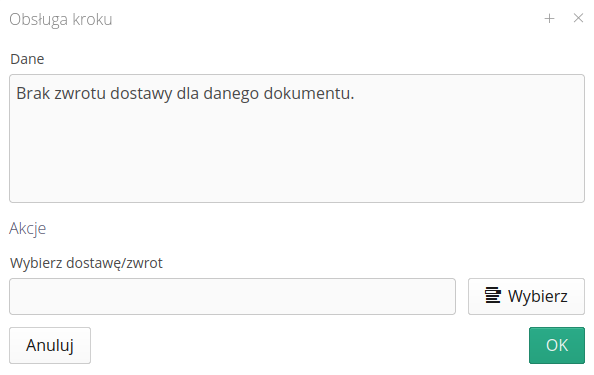
| Depending on the type of problem, object and data, the dialog may contain other questions/user interface. |
When you select the History button, we display information about how such a problem was solved and the person who made such a decision.
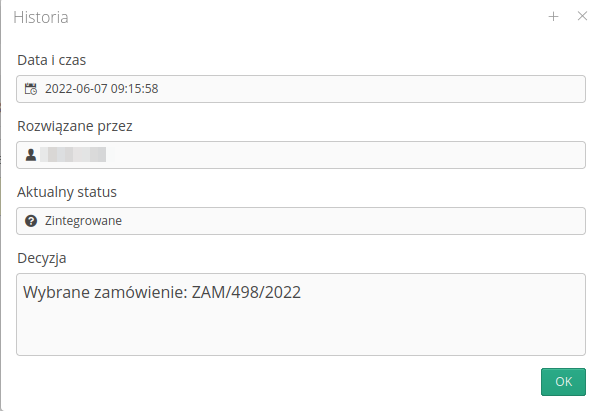
Once the integration is correct, the system automatically links the integration document to the target document - in this case, the delivery document. We can quickly navigate to this resulting document using the Target Object field and the navigation action located next to it.
Once the integration is complete, the status of the message changes according to the result of the integration.
Outgoing integrations
Outgoing messages contain all information about data that is sent from the AMAGE system to external sources. The main view contains in tabular form information about the sent messages, their destination address/data end, and the date when such integration was performed.

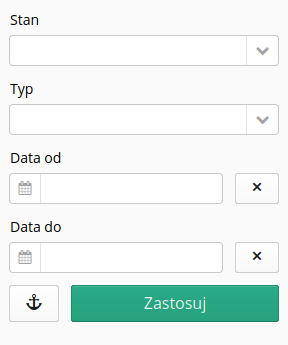
Using an additional side filter, we have the ability to limit the view and filter out data relevant to a given date range or status.
BIM/CDE environments
The AMAGE system has the ability to integrate with CDE (Common Data Environment) environments created to support BIM processes. With these integrations, we can access and visualize IFC/3D models of designed investments and access technical data such as libraries and documentation. AMAGE allows access to various CDE environments depending on the system used by the client. The first system is the Catenda environment (BIM Sync/Catenda Hub) and we will cover this documentation on its example.
| In order for the CDE module to be available to users, it must be enabled in the system configuration flags in the "Integration" section. |
After proper authorization and connection of the systems (see one of the available tutorials on how to do it fully), we get a two-way connection and the ability to interact with data from the environment directly in the AMAGE system.
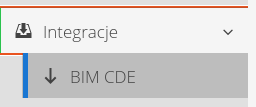
Access to the CDE browser is possible through the main menu in the Integration section. We select the BIM/CDE action.
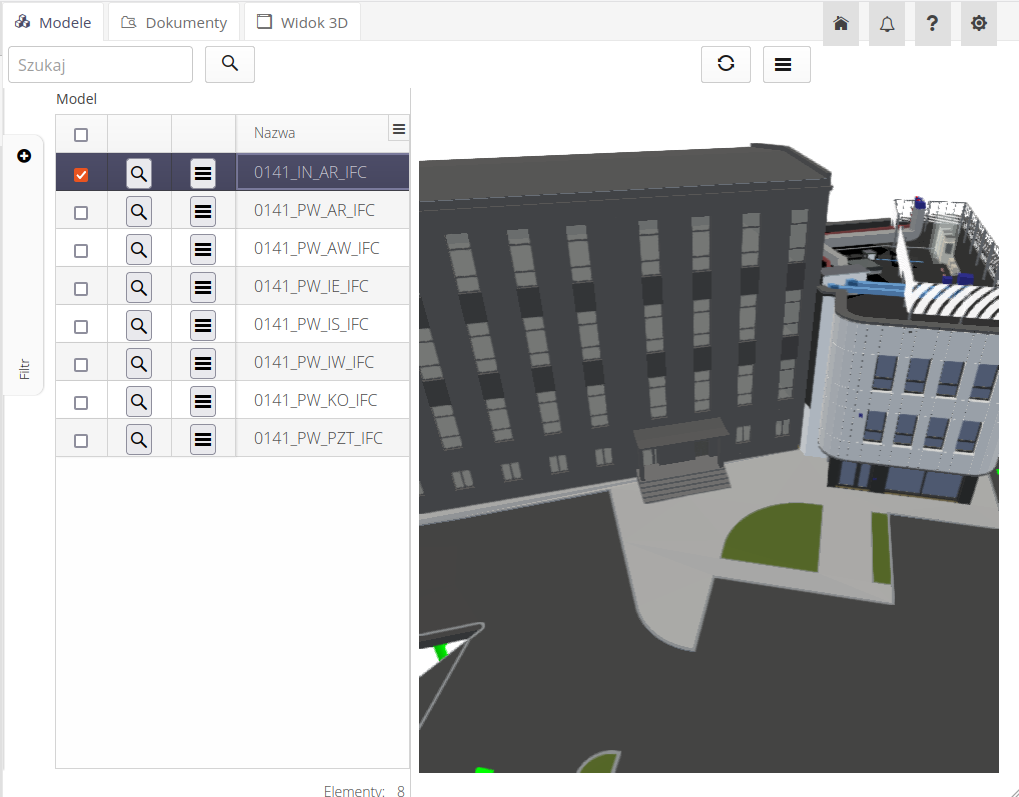
After loading the view, we can access:
-
Models - 3D IFC models with a built-in contextual browser and data import to the AMAGE system
-
Documents - a list of libraries and documents available in the CDE environment
-
3D model - model of the entire project and data viewer
After selecting 3D models, we get a list of all IFC models in the CDE in one part. After selecting (marking) any one in the right part of the window, the 3D model browser is initialized. We can navigate it using the mouse.
A context menu is available for each model.

It allows you to:
-
Preview of a given model in a 3D view
-
Calls to the data importer from the IFC format to the resources in the AMAGE system
-
Open the CDE environment in a new browser window
-
Opening the browser of a given model in a new window
Selecting the document viewer allows you to navigate through all the libraries in the CDE. The list of libraries allows you to select any library in the environment and browse it. The buttons in the same line allow you to go to the main directory (root) of a given library and go to a higher level when navigating through the folders of a given library.
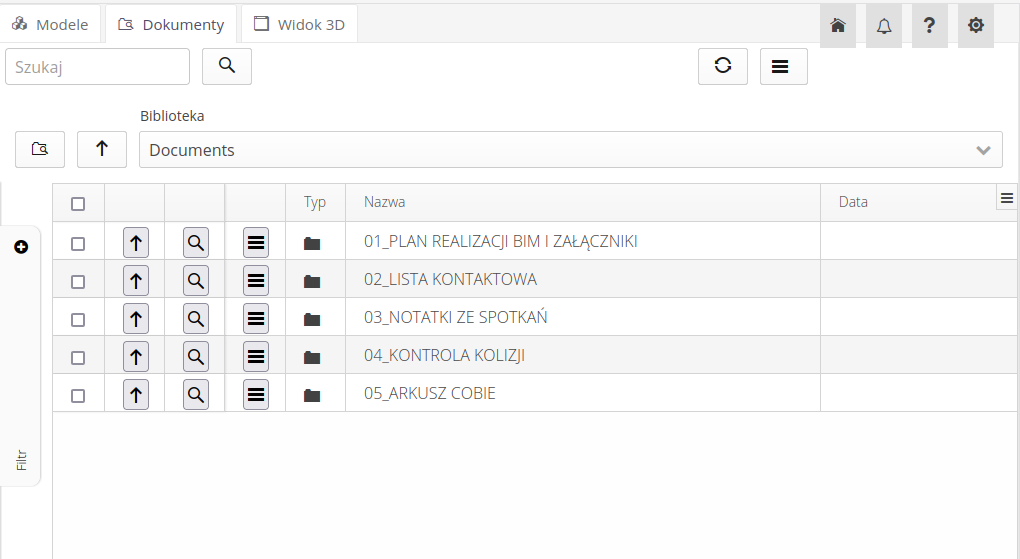
Each line shows either a folder or a specific document. Using the buttons, we can go to the parent folder, call the PDF document viewer or call the context menu.
In the context menu, we have the option of previewing the file, downloading it to a local drive or attaching selected documents to a resource/type in the AMAGE system.
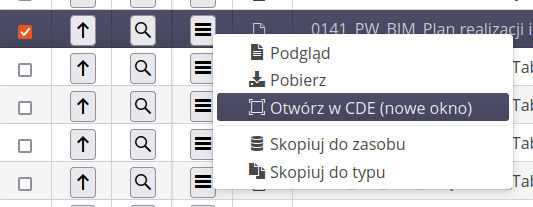
Linking documents will download them from the CDE and attach them as attachments to the selected resource/type. In this way, we can transfer documentation such as data sheets and technical information.
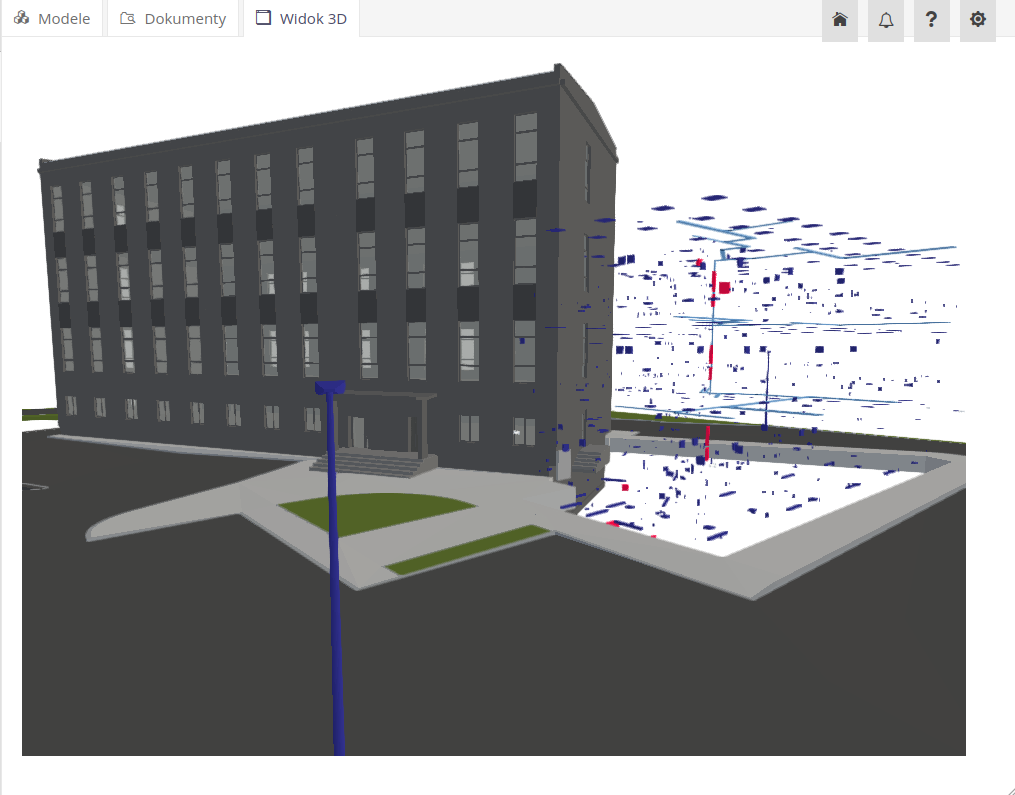
After selecting the 3D View viewer, the system loads all the models available in the CDE environment and visualizes them in one view.
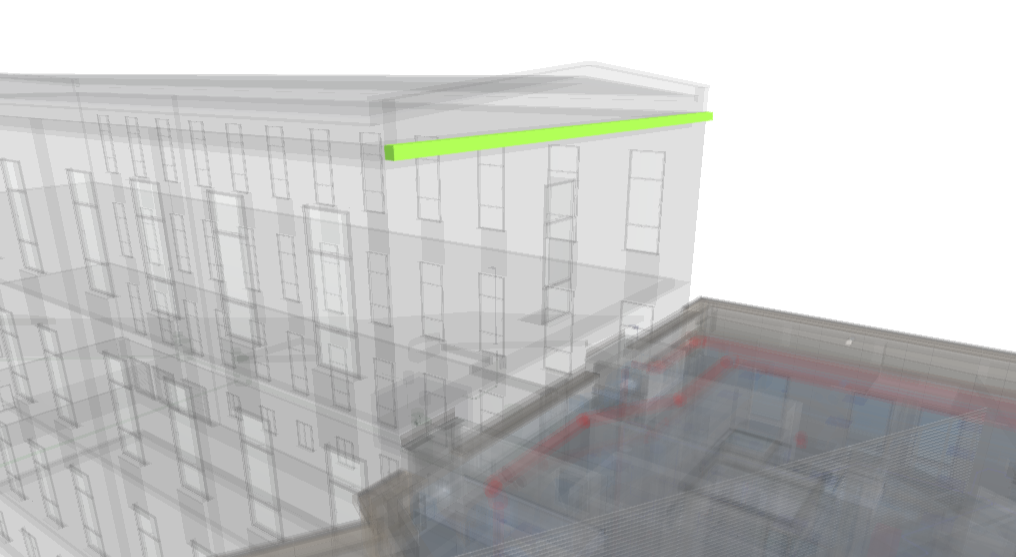
The system allows you to display all system assets in the context of a 3D model. Using a dedicated action in the asset list, we can display selected elements on the model. After loading, the model marks all irrelevant elements as transparent and highlights and selects all selected objects.
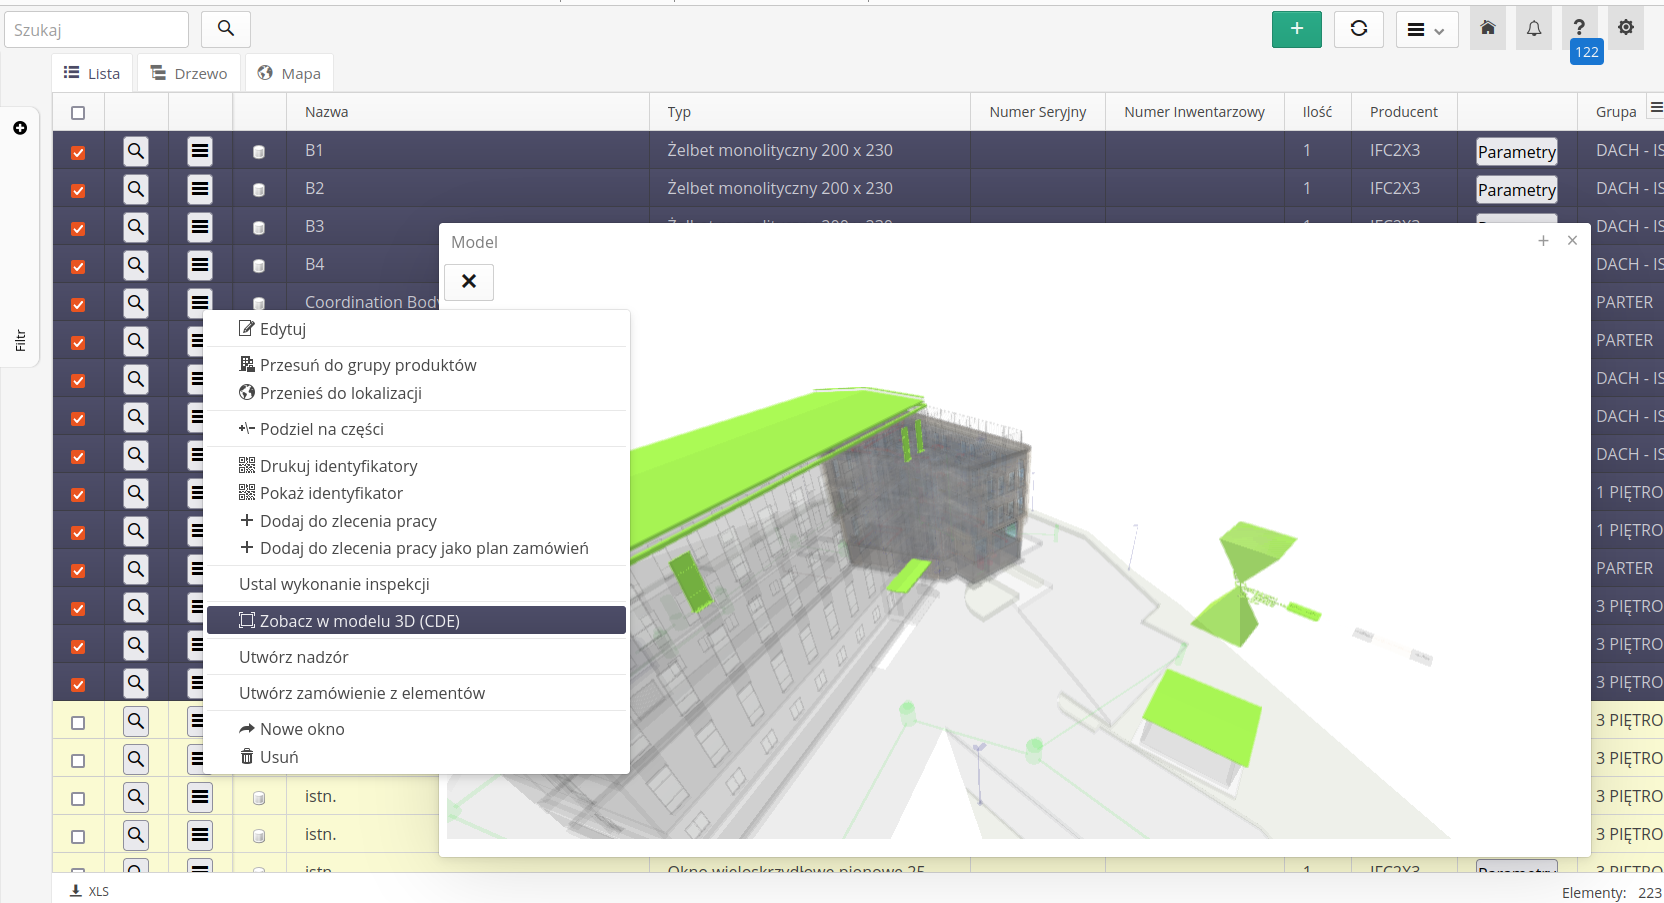
| For proper operation, it is necessary to have a GlobalId parameter defined for each such resource when importing data, either from the IFC model or from other sources. |
A single object with an element preview.
CDE configuration
If the access authorization to the CDE system expires, the following message will appear and, after approval, the system will automatically contact the CDE environment and re-authorise. When you return, the interface will automatically reload.

To configure the environment (for the first time or to change the configuration), go to the configuration section and select the action from the Extras menu called BIM CDE.
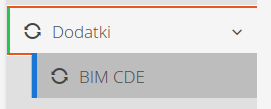
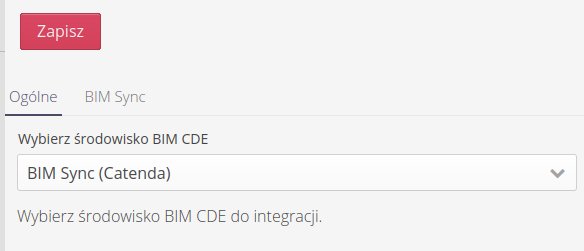
In the first tab, we choose which CDE environment we are going to connect to.
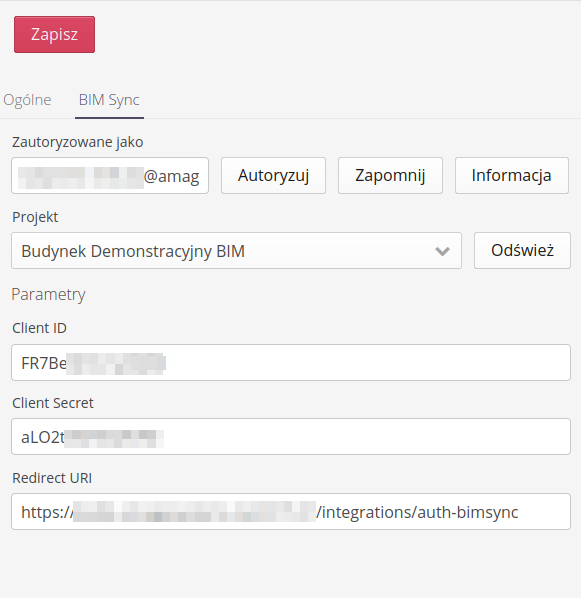
In the tabs of a specific CDE environment, we have the option of setting connection data and initial authorization or performing other activities specific to a given environment.
For example, the Catenda Hub/BIMSync environment allows you to enter authorization data obtained from this environment (authorization code, etc.). As the final element for the Redirect URI field, we provide the path of our instance extended by the address /integrations/auth-bimsync.
For SaaS systems, we provide a universal address for all instances, i.e.. https://app.amage24.com/router/bimsync/auth
|
In the Catenda Hub environment, we also have the option of invoking the first authorization, removing this authorization or displaying information about the current authorized user and selecting the project to which we will connect using the CDE browser in a given instance.
REST API and access
The system provides REST API for integrating external systems with the AMAGE system. To access the API, you must use the authorization mechanism using API keys built into the system. Generate an API key and activate it in the system.
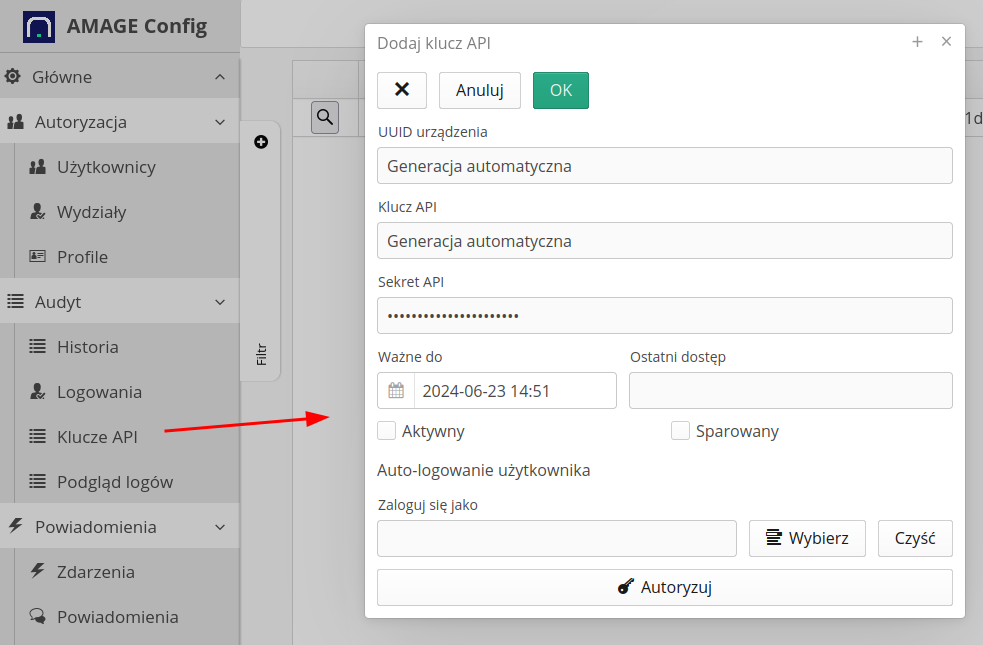
Record information about IDs, API key and secret. To authorize REST API queries, use this data to generate a query signature and send it in the query parameters.
| Refer to the examples in the AMAGE Academy to see the authorization mechanism and see sample codes and queries that are used to perform the appropriate REST queries and communications. |
The REST mechanism provides the following interfaces
REST API - providing report data in JSON format
Reports that are available in the AMAGE system can be downloaded using the REST API in JSON format. The format allows you to download data and use it in other Business Intelligence systems.
Interfaces:
-
rest/amage/v1/reports/generate/json/by-bookmark-uuid/{uuid} - downloading data in JSON format by generating data via the Jasper library. UUID is the unique identifier of the report tab from which we generate data.
-
rest/amage/v1/reports/generate/raw-json/by-bookmark-uuid/{uuid} - downloading data in JSON format, generating data directly by the AMAGE system. UUID is the unique identifier of the report tab from which we generate data.
-
rest/amage/v1/reports/generate/raw-json/by-report-uuid/{uuid} - downloading data in JSON format, generating data directly by AMAGE. UUID is the report identifier. All records of a given main object covered by the report are provided.
Interfaces expect any query format and GET method, they return JSON format ("application/json").
REST API - providing report data in PDF and XLSX formats
The interface allows you to generate reports in PDF/XLSX format, similarly to the JSON interface.
Interfaces:
-
rest/amage/v1/reports/generate/pdf/by-bookmark-uuid/{uuid} - generating a PDF report from the tab with the given UUID.
-
rest/amage/v1/reports/generate/xlsx/by-bookmark-uuid/{uuid} - generate an XLSX report from the tab with the given UUID.
Interfaces expect any query format and GET method, return binary format ("application/octet-stream")
REST API - downloading attachments
The interface allows you to download attachments based on their UUID.
Interfaces:
-
rest/amage/v1/attachment/get/by-uuid/{uuid} - downloading the attachment (Attachment) with the given UUID
The interfaces expect any query and GET method, return the binary format ("application/octet-stream") and the original file name.
