Structure
Structure
Resource Structure contains actions and views that allow you to inventory and access the data of individual resources. All actions are available in the 'Structure' group.
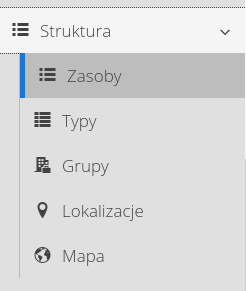
The available views are:
-
Resources - detailed information about equipment/machinery/products.
-
Types - information about the assortment and available items of a particular manufacturer.
-
Resource groups - resource categorization tree. Allows you to systematize information about resources
-
Locations - location tree. Predefined location tree to select in the places necessary to determine the geographic location
-
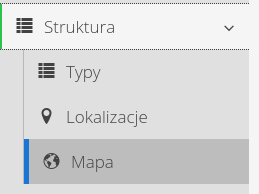
Map - general map - described in chapter Maps.
Resources
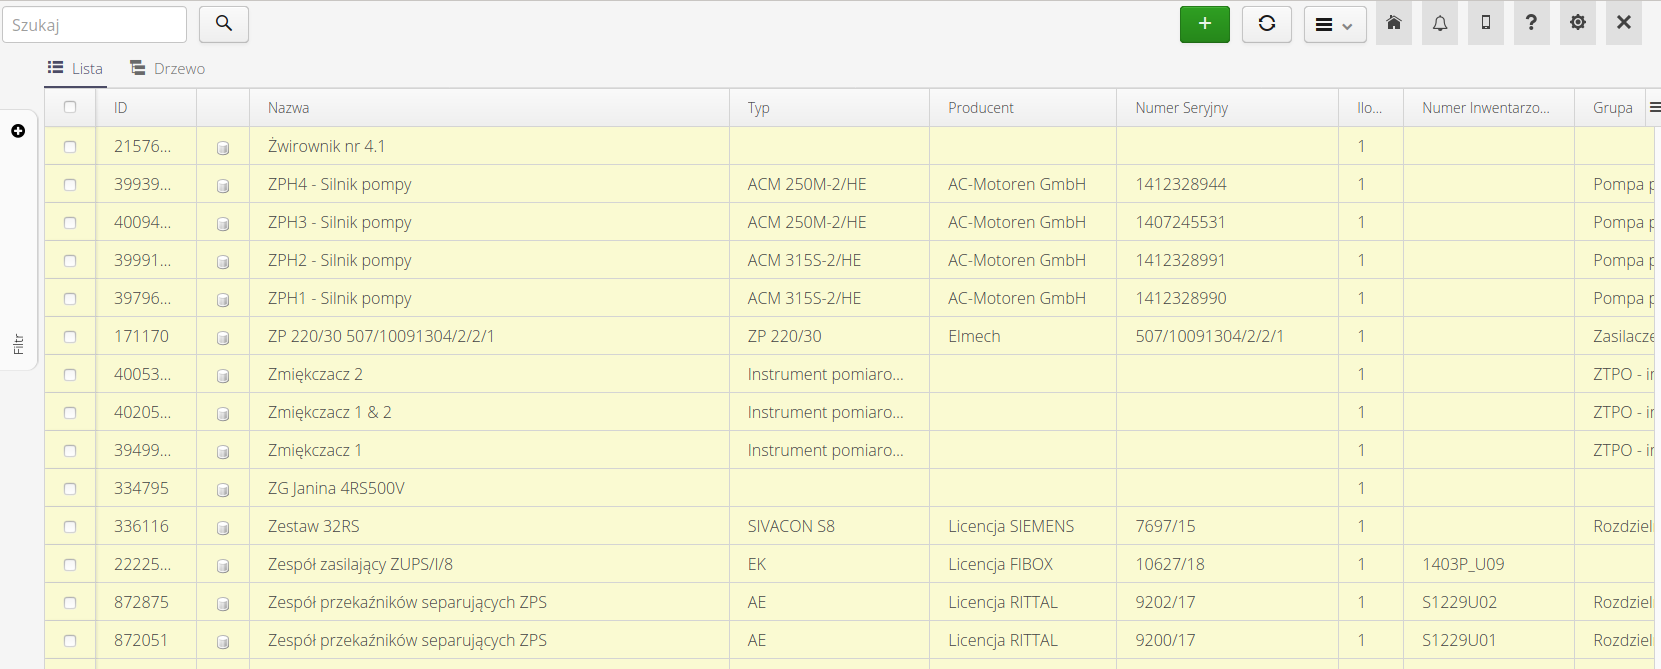
List of resources (products, devices) with the ability to view, create and edit them. The list contains information about all resources that are available in the system whether directly to the user as, for example, a source of documentation or are used as something that allows you to determine the exact place/source of the activity performed, such as service events.
| As a rule, a resource is anything that can be uniquely identified. For example, an engine that has its manufacturer, its type but also its serial/inventory number is a resource. Importantly, this is in contrast to Types in the system, which only have information about the manufacturer and type. A resource is of some type, but the type is not a resource :) |
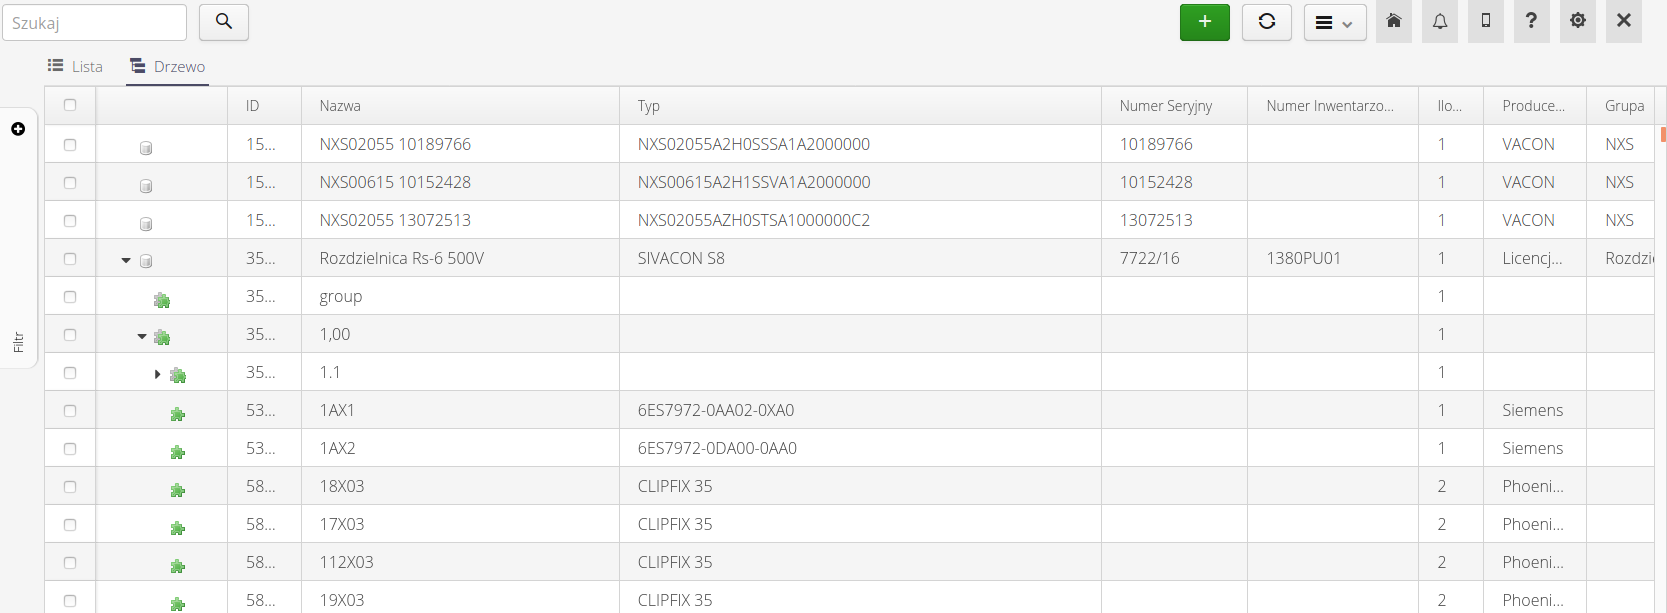
When you enter the resource list through the main menu, you get a resource view in the form of a list and tree of all resources defined/imported in the system.
| The tree allows you to visualize the subordinate elements. The AMAGE system allows you to create nested structures of resources, e.g. the internal structure of the switchgear, i.e. fields, cassettes, apparatuses, as well as the structure of the device: enclosure, motor, inverter, etc. allowing you to very accurately implement all event reporting, inspections, etc.) |
We can also use the 'Map' tab to go to the map view with the resources marked on it.
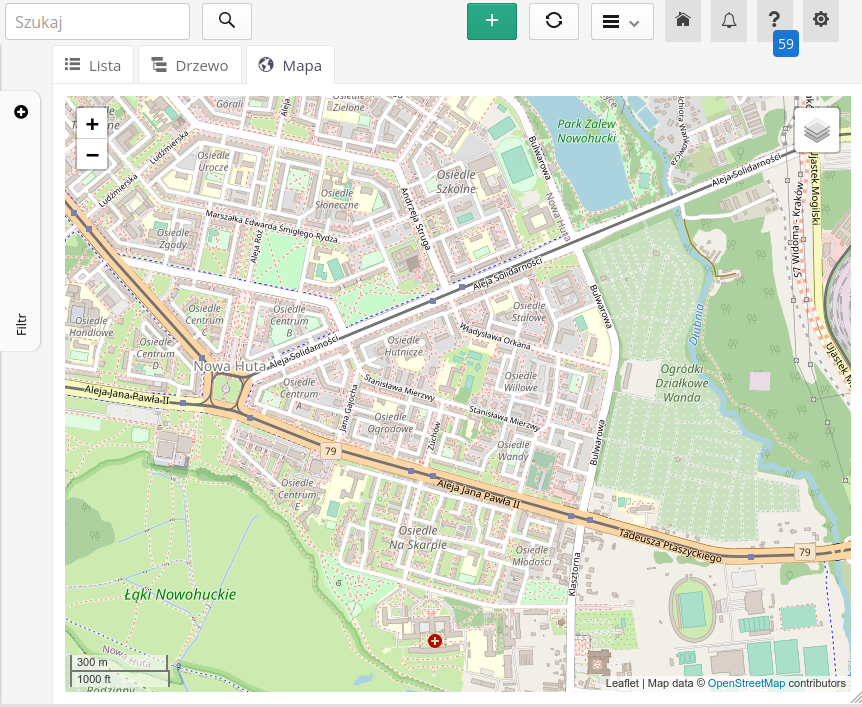
The map view allows you to add elements directly by selecting a place on the map.
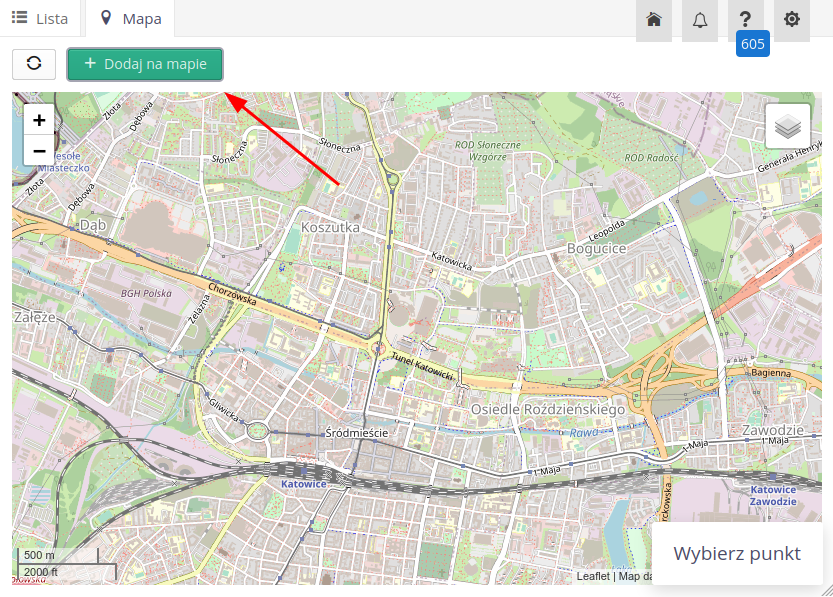
| For details, refer to the configuration and maps section on how to upload and work with your plant/construction plans. |
The tree has paging capability by default (for performance reasons). The number of pages, the current page and the navigator are located at the bottom of the tree view:

The resource tree can contain any nested structure in the internal structure of the resource. This can be used to indicate links between resources but also to represent the internal structure of devices such as electrical switchgear where individual levels correspond in the device structure - switchgear fields, cassettes and individual apparatuses.

List/Tree shows all resources with quick filtering. The filtering field allows you to search for text in the resource name, description, serial/inventory number. Additional filtering fields are available in the Filter side panel.
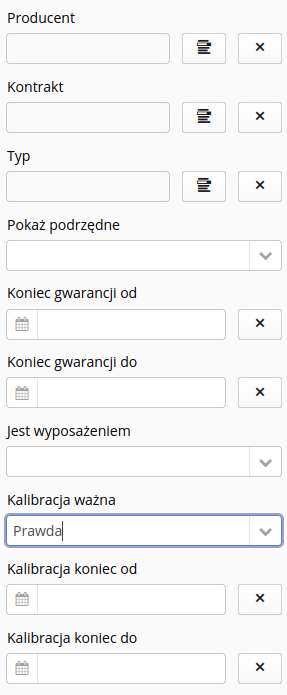
Using filters, you can further narrow down the presented devices in the list. Filters are divided into tabs. Basic information about the searched device is available in the first tab. With it, we can search in basic information, but also select resources that are equipment (e.g. measuring devices) and filter out devices that have a specific calibration date.
| The search is contextual and broadly considers a given type of object. Selecting, for example, a contractor will search the occurrence of such a contractor on both the position of the producer of a given resource and also the recipient/end customer. |
The second and third contain a tree of product groups or locations that allow you to select devices assigned to the structure. These views have their own filtering that works as soon as you enter the search texts.
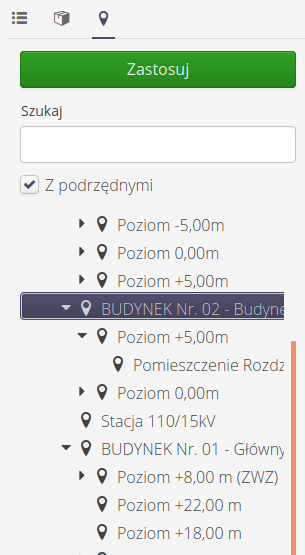
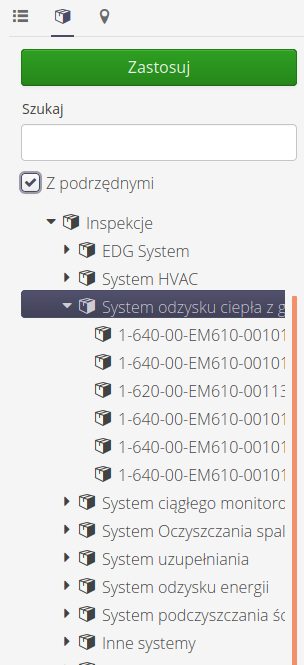
Filtering in the location and resource group trees can display the resources of a given point in the tree or a given point and all subordinate objects. To achieve this, select a given point in the tree and check the with child items option.
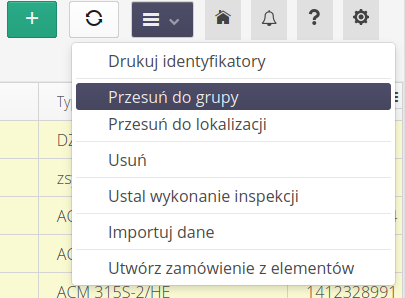
After selecting any number of resources in the list or tree, it is possible to call additional actions available in the context menu of the view. The visible actions depend on the modules available in the system.
Available actions:
-
Print IDs - calling up ID print formats for all selected resources.
-
Move to group/location - Calls up dialogs that allow you to move selected resources to another group/location.
-
Set up the execution of inspections - Calling actions that generate inspections for selected resources.
-
Create Supervision - Invoke supervision initialization actions in the supervision module for selected resources.
-
Data import - Calling a simplified importer from templates and xls/csv files defined in the configuration section
-
Create an order from items - the ability to create an order from selected items (e.g. to supplement/replace stock)
-
Add selected items to order - ability to add selected resources to an existing order
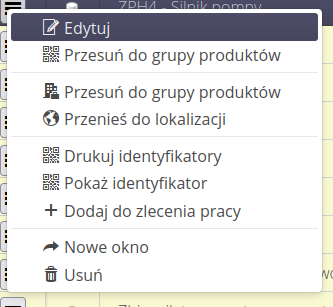
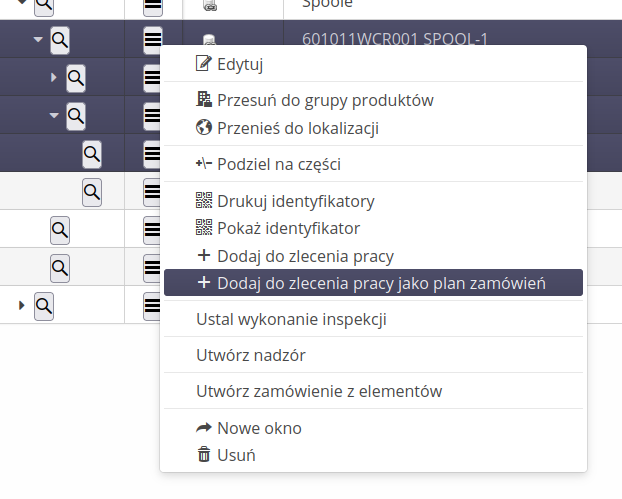
Using the available actions, we can add selected resources to work orders in two contexts - directly as resources participating in a given work order or, based on selected resources, generate a material plan necessary to implement a given area.
Resource details
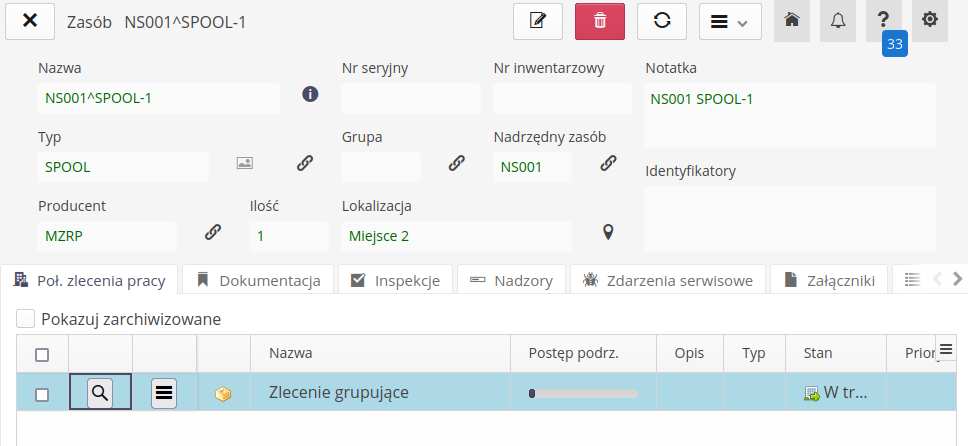
When you select an individual device, you are redirected to the resource details view.
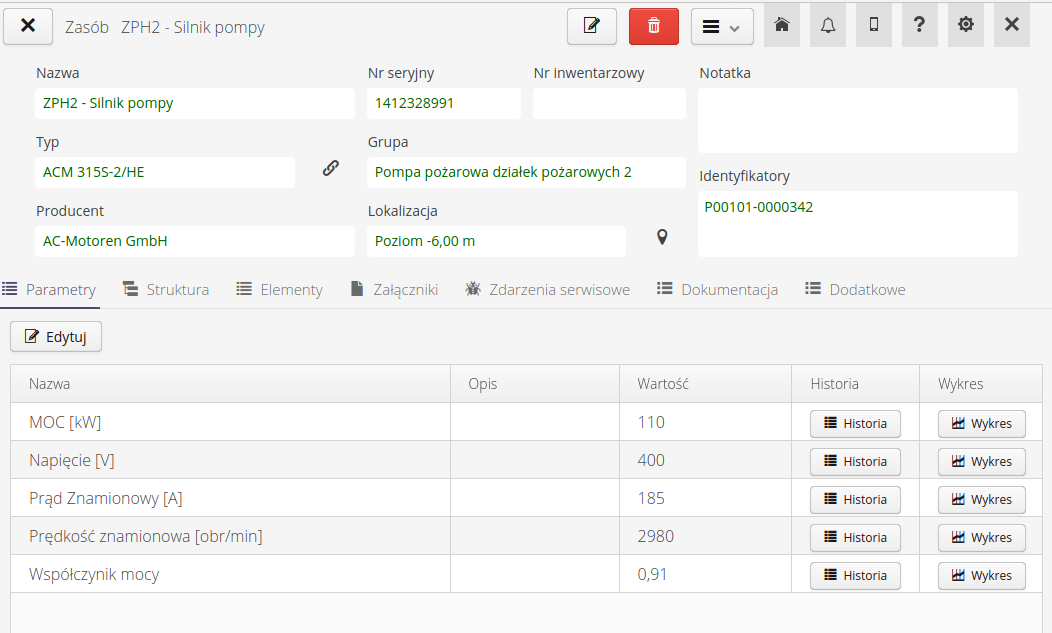
The detail view is divided into two sections. The upper one contains basic information about the device such as name, serial/inventory numbers, identifiers, assignment to a product group and location. The lower part contains detailed information about individual domain information.
In systems with many modules enabled, it is possible to configure the tab view for each user or globally. This is the same as the functionality available for the work order view. We can define the order in which tabs are displayed, hide them or move them to the 'More' view, which facilitates navigation and organizes the view for each user.
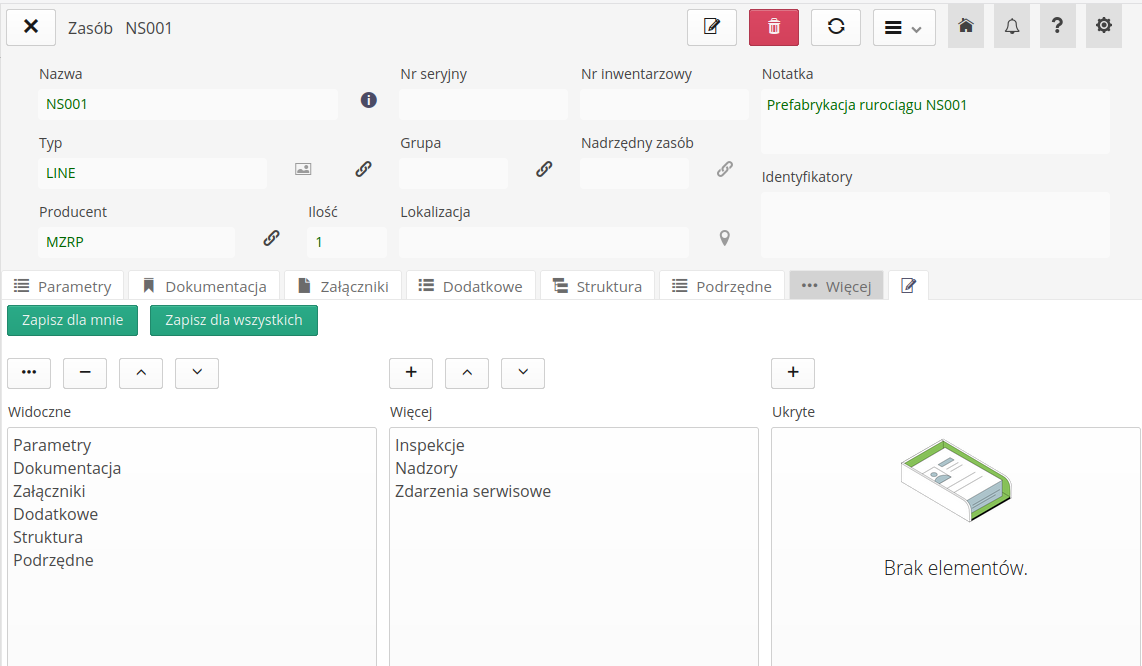
The context menu offers actions dedicated to a given resource:
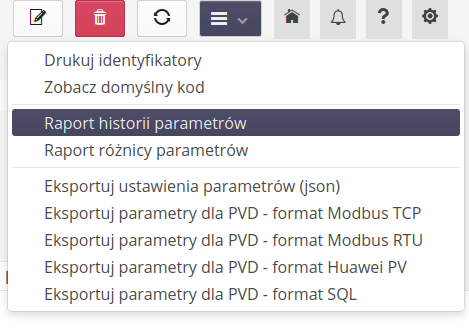
The available stocks are: * Display/print labels and QR codes * Parameter Input History Report - a report showing the history of changes to the parameters of a given resource (configurable). Facilitates monitoring of parameter changes over time. * Parameter change report - a report that allows you to show the differences between parameter values over time. In the case of parameters reported on a continuous basis (e.g. motor-hours, energy meter), the differential data, for example, for a given month, is relevant. The report allows you to display information about the values of parameters on the border of time ranges and the difference in the values of these parameters. * Generation of parameter export in JSON format - data is required for aggregator devices to configure them in order to send measurement information. For more information, see the PVD application manual. Here we can generate the different formats required for each communication protocol.
Detailed views contain information on purchasing/trade data. Additional parameters of the device, its internal structure, and elements from external modules such as a list of service events of a particular device, execution of inspections.
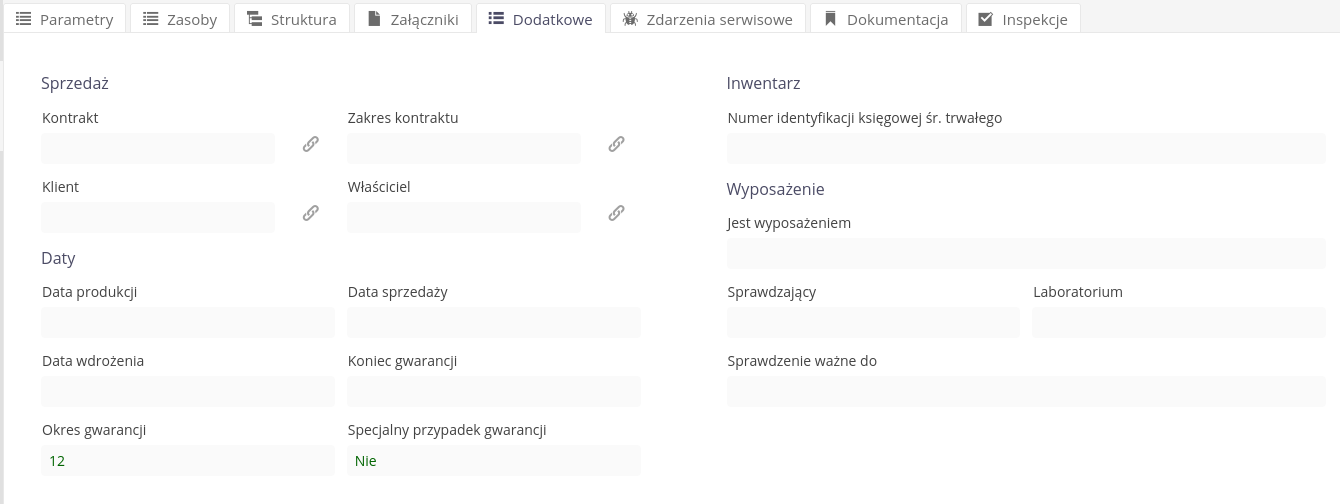
Additional data contains information about the device in the context of sale/purchase. The information contained here relates to the classification of the device (under contracts, orders), information about the manufacturer, supplier and warranty periods. Additional information applies to the resource that is marked as equipment, i.e. a device that is periodically checked (calibrated). The asset identification number allows you to store additional information.

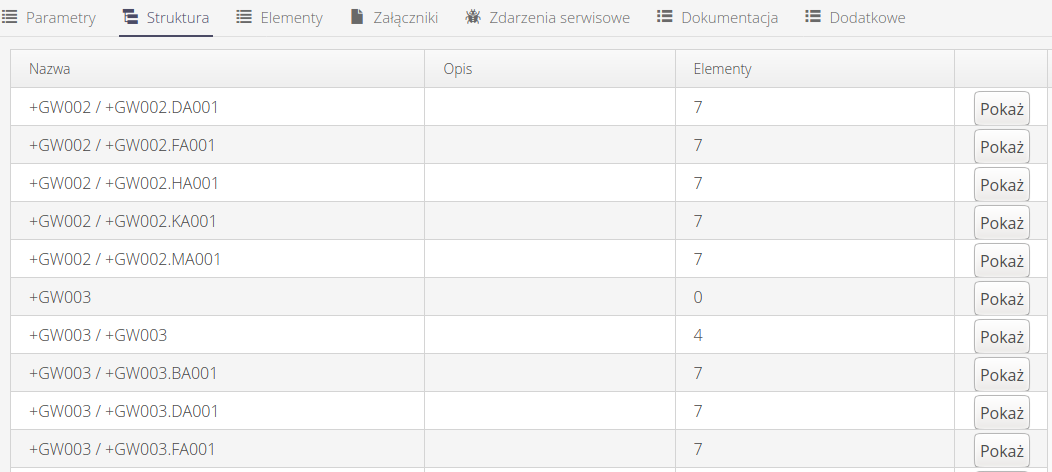
Structure/Resources represent the internal structure of a resource. For example, a switchgear is a resource that internally consists of individual cabinets, cabinets of cassettes and the cassettes contain the corresponding apparatus. The system allows using a tree structure (imported from project files) to map exactly such information.
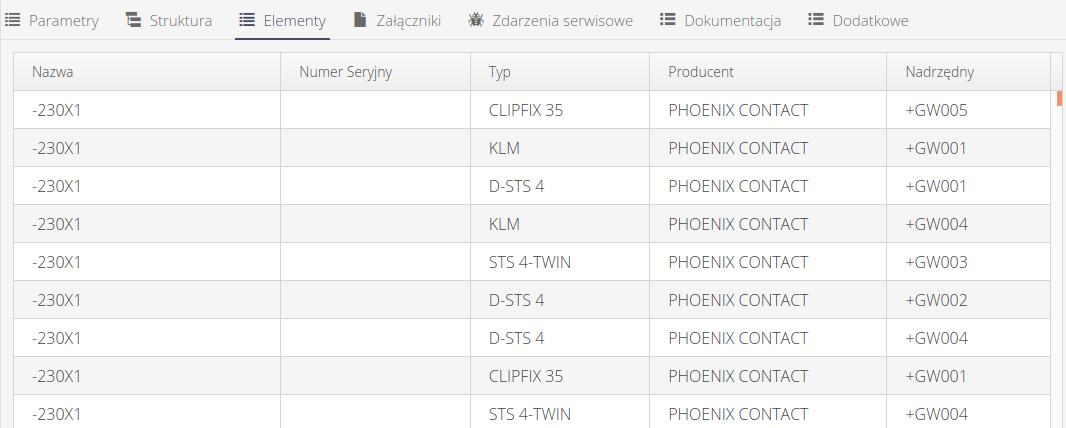
The details of the elements inform about the list of apparatus that is built in the resource.
| The individual tabs in the resource detail view depend on the functional modules enabled in the system. Depending on the available modules, the view may vary. |
Parameters
The parameter list is a list defined by system users at the Types level. In types, we define a list of parameters (characteristics) of devices of a given type. This determines the characteristics of the device. Parameters can be categorized.
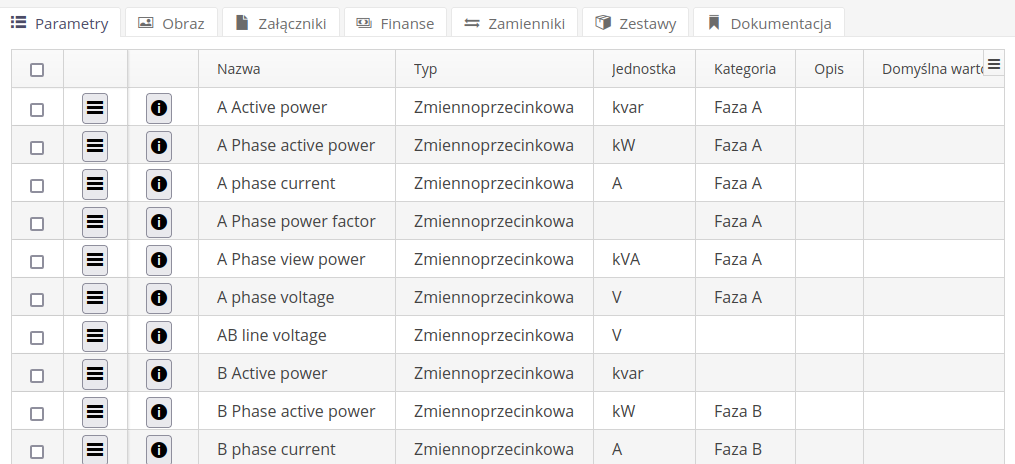
Parameters are defined in the type editor. In addition, in the parameter context menu, we can quickly set the category for the selected list of parameters.

Then, after creating resources of this type, it is possible to define the value of a given parameter (parameter settings). Each such parameter stores its own history of changes and it is possible to present changes of such a parameter over time.
In the list of parameter settings for a given resource, we have a presentation of the current parameter values. The list is divided into sections corresponding to particular categories. In the list we have information about the parameter and access to the preview of data in the form of a list History and a graph Graph.
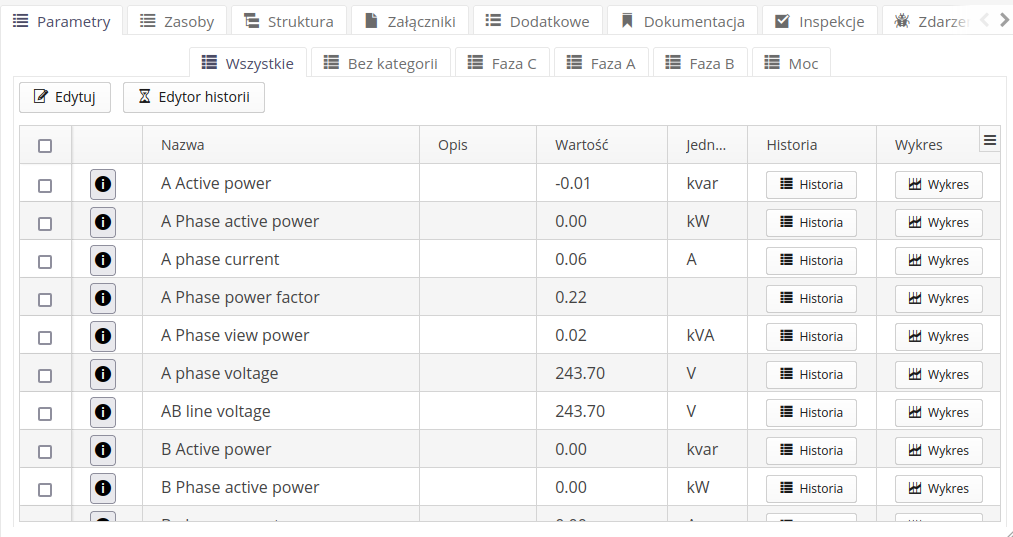
We also have here the ability to edit the current parameter value and the parameter history editor. Both actions are available through the appropriate buttons in the view.
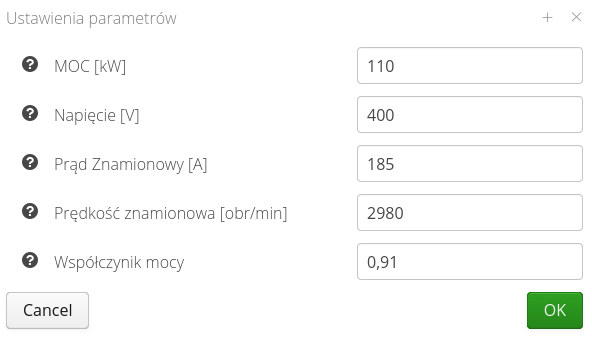
After selecting the parameter editing option, the user is presented with a list of parameters with their current default/set values. The system detects changes to specific parameters and, when saving, updates their values and enters information about these data into their history.
Each record of a parameter creates a record in its history. The history contains all parameter changes over time. Whether it is related to the recording of data through import, manual editing or entering data from external measuring devices.
The parameter history editor allows you to edit historical records. This allows you to delete, modify, set a fixed value or correct the value according to mathematical calculations.
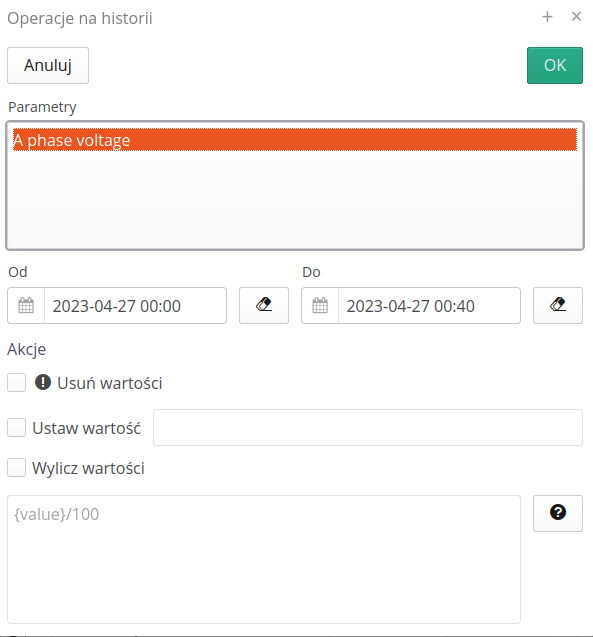
The editor allows you to:
-
selecting the parameters to be edited
-
specifying the date range that applies to the edition
-
delete history in the given date range
-
setting one fixed value in the given date range
-
modifying an existing value according to the given mathematical expression. The current value is
{value}.
Parameter history allows you to show historical changes to the parameter settings. It indicates the source of the changes, the value made and the user who made the change.
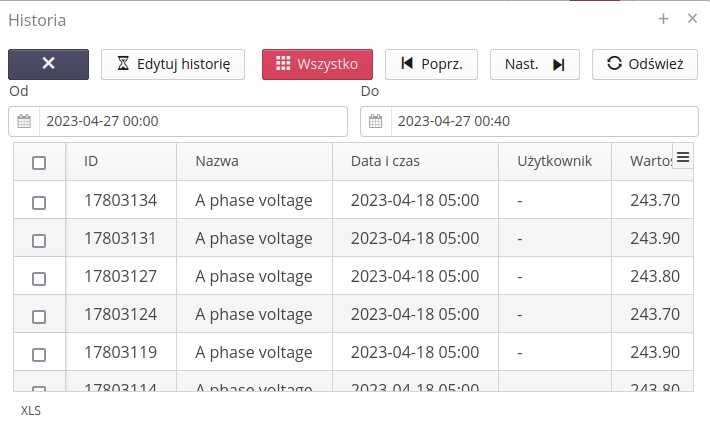
Using the buttons, we allow:
-
selecting the date range that we display
-
shift the range forward/backward according to the current range
-
display of all historical records
-
data editing
At the bottom of the window is a button that allows you to export the entire selected range of data to XLS format.
Selecting the All button will download all historical records of a parameter. This may result in downloading a very large amount of data. Approach these operations according to your knowledge of the amount of data in the system.
|
| The change in the value of the parameter settings can come both from the user’s action but also can be introduced by information systems (e.g. data aggregators). In this case, the user information will be blank. |
The user, for parameters of numeric type (numbers) has the ability to generate graphs with historical data. After selecting the button on the parameter list, the graph is presented in the form of a time line with the possibility of any visualization of the time period.
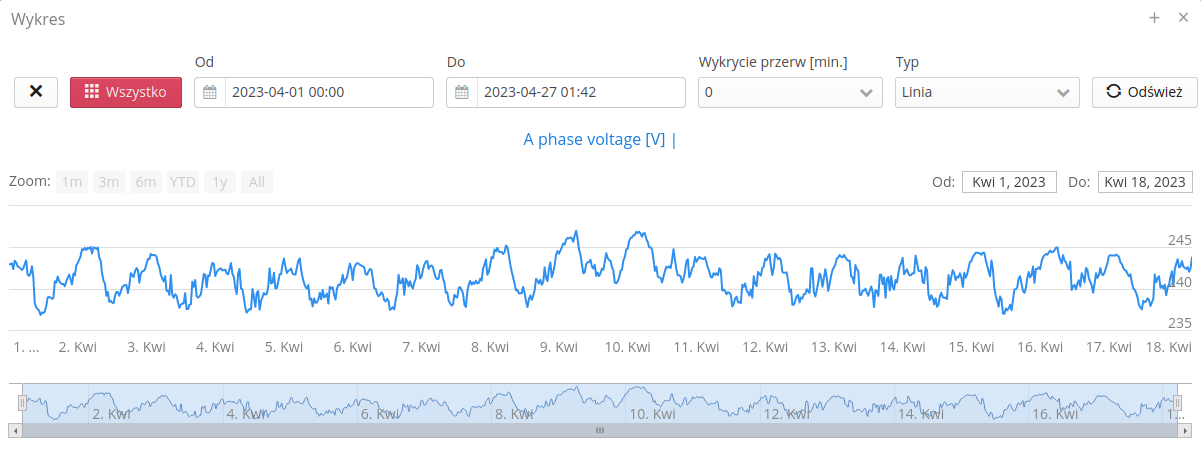
The chart has the ability to present many parameters at once. Using the date range and buttons, we can specify the visible range. The lower timeline allows you to narrow down the visible view in the upper part of the chart.
Automation
In the list of parameters in the resource, there is an additional context menu for each parameter. In it, there is the possibility of changing the parameter value, but also access to the automation module, if it is enabled. The module allows you to define events and schedules dedicated to a given parameter. Events will be performed only for a given parameter (a specific object), and not for all parameters of the resource or all parameters in the system.

Edit/Create a resource
| The creation of a new resource takes into account the currently selected filters of the main view of the resource list. This allows you to quickly add a new resource to a given location/product group without having to search for data in the formats yourself. |
The properties of a new/edited resource are divided into sections: General, Identifiers, Sales, Equipment, Documentation, Attachments, Parameters.
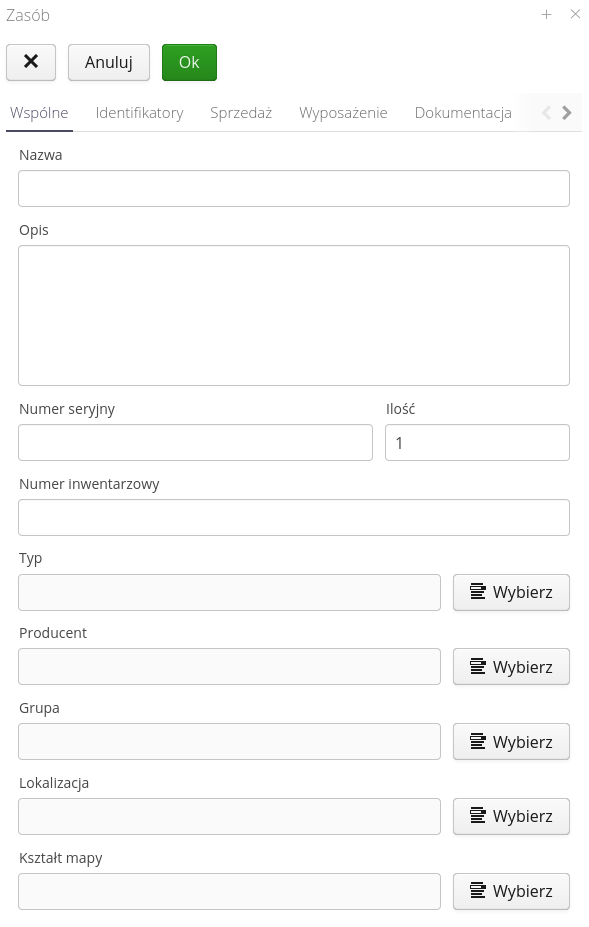
Editing of common data includes basic information - names, serial numbers and assignment to specific grouping categories and characteristics, e.g. assignment to a selected device type. In this area we also define the location of a given resource on maps and plans.
The system allows you to define the quantity/number of a given resource. Inside the system, data is stored with an accuracy of six decimal places. When defining a resource, we can enter any precision, but the visualization of the quantity for a particular resource depends on the selected unit in the element type. If it is a unit of the piece type, the quantity will be displayed in the resource as an integer, if other, the number of decimal places will change accordingly.

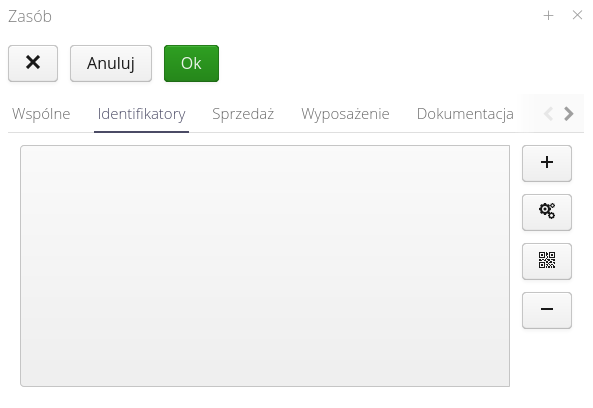
Identifiers allow you to assign identifiers to a resource in the form of printed labels with 2D codes or RFID tags. Each of these identifiers uniquely identifies a resource or component.
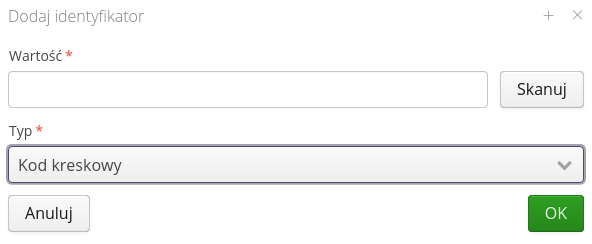
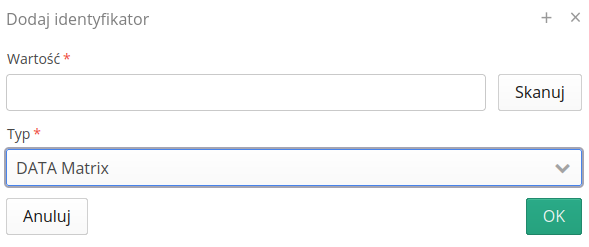
In the format for adding a new identifier, we specify the value of a given identifier (code content, RFID tag value) and its type. Depending on the type, mobile systems will require the availability/enabling of the appropriate type of reader.
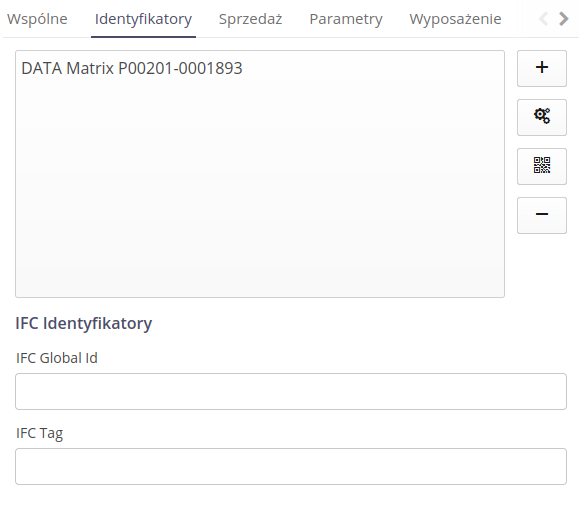
If the system has modules for BIM/IFC models enabled, fields allowing editing GlobalId/IFCTAG identifiers also appear in the identifier view. This allows you to add information about identifiers compliant with IFC/BIM standards. These values are used in BIM systems to uniquely identify elements in 3D models. We can also edit existing identifiers imported from the IFC model or, for example, the COBie template.
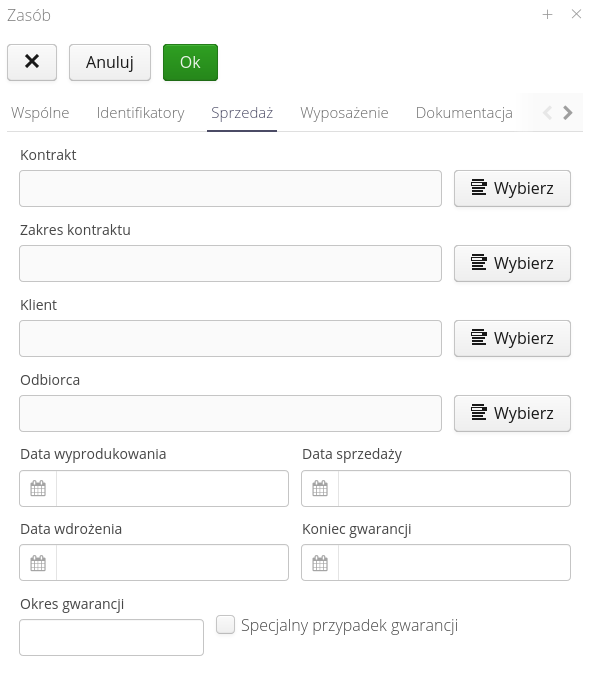
The sales tab contains information on the sales/purchase history of the asset. There you can specify the target customer/recipient, contract and dates, and warranty periods.
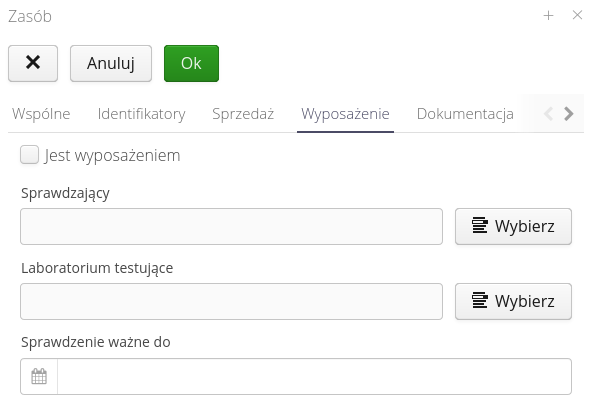
The equipment section allows you to view and edit data regarding equipment properties and parameters required during periodic calibration/checking of a resource.
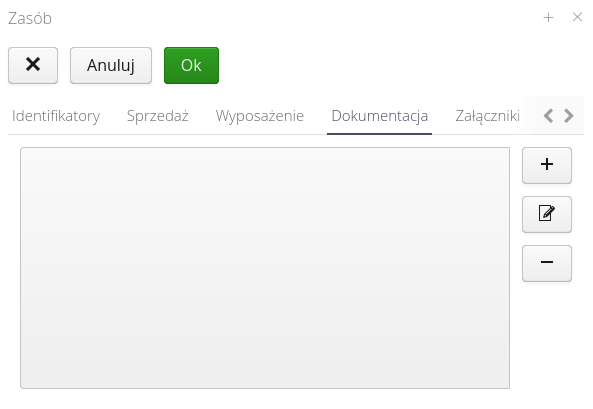
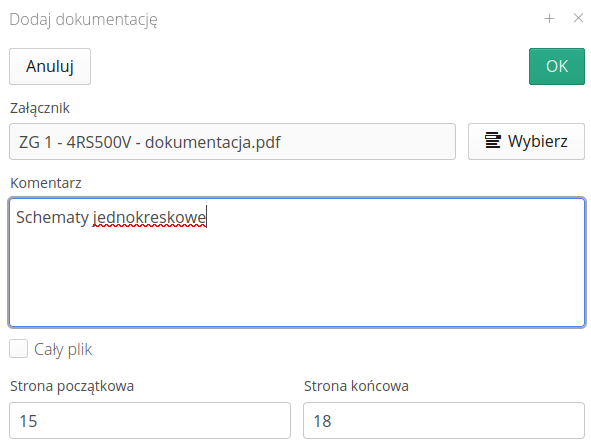
The documentation tab allows you to specify the exact mapping of the attachments of a given resource in the form of documentation tabs. Here we indicate the attachment and the page numbers that pertain to the issue. This allows the system to simplify navigation to a specific documentation area of a given resource.
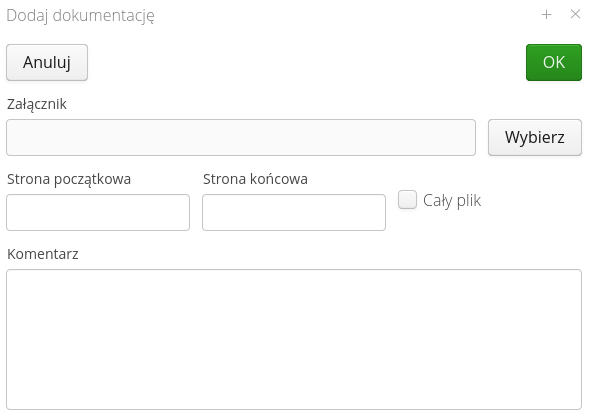
Adding an individual entry to a file involves selecting an attachment and specifying the beginning/end pages.
| The system has the ability to automatically index documentation attachments through documentation mapping. This functionality is enabled during specific deployments. |
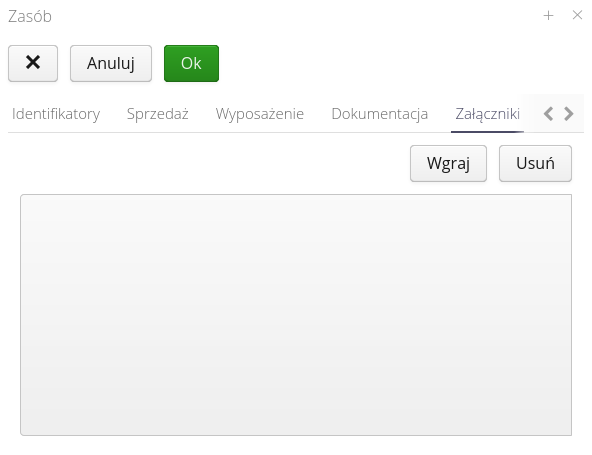
Attachments allow you to add/remove additional attachments to a resource.
Division into sub-assets
The system allows you to divide the resource into parts. This is possible when you enable the appropriate option in the global system configuration. This action may be useful in cases where we introduce resources into the system with a number larger than a single item or enter the length of an element that can be divided as part of the process (e.g. cutting).
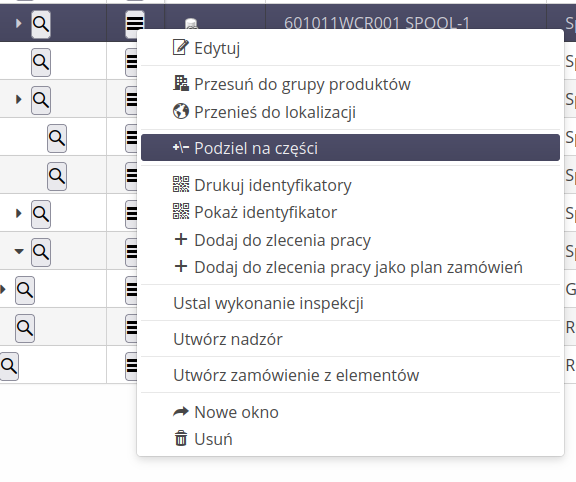
After enabling this option, an additional action will appear in the system allowing you to divide the resource into parts.

The system displays a dialog box with information about the current number of the asset and allows you to specify the number of divisions and their value/length. This will allow you to divide the element into smaller parts in any number. We can also specify here whether new resources are to appear in the system in the same place in the structure or whether they are to be additionally defined as sub-asset of a given asset (tree navigation). The dialogue additionally shows the remainder in the original quantity asset.
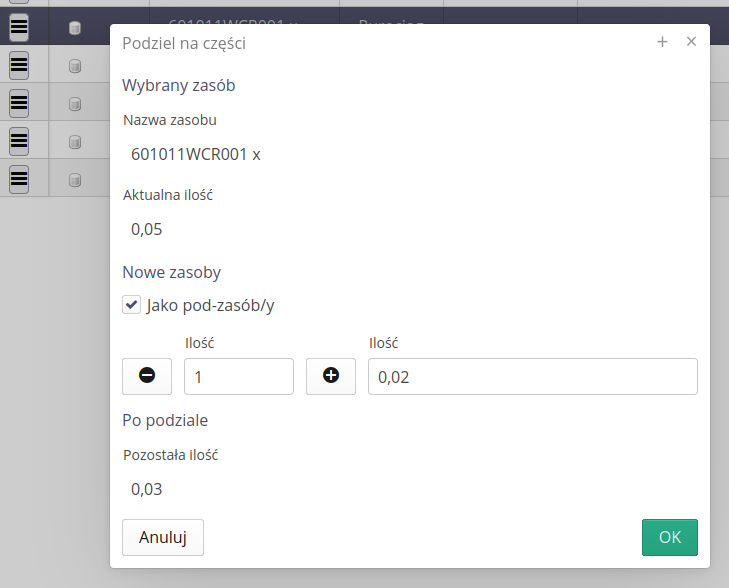
| When dividing into sub-assets, parameters, type and placement in the location are copied. Detailed information such as identifiers that are used to uniquely identify the resource are not copied. They should be assigned separately to new assets after division. |
Groups
Resource groups allow you to categorize resources in a structured way. Typically, a plant/building has thousands of resources (equipment, components, structures, etc.). Representing everything in the form of one table is problematic and difficult. The user is not able to effectively manage such an amount of data. In order to divide such a number of resources into elements able to be managed efficiently AMAGE introduces two trees to which a resource can belong. The group tree allows to divide resources according to any nomenclature adopted by the user. It can be a division by control systems in the production plant, it can be a division by functional areas of P&ID schemes. It can be a division by building element groups. Any of these groupings can be represented in the system.
Upon entering the resource group section, a tree of all defined resource groups is presented. Navigating through the tree allows you to expand individual branches of the tree. A dedicated button Resources allows you to display all resources that are assigned to a particular group. Add and edit operations are available at the top on the action panel.
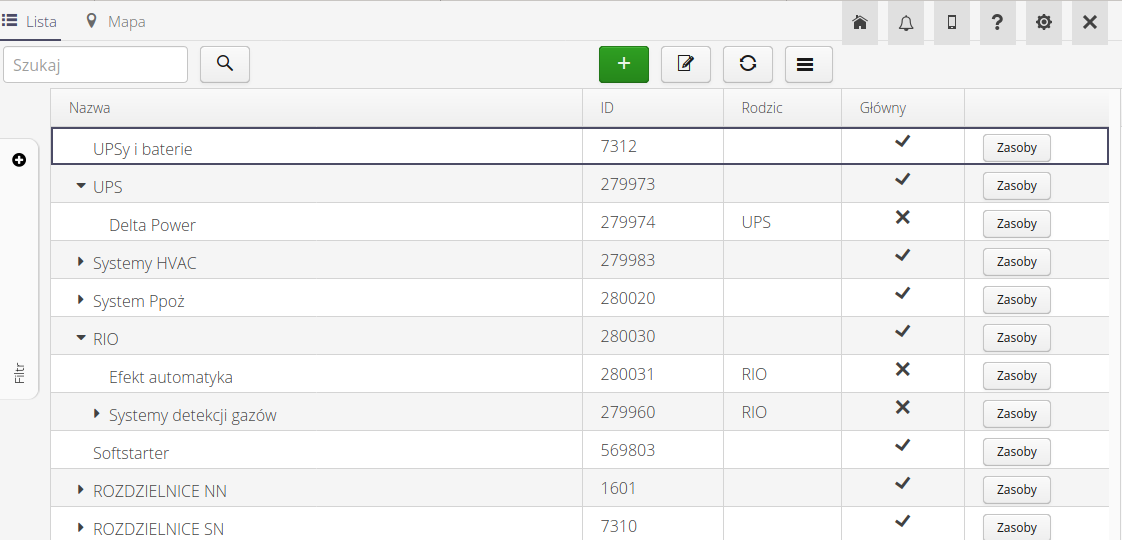
Adding/editing a group allows you to enter information about the name and description of the group. It is also possible to specify the location of a given group at the map level by selecting a map shape.
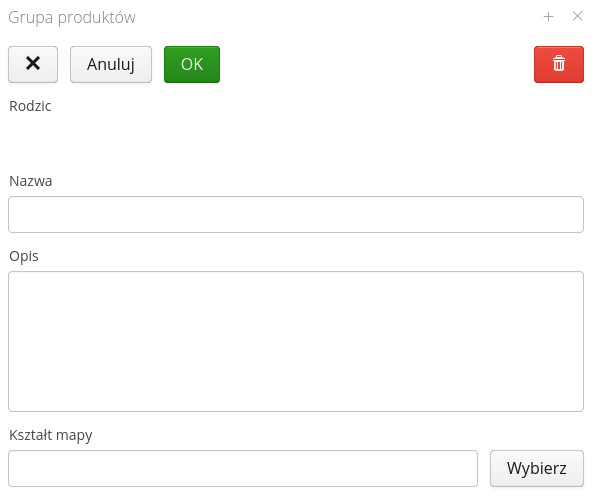
| Resources during their editing have the ability to specify a group of resources in their editor. |
Locations
Locations allow you to categorize resources in a structured way based on geographic location. Typically, a plant/building has thousands of resources (equipment, components, structures, etc.). Representing everything in the form of a single table is problematic and difficult. The user is not able to effectively manage such an amount of data. To divide such a number of resources into elements able to be managed efficiently AMAGE introduces two trees to which a resource can belong. The location tree allows grouping resources by geographic location.
Upon entering the location section, a tree of all defined locations is presented. Navigating through the tree allows you to expand individual branches of the tree. A dedicated Resources button allows you to view all resources that are assigned to a particular group. Add and edit operations are available at the top on the action panel.
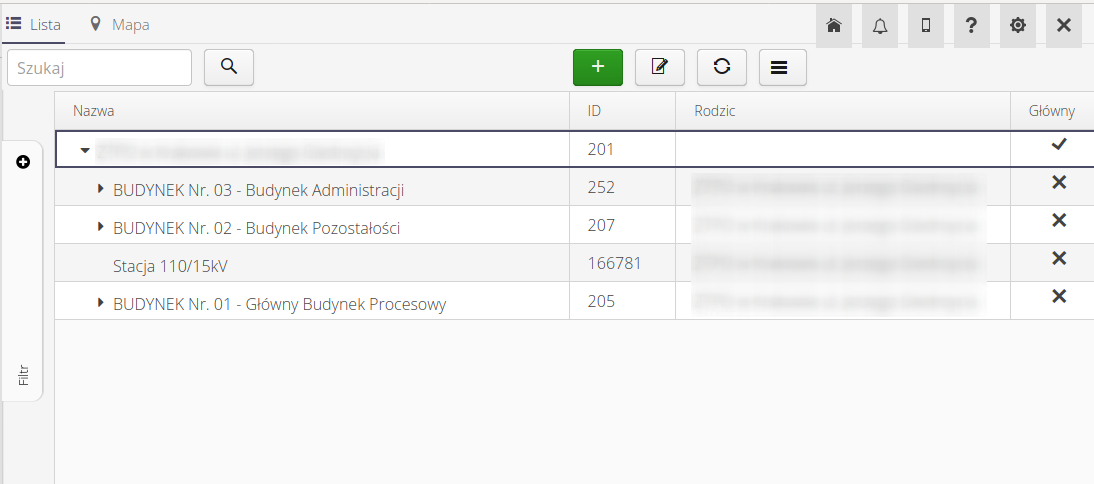
Adding/editing a group allows you to enter information about the name and description of the group. It is also possible to specify the location of a given group at the map level by selecting a map shape.
For locations, it is also possible to define identifiers associated with a given location. This is used, for example, in the inspection round path in the Inspection Rounds module. The identifier then acts as a checkpoint to which the selected identifier (2D code, RFID tag), etc. is added.
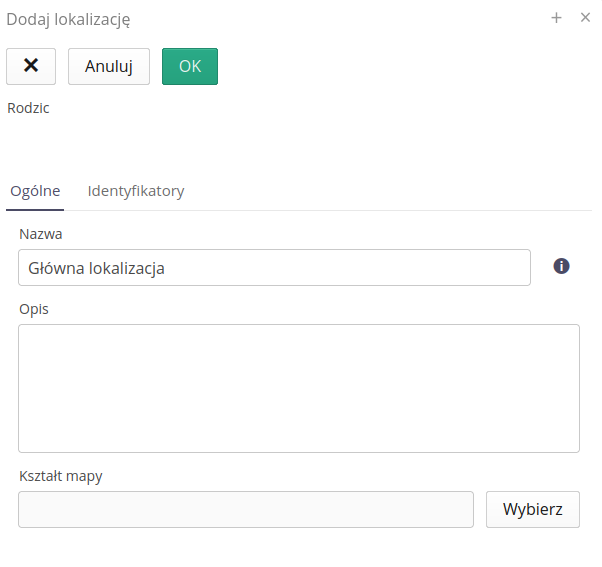
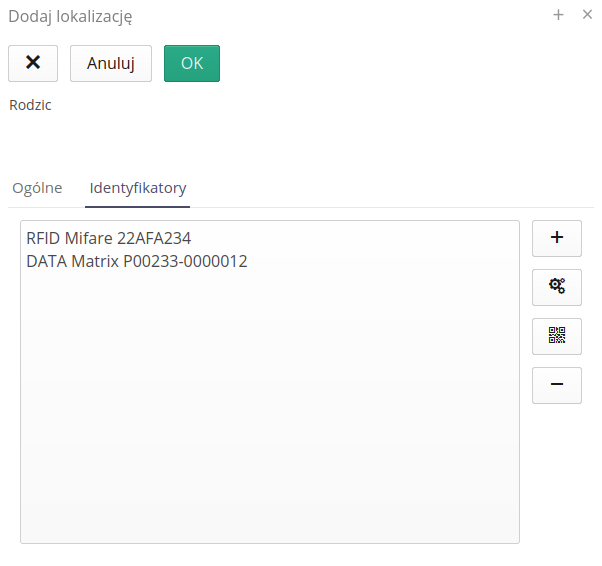
| Resources during their editing have the ability to specify a location in their editor. |
We can also add an item directly from the map view. We select the 'Add on map' option and then indicate the place.

Types
Resource/element types allow you to collect information common to a single type of assortment. Each resource must have its type defined - that is, a generic definition derived from the catalog number/manufacturer.
| In the system, a resource is a specific device, object, item that we can uniquely identify. If it is a drill, it is exactly the drill we see. If it’s a machine it’s exactly the machine on the 1st floor. Types, on the other hand, are a general description of these machines. For a drill it will be its manufacturer and model. In the system we will have defined one such type but 100 actual drills (resources). |
Types allow us to describe multiple resources with a single set of data. Added documentation to a type allows it to be shared across all resources of a type.
After entering the types view in the system, the user is presented with a list of types in tabular form. There is basic information about the given types and their parameters.
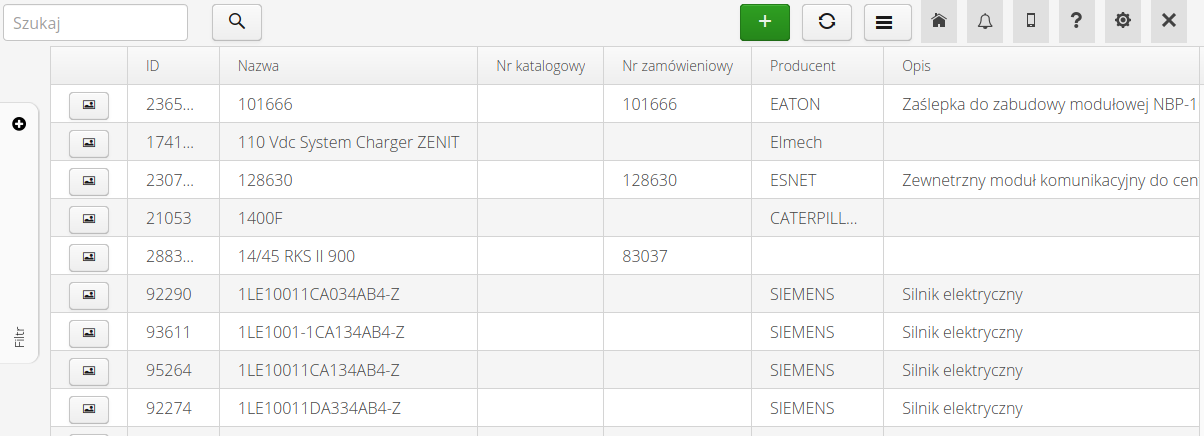
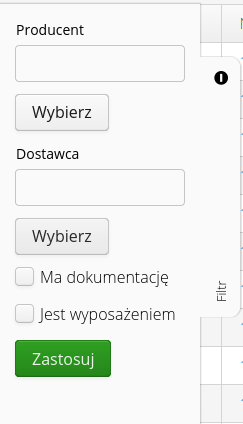
The list can be filtered and searched using the Search field, category selection or other data available in the filter panel.
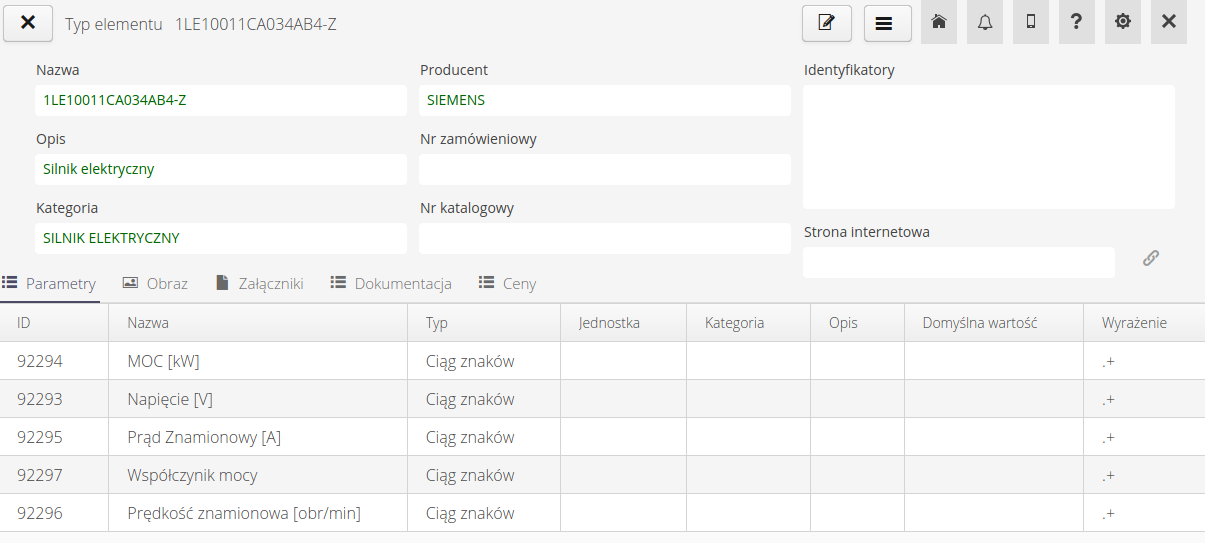
After selecting any type, we go to the details view. The view is divided into two parts. The top one contains basic information such as name, description, manufacturer, category, order/catalog numbers, website and list of identifiers. The bottom part is for additional data specific to that object.
| The list of identifiers can include identifiers assigned by the system, as well as, for example, identifiers such as GS1/EAN codes, i.e. standard barcodes contained on most bulk assortments. It allows the system to use these codes for type identification during e.g. warehouse receipts/dispatches. |
The details include:
-
Parameters - parameters are described in the following section.
-
Picture - type photo
-
Attachments - list of attachments/files attached to the type (e.g., datasheets).
-
Documentation - the system allows you to divide attachments into indexed sections. This allows quick reference to a selected section of the file, e.g. documentation from mobile devices. This makes it easier and faster to access the documentation.
-
Prices - definition data of prices, warehouse data and equipment rental information.
The price details contain information about the storage area and equipment rental. Here you can record information on ERP warehouse indexes, price, weight and area of the item. In addition, we specify here the minimum and maximum quantities of a given type on the warehouses. This allows you to warn users when minimum and maximum stocks are exceeded.
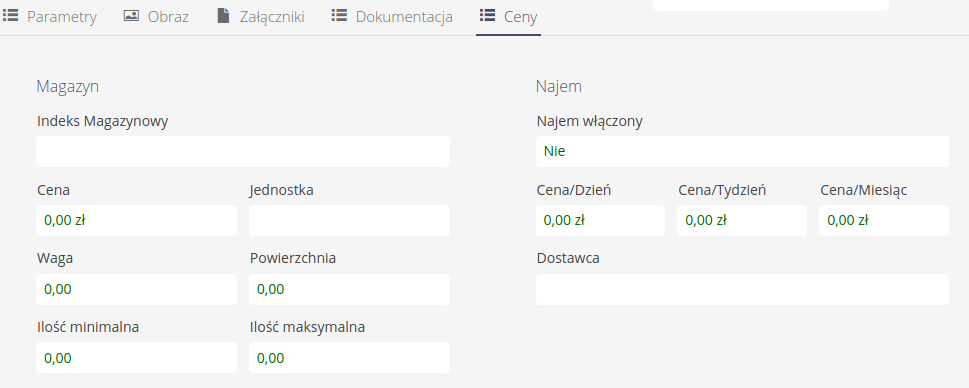
Additional information is the parameters for the rental of small equipment. Here we specify rental rates per day/week/month and select the supplier of the type of equipment (assortment).
| Additional information on rental of small equipment is defined for the selected contract, e.g., the number of days defining each price range. |
Edit/Add a new type
Editing a new type is activated in the type list view by selecting the action button (+). Editing a type is done by selecting an action in the details view of the type. The editing window is divided into tabs for editing individual groups of type properties.
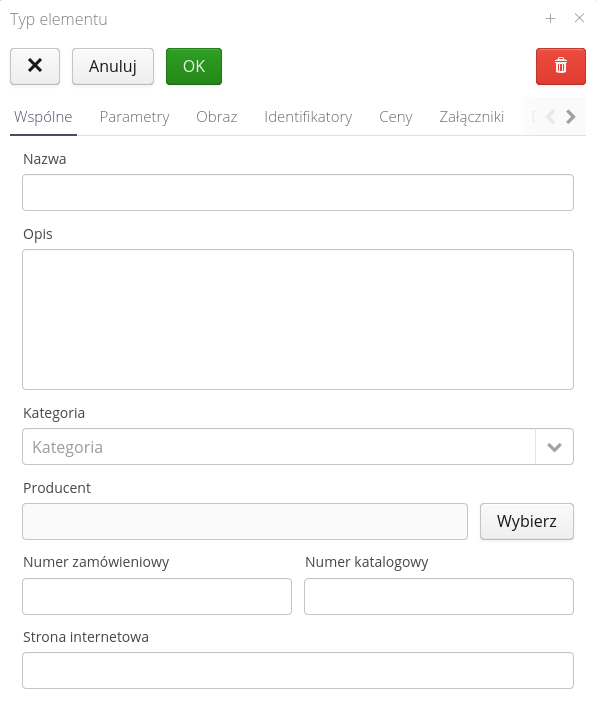
Basic Data allows you to edit the main information - name, order/catalog numbers, manufacturer, category and website address for the type.
The image view allows you to upload any image/drawing showing a particular type of equipment. This image is displayed in the inventory list, in order/supply procedures and in the stock area making it easier to recognize the assortment.
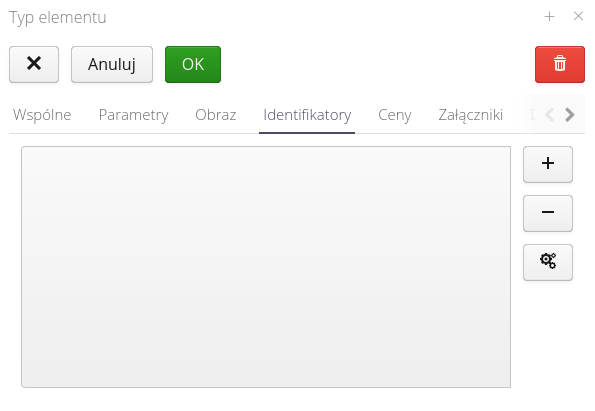
The identifiers section allows editing/adding identifiers to streamline operations on types. Identifiers can be GS1/EAN codes for identification with barcodes.
Pricing and rental-related parameters are described in the Prices_ tab. All information entered here is used in the areas of orders/supplies, inventory turnover and equipment rental.
Using this section, we can enter a number of information regarding the item and warehouse operations, deliveries, and leases.
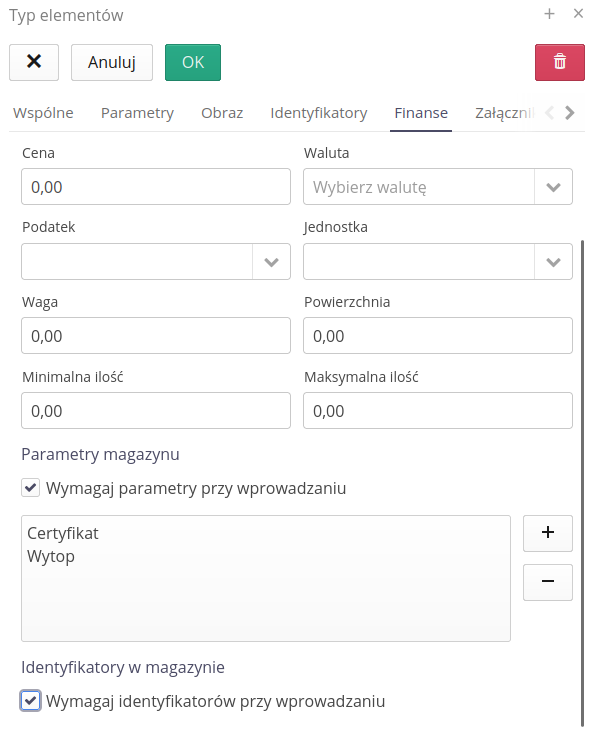
The 'Require parameters when entering' option will allow you to perform additional operations during deliveries and warehouse operations. Using this option and indicating the required parameters, we can determine what parameters will be required to be provided during delivery or warehouse operations. These can be any parameters of a given type, e.g. Certificate and Melt.
| The user has the ability in the warehouse parameters view of a given type to specify minimum and maximum values on each warehouse. This allows the user to be notified when either of these limits is reached. This is visualized in the warehouse view (quantity on the warehouse with a red background if the minimum quantity has been exceeded or yellow if the maximum quantity has been exceeded) and through notifications via notification or email (NOTE. This requires enabling the appropriate automation in the schedulers section). |
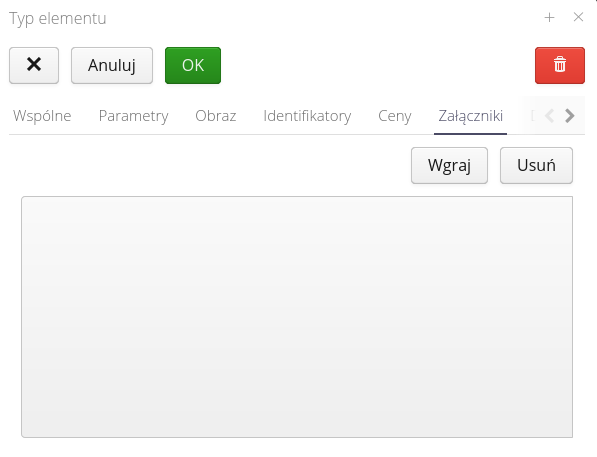
Attachments allow you to upload files specific to a particular type. These can include directories, technical data, certificates and formal confirmations.
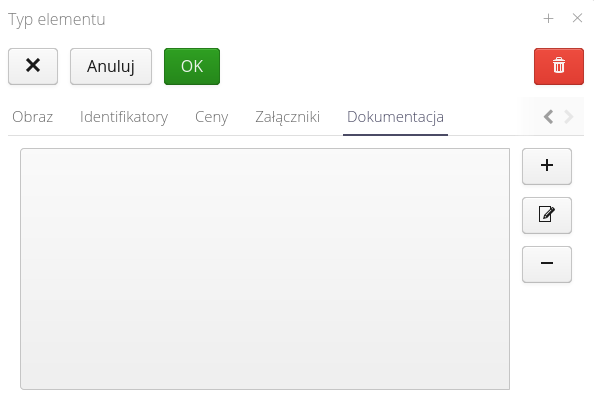
The documentation tab allows you to define abbreviations for individual attachments allowing you to specify both the description and the opening page of a given documentation section. This facilitates quick access to data in the desktop system and especially on mobile devices.
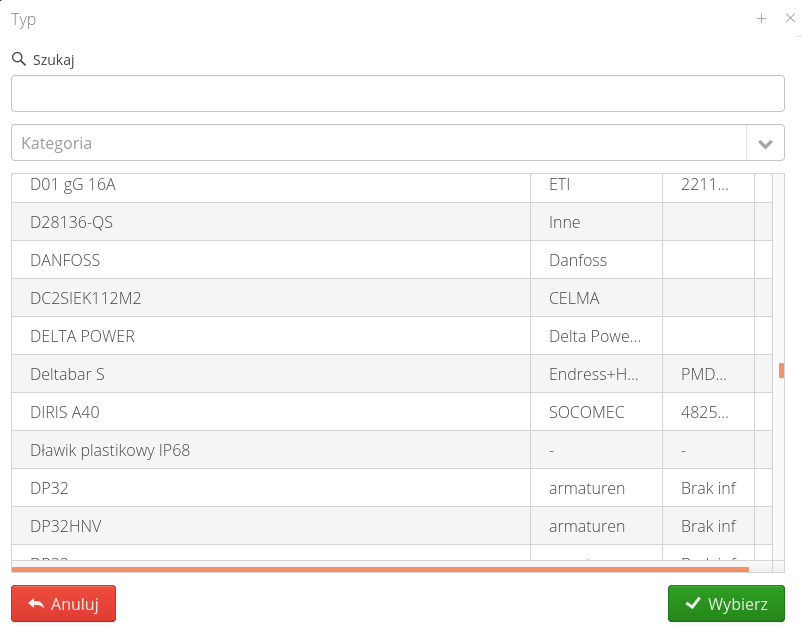
The type selector allows you to browse and select a type from the entire assortment list. In this window it is also possible to add a new type if it does not already exist.
Parameters
Parameter list allows you to define a list of properties of resources of a given type. The system has the ability to define any parameters for types/resources in the system. Usually between devices/types, some of the parameters are repetitive, e.g. electrical parameters, environmental parameters, etc. The definition of such a parameter list is defined in the Parameters tab.
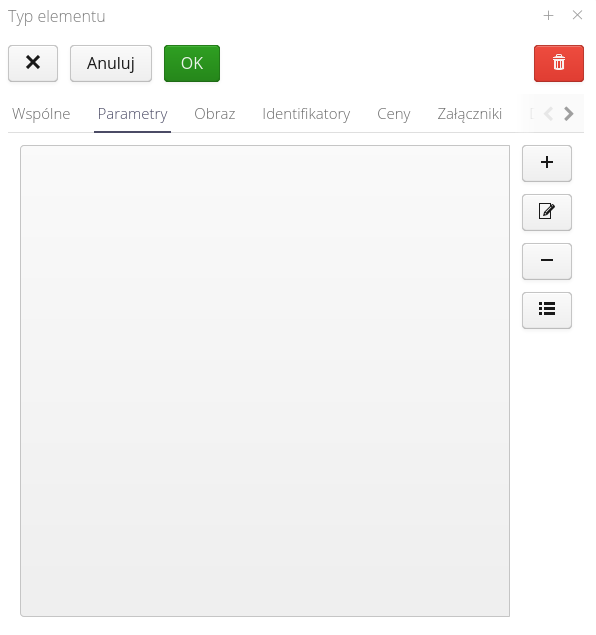
| Parameter is entered/deleted and this is updated in all resources of the type |
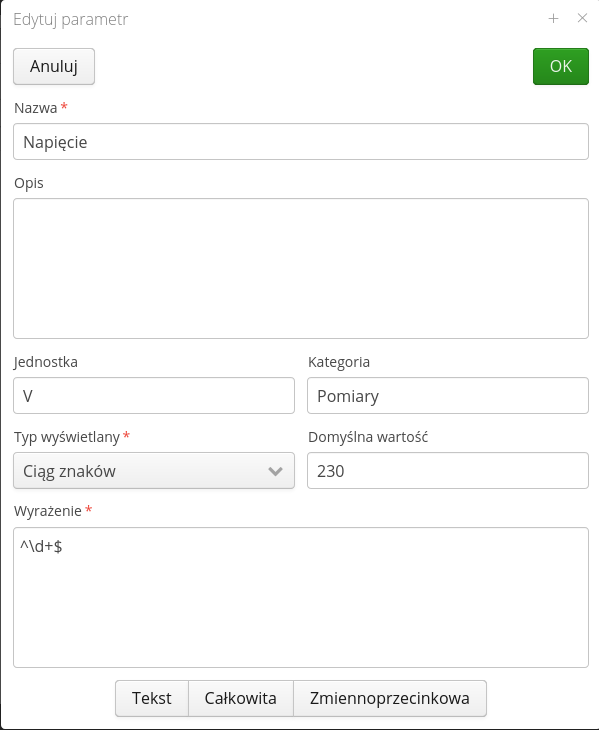
Available fields:
-
Name - Name of the parameter
-
Description - Additional textual description of the parameter.
-
Unit - Unit of measurement. Displayed for users.
-
Category - Category of the parameter. Parameters can be grouped into categories.
-
Default value - Default value of the parameter. When adding a new resource, it receives a parameter package. If there is a default value entered here, it will be copied to the resource (with the possibility to change it later).
-
Display type - the display type of the parameter. On it depends the available editor (e.g. text field, date field).
-
Expression - checking expression. At the bottom there are three buttons that predefine the checking expression for the most common data types. The expression is a regular expression (RegExp) with the help of which the system checks whether a parameter is of a certain format. This allows you to pre-validate fields during data entry.
| Regular expressions are a very powerful mechanism that allows you to define virtually any rules. For more information, see websites about this mechanism, e.g. www.regexpal.com |
Identifiers
Identifiers are used to generate and export labels. Printing carried out on ordinary printers or specialized label printers.
We add identifiers in the appropriate views for individual resources or other objects in the system. Usually, we can add them manually, scan them from existing code or generate an automatic identifier for a given system.
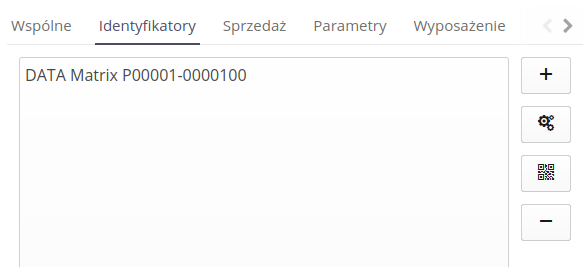
Adding the identifier manually allows you to enter its value (if it is a printable code, the scanning option is available) and select the type.
| For the bluetooth beacon type, the system checks if the code has the value of the device’s MAC address in the form of 12:34:56:78:AB:CD. |
Printing is available from the context menu of objects. The context menu contains information of type "Print IDs".
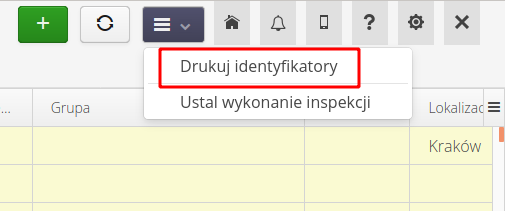
These operations are available in:
-
List of resources/resources
-
List of types/types
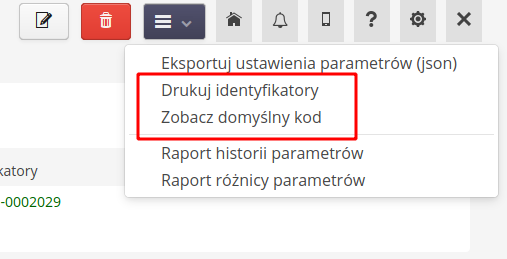
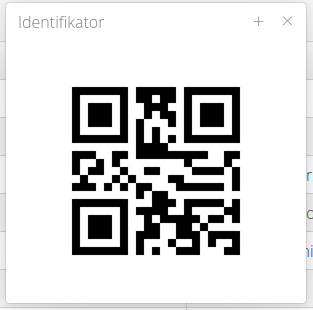
Always the user can also preview the graphical information of the identifier generated by the system by selecting the show code option from the menu.
The generation is divided into two stages. If you have already defined a template, you can use only the first stage. After calling the ID generation and printing operation, the first window appears.
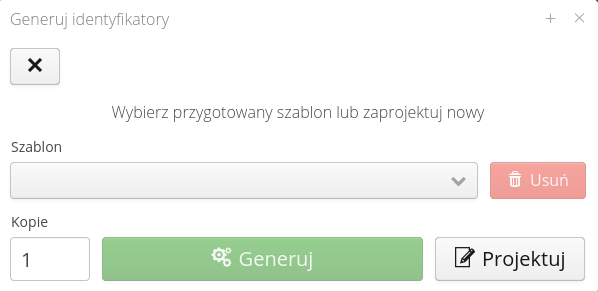
After selecting a template, specifying the number of copies, you can immediately start generating labels.
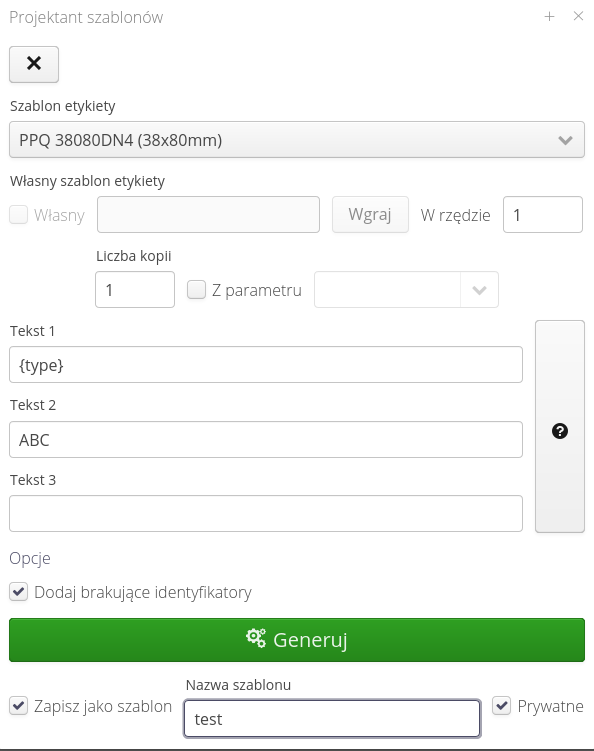
If we want to change the appearance, customize it or specify other parameters, we can use the designer available under the Design button. After calling this action, a new window appears, which allows you to select a label template, customize it and print the data.
Designer enables:
-
Label template selection - from predefined ones
-
Define your own label template - upload your own label format *.jasper
-
Specify the number of copies or indicate the parameter of the resource from which we will take the number of copies of the label
-
Texts with a formatter with the possibility of placing in the label formatter
-
Ability to generate identifiers if the resource does not have them
-
Ability to save all parameters as a template for further use
| Label design is described in detail in the How to do documentation on the Help Portal |
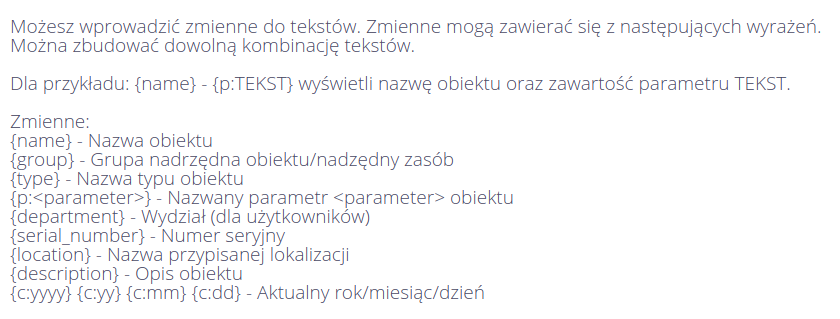
The parameters of available variables are displayed by selecting the (?) button. A pull-down of the parameters available in the fields is displayed.
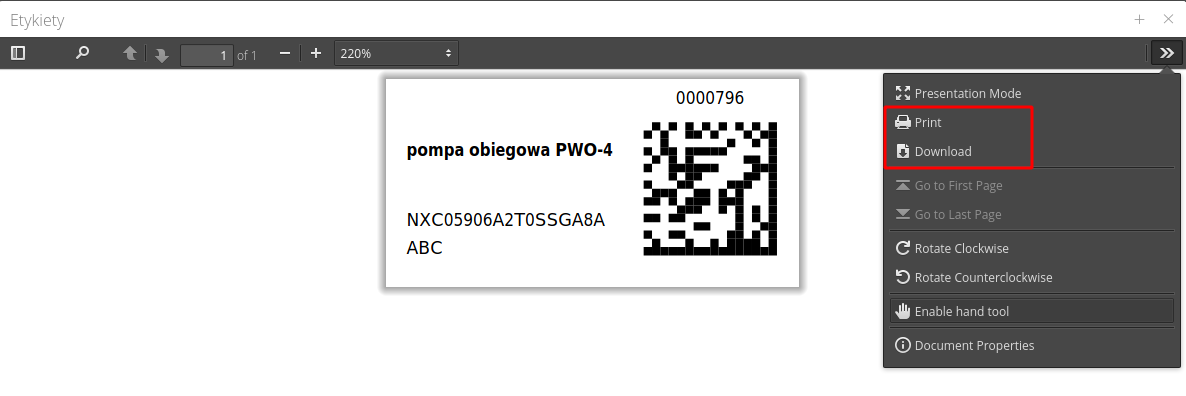
After label generation, a preview window is displayed. The report can be saved as a local PDF file or printed directly on the printer by selecting the pop-up menu.
Maps
The range of visualization of objects on maps is available from the 'Structure' menu.
Maps and plans
The browser for geographical maps and your own construction/plant plans is available from a dedicated action in the main menu. After selecting it, a map view is presented with the option to specify the objects that are visible on the background. Available include: views of locations, resources, contractors, orders and more. All of them are presented in the form of icons on geographical and other maps.
After selecting any object on the map, we present basic information about the selected object in an additional bubble and allow you to go to the details of a given object by selecting the link located there.
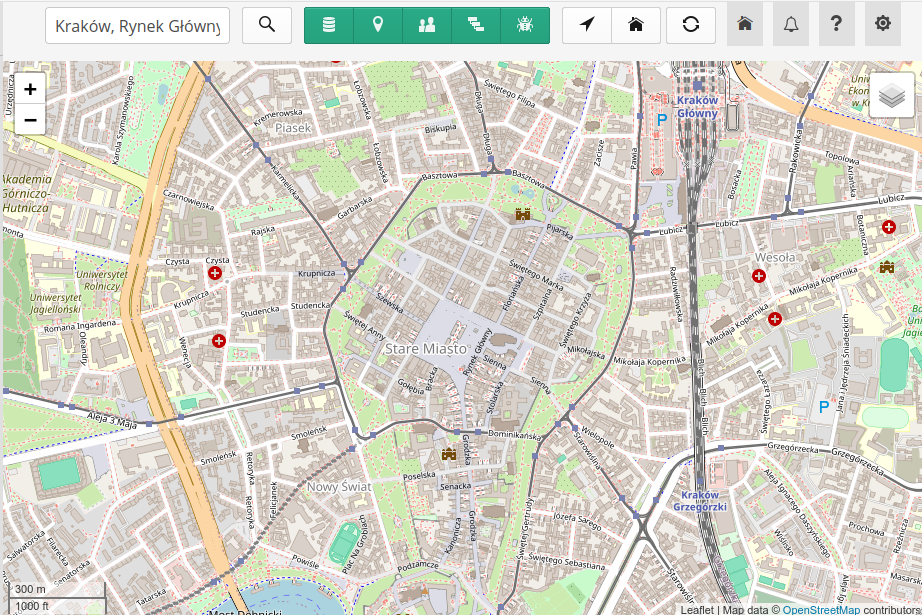
Using two buttons we can quickly go to places:
-
arrow icon - to the current place (geolocation). The browser will now ask for access to your location. This operation must be allowed.
-
home icon - switch to your own home location defined in the configuration
The main map view allows you to search for a place by entering it in the search field. After entering the search content in the search field, a window with the results appears.
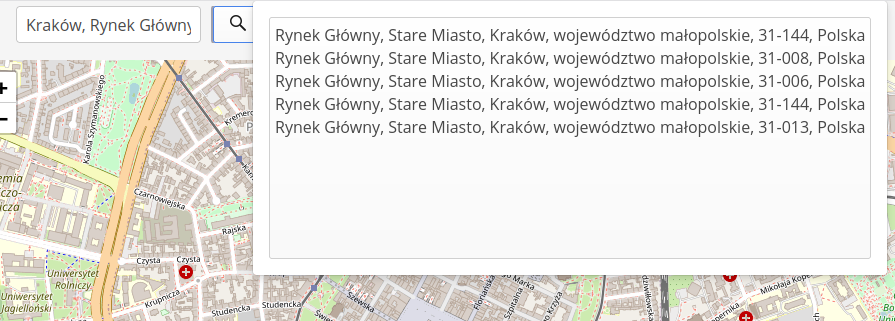
| By default, the system supports geographic maps served by OpenStreetMap. The AMAGE system also has the ability to display your own maps (underlays), which can be your own geographic maps with additional information marked, or maps of the plant, PI&D processes and others. During implementation, it is possible to configure such maps from supplied underlays in DWG format or high-resolution images. On their basis, tiles are created to display individual zoom levels and make this data available in a secure environment. This allows you to access the data without having to upload the data to external map servers such as Google. |
Documentation
Documentation in resources allows you to detail the location of relevant parts of the documentation in related attachments to a resource. This facilitates quick access to documentation when working in demanding areas and time regimes.
Each resource can store any number of attachments. Sometimes such a file, which is documentation, can contain hundreds of pages.
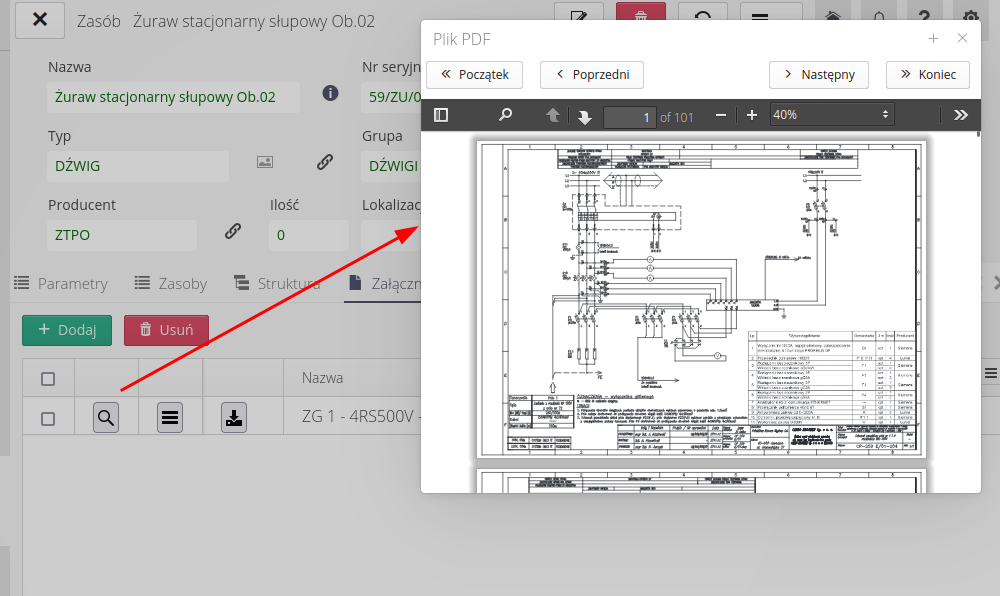
To facilitate quick access to the documentation, we can go to the Documentation section and choose to add a new item. With it, we can specify the name of the attachment, the range of pages and detailed information about the content.
Once the entire list of contextual documentation is defined, it is an additional piece of information that allows quick access to data.

After selecting any range, the system automatically goes to the selected page in the documentation.

| The mobile version of the system has identical functionality to facilitate access to contextual and processed documentation on site. |