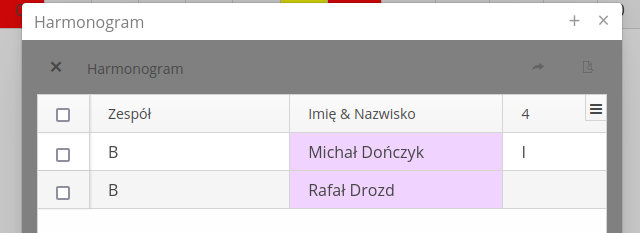
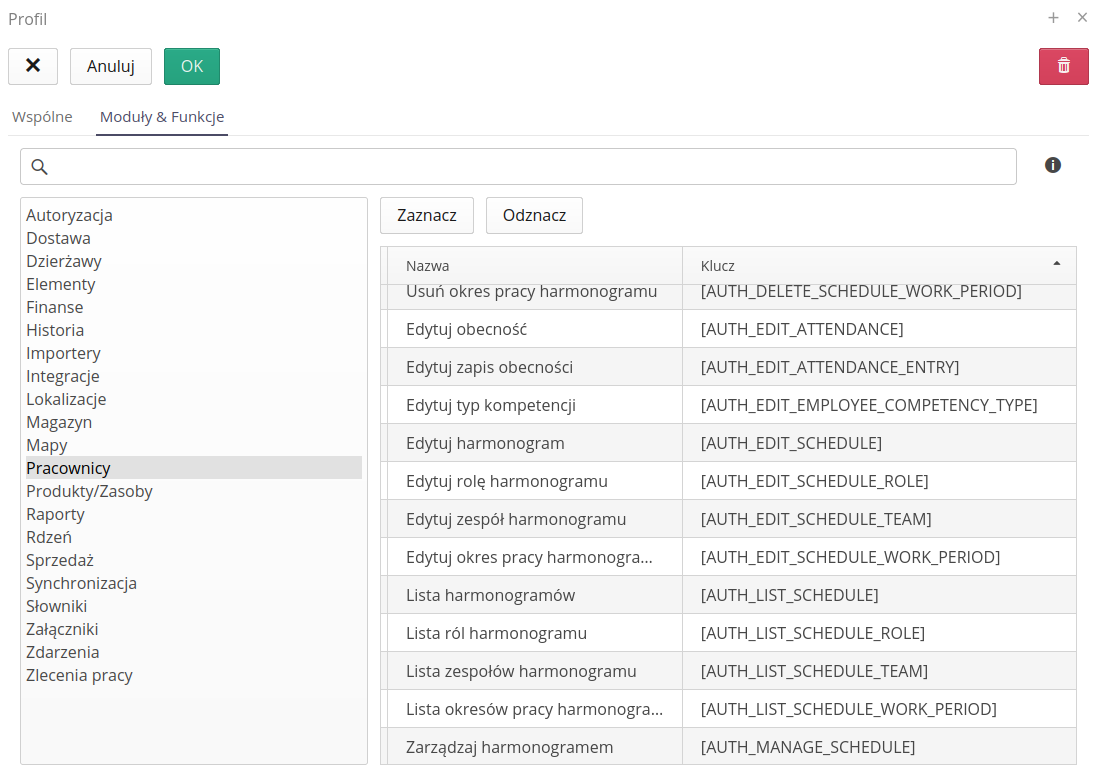
Employees and attendance
The employee view allows you to view and define data specific to the system user or employee/subcontractor. Information and data related to individual employees are located in one place. The system also allows you to edit this information and view data regarding their presence. Both of these views are available in the Work Structure section.
Employee
Viewing employee data is available in the main menu under Work Structure and Employees actions.
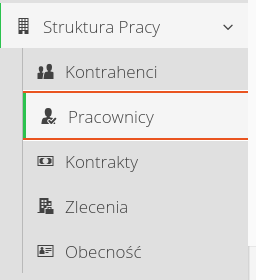
| The employee view in the main application interface allows you to view all employees in a functional context. An additional employee/user view of the system is the user view in the configuration section of the AMAGE instance. There you can define additional values and permissions for specific system functions. Usually this section is available only to authorized system administrators. Hence the need to present employee data in the main application interface. |
When this action is selected, the main list of all employees defined in the system is displayed. This view is divided into two tabs:
-
List - list of all employees
-
Calendar - summary calendar - displays contextual data for all employees and events assigned to them.

The employee list contains all the necessary information to view/edit employees who appear in the system - either as users or as passive records that create a history of events, e.g. as a member of a brigade when reporting hours in a work order.
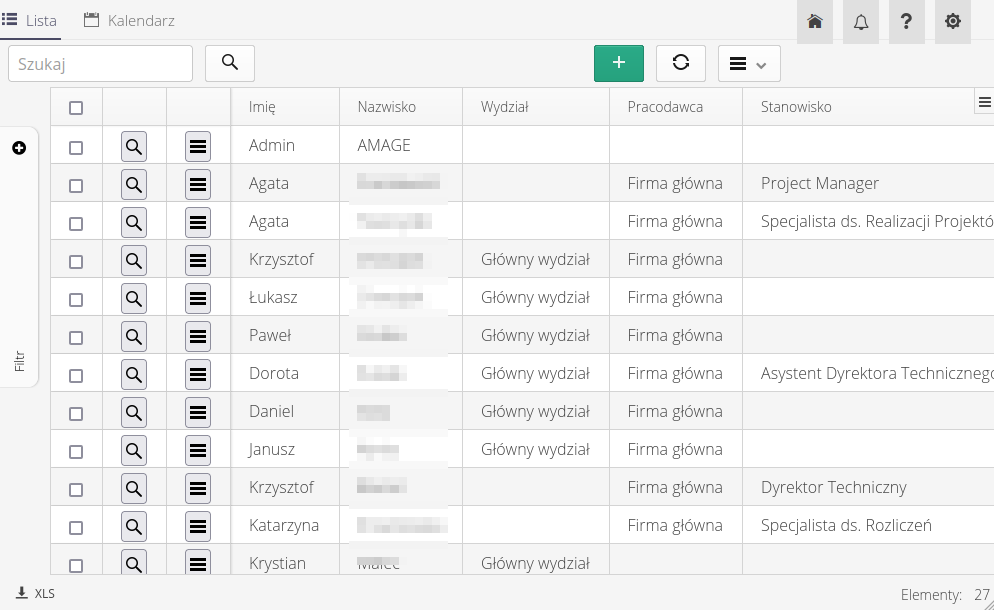
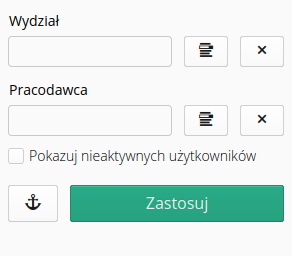
The general filter allows you to view employee data and filter it according to available parameters such as:
-
Department - filtering employees belonging only to a particular department
-
Employer - filtering employees whose employer is the selected company
By selecting any employee, we go to the employee’s details. The view is divided into two parts. The upper one contains basic information for the employee - his or her identification, address, HR numbers and IDs.
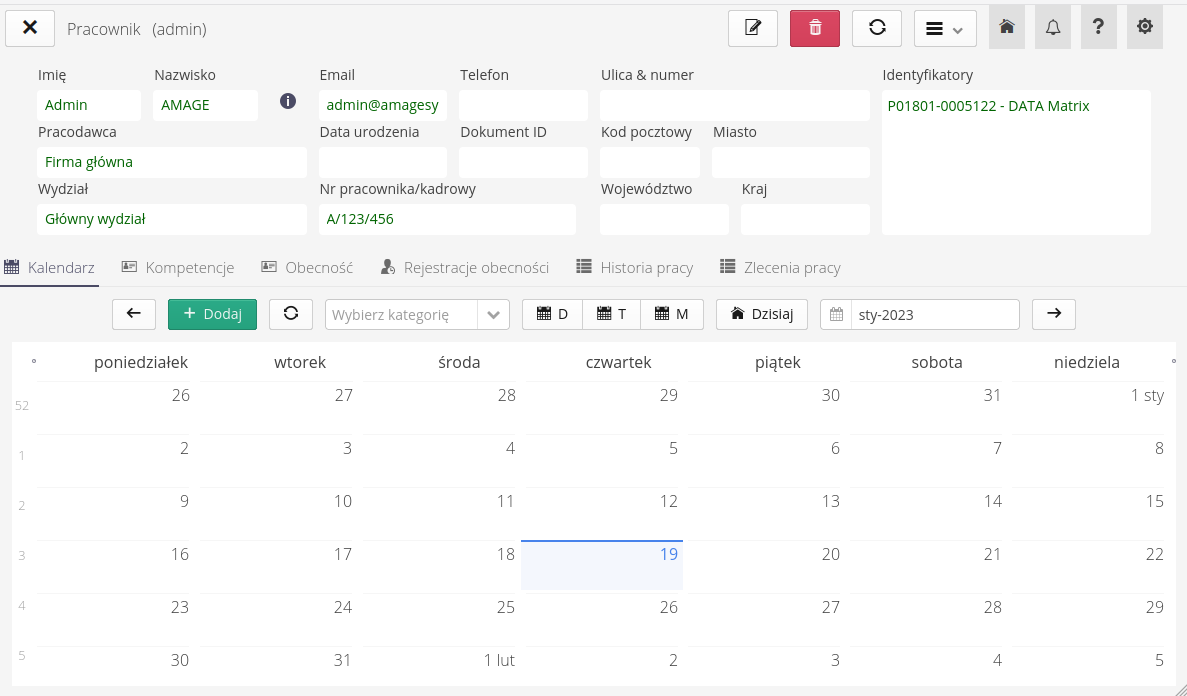
At the bottom are tabs with employee-specific data:
-
Calendar - calendar with view of data records for selected employee
-
Competencies - a list of the defined competencies of a given employee, along with their expiration dates, if any
-
Attendance - employee attendance record (resulting from registration analysis or imported from external time recording systems)
-
Attendance registrations - attendance registration list
-
Work history - a list of records of the history of work orders in which the employee appeared as participating in the task
-
Work orders - a list of work orders directly assigned to a particular employee
In the context menus of this view, we have the ability to perform basic operations on a given employee.

Current stock available:
-
Show 2D code - shows the 2D code of the main ID assigned to the employee.
Adding/editing an employee
In the employee viewing interface, we have the option to add or edit an employee. The editor consists of several tabs that allow us to define basic information about the employee.
| This editor does not replace the main authorization editor for users. In the AMAGE system, each employee is a system user (potential), but this does not automatically mean that the employee can log into the system. These parameters are set in the administrative view. Nevertheless, an employee can be added from either view. |
Employee editing data is divided into sections:
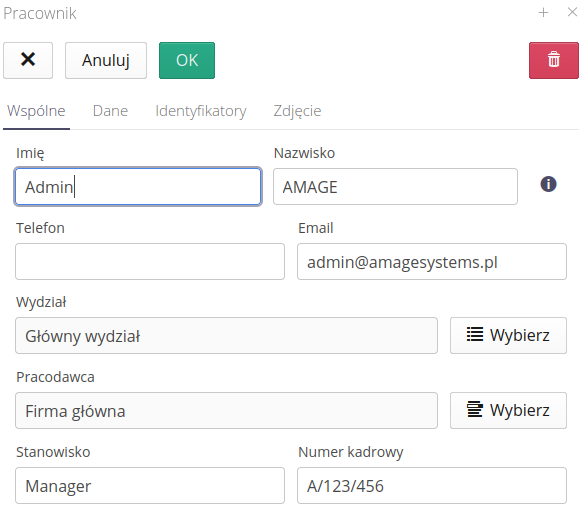
General employee data, where you can enter data on:
-
Personal data - personal data of the employee, name, surname
-
Employer - employer - this is important when, for example, adding subcontractor company users
-
Department/position - a department/position within an organization
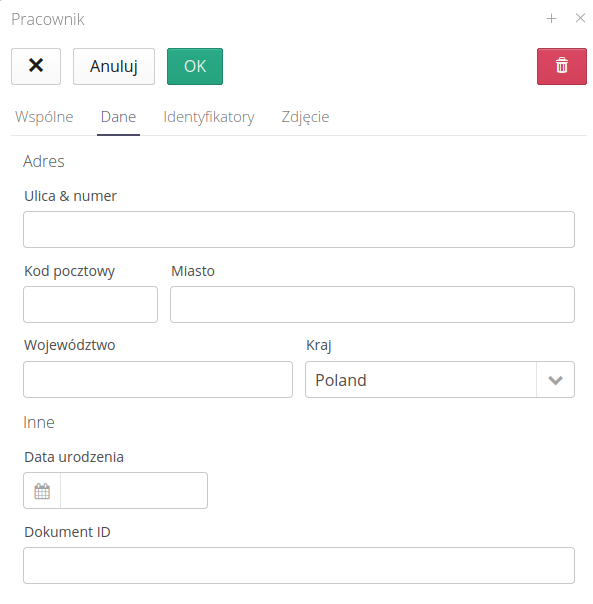
Address data is information about location and place of life.
-
Address - address and locations of the employee
-
Identity document ID
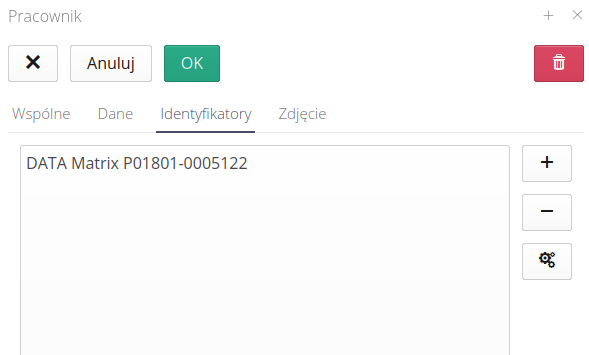
The list of identifiers allows you to generate/add identifiers that an employee can use to identify himself in the system. These may be labels with 2D codes or contactless card identification numbers (RFID). In any case, we can add this information here.
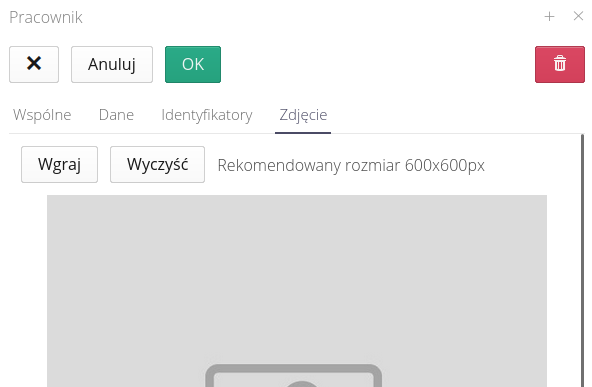
We can also add a photo of the employee for use in employee identification areas (entry/exit registration, competency verification, etc.)
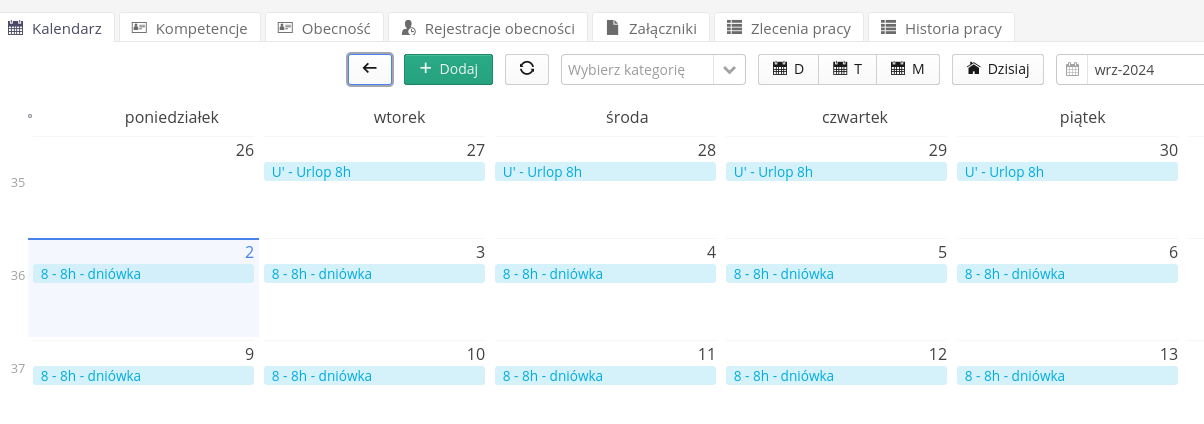
Employee calendar
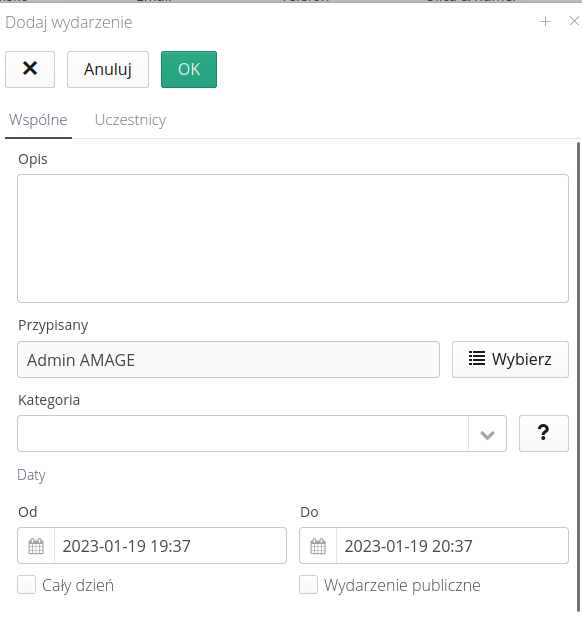
In the AMAGE system we can define calendar events. They can be available to every employee (public) or available only to the person creating the appointment in the calendar and the people assigned to it. Each employee can define an event in the calendar. An event may have its definition fields:
-
Description - description of the event
-
Assigned - the person responsible/assigned to the event
-
Category - event category - dynamically created list
-
From/To - the date of the event
-
All day - whether the event lasts all day
-
Public event - whether the event is public i.e. anyone can see it.
The calendar view displays all event information with the ability to filter by category, employee and the date range in which the event occurs.
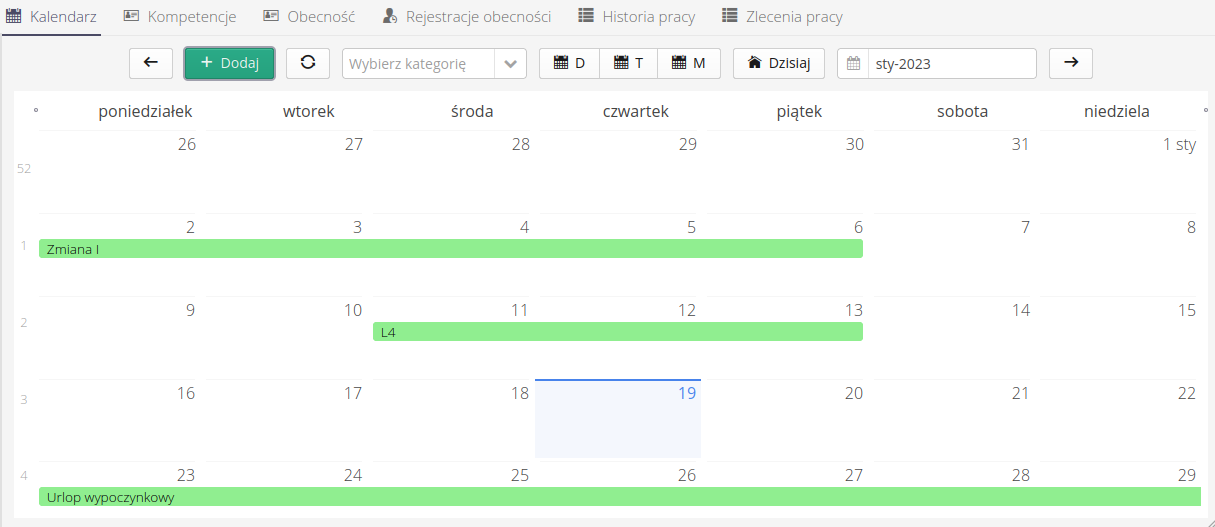
The calendar view is also available in the detail view of each employee with the context of the employee only. The view shows all events that are assigned to the employee. In the case of availability of individual modules/functions, all technical information about events on the timeline (schedules, attendance, work orders) as well as standard calendar events appear in it.
Employee competencies
The list of employee competencies allows you to define the skills of a given employee and the ability to track the expiration dates of a given competency (for competencies that have an expiration date).
The list of competencies contains all the necessary information. When a given competence expires, the system colors the validity dates accordingly (yellow - we are approaching the end of the competence validity period (1 month), red - the competence has expired).

We can give each employee additional competencies.
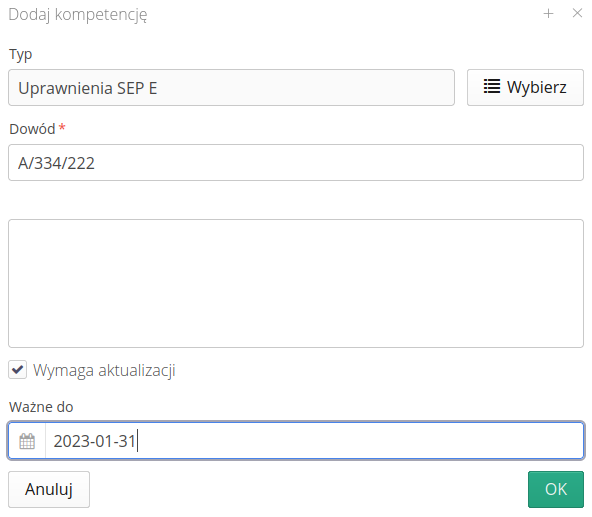
When adding competencies, we need to indicate the type of competency the employee has and we have the option to indicate the expiration dates of the document.
-
Needs updating - the document needs to be updated, i.e. it has an expiration date
-
Valid until - expiration date until which the document is valid
| This data can be used in a mobile application to verify the competency of workers on the construction site/plant. |
Tasks and orders
Additional tabs defining the employee’s ties in the task system are the tabs for the tasks performed and the employee’s work history in these tasks.
Assigned work orders display a list of orders to which an employee is assigned as a responsible person. You can view the assignments in this tab and go/execute standard operations from the assignment context menu.
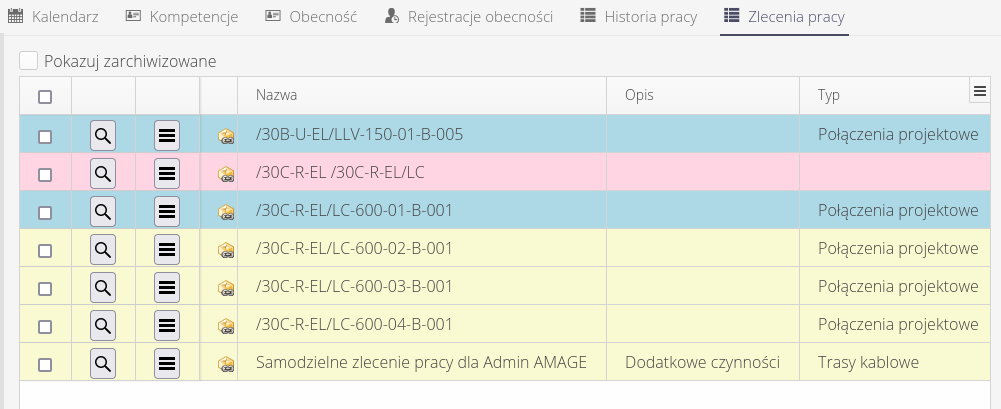
The work history tab shows a list of all work order status change reports in which a given employee was indicated as a person participating in the implementation (team/brigade). This view shows all the jobs in which this employee has worked. An employee DOES NOT HAVE to be assigned to a given job to appear on this list.

Types of competence
In order to define the competencies of individual employees, we must first define the types of competencies. Competency types allow us to group and filter employees with specific competencies. To define the types of competencies, we can go to the dictionary definition directly from the employee’s view, using the context menu.

Or go through the system configuration and there, in the definition of the dictionary list, select Types of competence.
The list of competencies shows all available types of competencies defined in the system.
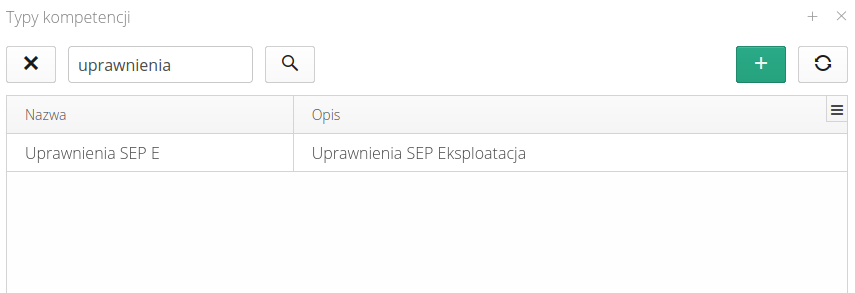
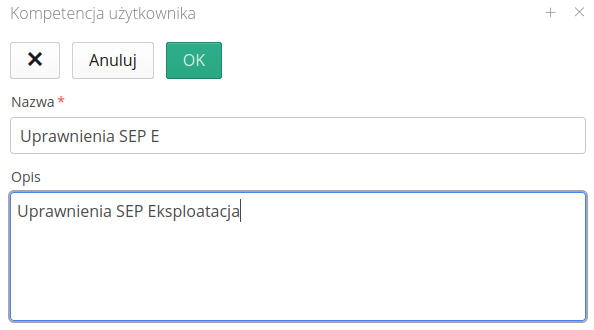
The definition of a new type of competence is straightforward, requiring only its main name and possibly a broader description that applies to it.
Attendance
The system has simple containers for storing information regarding the employee’s presence and recording these presences. The system distinguishes between attendance registration, i.e. an event that indicates the start/end of employee activities in the context of working time, i.e. start/end of work or special entries/exit, e.g. on business. Based on the attendance registration, a specific attendance is generated, i.e. the calculation of the employee’s stay time at the workplace. Attendance is the sum of all time ranges resulting from related attendance registrations.
| Typically, the AMAGE system uses external time and attendance recording systems and integrates this data into a single platform. However, AMAGE has simple solutions for recording working time with mobile devices and billing these recordings using simplified algorithms. However, NEVER can the settlements generated by AMAGE be treated according to legal standards as a full-fledged working time settlement in accordance with, for example, national working time arrangements. |
Access to attendance/attendance records is available from the main menu view under Work Structure.
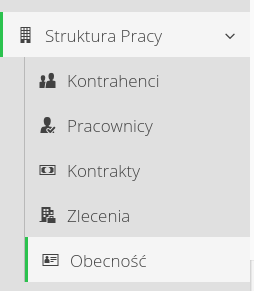
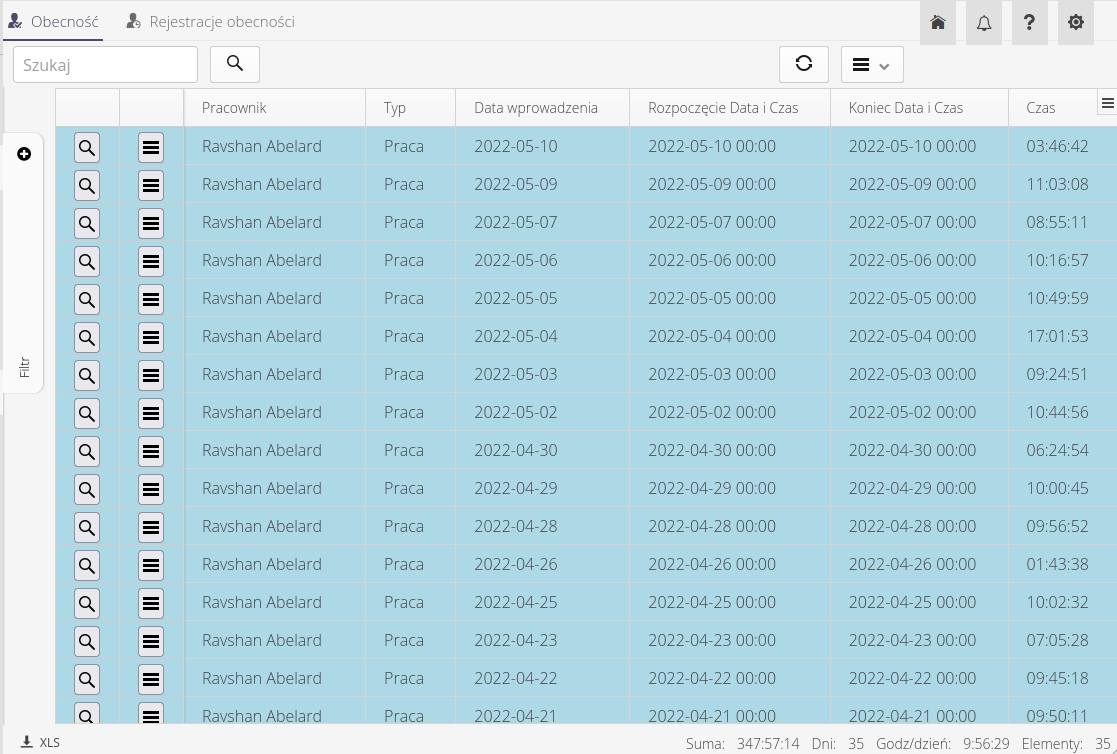
Two main tabs appear in the main view when the module is activated. One for attendance and the other for attendance registration.
The attendance list shows the attendance registration, i.e. the total working time of a given employee. The list shows the attendance type, registration date, start and end times of a given period and the calculated employee presence time.
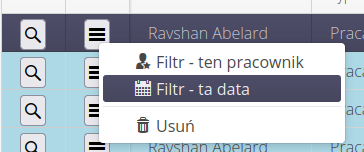
The context menu of each registration allows you to go to the view of a particular employee or perform direct actions:
-
Filter - this employee - a quick filter showing the presence of this employee only
-
Filter - this date - a quick filter showing registrations only on the day to which the record applies
-
Delete - delete attendance registration
Detailed filter allows you to filter and display information about the selected employee, date range.
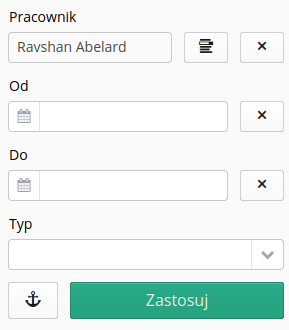
In the view’s context menu, global actions are available for the given operations and activities concerning the recording of working hours.

Available actions:
-
Report - Attendance - display a filter that generates an attendance report. In the filter, we have the option to specify the data from which the report will be generated.
The report allows grouping by selected criteria (department, employer, type of attendance). The generated report contains basic information about employee attendance in a given period and a summary.

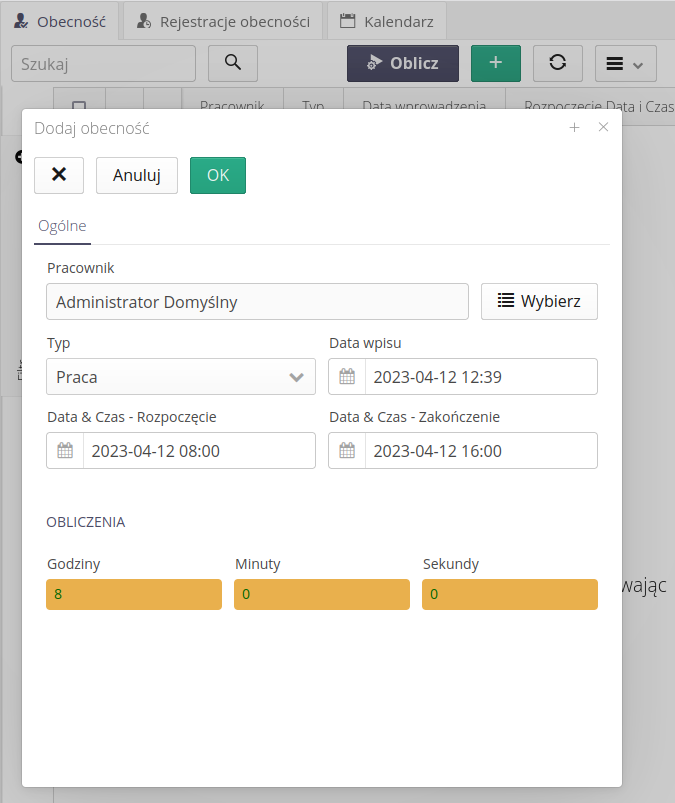
In the system, we have the option to add attendance manually using the Add action. Using it, we call up a window that allows us to select the user and specify the start/end times of the attendance, the mode of registration and the date of entry. The system automatically calculates the reported time.
The attendance registration view shows individual records registered using the AMAGE system (entries/exits) or imported from external time and attendance systems. The list contains all registrations with the option of filtering the view and viewing only a certain range of data. The tabular view shows information about the time/type of registration and the person who generated such registration (if these attendances are registered by people, e.g. brigade managers).

In the context menu of the registration view, we have the option to go to the employee who is assigned to the registration and to delete the registration in question.
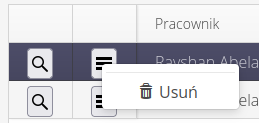
Available actions:
-
Delete registration - deletes the selected registration(s)
In the system we have the possibility with the (+) button to add a new attendance registration. After invoking this action, we display a window where we define all the parameters of this registration.
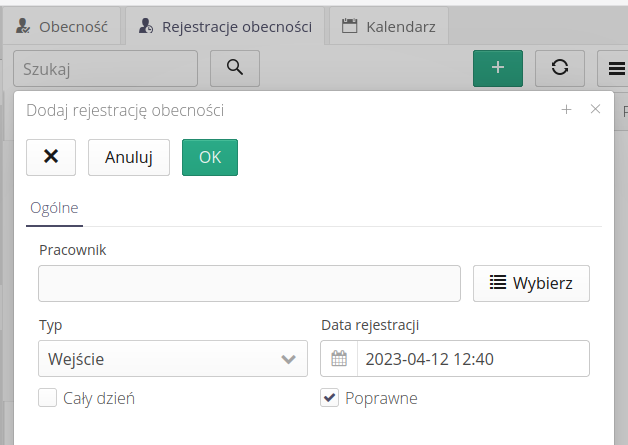
Attendance Calendar
The registrations and the calculated attendance itself are displayed in the Calendar tab. The daily/weekly/monthly view displays all registered events. We can use a filter to display the data of only a selected employee.

Attendance settlement
The system also allows you to calculate attendance time based on registration. Calling the Calculate action opens a window where you can specify a date range and calculate attendance.

Calculate action for generating attendance based on registrationFor selected dates, the system DELETEs the currently recorded attendance of all employees and, based on the registration, recalculates the attendance of employees. Detailed information about the calculations appears in the results log.
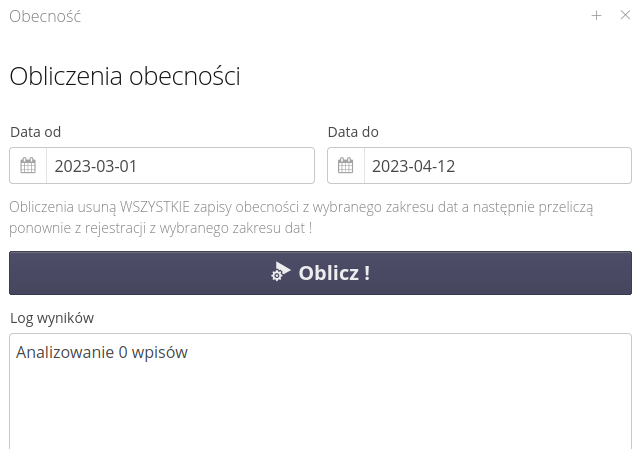
After the attendance is counted, they are saved in the system and replace those previously created.
| The system also has an automatic scheduler that automatically calculates attendance according to a predefined schedule. |
Employee schedules
The Employees module has the ability to work with employee schedules. This is especially useful in companies where shift work is carried out and there are specific teams/roles of employees that should work alternately in specific shifts, but we should also ensure appropriate staffing during specific periods. This is exactly what the schedule view can be used for.
Access to managing employee schedules is possible from the main menu view in the Work Structure area. Using the Schedules action, we go to the schedule management view.
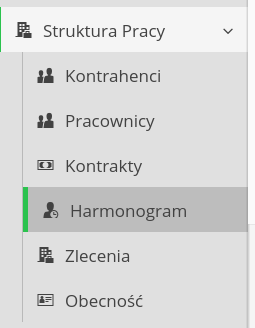
| Employee schedules are available only to authorized system users. Depending on the user’s permissions, access to this function may be limited. If you do not have access to this feature, the user will not see this action in the main menu. Schedule functionality also depends on system features and is enabled in the system configuration. Please contact your system supplier for information on the availability of this feature. |
Schedule view allows you to view and manage employee schedules. This view is divided into two tabs:
-
List - list of all schedules
-
Summary - summary of the working time balance

The view shows the currently selected month and a list of schedules for individual employees. In this view, we can view schedules for individual employees and perform basic operations on schedules.
Each row shows information about one person’s schedule. Information about his team, role and assignment to specific types of schedule on each day of the month. At the end of the row there is a summary of working time for a given employee.
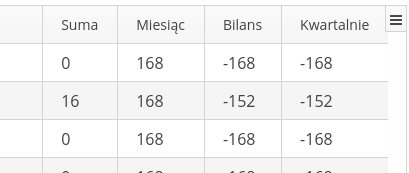
It contains information:
-
Total - the sum of working time in a given month
-
Month - number of working hours in a given month
-
Balance - the difference between the sum of working time and the month
-
Quarterly - total working time in a given quarter
Each column contains a summary of the information contained in that column.

The available column summaries are:
-
Total - the sum of working time on a given day of the month - resulting from the number of hours of a given schedule
-
People - number of people working on a given day - number of people with an assigned schedule
The main toolbar allows you to perform basic schedule operations and also includes a filter that allows you to display only selected people’s schedules according to the following criteria:
-
Team - display the schedules of only the selected team
-
Role - display the schedules of only the selected role
-
Search - searching for schedules by name
-
Calendar - calendar selector for which we present a given schedule
-
Managed by me - display only the schedules of people who are managed by the currently logged in user
People who are defined as managed by the selected employee - defined in employee roles - are displayed in the schedule view with an additional asterisk next to their name. This allows you to quickly identify people who are managed by the selected user. This is used, for example, to define the role of a "mechanic" and assign the manager of a given mechanical team to manage these people.

The main toolbar offers the following actions:
-
Search - calls the search filter and filters the data
-
Add - adds a new schedule for a given month, if it has not been defined yet
-
Edit - editing the currently selected schedule
-
Delete - deletes the currently selected schedule
-
Refresh - Refreshes the view
-
Menu - additional actions available from the context menu
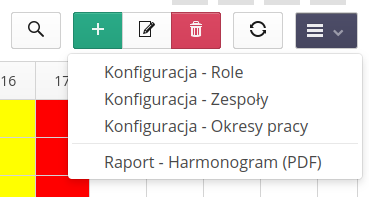
In the tools menu we have access to the following sections of the module:
-
Configuration - roles - definition of employee roles
-
Configuration - teams - definition of employee teams
-
Configuration - work periods - definition of work periods (schedule types)
-
Report - schedule (PDF) - printout of the schedule report as a PDF file
Dictionary - employee roles
The employee roles dictionary allows you to define roles that can be assigned to employees. The employee role allows you to determine what skills a given employee has in the system. The roles may be technical teams, e.g. mechanics, electricians, office workers, but also management roles, e.g. team managers, department managers, directors. Using this categorization, we can group and manage employees' schedules.
After selecting a dictionary action, a list of all defined roles in the system is displayed. We can add a new role, edit an existing one or delete it. Use the Add button to add a new role.

Adding/editing a role allows you to enter key information regarding the employee’s role.
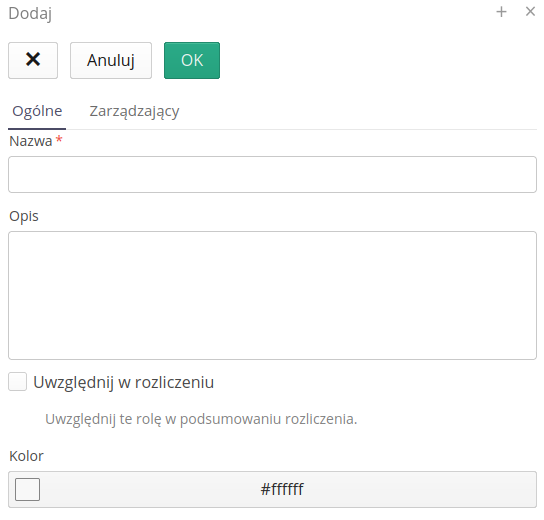
The data entered in the editor is:
-
Name - the name of the role
-
Description - additional description of the person
-
Include in the settlement (balance) - whether to include this role in the working time balance and show it in the occupancy summary for a given month. Some roles require verification of occupancy, e.g. dispatchers, and others do not, e.g. office workers.
-
Color - color assigned to the role - used in the schedule to visualize the role assignment
-
Managers - a list of people managing a given role. These people will be able to edit and define the schedule for employees assigned to the selected role.
| The role is assigned in two stages. The default role that we define in the dictionary, but when editing the schedule for a specific month, we can change the employee’s role assignment. This allows you to have an employee who until January is e.g. an electrician, and from February he was transferred (due to his competences) to the role of a mechanic. Changing a role in the schedule interface will reassign the employee between roles, but in the January schedule, that employee will still appear with their previous role assigned. |
Dictionary - teams of employees
The team dictionary allows you to assign employees to a different grouping category. Often, to ensure that the technological process is staffed with qualified employees, we create teams consisting of employees of various roles. Teams may be technical teams, management teams, design teams, brigade teams, etc. For example, a team also involves staffing the control room and the technological process with an appropriate number of employees with specific roles, e.g. 2x dispatcher, 1x electrician, 1x mechanic. Using teams, we can create a group of people, which is then visualized in the schedule and monthly occupancy balance.
Going to the teams dictionary allows you to view and manage employee teams. This view allows you to add a new team, edit an existing one, or delete a team.

When adding/editing a team, we can enter key information about it.
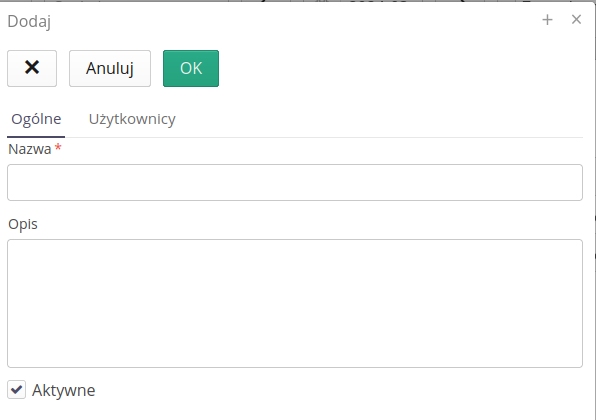
Data possible to enter:
-
Name - team name
-
Description - additional description of the team
-
Active - whether the team is active, i.e. whether it will be visible in summaries and balances
-
Users - list of users who are assigned to a given team. These people will be displayed in the schedule as assigned to a given team.
| As with the role, assignment to a team is a two-step process. By default, we define a team in the dictionary, but in the schedule we can assign an employee to a team. Changing the team assignment in the schedule will rewrite the employee between teams, but in the schedule of the previous month (and earlier months) this employee will still be displayed with the previously assigned role. |
Dictionary - working periods
Working periods are the main place where we define the types of possible work performed by employees and their hourly allocation. These are usually periods of e.g. 12 hours for employees working in shifts, but also regular periods for office workers. Working periods define what working hours are available to employees and what properties a given period has. Working periods are used in the schedule to determine who works and when and to calculate the working time balance.
After entering the work periods dictionary, we can view and manage work periods. This view allows you to add a new work period, edit an existing one or delete a work period.

The work period editor allows you to enter key information about the work period.
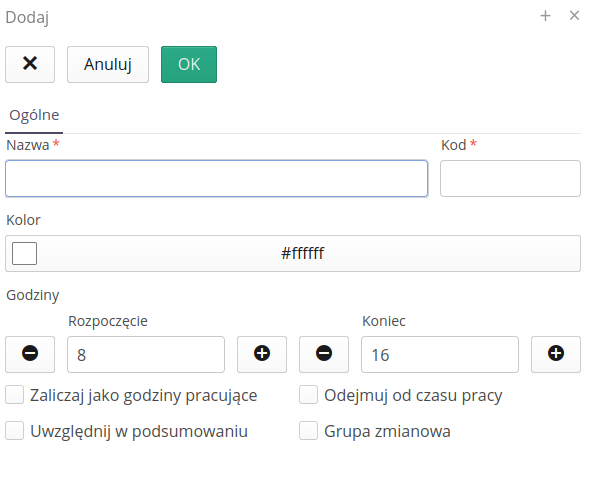
Possible data entry and its meaning:
-
Name - name of the working period
-
Code - work period code - displayed in the list (Table). Usually it is a shortcut that allows us to display it in a limited place in a table cell
-
Color - color assigned to the work period - used in the schedule to visualize the assignment to the work period
-
Hours - from/to - definition of working hours in a given period. The planned working time is calculated from them
-
Count as working hours - whether the working period is to be counted as working hours in the working time balance.
-
Include in the summary - whether to include this period of work in the summary of the working time balance
-
Subtract from working time - whether to subtract the working time in a given period from the working time balance (the default reaction is addition). This can be used in the case of definitions, e.g. overtime collection.
-
Shift group - a flag indicating that a given work period is shift-based and will be used in the definition of subsequent changes in the schedule.
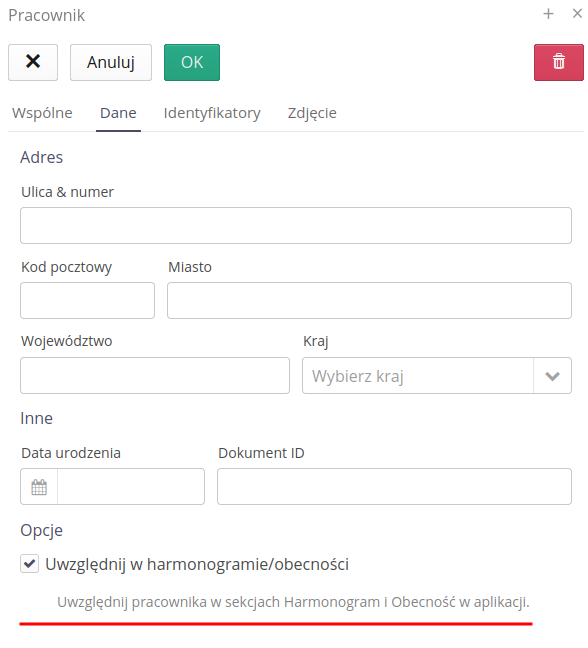
There may be a large group of users/employees in the system. Only some of them can be included in the working time balance. Depending on what employee roles are assigned to the working period, the system includes them in the working time balance. We can specify that, for example, office workers are not included in the working time balance, but shift workers are. We define it in the employee’s properties in additional options. Only employees with the flag checked will be visible in the schedule list.
Working on a schedule
After defining all the dictionary data, we can work on the schedule for individual months. The schedule is always defined for a specific month. After selecting any month in the calendar selector, the system checks whether there is already a defined schedule. If it doesn’t display the appropriate message. The user can create a new schedule for a given month. After selecting the month and the 'Add' action, the system displays a window in which we define the schedule for a given month.
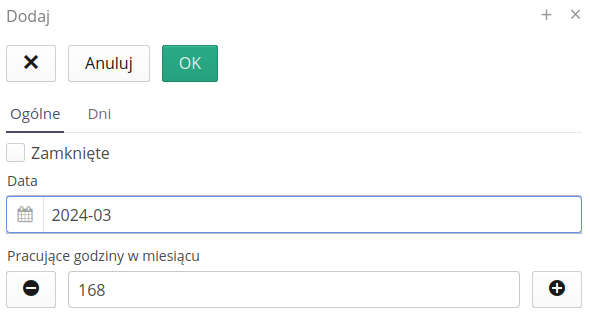
Using the form, we define the month, add any description and specify the number of hours worked in a given month.
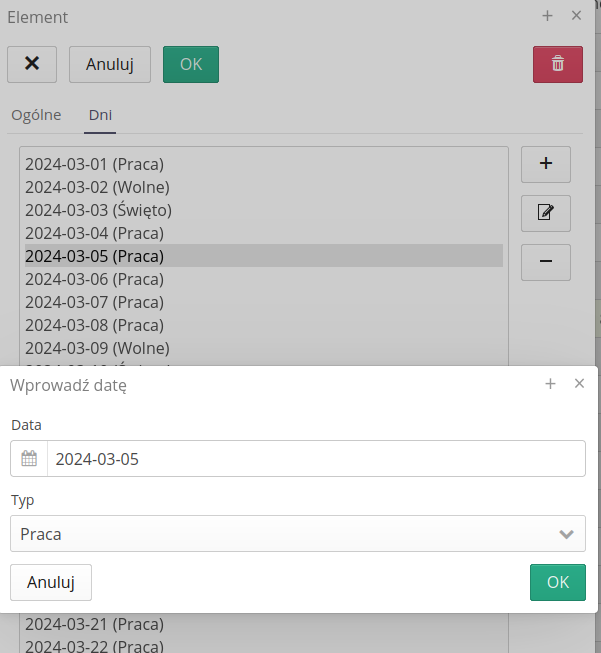
| By default, when you first create a schedule for a month, the system checks weekends and calculates working hours according to the number of working days, using an 8-hour working day. We can change this later when editing the schedule. Each time a day is marked as a day off/working (see menu actions below), the system recalculates the number of working days based on the designated days off/holidays. |
All days are entered in an additional tab. When creating the list, it is inactive because the system will automatically define all days of a given month at the beginning
After saving a new schedule or selecting a month with an already defined schedule, the system loads the configuration and displays all information in a summary view. The view shows a list of all employees, specifying their team assignment, role and information about the assignment for individual days. Additionally, all days off/holidays are marked with an appropriate background color.
A context menu is available for each employee, which allows you to perform activities specific to the employee (and not to a specific day of the schedule).
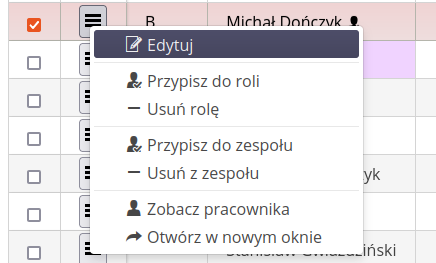
Available actions:
-
Edit - editing employee properties
-
Summary - show summary for selected employees
-
Assign/remove to role - assign/remove an employee to a role. ATTENTION. Review the dictionary information about the employee’s assignment and role history
-
Assign/remove to team - assign/remove an employee to a team. ATTENTION. Review dictionary information about the employee’s assignment and team history
-
View employee - view employee details
-
Open in a new window - open the employee details preview in a new window
The assignment of individual employees to the schedule on selected days is carried out through a process consisting of two stages. First, we select the employees we are interested in and on whom we want to perform schedule assignment operations. The background of the selection will turn light yellow.

Then we left-click on the selected day on which we want to assign employees. The system displays a context menu that allows you to perform the schedule assignment operation. The operation is performed for all selected employees. After performing the operation, the selection is not cleared, which allows for quick assignment to subsequent days.
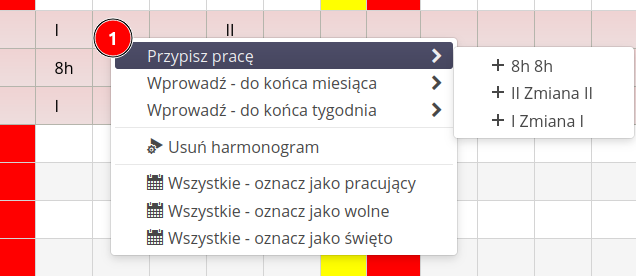
Options available:
-
Assign work - drop-down menu with a list of work periods available for assignment to selected employees and a specific day.
-
Enter until the end of the month/week - additional expandable operations that allow you to select a working period from the selected cell and apply the rule for subsequent days in the period until the end of the working week or until the end of the month
-
Shift 12/12/48 - generates subsequent shifts defined by the 'Shift group' flag during the period of work in the 12/12/48 mode, i.e. the first shift, the next shift (through all shifts), and then 48 hours (two days off). This allows you to quickly select the appropriate change algorithm for each selected employee, e.g. a team.
-
This schedule - assigning a selected work period to the schedule for selected employees and defined until the end of the week/month, excluding holidays
-
This schedule (taking into account days off) - assigning a selected work period to the schedule for selected employees and defined until the end of the week/month, taking into account days off
-
Delete schedule - deletes the selected schedule for selected employees and the specified period - from now until the end of the week/month
-
Remove from schedule - removes the selected day from the schedule
-
All - mark as working/free/holiday - marking the selected day as a day off/holiday (for all employees)
After performing the operation, the system automatically displays all information in the table and updates row and column summaries allowing you to check the correctness of employee assignment.
We can print the prepared schedule in the form of a PDF report. Select the report printing option from the tool menu. The system generates a report with a colored background and all information available in the list.
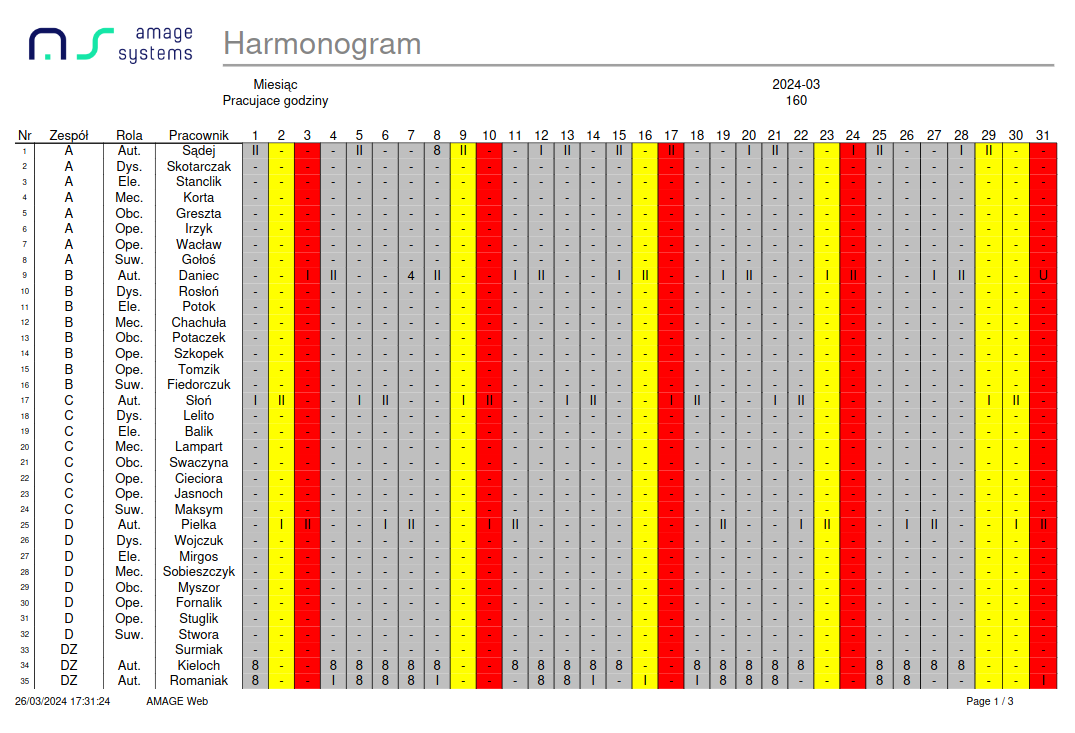
We can perform such operations for every month. Once a given month has been archived, it is not possible to change the schedule. The system will display an appropriate message.
Summary of hours of selected employees
After selecting employees and choosing an action from the context menu, a window appears showing statistics and a summary of employee hours. The table shows all schedule types and assigned hours for the selected employees. Below are two pie charts - a summary of all employees and a summary of the selected employee.
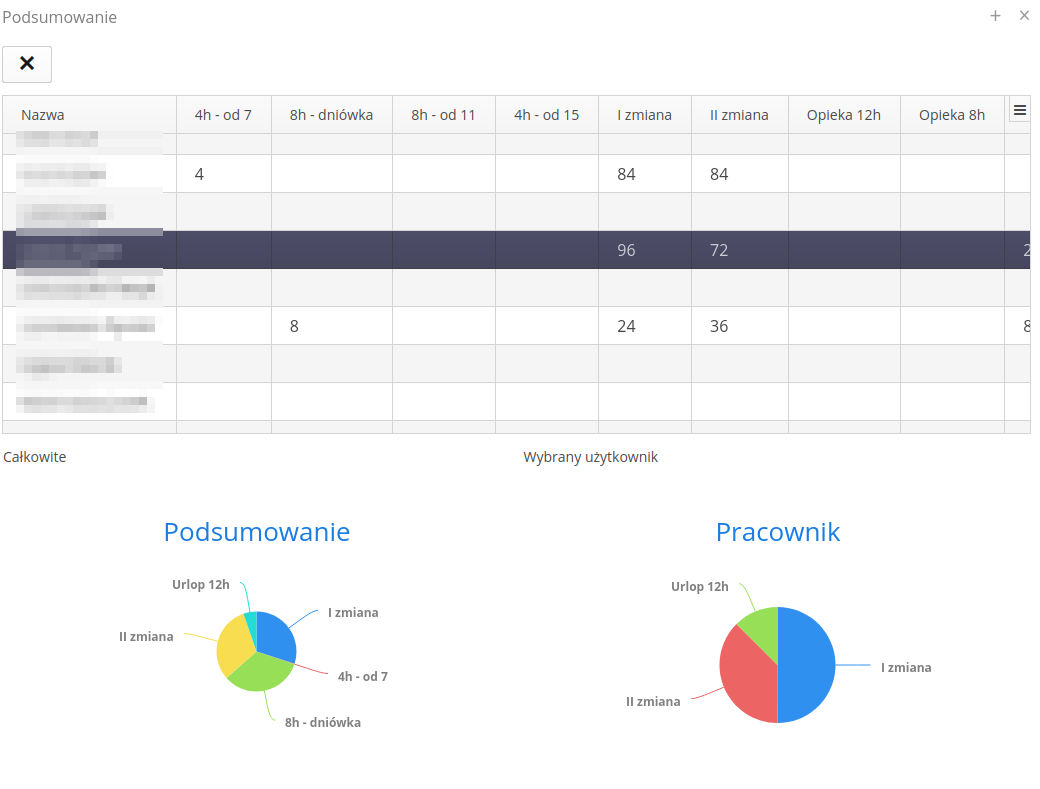
Balance of employee allocation and occupancy for the month
If a schedule is defined for a given month, the system automatically calculates the working time balance for all employees. The working time balance is the sum of working time in a given month. The system calculates working time based on defined work periods in the schedule. The working time balance is displayed in the Summary tab.
This comparison is especially important for workplaces that require a specific shift staffing with employees with appropriate competences. This view displays all employee roles and teams in the system and their occupancy in a given month.

The numbers on each day indicate the number of people who have been assigned from a given team and role to work on a given day. This way you can easily verify whether we have full occupancy on a given day.
Using the available filters, we can change the view and the presented data. Using the 'Mark as empty' option, we can mark as empty all days that do not have employees assigned, which makes searching and diagnostics easier.
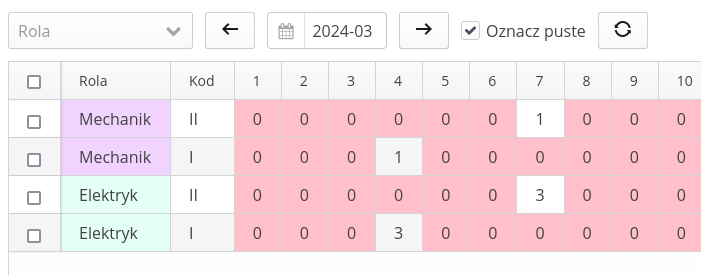
After clicking on the selected day, you can access the context menu, which allows you to perform operations on the selected day. A detail view is available, which displays information about specific employees assigned to a given day from a selected role. This makes it easier to quickly check who is assigned on a given day and whether we can react in any way to any shortages.
