Supervision
Supervision
The supervision area allows monitoring the progress of assemblies, construction work and building of tracked elements. It is used in the construction area and in the field of production process management for elements that require continuous tracking and identification of individual objects.
Supervision actions are available in the dedicated main menu in the 'Supervision' section. They allow you to display data and configure them.
Supervision of the process
The process supervision module allows you to carry out effective monitoring of performed activities in the context of resources defined in the system. The system allows you to define the supervision process using flexible templates and then overlay these processes on equipment/resources/components.
With the help of states and parameters, it is possible to track in detail the current progress of the overall supervision process and in detail for each device/element. Reporting by all users of the system allows you to disperse the implemented activities and have control over all operations in the system.
The result is full control over the tasks in progress having as data the actual information from the construction site or production plant. A side effect is the ability to easily monitor the productivity of the work, the progress of the various stages of the work and the implementation of the process in a fast and precise manner.
Dashboard
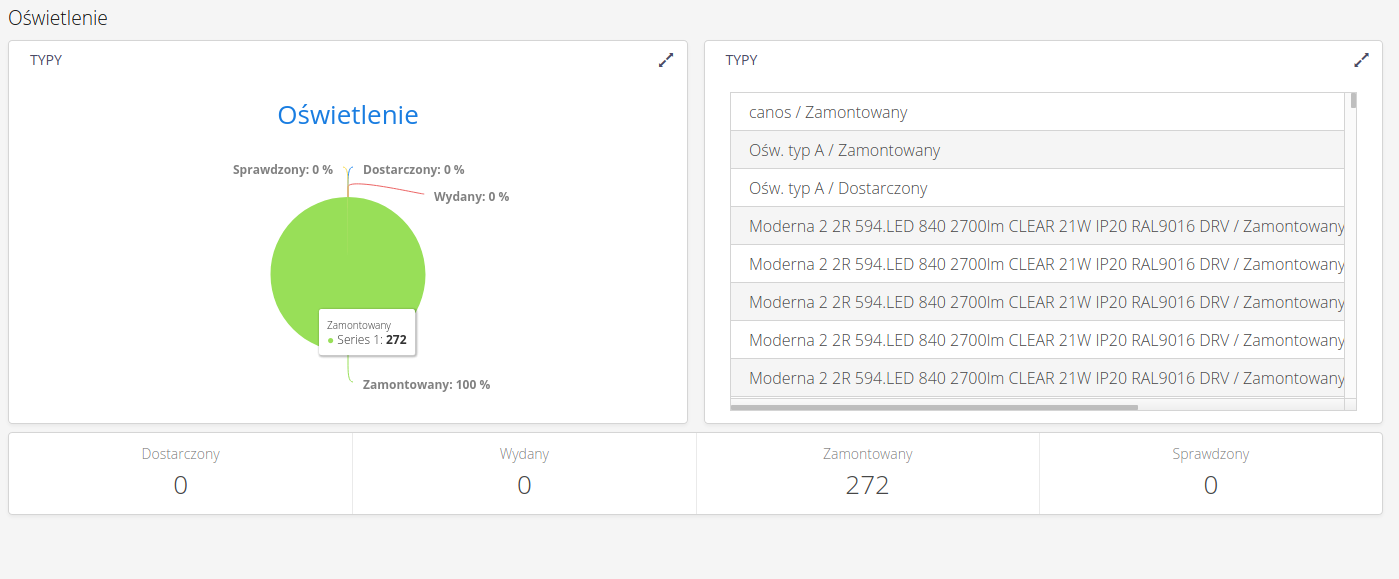
A dashboard is available for the supervision system, which presents all information on active supervision templates in graphical form. The dashboard shows, with a breakdown by supervision template, information on the status breakdown of progress, a list of recent supervision changes with a selection of items, and reporting statistics for each supervision status.
List of supervised elements
The list of supervised items allows you to view all information about the supervised objects.
The list can be presented in a simplified way giving information about the current status of a given resource, percentage progress and basic data of elements.
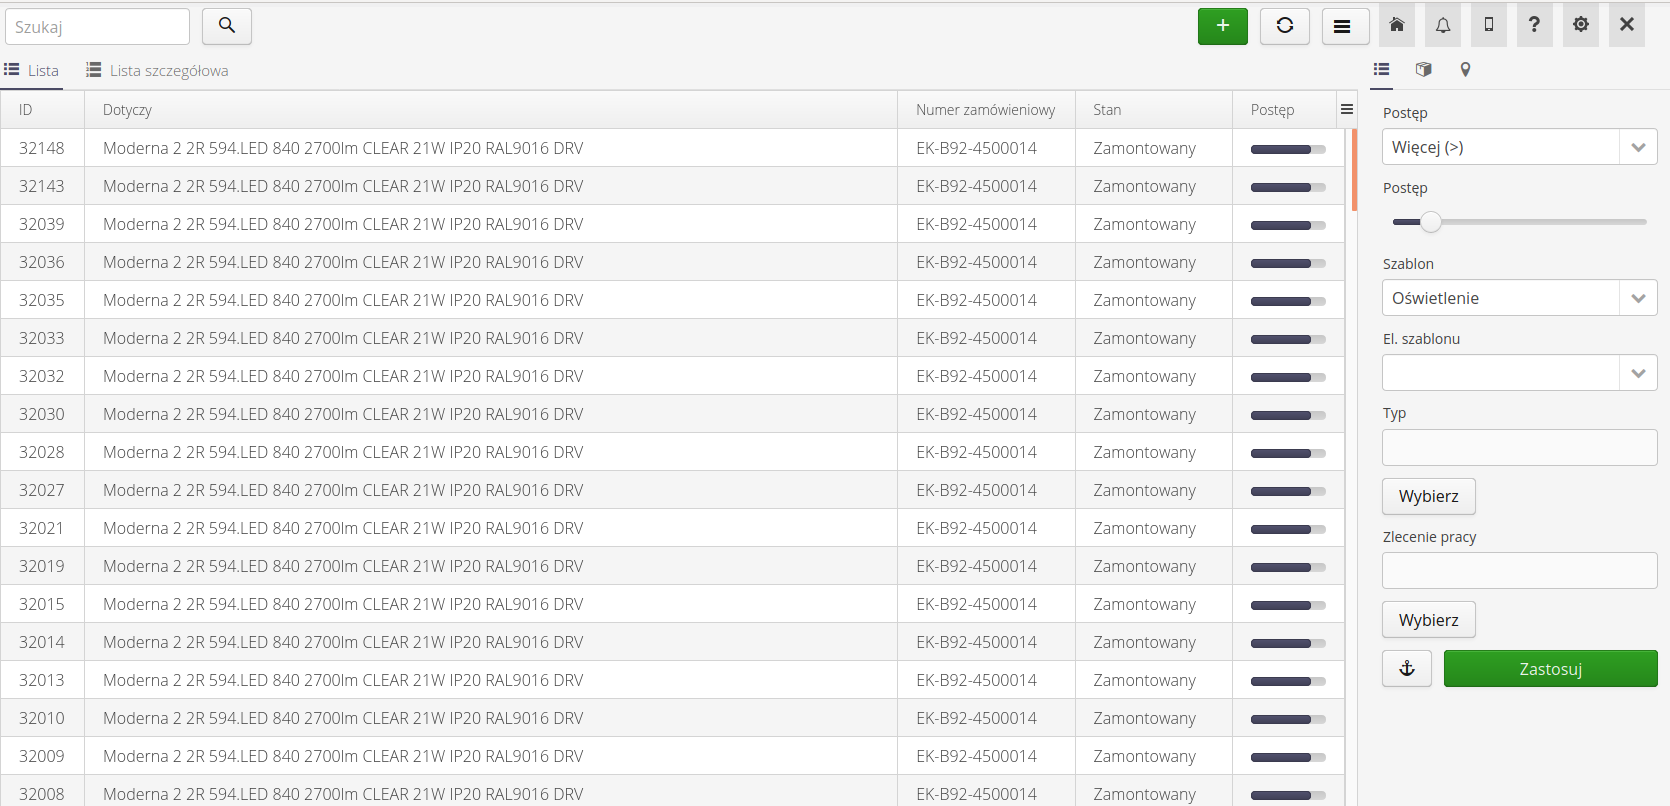
And in an expanded form depending on the context of the template. After selecting a supervision template, all states of a given supervision are placed as additional columns in the view. This allows you to quickly visualize the progress of ongoing work and its execution.
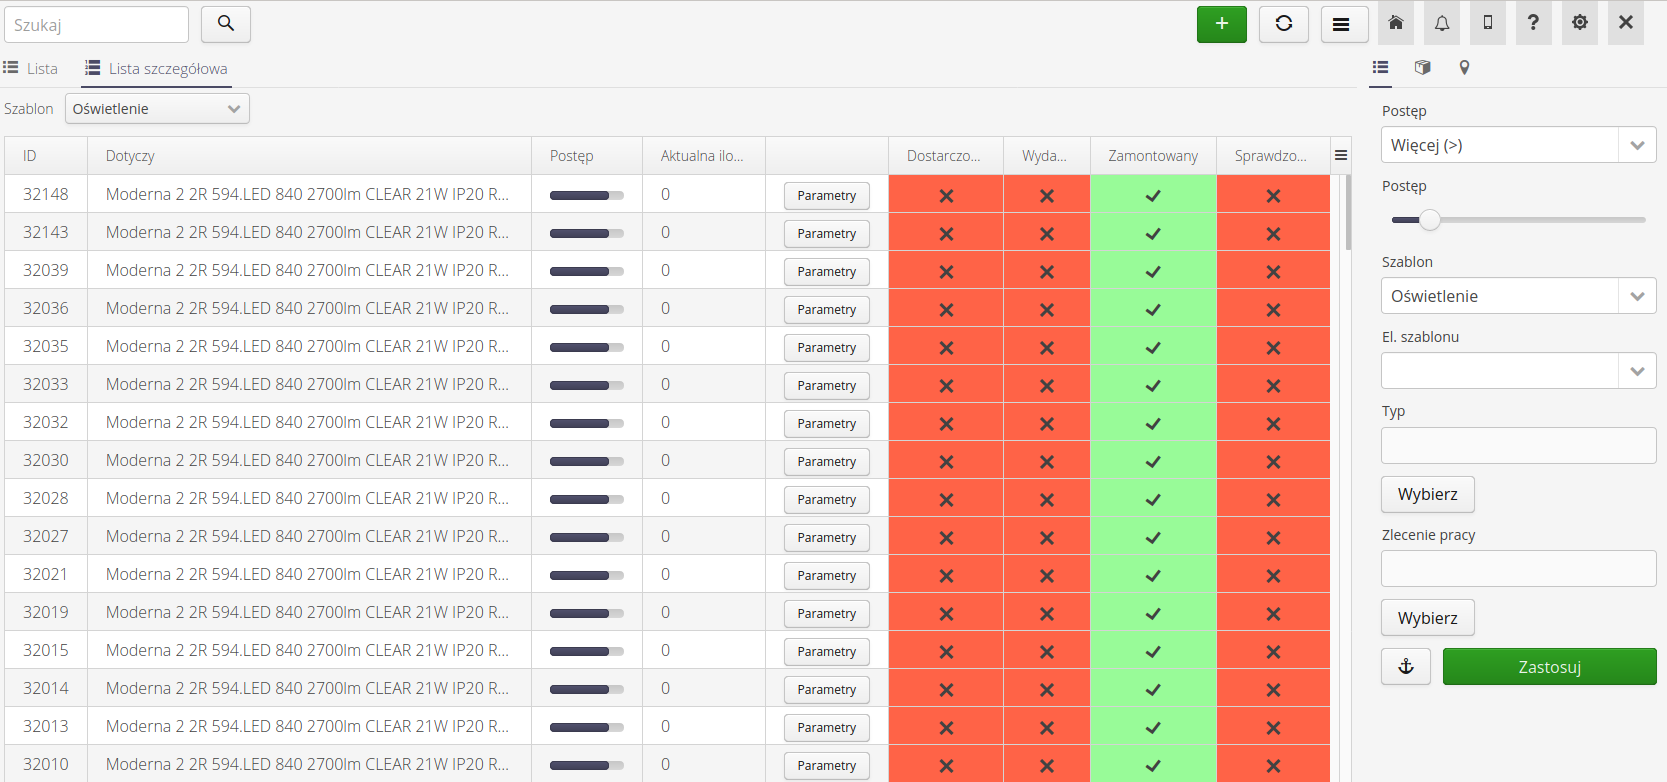
If a given state has the option of automatically showing it in a tabular view enabled, then its name appears in an additional tab in this view.
Using the configuration options in the system configuration, we can enable additional restrictions on the visibility of tabs for users with appropriate permissions to selected supervision templates. This allows you to limit access to data from the level of data security, but also allows you to organize the supervision view for users who only deal with a selected area of activity and should only see those activities for which they are responsible.
To achieve this, you must enable the option that filters data based on permissions in the configuration option.

After setting the appropriate access permissions, the user after entering the supervision view will only see the supervision templates for which he has permissions.
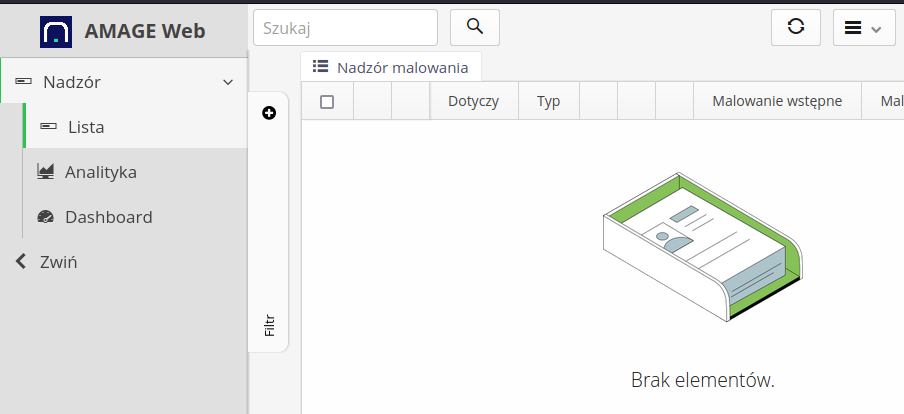

Depending on the selected configuration option, the list contains basic information about a given resource and a list of all states and their status along with registered and additional parameters displayed in this view.

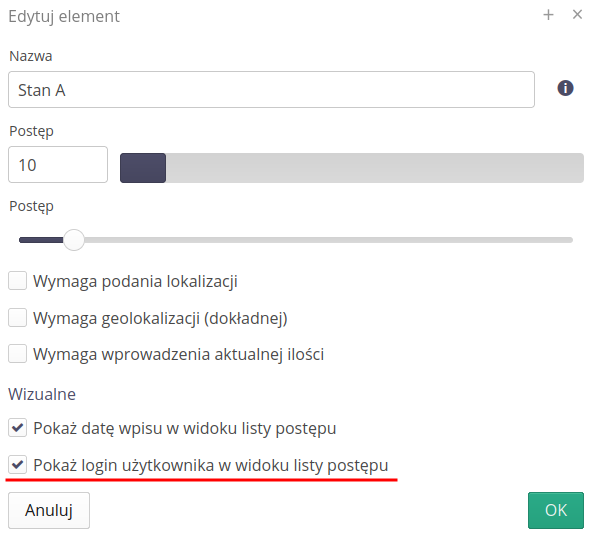
If you select the option to show the user/registration date, then in the supervision details view, in addition to the current status, the system will display two additional columns - registration date and login of the user who performed the given registration.

| The system automatically ignores changing the supervision template in the filter. |
Additional columns appear in this view depending on how the supervision template is set up. Possible available columns:
-
Location indicator - if a location is required and the resource has its own geolocation, a map icon appears here.
-
Supervision statuses - all supervision statuses are displayed in separate columns with graphical information about the registration of a given status or its absence.
-
Supervised parameters - list of supervised parameters defined in this supervision template with the current value.
-
Additional parameters - a list of all additional parameters that have been specified in the template definition.
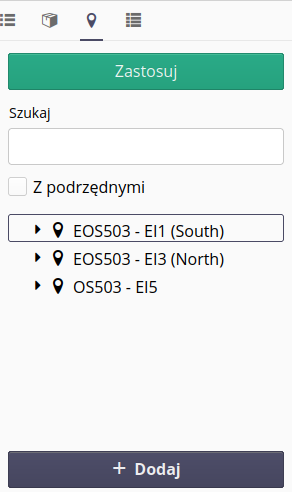
Built-in filters allow you to quickly filter selected items taking into account their location, progress, place in the resource group and other data.
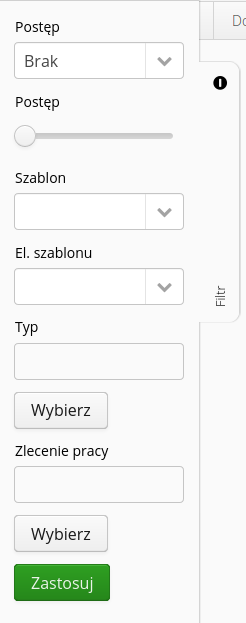
For location trees and product groups, it is possible to add a new location/product group record directly from this filter view. This makes it easier to manage items.
After selecting any supervised item, we go to the details view of that resource. The view is divided into three parts. In the upper one, a list of all states is shown as buttons. Unreported states are shown as red buttons, reported states are green buttons. Selecting any button will open the status change window.
Another element of the detailed view is information about a given resource. Information about what it concerns, item type, current status and progress, current reported quantity and identifiers assigned to the resource. The last part of the detailed view is intended for a list of status change history along with parameters that have been entered in a given status and a list of current parameters of a given monitored resource.
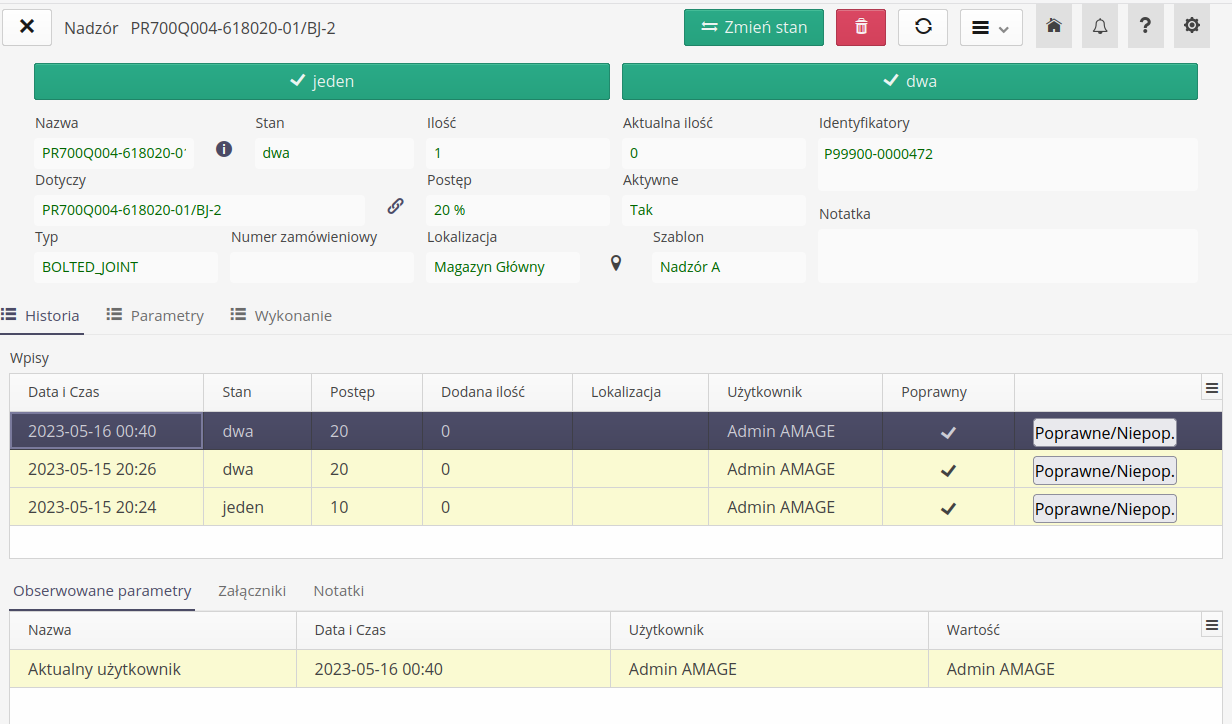
If the number of states and their text descriptions exceed a certain length, the system will turn on the scroll bar for buttons, which will allow you to display all buttons without cutting off the texts.

The state change history list presents information about individual state change entries. By selecting any entry in the lower part of the history, the data of the parameters that were additionally introduced in the given state entry are presented.
Calling state change displays the state change window. The window allows you to select the currently reported state, select the reported number of items in the state and the location where this state is reported.
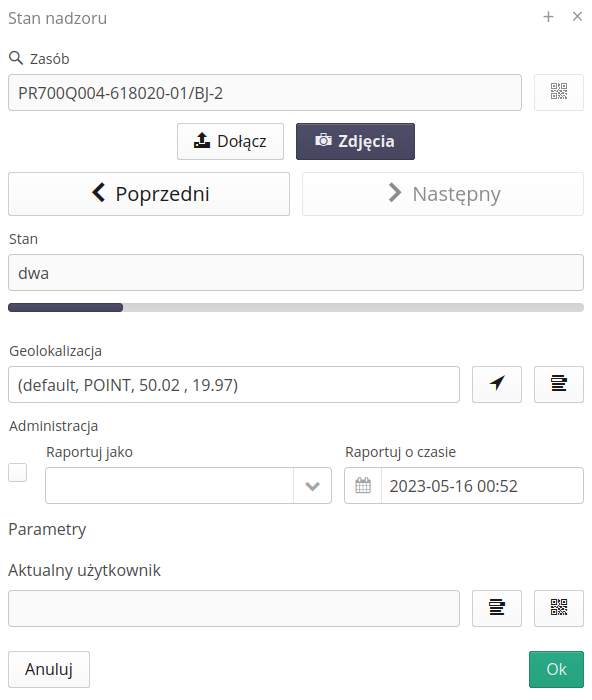
During the status change, we also have the option of attaching photo documentation and viewing the currently attached photos.
If the user has super-administrator rights, an additional field appears in the Desktop interface of supervision registration, allowing to specify the person/date and time of registration of a given entry. This allows the super-administrator to complete these data in the event that, for example, a given user forgot to do it and is currently on sick leave.

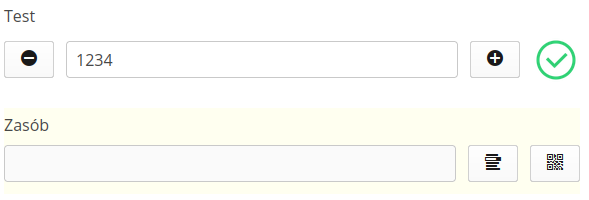
For a numeric parameter, a text/numeric input field appears. If prompting of the last entered value is selected in the options, additional +/- buttons appear, which allow you to increase/decrease the integer by 1 without having to enter the value.
If geolocation is forced for a given state, a control appears that shows the current location. The system automatically tries to get the geographical location from the operating system. You can use the arrow button to force the location to be updated again, or use the select button to select the location manually.
You can also define specific parameters for which the data entry controls will change. This is an example of the data parameter. After its definition, the data entry control changes to date/time selection.


In addition, for states that have defined parameters for reporting, they appear at the bottom of the window. Each parameter has its own controls, and depending on whether it has been defined to be reported by record or code scan, the system provides the appropriate controls for data entry or code scan. If the parameter has an incremental reporting option, an additional button +/- appears to enable this function.
| Reporting quantity in state allows you to add it to the current quantity value in the monitored parameter. You can use this parameter to report data incrementally, for example, the length of installed cable route components. |
| The supervision history can be imported from an external source (XLSX file) which contains information about the resource, parameters, status and the user registering this change. Additional information can be found in the section on data importers. |
Templates
To enable the recording of supervision, the system must have defined templates for supervision status. Templates are definitions that specify the process we want to supervise. They consist of stages, which we can usually define as a percentage of the execution of the whole. In addition, for each stage, we can indicate what additional information when recording the stage we are interested in. These are the observed parameters. These parameters during a state change can be entered as a number, text or a value scanned from a 2D/bar code. In addition, the numeric value can be entered as a difference from the previous state.
| For example, for the cable laying process, the process of connecting wiring to electrical apparatus usually involves shortening the laid wire/cable. In this case, it is easier to enter information about the amount of wiring cut off than the actual length. |
After selecting the module responsible for supervision templates, a list of all defined templates is presented.
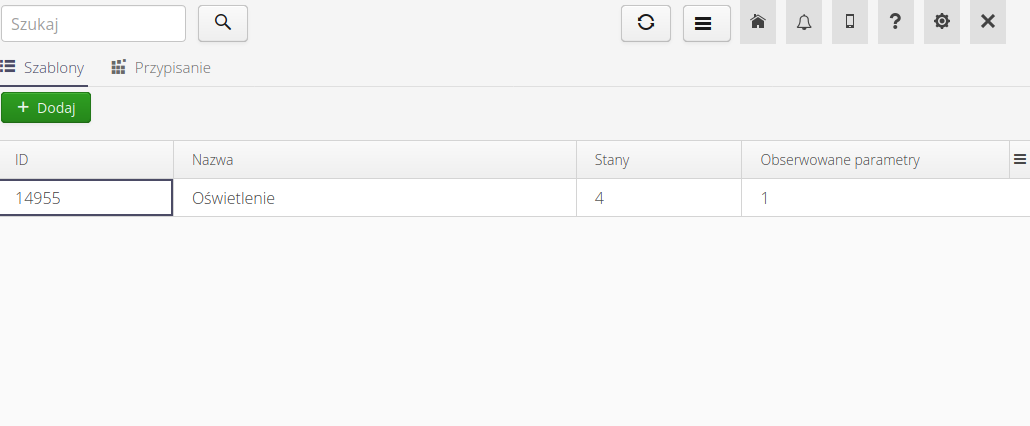
Adding/editing a template is done either by selecting the Add action or selecting any existing template. After this action is executed, the template definition dialog box is displayed.
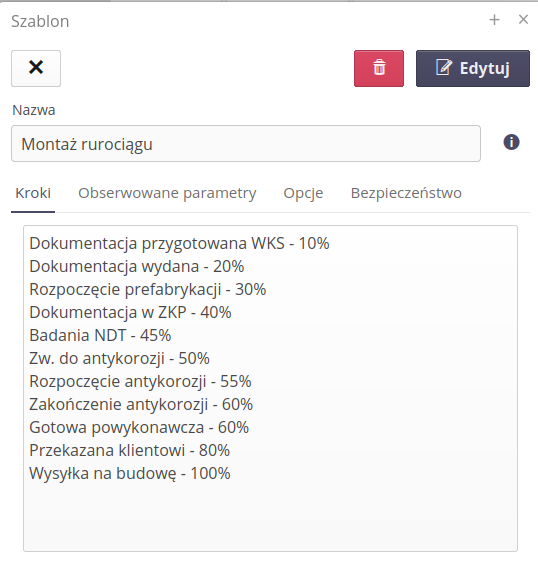
In the view, we define the name of this template, the list of steps/stages of the template and the list of observed parameters.
Supervision template step
The template step contains information about its name, the percentage progress that results from the achievement of a given step.
-
A possible parameter is the ability to force the indication of the location when reporting a given step. Enabling this option will require you to provide a location when changing state to this step. This allows you to track the circulation of information about the location of the resource.
-
Geolocation allows you to determine the exact location of a given resource at the time of recording the state of supervision.
-
Forced entry of the current quantity allows you to register the current quantity of the element. This allows you to record and record the number of assembled elements, etc.
-
Requires entering previous states - after entering this option, a given state cannot be saved if previous states have not been saved (according to percentage progress).
-
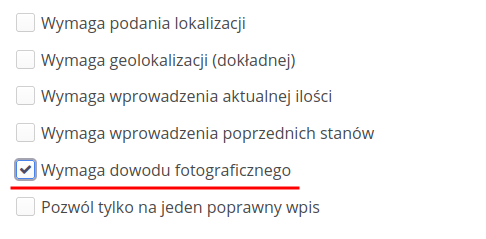
Requires photographic evidence - requires attachments (photos) to be included when saving the status. Without this, the entry cannot be saved.
-
Allow only one valid entry - Allows only one state entry to be saved to the system. If we try to save the state again, an appropriate message will appear.
Visual options allow for additional detail/list view options. Actions available:
-
Show the date of entry in the summary list (table)
-
Show the login of the person who made the entry (also in the table)
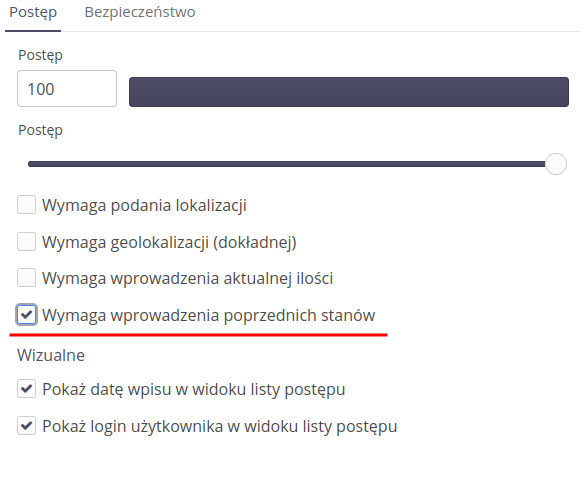
Options that limit or specify requirements during registration:
Only one correct entry in the system
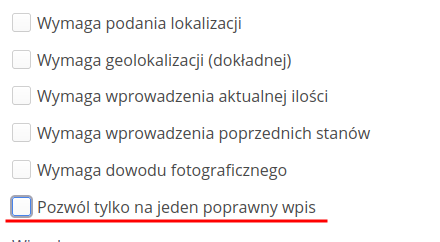
Photo evidence required
Automation
An additional section allows for additional automation of performed activities. After enabling the 'Initialize new supervision workflow' option, after reaching the selected step of a given state, we can automatically initialize a new supervision template for this resource.
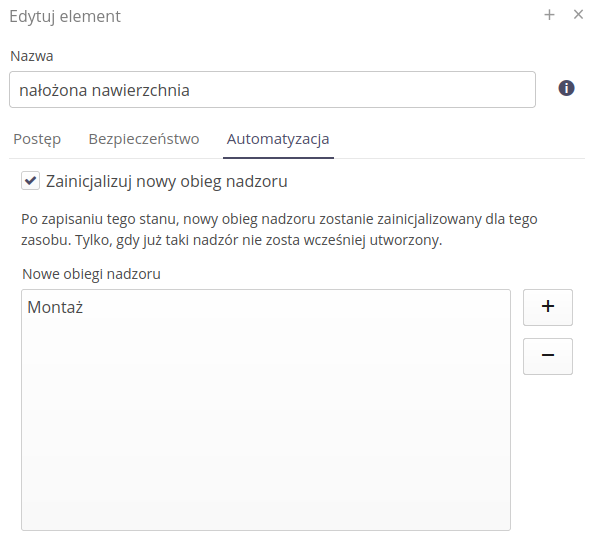
In this case, after reaching the Plaid surface state, a new supervision template Installation will be automatically launched in this template for the resource we are operating on. This allows you to create records in the supervision system gradually during the implementation of complex processes when we have many supervision templates, for example for various industries.
Permissions/Security
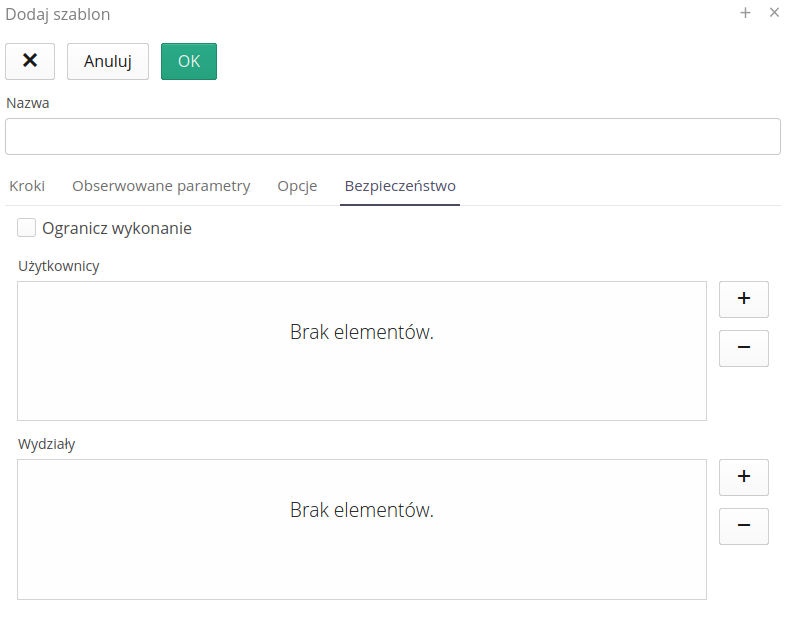
The system allows you to define permissions for a list of users or departments that can change (enter) states for a given template or, in more detail, for each supervision state. By selecting a person/department and enabling Restrict execution we do not allow other people to change to a given state.
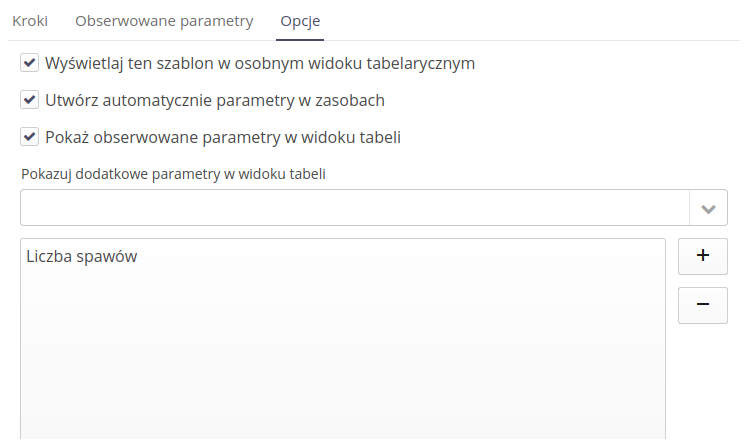
Supervision options allow for additional configuration of the display of this supervision data and their execution.
-
Display this template in a separate tabular view - after entering the general view, this template will immediately have its own tab with data. This makes it easier to view this data
-
Automatically create parameters in resources - if the resource does not have a given parameter during registration, it will be automatically created.
-
Show observed parameters in table view - all observed parameters will be displayed in the resource status preview table.
-
Show additional parameters in table view - a list of additional parameters that will always be displayed in a given table view. This allows you to specify additional parameters that will always appear and make it easier to work on this view.
Watched parameters
The last set of data are the observed parameters. Adding a parameter displays information about that parameter. At this stage, we specify in which supervision states a given parameter will be monitored. The name of the parameter (of the types) that will be required during supervision registration in the above-mentioned stages.
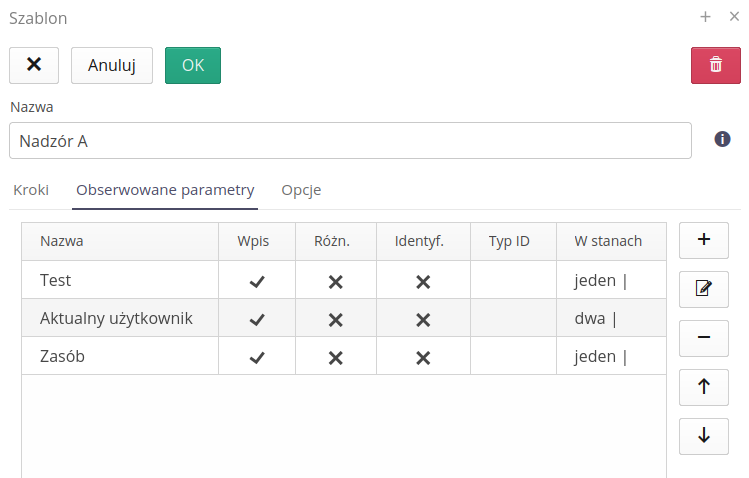
Adding each parameter allows you to specify the actions that can be performed during data registration. In the supervised parameter view, specify the parameter name and property.
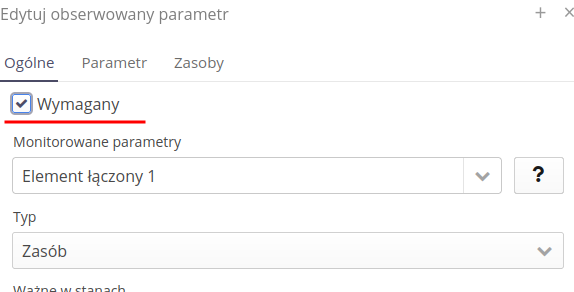
The parameter may be required or optional when entering. We can specify this property using options in the parameter definition.
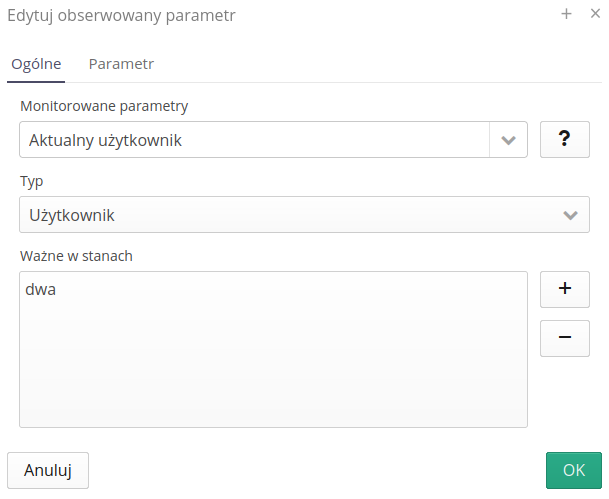
-
Monitored parameter - choose from the parameters available in already existing resources or you can add a new parameter by entering this parameter and pressing the
ENTERbutton. The(I)button displays this reminder. -
Type - Text, Number, Resource, User, Serial Number, Inventory Number, Identifier, Date or Date & Time - depending on the type of the recorded parameter, the appropriate user interface is displayed - for resources, the ability to scan the code or select it, etc.
-
Valid in states - specifies a list of supervision states in which a given parameter will be required for registration.
For types - serial number, inventory number or identifier, after completing the parameter registration, the relevant fields in the resource will be updated with the entered parameter.
For the date and date & time types, the controls will change their appearance allowing you to select a date from the calendar. The data saved in the parameter will be in the ISO date and time format yyyy-MM-ddTHH:mm:ss.
Additional options relate to how the information is entered. For parameters of any value (text, number, numbers) we can specify data entry options and auxiliary actions/controls.
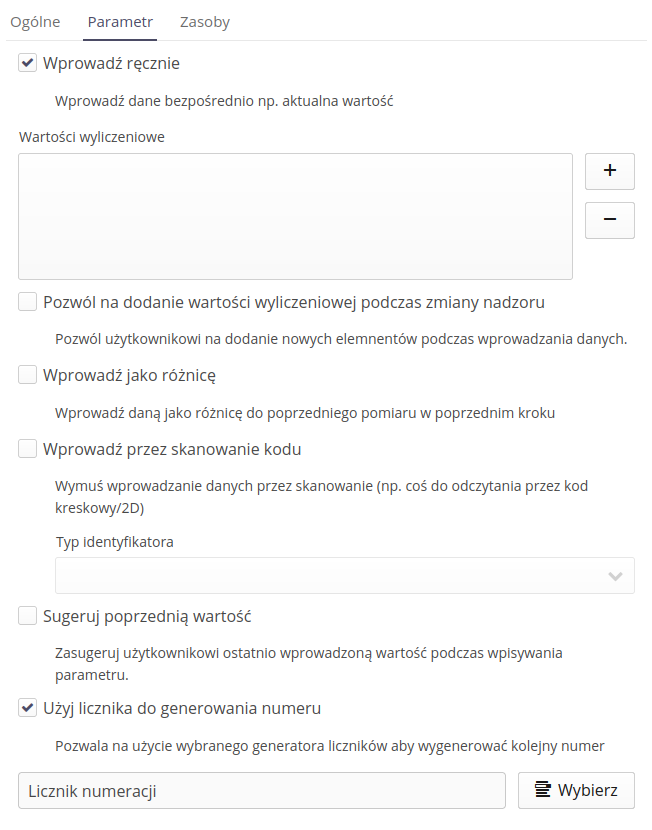
-
Manually enter - entering a direct value.
-
Enumerated values - allows you to specify a list of values that will be possible to select during parameter registration
-
Allow adding values - an option that allows the user to dynamically add new parameters to the list while entering data
-
Enter as difference - entering the value as a difference from the value entered in the previous state
-
Enter by scanning a code + code type - enter a value by scanning a code of a specific type
-
Suggest previous value - enabling this option will result in entering the current value of the parameter in the editor during registration.
-
Use the counter to generate the number - indication of the counter that will be used to generate subsequent values proposed during the registration of a given parameter.
| These options can be set only for parameters of the Text, Number type and resource data registration, which are text (serial number, etc.). |
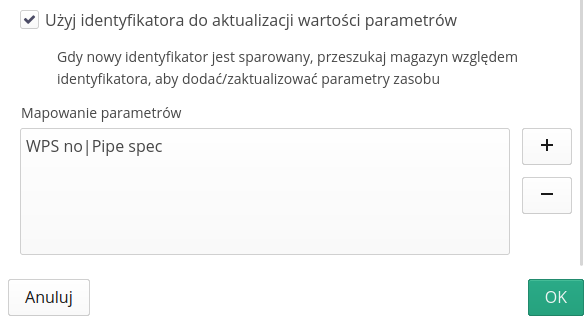
To define the use of the identifier during supervision registration, we can use data created in the delivery/warehousing module. After enabling this option, the system will search warehouse documents for scanned codes. Once they are found and the warehouse document has specific delivery parameters (e.g. information on material classification, manufacturer’s declaration), they will be transferred to a given resource that we supervise.
Using an additional definition, we can determine the exact parameter mapping between the warehouse document and the target resource parameters. We do this by renaming them or using existing parameters in the resource.
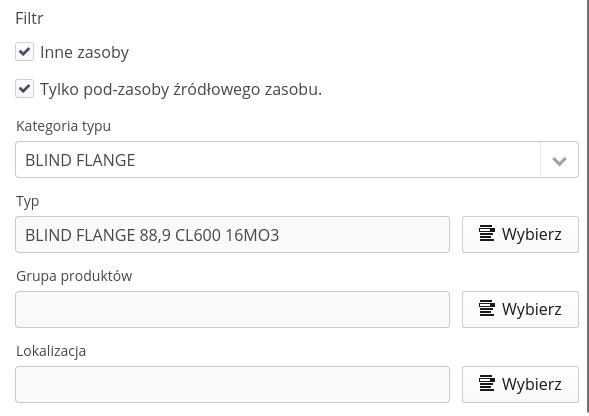
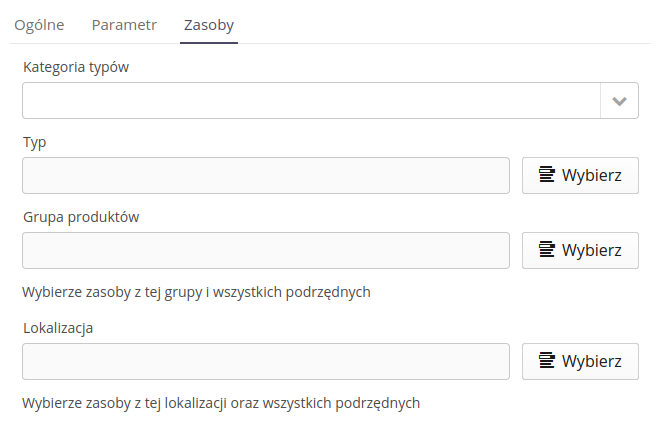
For the "Resource" type, instead of the above-mentioned option, we can specify a filter that narrows down the list of elements to choose from. We may limit resources to those of a specific type, category of type or located in a given location/group of products.
Automation of parameter change
The supervision system allows for additional automation of activities. Sometimes it is required to change the value of another parameter after writing a parameter, even in parent resources. Using this functionality we have this opportunity.
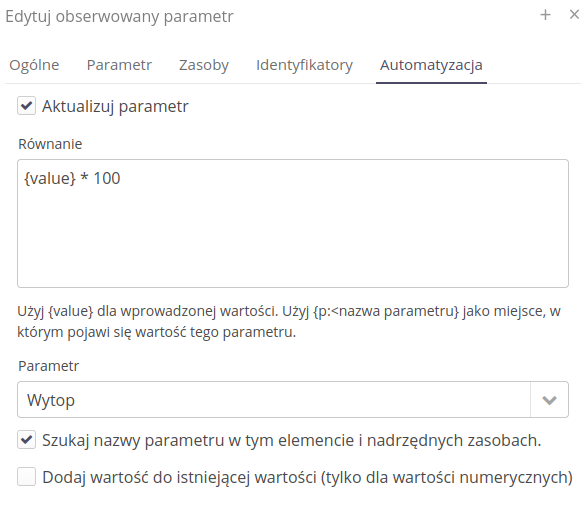
After enabling the Update parameter option, we can specify the equation that will be used for this operation. This allows you to create advanced rules that also take into account additional parameters to calculate the final value. Refer to the inspection modules to learn more about the capabilities of the math functions.
In this case, we specify that after writing a given parameter, the reported value should be multiplied by 100 and saved in the new parameter Heat.
Options:
-
Search for the parameter name in this element and parent resources - allows you to search for a parameter (here `Smelting' in a given resource, but also in parent resources - allows e.g. to sum the values)
-
Add value to existing value (for numeric values only) - Once the target parameter is found, if you enable this option the resulting value will be added to the value already there instead of being replaced.
After defining this type of rule and registering a parameter with a specific value.
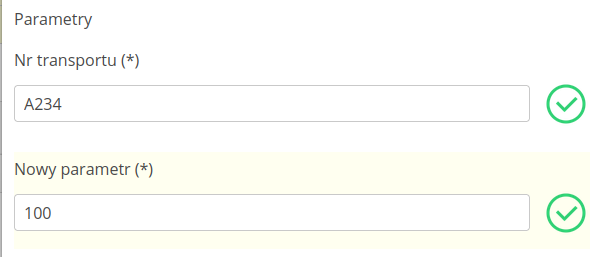
The system will automatically introduce modifications to the target parameter by performing appropriate mathematical operations.

Parameters update after selecting an identifier
When using a warehouse module that has the option to identify the parameters of materials in the warehouse enabled, the supervision system can automatically update the parameters of a given resource after scanning/pairing it with the warehouse item’s ID.
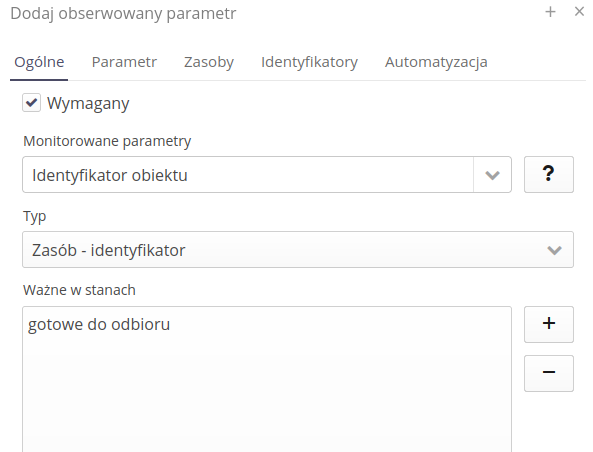
Additionally, we define an option for registering identifiers.

After such a definition, if a given supervision state is saved and a material identifier is read from the warehouse that has specific parameters, these parameters will be transferred to a given resource.
| The detailed method of using this functionality is described in the tutorials in the AMAGE academy. |
After completing the parameter definition, go to the last section, i.e. the parameter registration option.
Associating templates with types
After defining a template, it is necessary to indicate to the system which types of resources will be monitored using which template. This allows you to automate monitoring when resources of the selected type are added to the system.
To define the association of a template with a type we go in the view of supervisory templates to the Assignment tab. In this view, resource type associations with templates are presented.
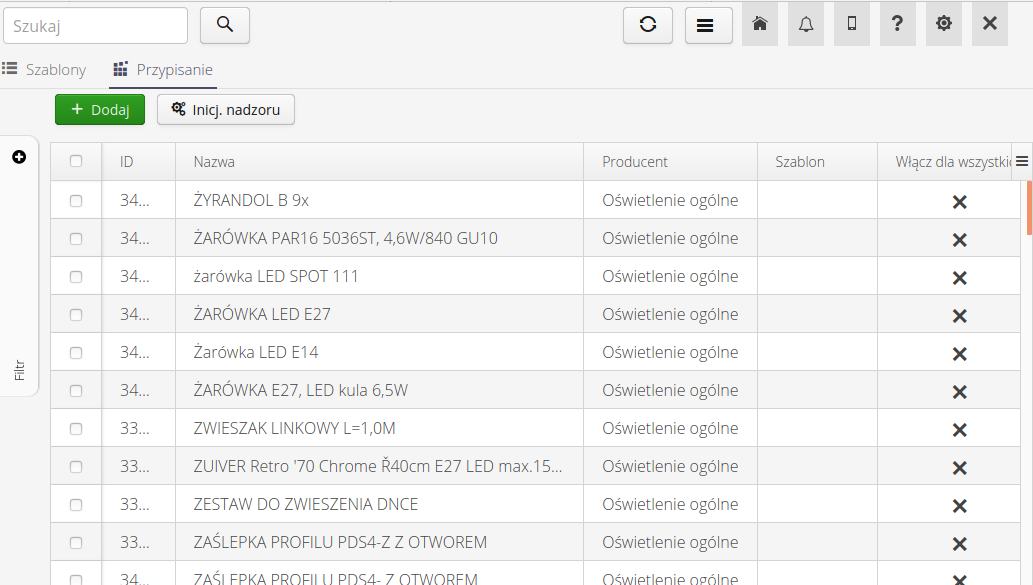
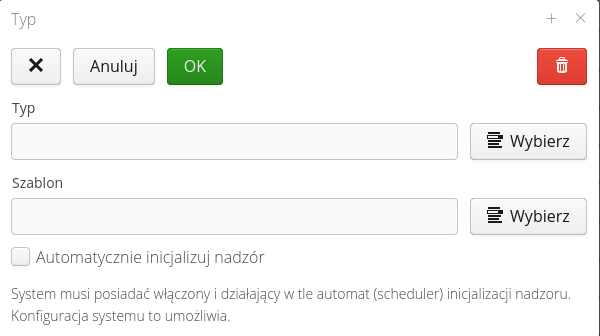
To add a new mapping, select the (+) button and then enter the type and template in the new window. Enabling the Automatically Initialize Supervision option and activating the corresponding automation will automatically assign supervision for all new resources of a given type. This is useful when, for example, importing new resources from project documentation.
Progress by type
An additional view in the supervision system and if an additional module related to orders/supplies/warehouse is enabled, is the process progress view against types.
After selecting a particular view and specifying a template and work order, the system displays all the types of items defined in the assembly plan for the work order.
| It is a requirement that the work order has a billing account, and to this account are associated warehouse and delivery documents that relate to the execution. This allows you to link the work order’s material plan, assortment, and internal and external deliveries/billing. |
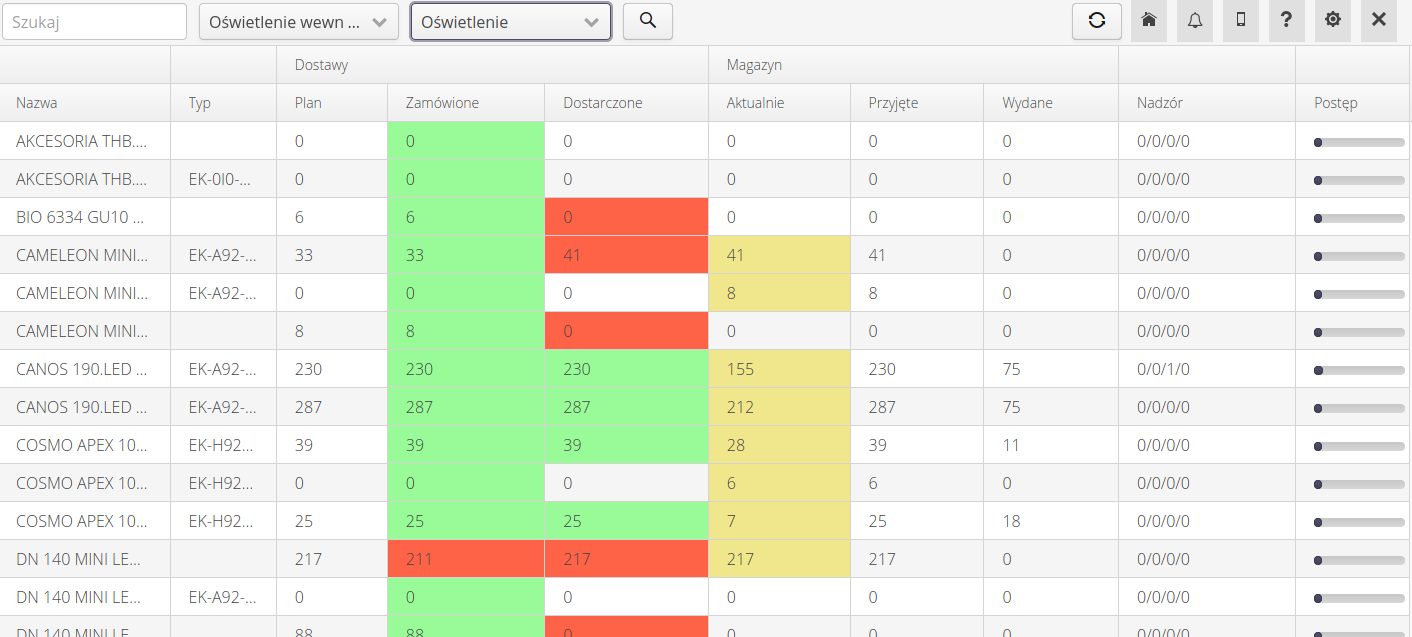
For each such type, it displays statistics on the quantity:
-
Information about the quantity against the plan defined in the work order
-
Number of items ordered
-
Number of items delivered
-
Current stock of the item
-
Current number of items taken into storage
-
Current number of items issued from the warehouse
-
Supervision statistics for the selected template indicating the number of elements in the selected states
-
Summary progress of supervision for a given element in the form of numbers corresponding to successive states of supervision
Execution plan
After importing and establishing supervision, users can record changes and parameters. Sometimes there is a need to indicate to employees the work they have to do within a certain time. In the supervision module, we use the Executions section. With its help, we can determine the work schedule.
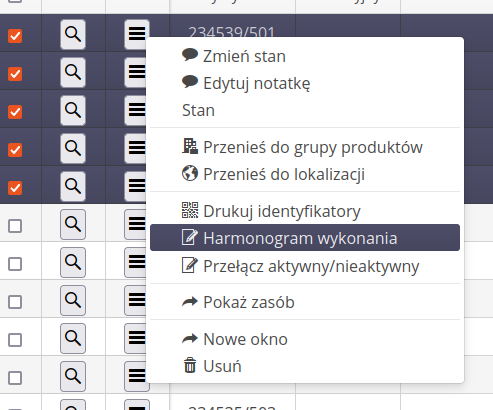
To set a schedule, select from the list of supervised elements the ones you want to assign and specify the date. We choose the action of the schedule.
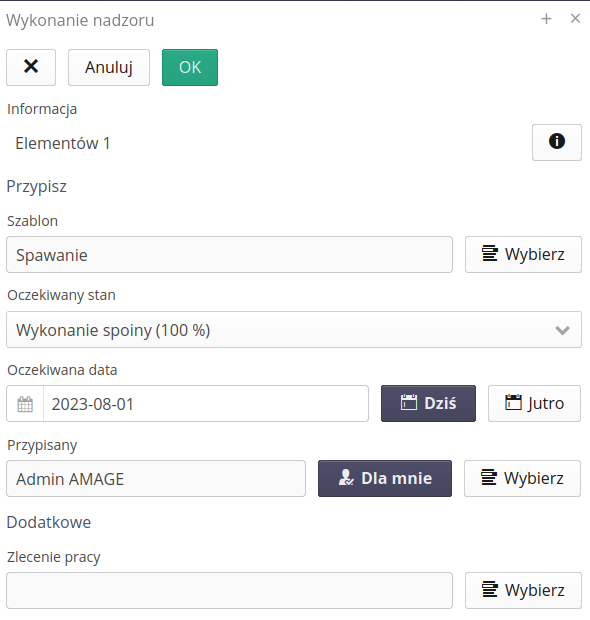
A window appears that allows you to enter information such as:
-
Expected final state - what state will be defined as fulfilling this task. We can assign tasks to the appropriate people with a division into states - i.e. state A will be the first person responsible, and another person with a different deadline for achieving state B.
The execution plan is presented in a list that we can browse and analyze.

In supervision details, an additional tab appears that shows all execution plans that are assigned to a given resource.
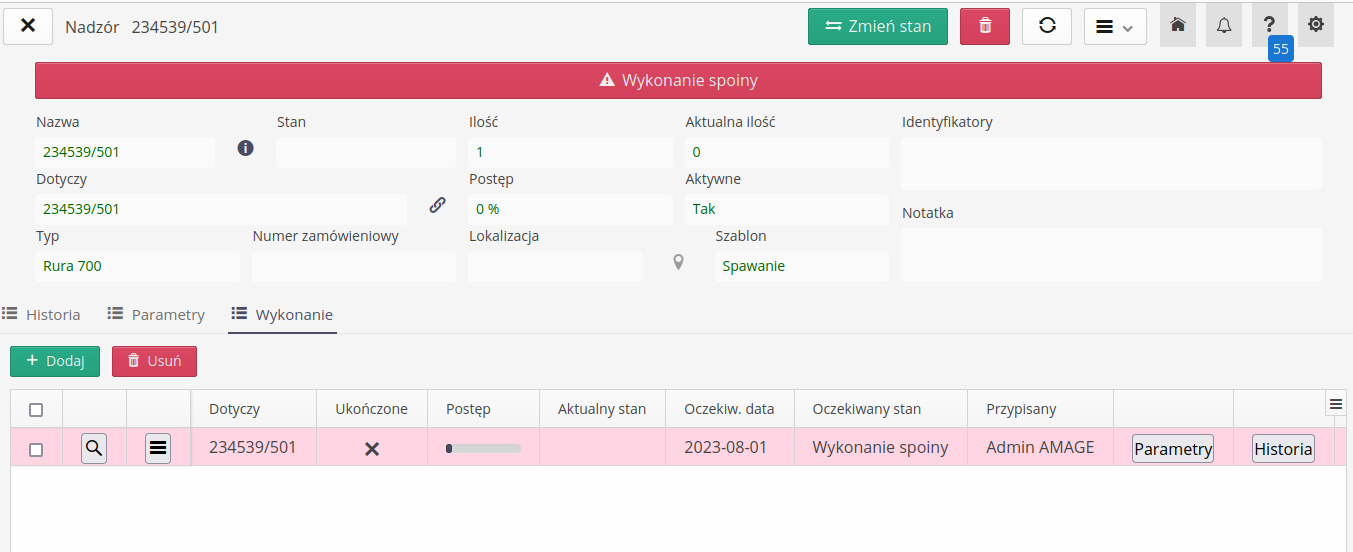
| When creating a schedule, the history of each item is analyzed. If a given resource already has an expected status recorded in the historical record, then this execution is automatically marked as done. |
Calendar of performances
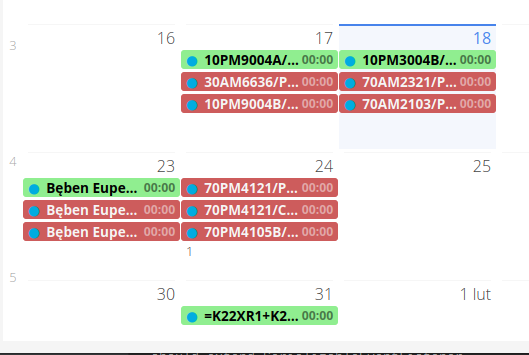
The execution calendar view allows you to show the scheduled execution of assembly work over time in the form of a calendar. When you go to the calendar tab, you get a monthly view with the current data view.

When you schedule assembly work for a selected day, it appears on the specified day. Scheduled items are marked in red. After this type of supervision (e.g., achieving assemblies that are expected in execution), the date changes to the date of execution and the color of the entry changes to red.
Map of elements
If the resources that we supervise have a saved location (a place on the map or are associated with a location) then they are presented in the map view. The items are placed at their current location.
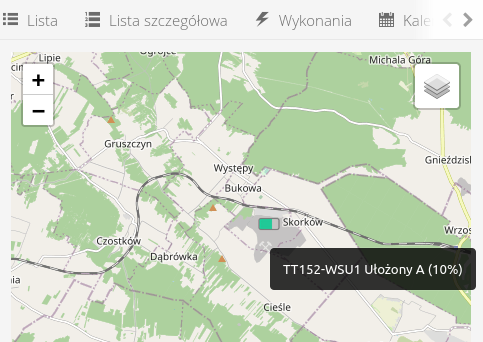
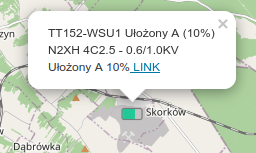
When any item is selected, a more detailed description of the resource, its type and current progress appears. The link takes you to the supervision details of the item.
| The map can have a geographic underlay - available by default - or you can upload your own underlays and diagrams to the system as a background to define the location. To do this, refer to the documentation in the configuration section or tutorials on creating and generating underlays from DWG drawings, for example. |
Planning the work to be done
Once we have a list of all the resources we want to supervise, we can proceed to view the work scheduled to be performed. To do this we go to the supervision list and select the Completions tab.

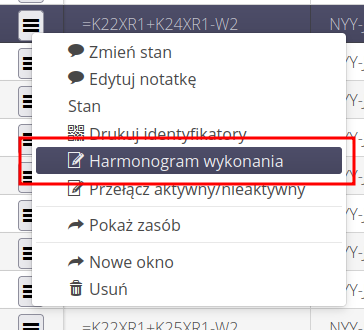
In order to schedule the work, we need to first go to the list of all supervised resources in List or Detailed List view and then select the corresponding resources. Then, using the context menu, we select work scheduling with the Execution Schedule action.
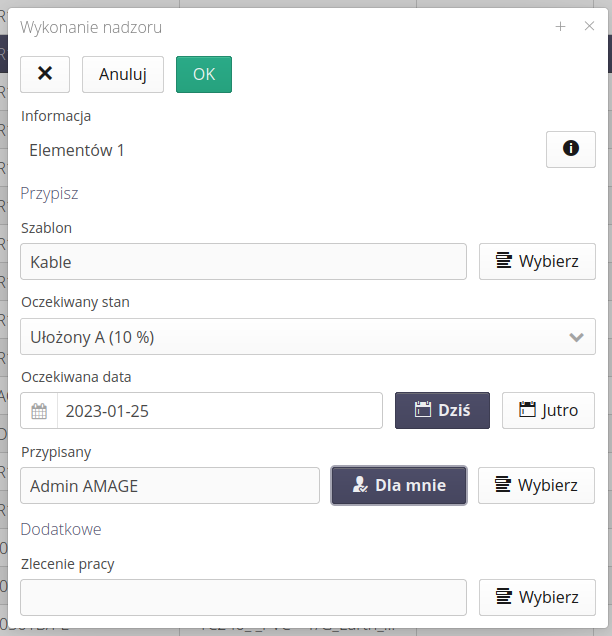
A window opens with information about the selected number of items. Selecting the (i) button obtains a list of resources currently selected and subject to this plan.
With the help of this editor we can specify the expected state that will cause the completion of this task, the deadline for completion with the possibility of choosing today’s or tomorrow’s fast day. We also select the person who will be responsible for this task.
Optionally, we can assign an execution to a work order to monitor a group of executions within an assignment to a work order.
| Determining the target state of supervision allows us to divide the work among multiple people/brigades. If we have states A-B-C-D, with states A-B reported by one brigade and C-D reported by another, we can create two execution plans with two different deadlines, target states B/D and corresponding foremen. |
After saving these options, you get a list of planned work that has been scheduled. The information there shows the expected states, assigned persons and the current state of supervision.
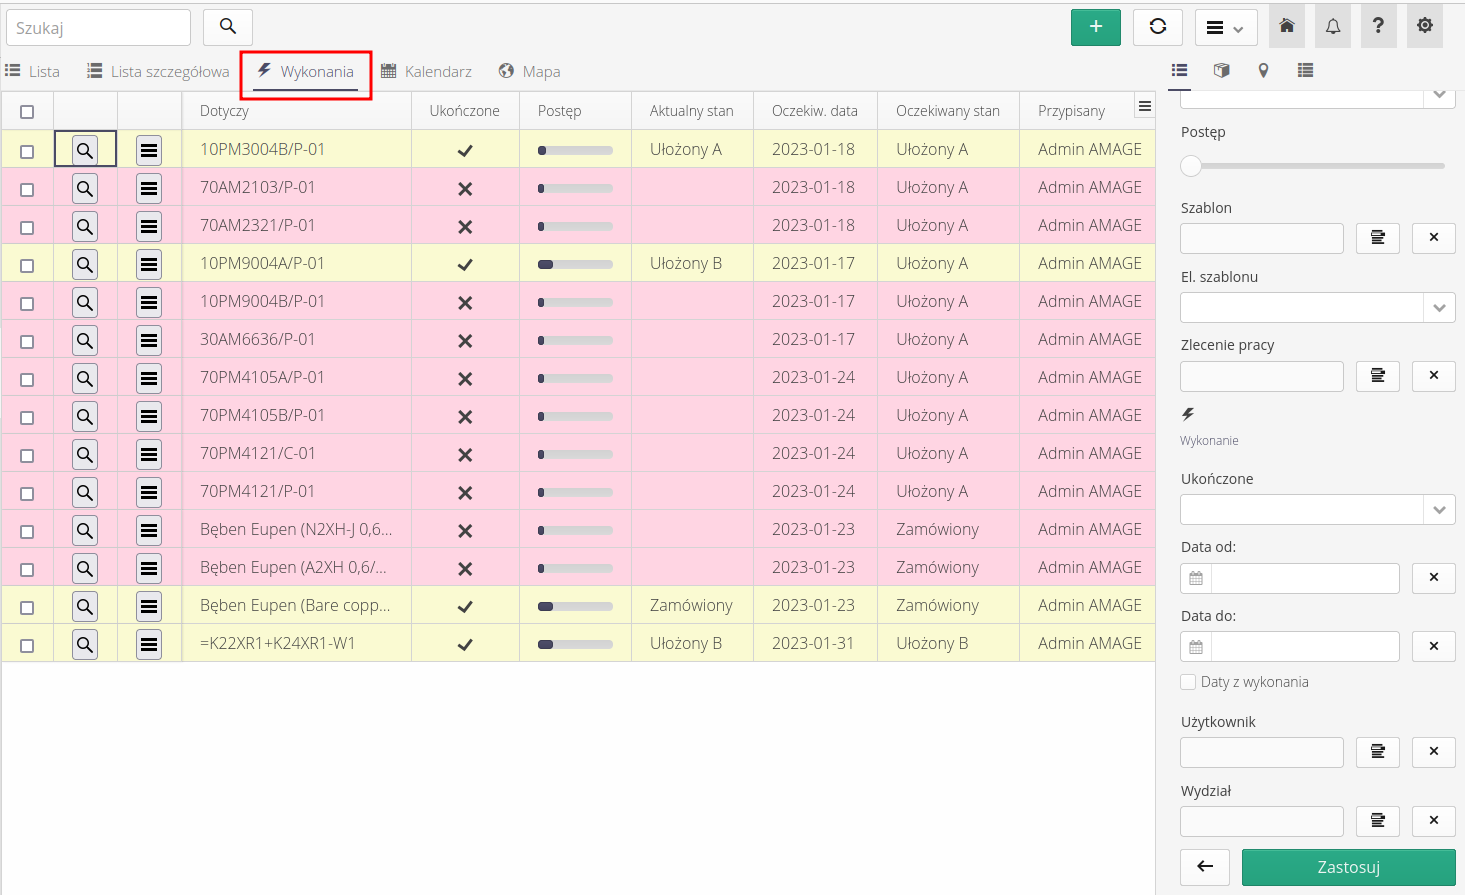
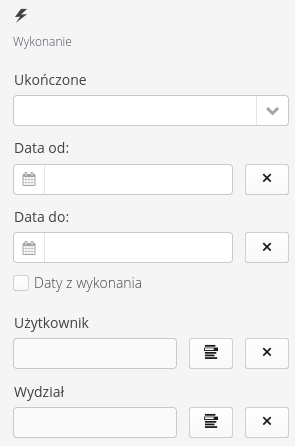
Additional filters in the drop-down menu specifically related to elements of supervision execution are located in the specified section.
In the context menu of executions, we can report the state (the target state for the execution plan will be selected by default) and perform additional contextual actions (open in a new window, delete, etc.).
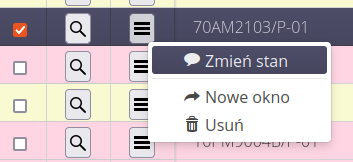
| Work reporting can also (mainly) be done using the mobile application. This mechanism is described in the documentation for the mobile app. |
Linking the work plan to work orders
The supervision execution plan can be associated with any work order. When you plan a work order, you assign information about the work order. The plan is added to the work order.
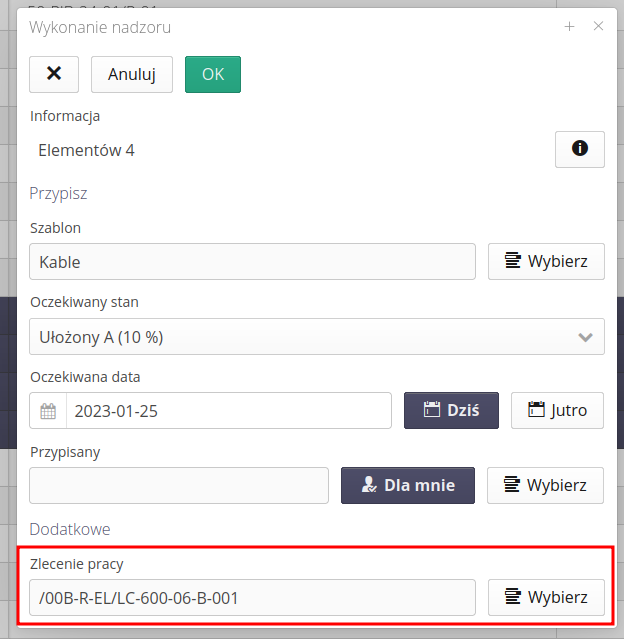
The work order in the `Supervision' tab contains information about these items, and there it is possible to view all supervision plans assigned to it.

Progress analytics
Supervision progress analytics allows you to monitor and visualize progress against several grouping criteria in the system. Recorded supervisions are saved and entered directly. We can view individual resources and their progress/recorded data. Resources are described by several criteria including its type, assignment to a resource group, location or assortment category.
The analytical view allows you to view the data in the system against these criteria and indicate the current progress within the selected supervision template.
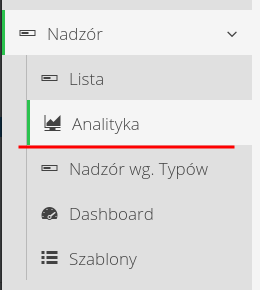
The analytics view can be accessed through the main menu and the Analytics action in the Supervision section.
When the module is turned on, the system initializes the first view and the data can appear as shown. Here, analytics has been selected against product groups and a supervision template specific to cable work has been selected.
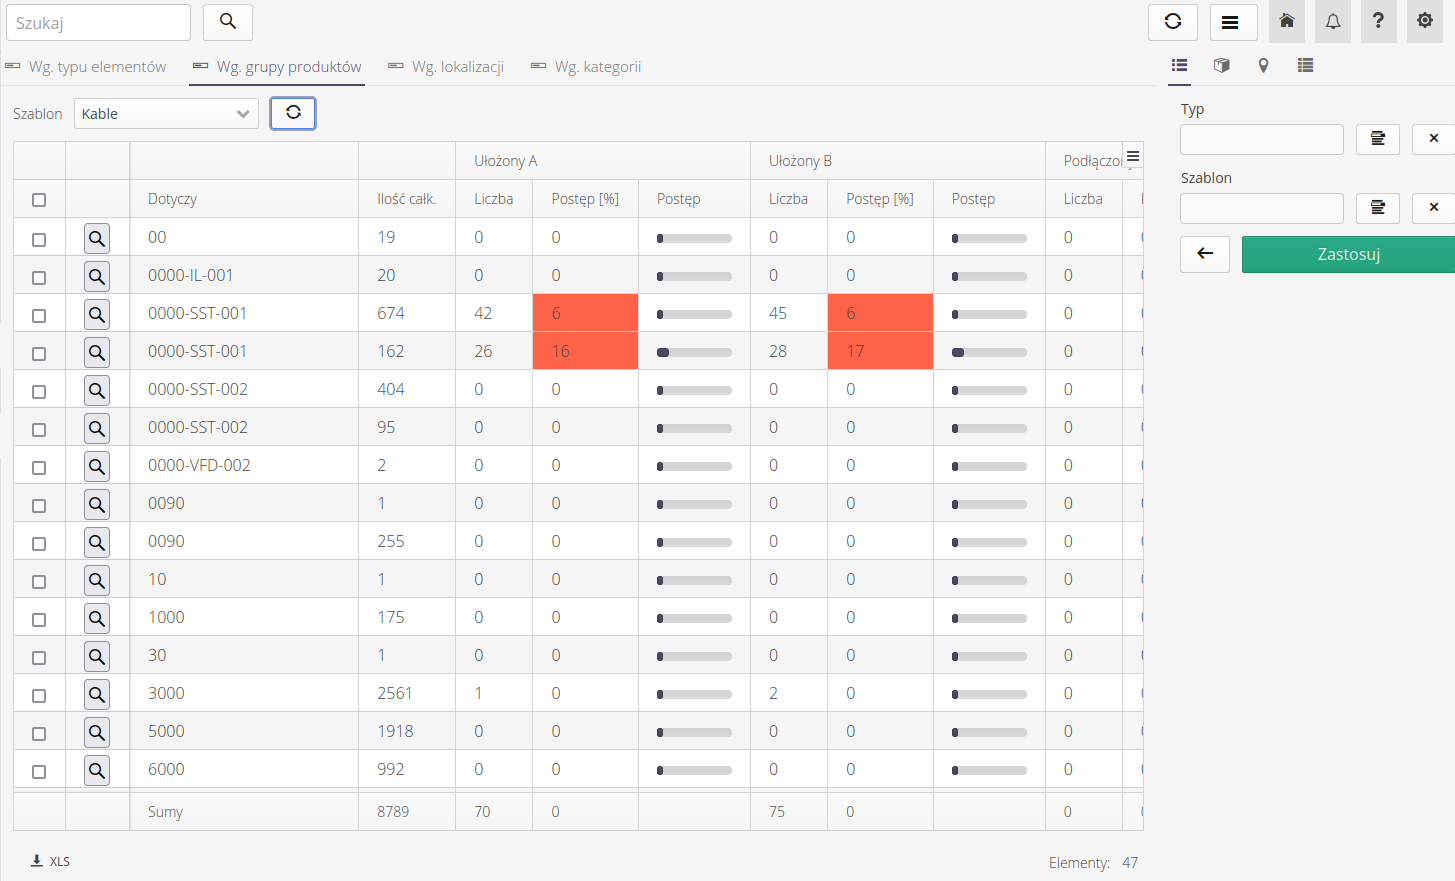
The following data views are available in the analytical view:

-
By item type - grouping by assortment types, e.g., individual types of wiring, piping, etc.
-
By product group - a group of products and linking resources to that group
-
By location - location
-
By category - assortment category
To view additional information, you must additionally select the supervision template against which you want to monitor progress. This is because any resource can be supervised against multiple templates.
Additionally, the 'Count only unique entries' option is available in filters. It allows the analysis to omit the recording of multiple of the same events, e.g. the recording of multiple supervision states for the same resource. Such operations may distort the analyses, but sometimes they can be useful, which is why there is an option to choose one of these two modes.

Each view for an individual supervision will show summary and detailed information for each supervision condition.
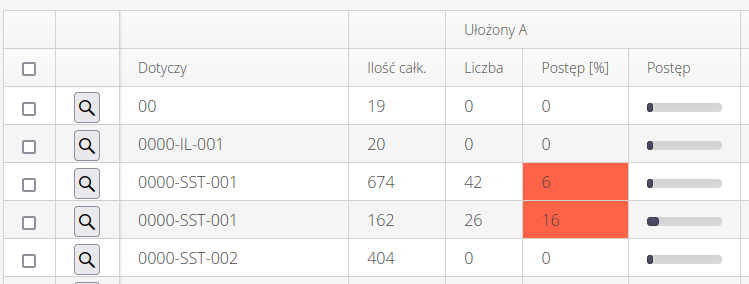
Available fields:
-
Applies - what type of object the analysis applies to (item type, group, location, etc.) varies depending on the selected tab
-
Total quantity - the total number of elements of a given grouping type
-
Arranged A - grouping - grouping against individual supervision states. In this case, the first state for wiring supervision.
-
Number - the number of resources with such supervision status reported
-
Progress [%] + progress bar - percentage progress relative to all elements of a given grouping type
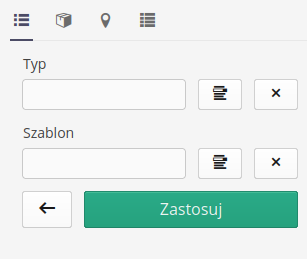
In addition, we can limit the visible objects using side filters, which allow us to select only supervision items that match the search criteria.
Progress view of work in periods
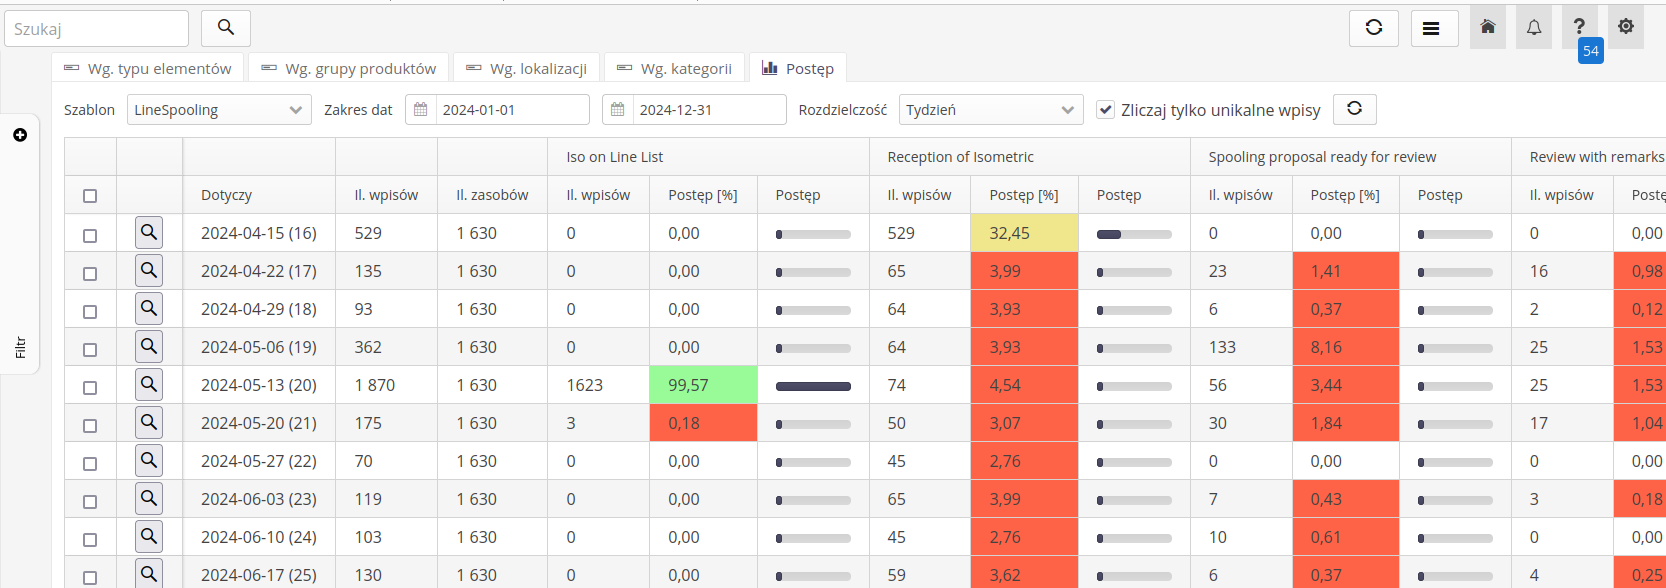
The progress view in periods allows you to analyze the progress of work in a specific period. In this view, you can specify the time range that interests you and see the progress of work in a given period. The filter allows you to specify the interval of daily, weekly, monthly. The date filter allows you to specify the time range that interests you. The supervision template allows you to specify the template against which you want to analyze the progress of work. Count unique entries, allows you to count only unique history entries for a given resource in a given period.
In the data view, each row corresponding to the selected period displays information about the progress of work in the given period. The number of resources is the total number of resources for the given template. The percentage progress is calculated relative to this number. The columns display information about the individual supervision states.
| All data can be saved to XLS format using the action available in the status field of the respective view. |
Cable module configuration
| The functionality described here, is available in an extended version of the supervision module with additional options and adaptation to the implementation of cable work. |
The implementation of supervision for cable work requires the definition of certain parameters and settings for fast reporting. The supervision system is very flexible and allows the definition of many arbitrary supervision schemes. Supervision of cable work is also subject to such general rules, but the system additionally has some tools that support the implementation of such work. To facilitate the work in these modules, some parameters should be indicated in this configuration module, which will then be used in the main interface of the application
Access to the configuration data of this area is realized through the Additions menu and then the Cable Configuration section. This menu is only available for systems that have this functionality enabled.
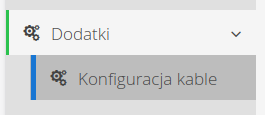
When we go to this view, configuration information appears in two areas: cabling definition and definition of drums storing cables for installation. We can set the following data in these sections:
Wiring configuration data
The definition is divided into two parts.
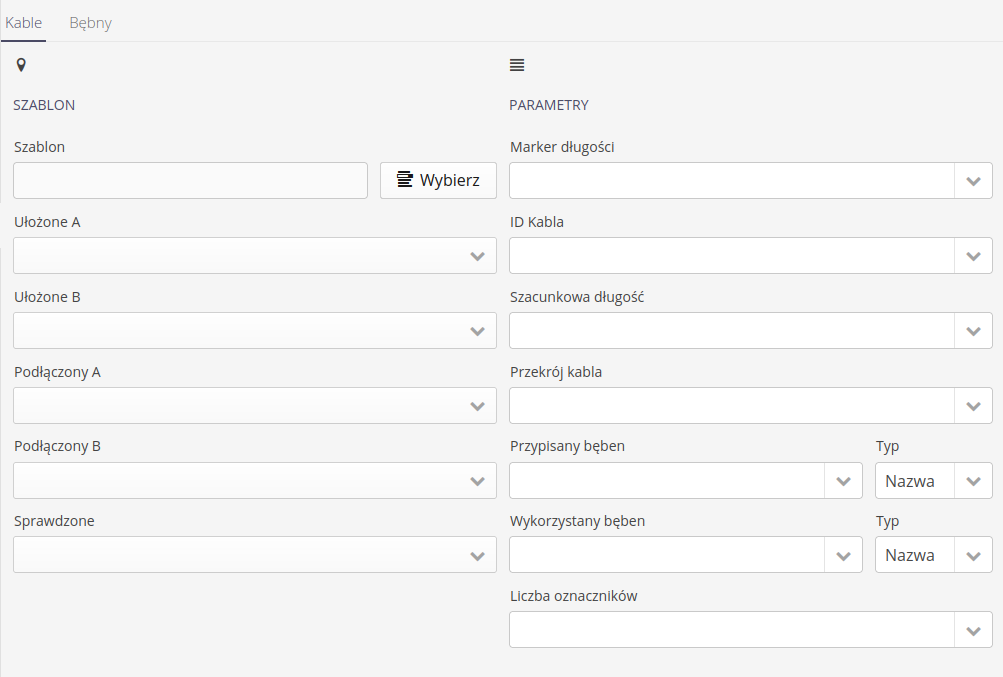
The first allows you to specify the supervision template and supervision states, which are used in views, analytics and reports specific to the execution of cable work. It is required to provide this data because the supervision templates can be arbitrary and only the specified states allow checking and reporting on individual works.
-
Supervision template + alignment/connection states
The second section is the selection of the parameters of the resources that store the relevant data.
-
Parameters - length marker - cable length marker, reported when recording cable work (layouts, connections)
-
Parameters - cable id - cable identifier - used when exporting data to external systems
-
Parameters - estimated length/cross section - estimated length or cross section of cable from design systems
-
Parameters - assigned drum - assigned drum to a particular cable (cable work schedule)
-
Parameters - drum used - drum used - reported by those doing the work
-
Parameters - number of markers - the target number of markers to generate labels will be stored in this parameter
| Typically, wiring data (cable lists) are imported into the system from lists currently available to the user. The parameters storing this data may have different names, hence there is a need to specify the names of these parameters in the configuration. |
Drum configuration data
Drum configuration data allows you to specify parameters to generate information on drum occupancy and utilization.
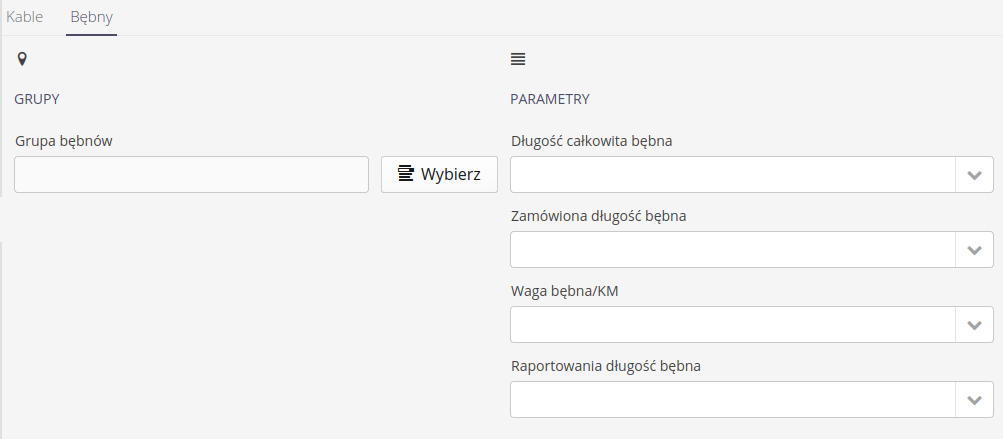
Parameters for definition allow you to designate the parameters in the system that are necessary for the implementation of reporting
-
Drum group - the main group in which drums are stored. This allows you to include only the drums from a particular group (and subgroups)
-
Parameters - total length - parameter storing the total possible capacity of the drum
-
Parameters - ordered length - a parameter representing the ordered length on a specific drum
-
Parameters - drum weight/km - indicated drum weight in kg/km
-
Parameters - Reported drum length - a parameter that can store information about the reported length on the drum/drum length during the execution of supervision, e.g., the status before release to the construction site and after returning to the warehouses.
| For proper operation of the cable extension, refer to tutorials and `How-To' examples that explain how to configure and use the system. |
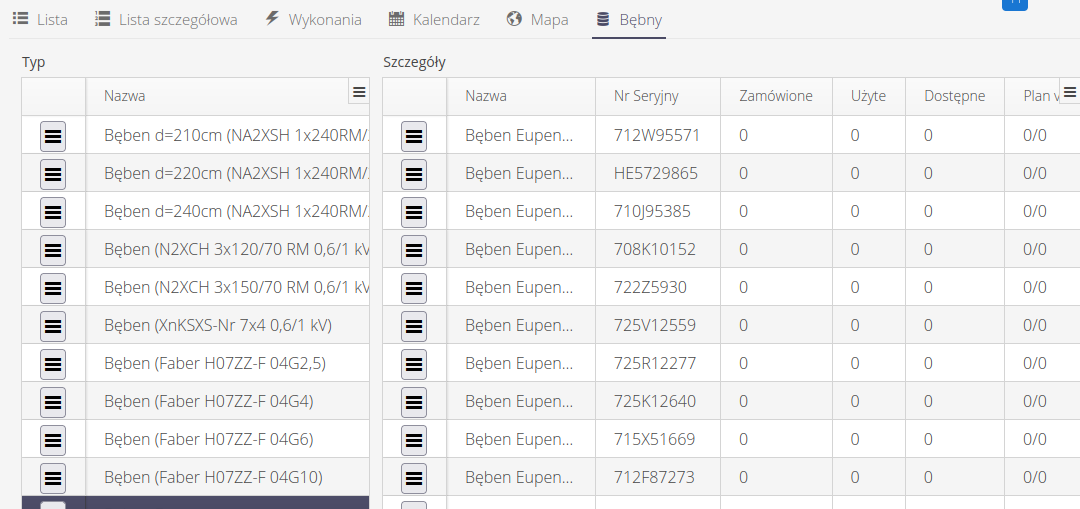
After connecting the configuration of the cable module, an additional tab appears in the Drums supervision list. It allows you to display all the drums defined in the system and visualize their material consumption.
