Import of types with parameters
Introduction
The document shows how to import the assortment (element types) into the system along with any additional parameters defining them. Sometimes, when importing an assortment, we want, in addition to the basic information (type, manufacturer, price), to import any additional parameters that will identify the given assortment. We can store important information there, which we can later use as parameters to perform analyses/automate activities.
Task
Let’s assume that we have an assortment to import, which, in addition to the basic information (type, manufacturer, price), has additional parameters that we want to import. In our case, we want to import an assortment that, in addition to the basic information, has two additional parameters.
Implementation
We prepare an XLSX file with data for import. In our case, the file contains data about element types along with additional parameters. In our case, we want to import element types that will have one additional parameter: "Rated voltage".

| Please note that in the import file we have two columns defined for one parameter. In one column we put the name of the parameter and in the second column we put the value of this parameter. This approach allows you to import many types of elements with different parameters from one file. It is enough to place another type of device in the second row, e.g. with the "color" parameter and the "black" value. In such a case, the importer will import the "Rated voltage" parameter for the first element type and the "Color" parameter for the second element type. |
We go to the AMAGE application to the configuration section. We select the data import section and select a specific importer. Here we select Element Types.
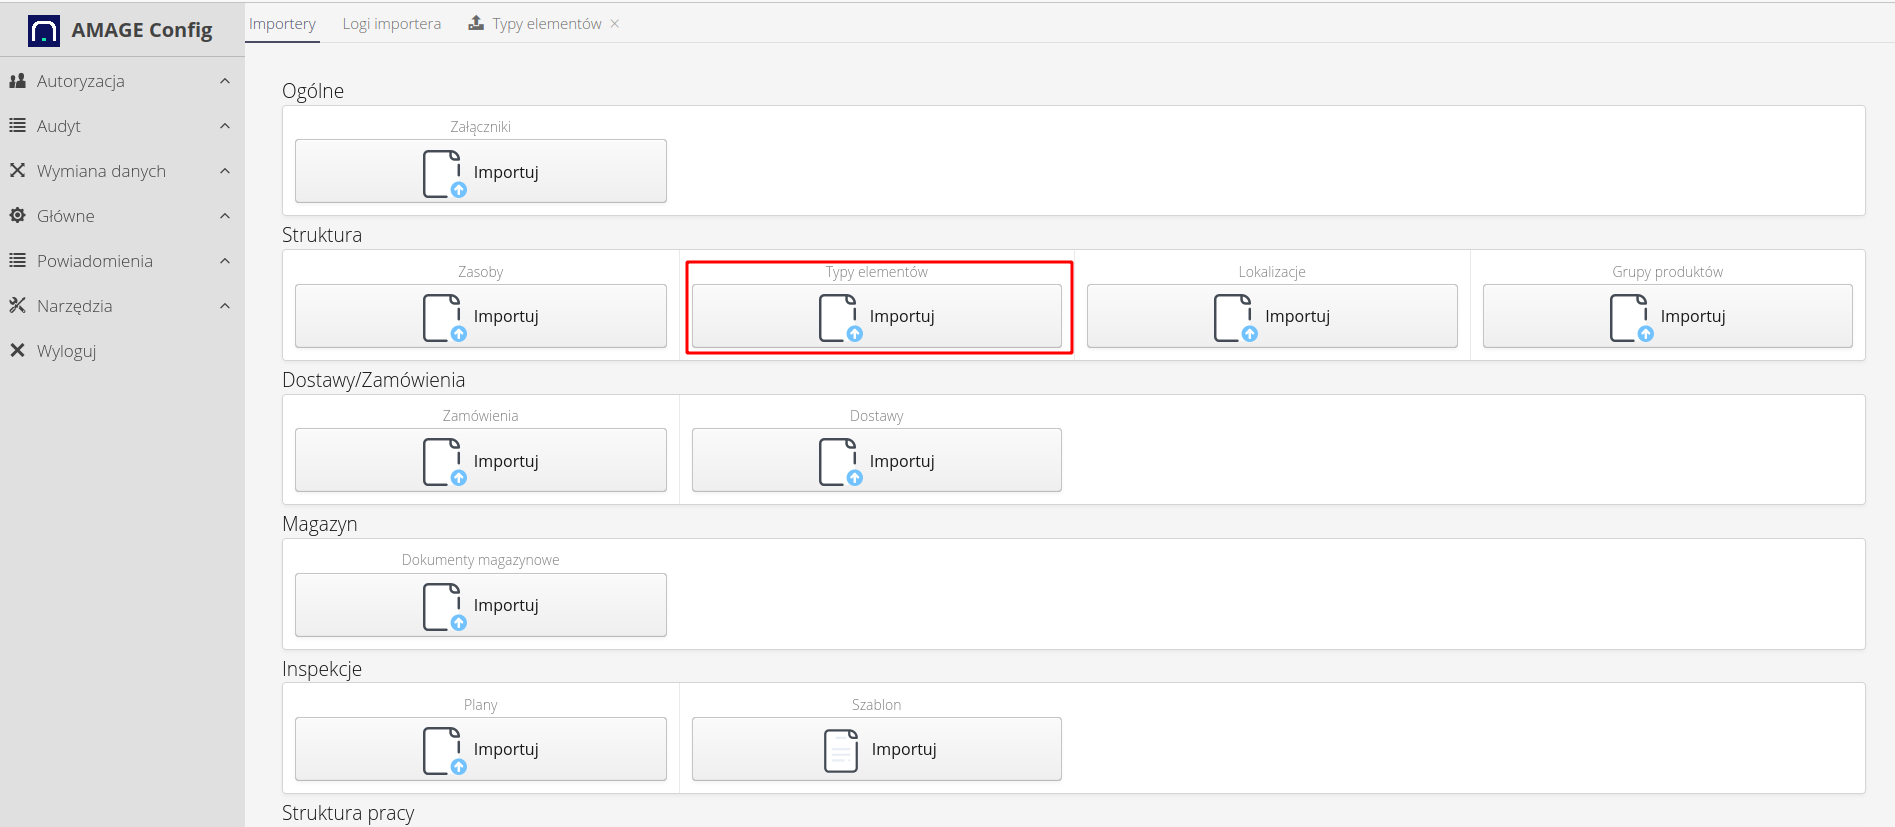
| The number of importers depends on the system configuration. Depending on the user’s needs and the functional modules enabled, different importers may be available. |
Let’s move on to data import. We select the XLSX file with the data to be imported.
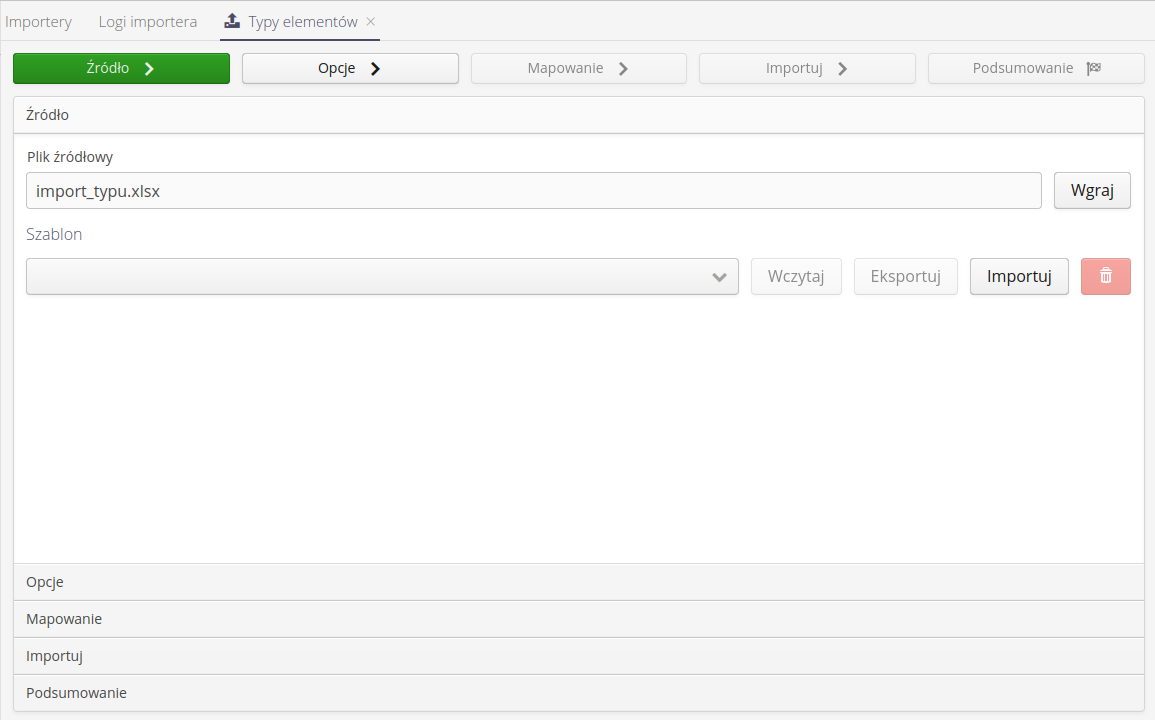
| Importers in the AMAGE system allow you to save all settings and column mappings as part of import templates. This allows you to import data multiple times from different files without having to reconfigure the import. The only limitation is the same structure of the XLSX file. |
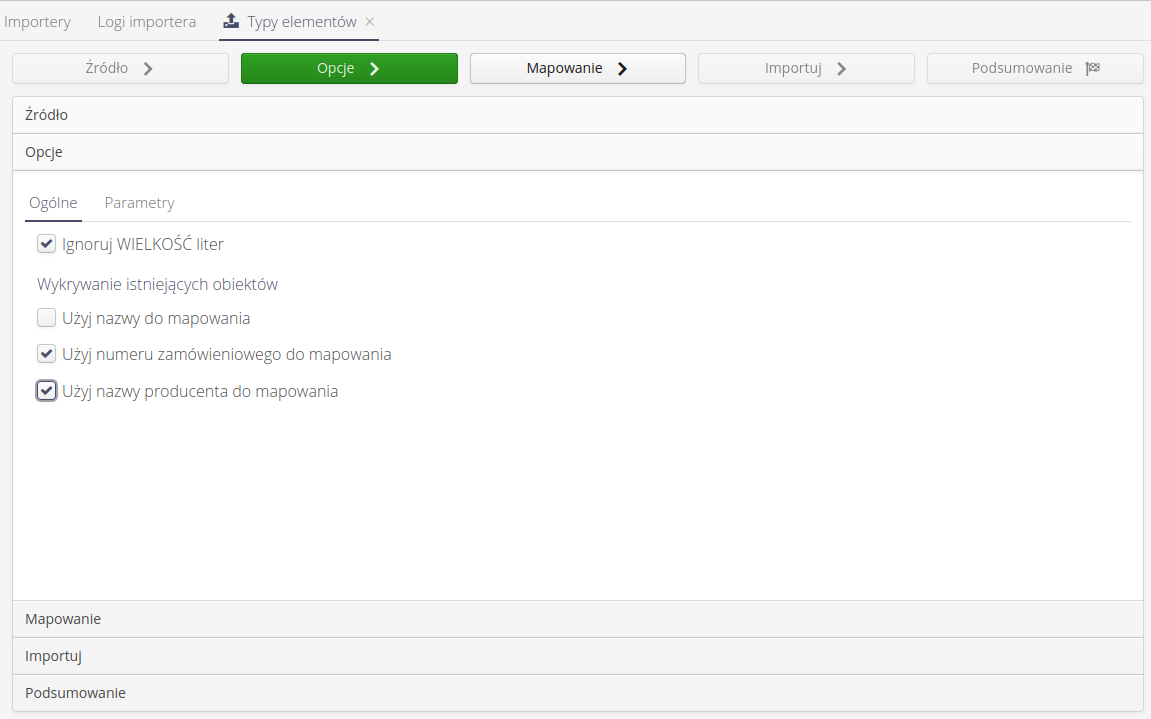
We move on to the next stage. We are introducing additional importer options. We select the option for the importer to ignore case during import. In the case of manually completed files, errors in letter size often occur. This option allows you to ignore such differences and not create unnecessary duplicates. Additionally, we select the option to select the column that will be used to map element types. In our case, this is a column with the order number and manufacturer’s name.
| The key in the importer is to properly direct the importer to exactly one record in the system to be sure whether the importer should import new data or update an existing record in the system. This is key information that allows you to intelligently create or update records in the system and at the same time avoid creating unnecessary duplicate data. |
We move on to the next step, i.e. defining additional parameters for importing element types. We can define any number of parameters for import. We add them using the (+) button.
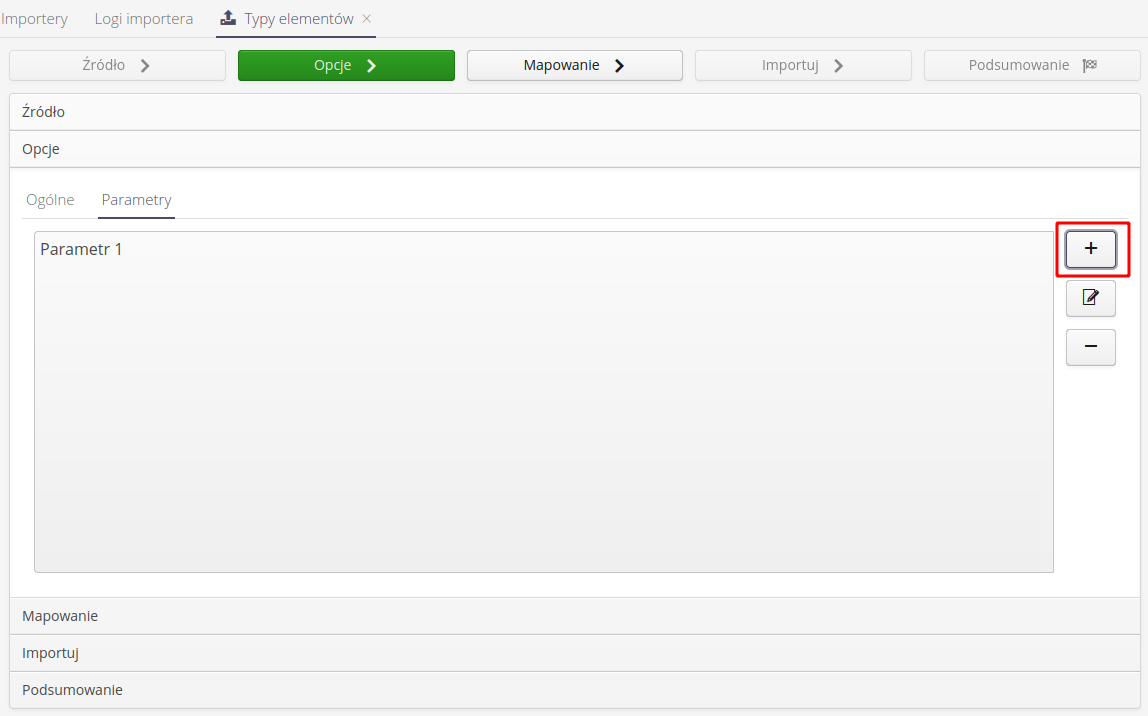
We can flexibly define each parameter and determine whether a given parameter property comes from an XLSX file or is permanently defined. In this specific case, we have defined a parameter with the working name "parameter 1", for which the parameter name will come from the import file from column D. The default value of the parameter will be read from column E. However, we set the remaining properties of the parameter to constant values, such as the additional description on "Description from line", the unit of measurement is [V], the column type is a string and the default parameter category is 'category 1'.
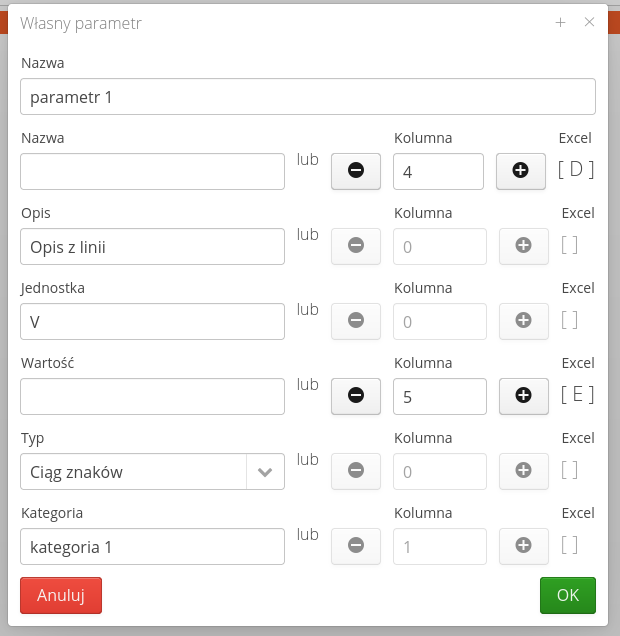
| The type importer has flexible capabilities for defining data sources for parameters. At first, the configuration may seem complicated, but after reading a tutorial like this one, it becomes clear and gives you a lot of options for defining import data and adapting to any data sources. |
We will stick to defining one parameter for the element type. We move on to the next step, i.e. defining the mapping of columns from the XLSX file to columns in the AMAGE system. This is a standard step that allows you to indicate columns for basic data identifying, in this case, the element type. The key parameters are the manufacturer’s name and the type name. All other parameters are optional.
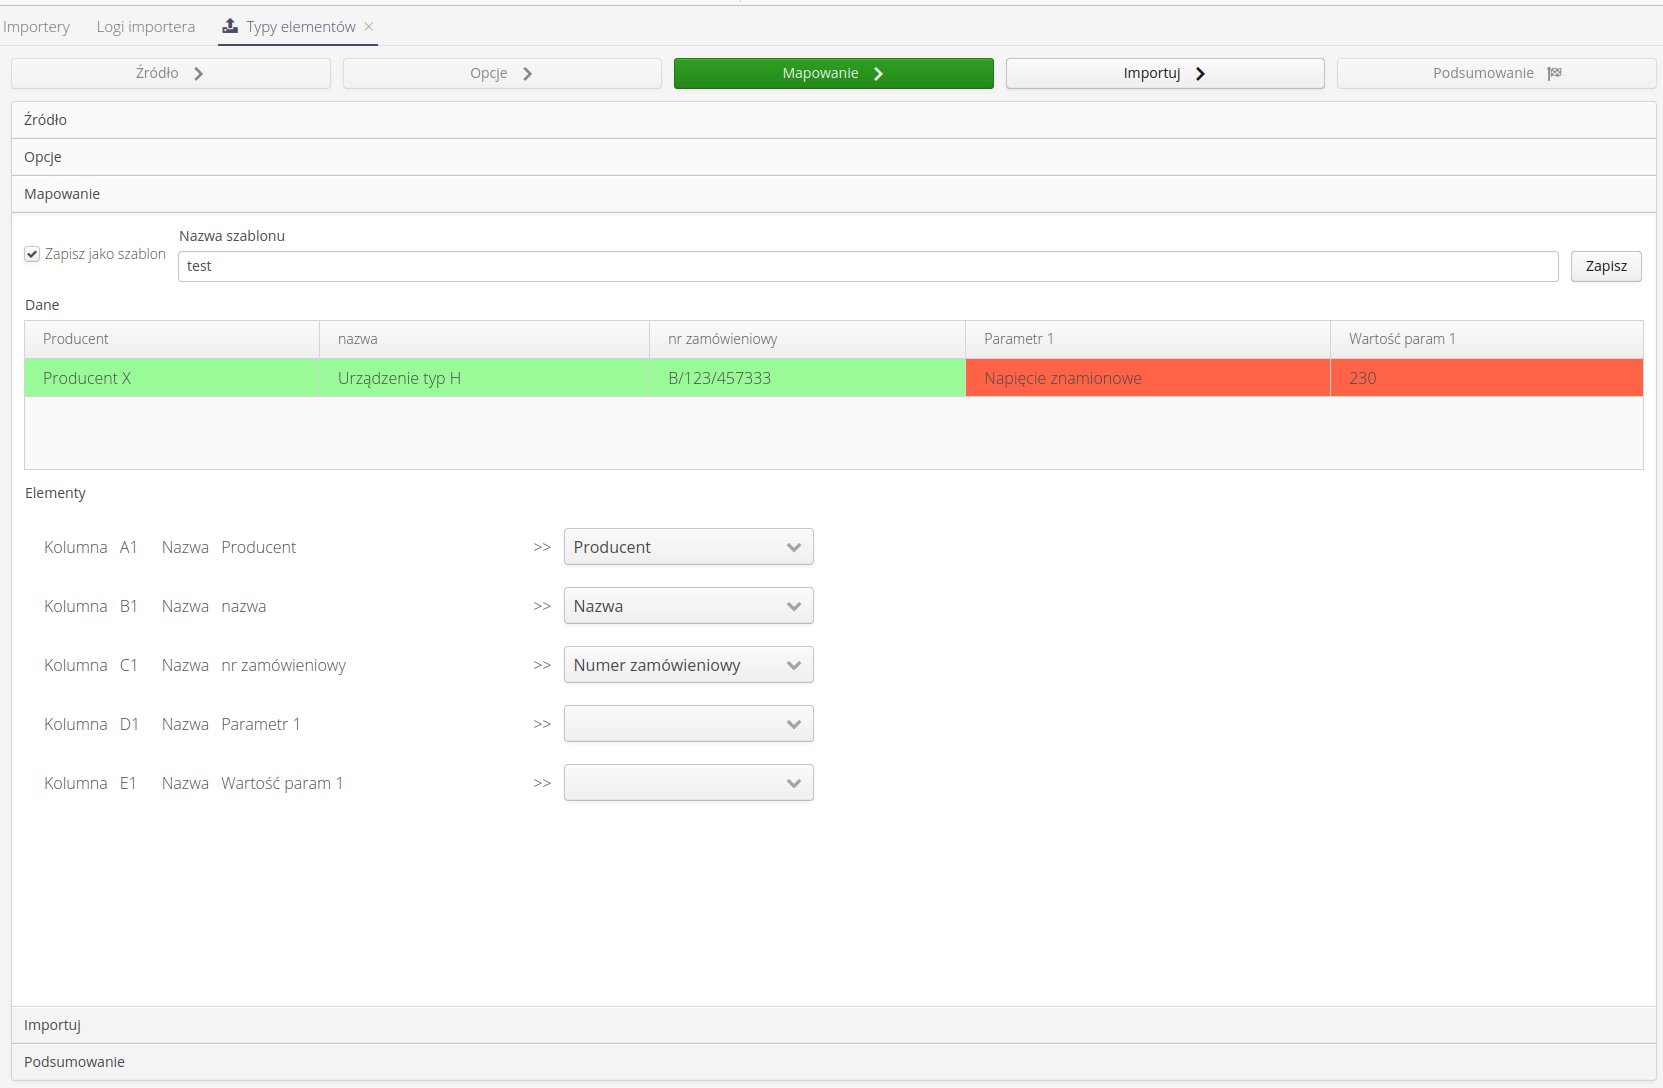
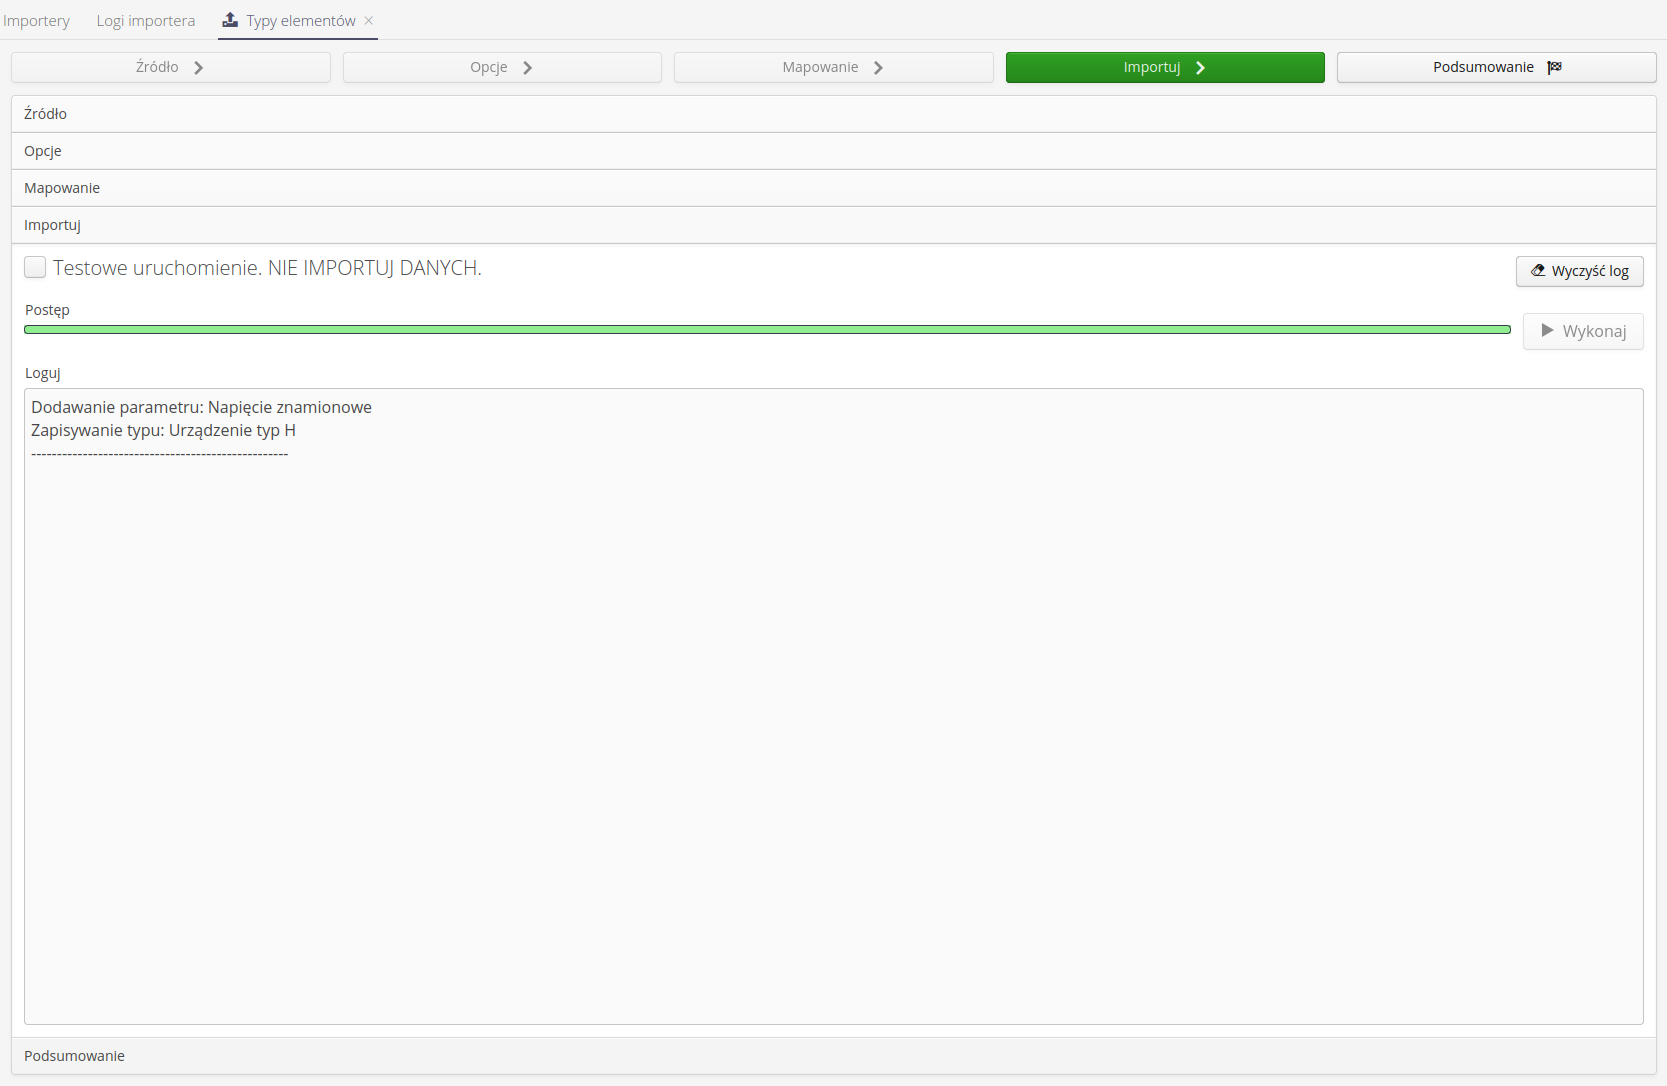
Let’s move on to data import. We import and save data to the system.
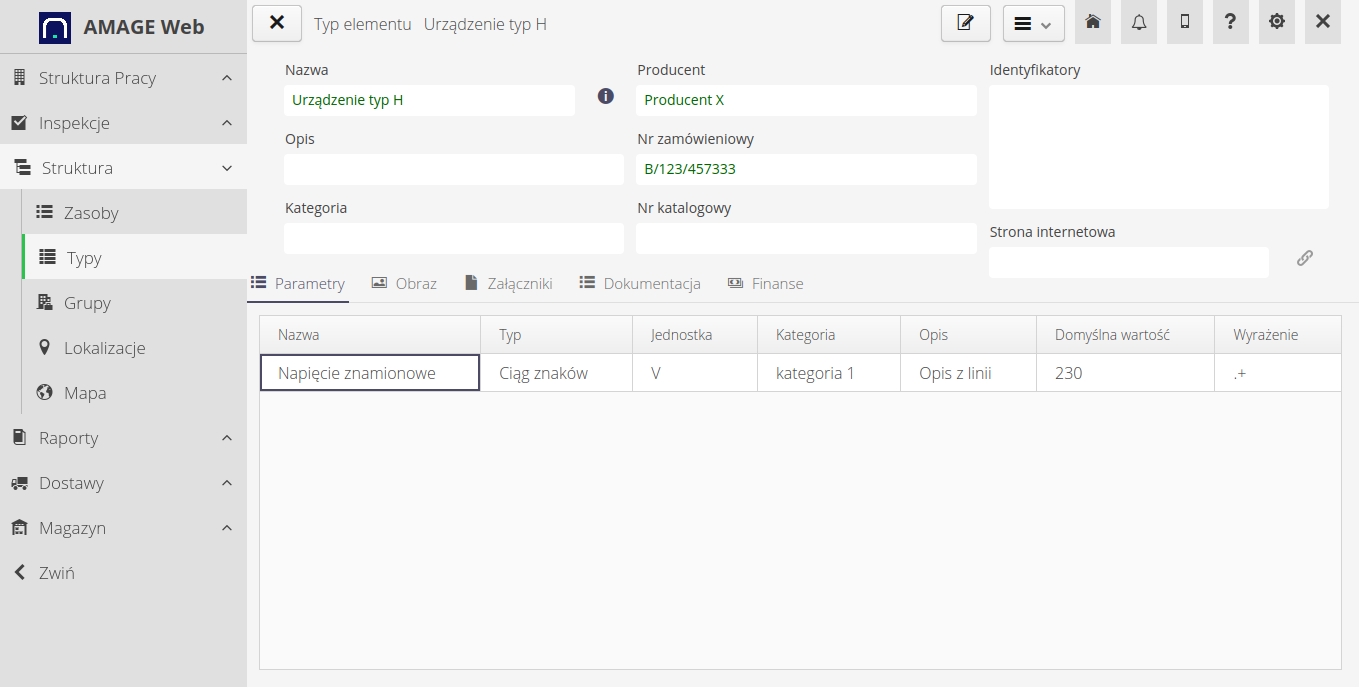
As a result, we receive element type data imported into the system along with additional parameters. We don’t have to create parameters manually.
Summary
In the AMAGE system, we can import element types with additional parameters. Thanks to this, we can import an assortment into the system that, in addition to the basic information, has additional parameters. In our case, we imported element types that, in addition to the basic information (type, manufacturer, price), had an additional parameter "Rated voltage". Thanks to this, we can flexibly define the assortment in the AMAGE system.
| The Howto is based on system version 1.17.0.2 (03.2022) and presents features that may not be available in your system. Ask AMAGE about making this functionality available. |
| Due to the ongoing development of the system, some screens or configuration files may look slightly different, but will still retain the full functionality described here. This does not affect the essential functions described in this document. |