General - definition, and pairing of the devices for offline operation
Introduction
The document shows how to add and pair a terminal for offline operation. These terminals are most often rugged devices for work in demanding environments. They have the ability to work offline, i.e., in a mode where we do not need access to the network to do our work (on a construction site, or in an industrial plant).
These devices use special communication channels and perform data synchronization (to work without a network). To do this, you need to add a device and define a task for it.
Adding a device
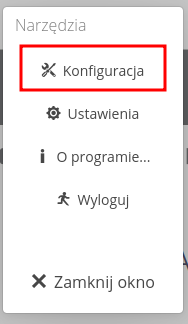
Devices are added in the system configuration view. We access it through the system menu and the 'cog' button.

In the action menu, select configuration.
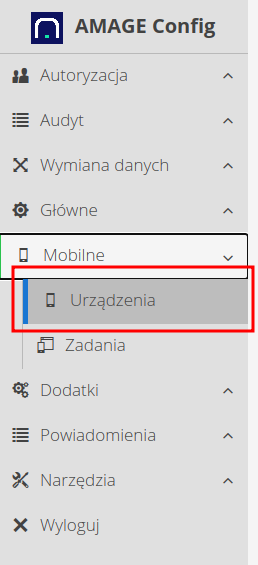
After going to the list of mobile devices, we add the device there. We go to the mobile devices section and perform operations there.
Choose the appropriate type of device (handheld terminal, tablet, etc.). Make sure which device we are configuring because they have different communication mechanisms. In this case, as on the screen, we are adding a terminal for supervision systems (handheld), which is a Windows CE terminal, so we choose this type of terminal.
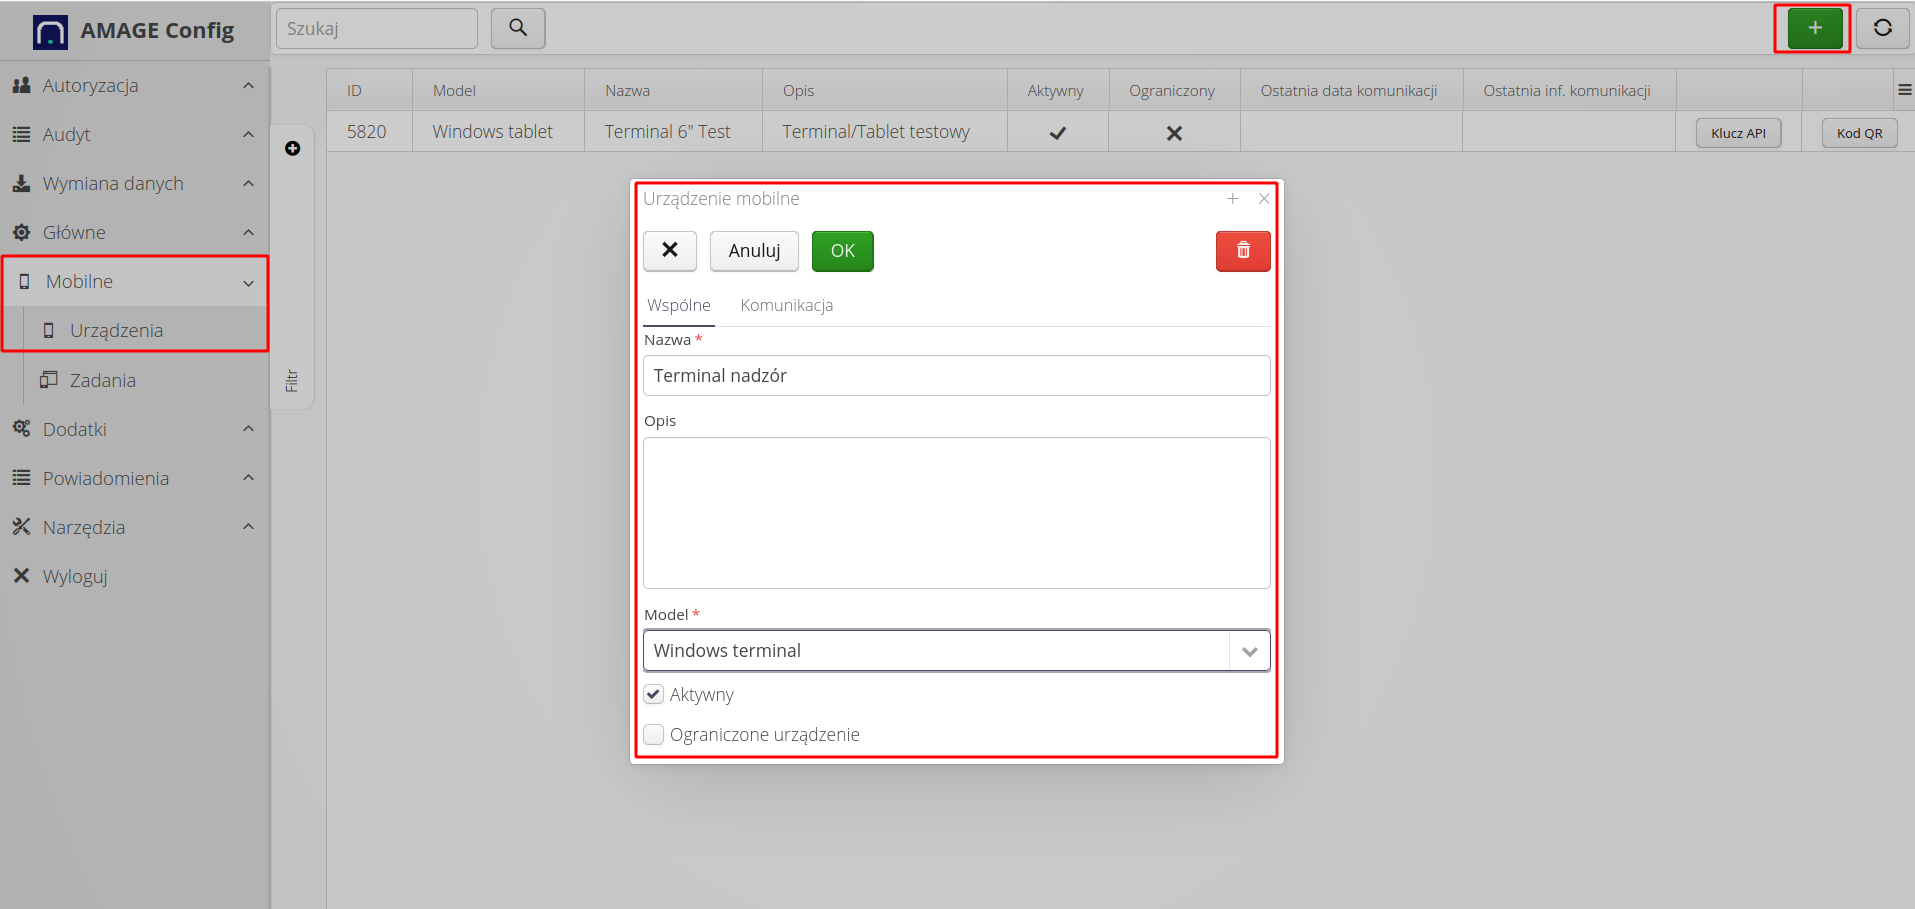
| It is important to mark the terminal as active so that it has the ability to communicate. Otherwise, communication will be impossible. |
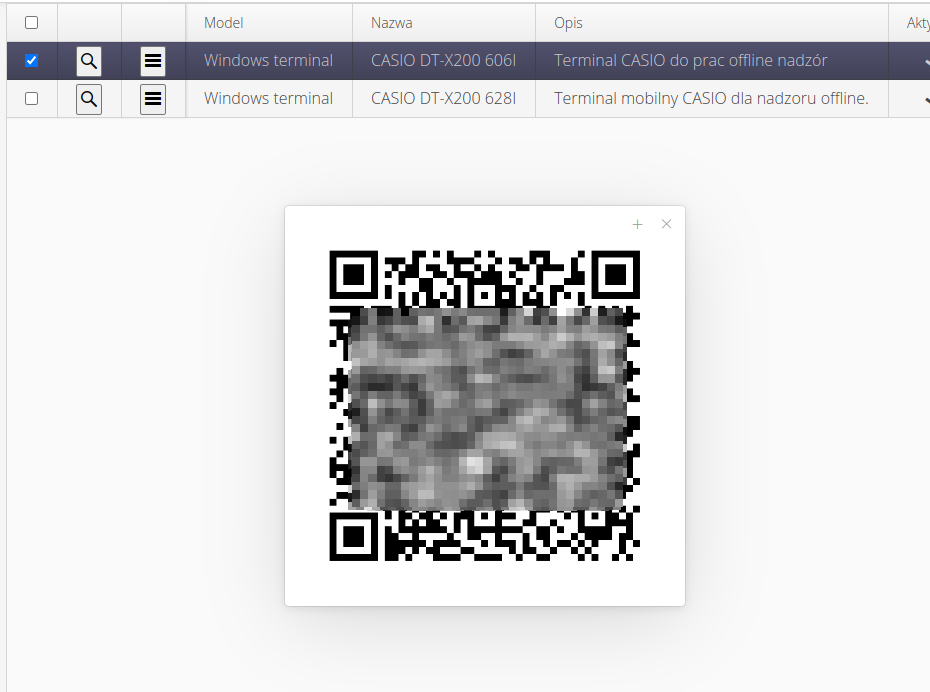
To configure the terminal, you need to enter communication data (server address, communication keys) on it and perform the pairing operation. For this purpose, the system allows you to generate a QR code with all the necessary information needed to pair the device. To do this, enter the devices view and select the QR code button or choose the appropriate action from the context menu actions (1) and (2)
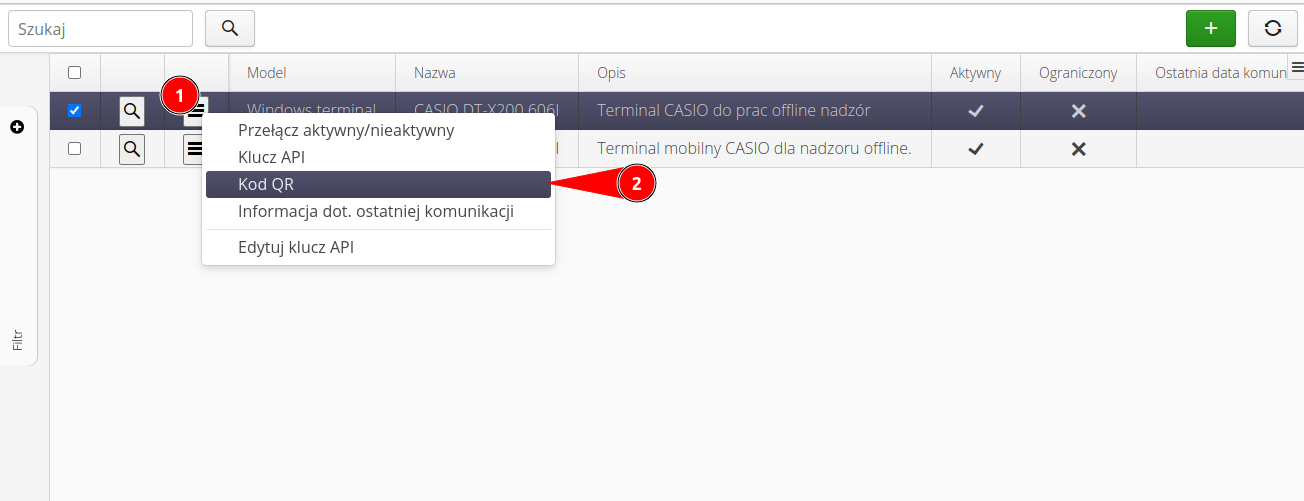
A code is displayed, which we already scan in the target application on the terminal/tablet.
For more information, please see the AMAGE Fx and AMAGE CE Lite application user manuals for the corresponding embedded devices.
|
Tasks for terminals
Terminals to work offline need to have a defined range of data that they will retrieve to work in this mode. Usually, the databases of the systems are massive. It would not make sense to transfer all the data considering the transmission time, the database size, and the device’s capabilities. Therefore, the concept of tasks for terminals was created. Tasks allow tracking communication with devices, viewing transferred data, and, most importantly, determining the range of data that will be sent to the terminal.
To add a task, go to the list of mobile tasks in the configuration view and create a new task.
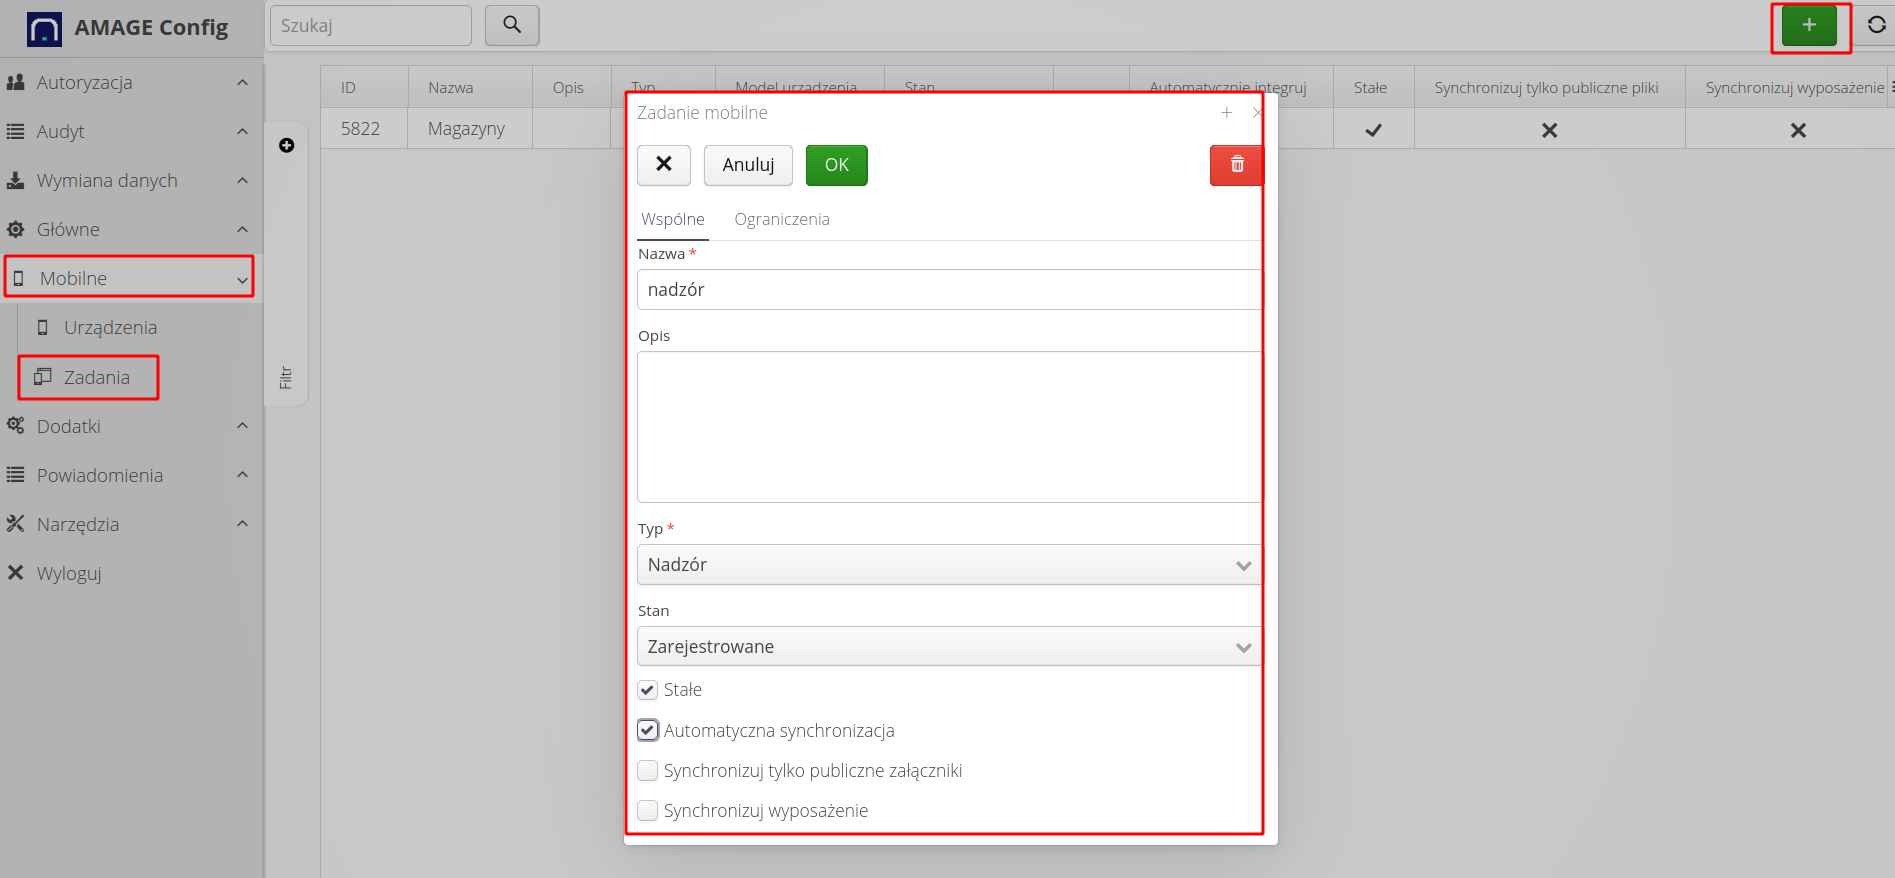
Task parameters:
-
Type/State- task type determines for which applications/functions this task will be visible during synchronization. See the user manual of the selected application to know what kind of task to create. Task status allows you to track one-time tasks. Once the task is completed (results sent), the terminal will change the status, and it will no longer be visible during subsequent synchronizations -
Permanent- enabling the task flag allows the task to be continuously available to the terminal. Even after sending the results, the task will not be closed. That allows the creation of continuously updated tasks. -
Automatic integration- after completing the work, the terminal sends changes to the server. We can review and accept this data. If you enable this option, the system will automatically load the data into the main database of the system (integrate it) after the terminal sends the data -
Synchronize equipment- for tasks, e.g., inspection, where you can select the measuring device with which you have performed the task - we need to have a list of measuring devices available offline. This option allows you to upload (in addition to other data) the list in the system. -
Tab
Limitations- allows you to limit/designate the data that will be sent to the terminal (device groups, by type, location, etc.). If the lists are empty, only selected objects to which the currently logged-in terminal user has access (work orders, service requests, etc.) will be synchronized
Users
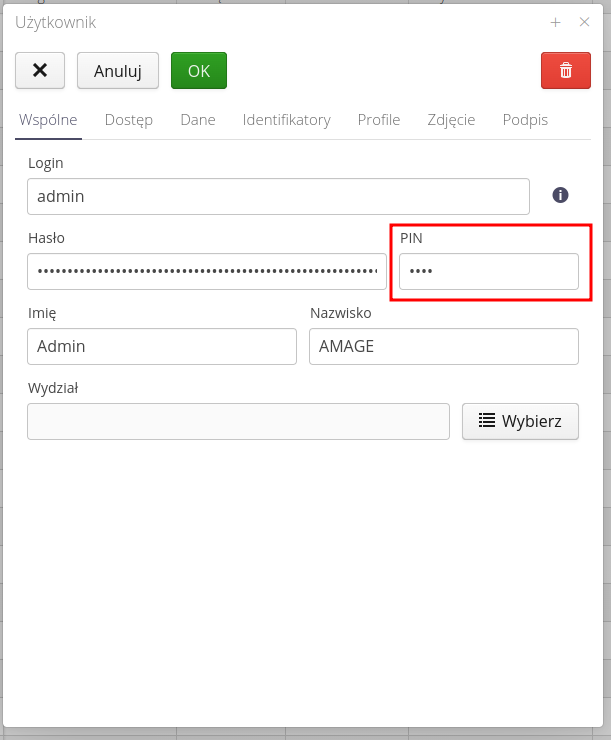
When working on devices for offline mode, it is necessary to remember to properly set the data for the login mechanism. Users on devices for this mode log in with a PIN (4-digit code). This code is set in the user settings (as the user data manager) or in the user’s own settings (after logging in the system menu)
In addition, in order for the user to be sent during the transmission of synchronization to the devices, it is necessary in the Access section to select access to the Fx application (offline) according to the permissions.
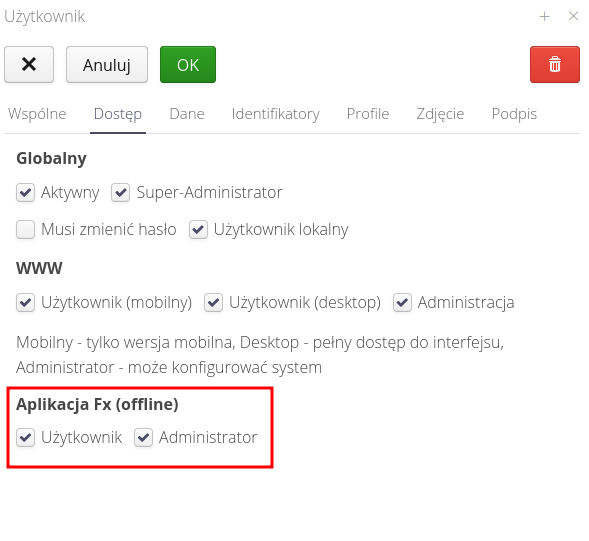
Permissions available:
-
User- can log in to the system and perform basic operations -
Administrator- a person who has access to the setting of a given application on an offline device
| Note that the permissions and other authorization flags available in the main system are not applicable for offline work for a simple reason - lack of access to this data. It is necessary to rely on this level of authorization and, for example, in the terminal with the AMAGE CE Lite application, the administrator has the ability to set the visibility of individual sections in the system for ordinary users. |
| The Howto is based on system version 1.17.0.2 (03.2022) and presents features that may not be available in your system. Ask AMAGE about making this functionality available. |
| Due to the ongoing development of the system, some screens or configuration files may look slightly different, but will still retain the full functionality described here. This does not affect the essential functions described in this document. |