Import of invoices from external systems (Accounting/Finance)
Introduction
The tutorial shows how to import invoices into the system. Invoices can come from external IT systems (ERP, Finance) or be collective invoices in the form of a collective sheet.
| The invoice importer shown here imports invoices as invoice summaries. Invoice detail items are not imported. |
In order to import invoices from any data source, you must first create an import template definition in the system, i.e. indicate in which column what is contained. This allows you to configure imports to any data source. The ability to save such a template allows you to reuse this definition for subsequent imports. For invoices, we usually import them periodically from the same input format, so the quicker and simpler it can be done, the nicer it is to use this feature. Simplified data imports will be used for this purpose.
Import template definition and first import
To define and perform the first data import, go to the system configuration view. The definition of data mapping (column indications) is performed rather by users with more knowledge about data, which is why the import definition module is available in the configuration section.
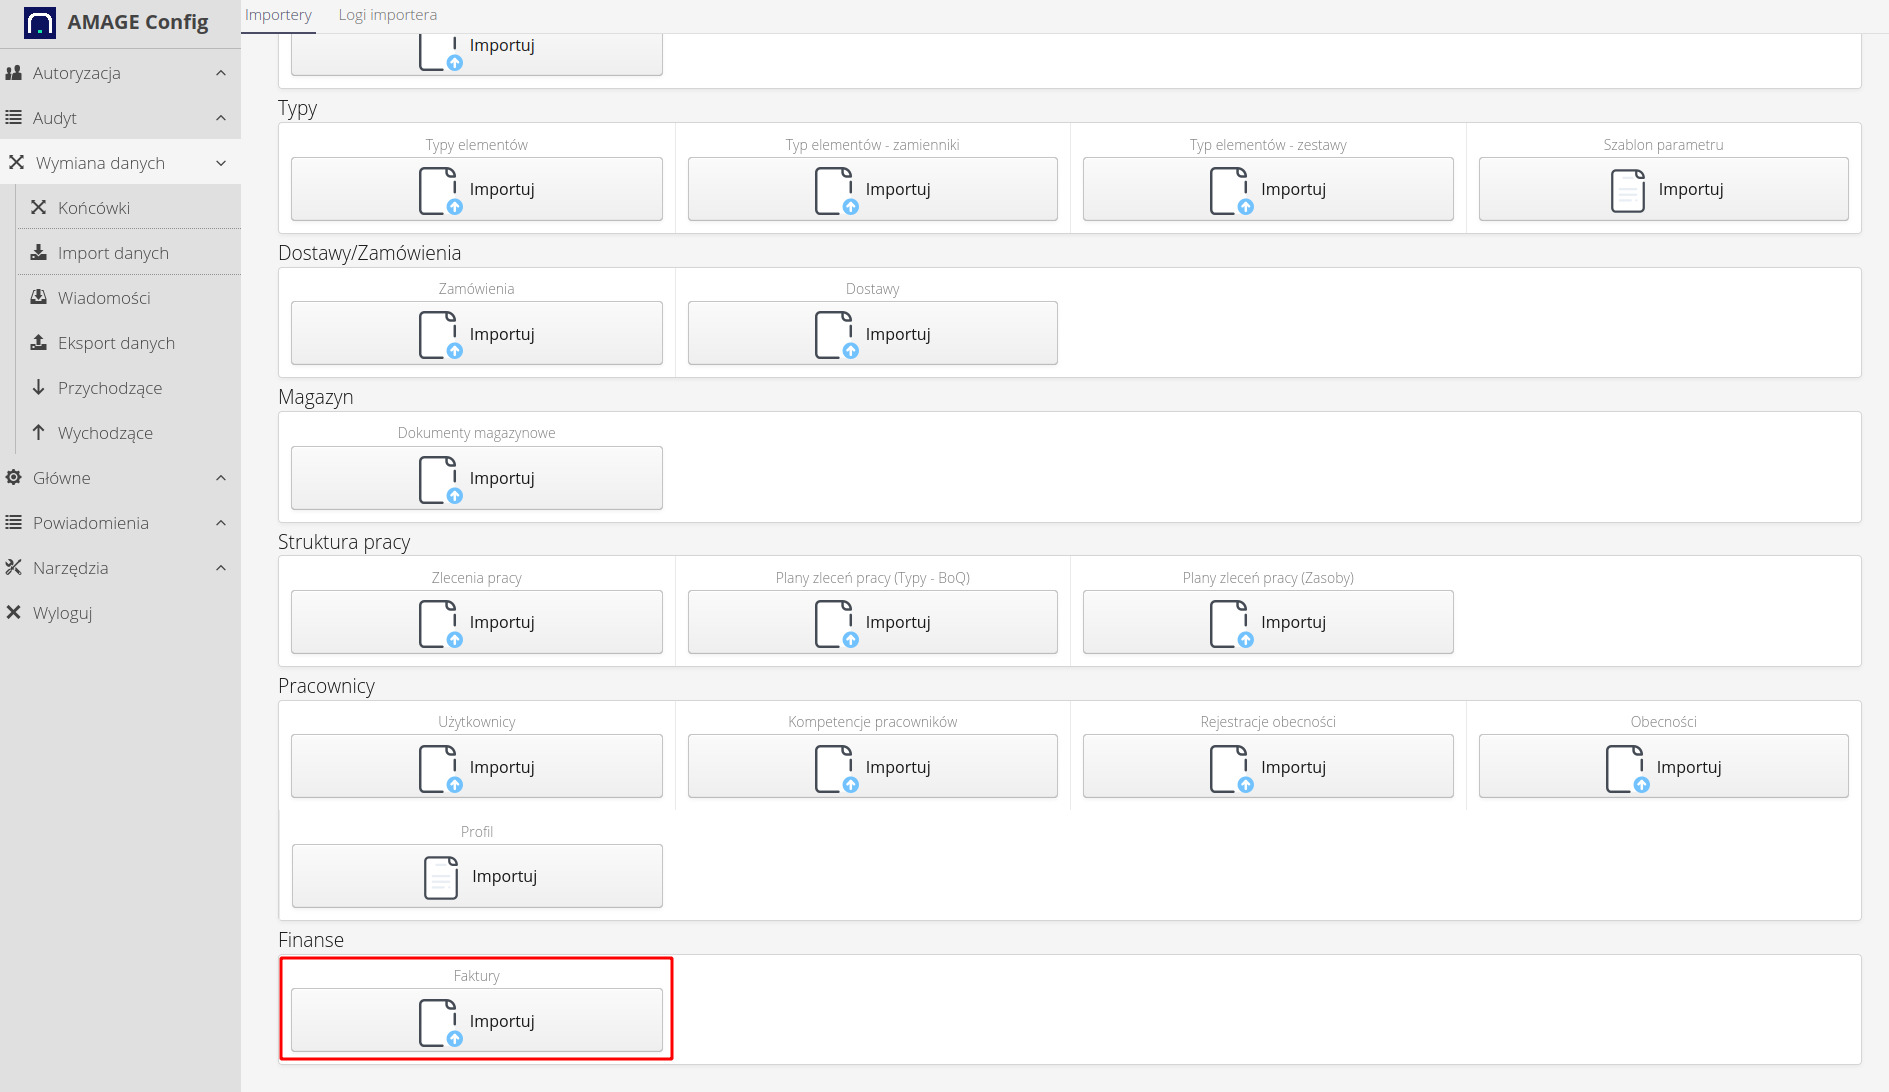
After going to the importers view, select the invoice importer.
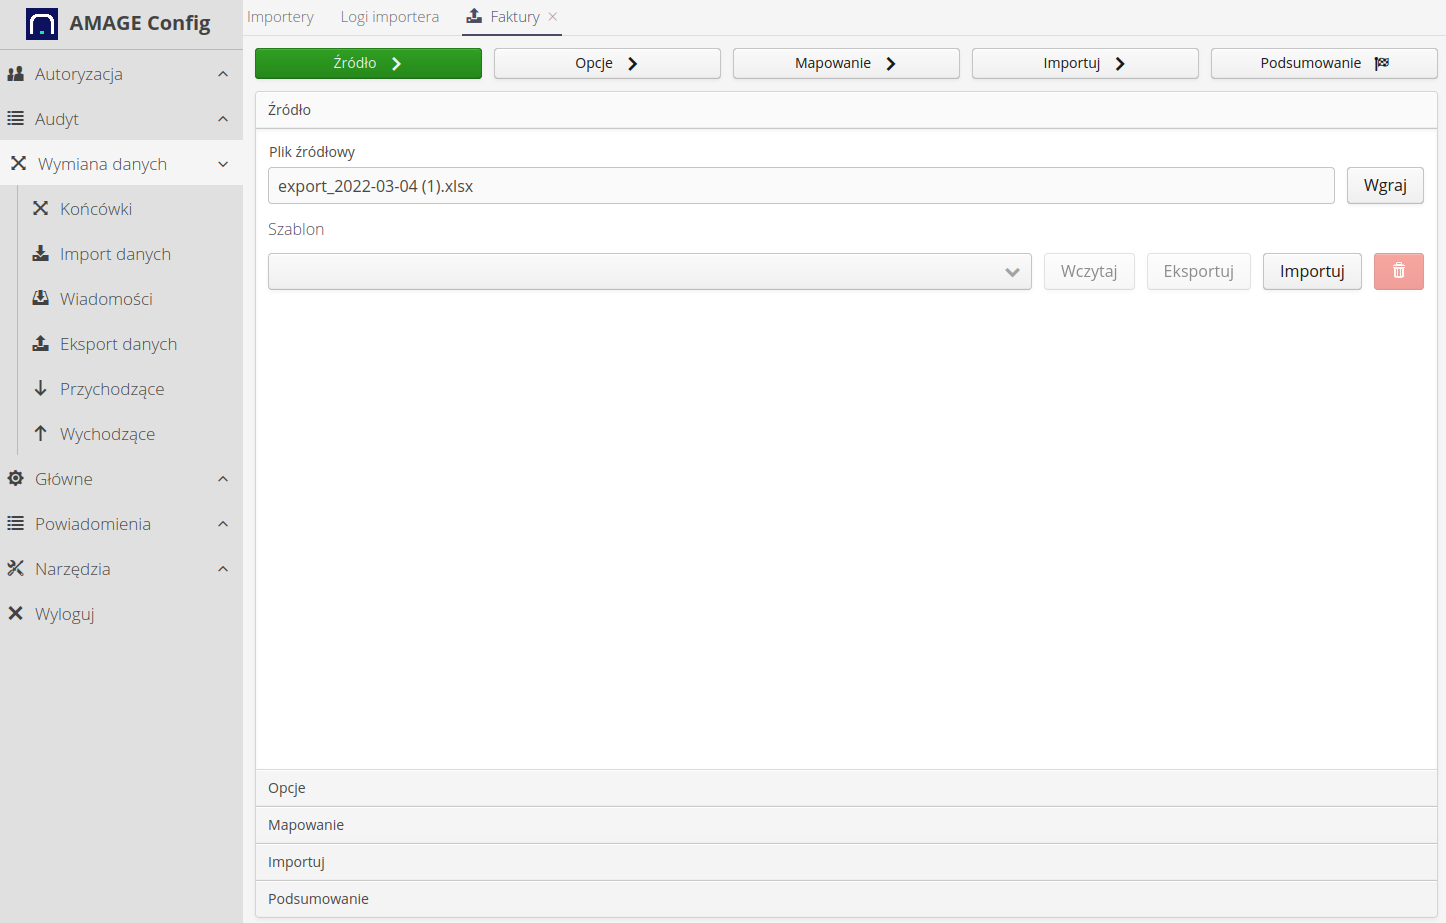
In the first step, we select the input file (the one we want to import). In this window, we can manage (and use) already existing data mappings (column associations). If we do it for the first time, we do not have to choose anything here except to load the source file.
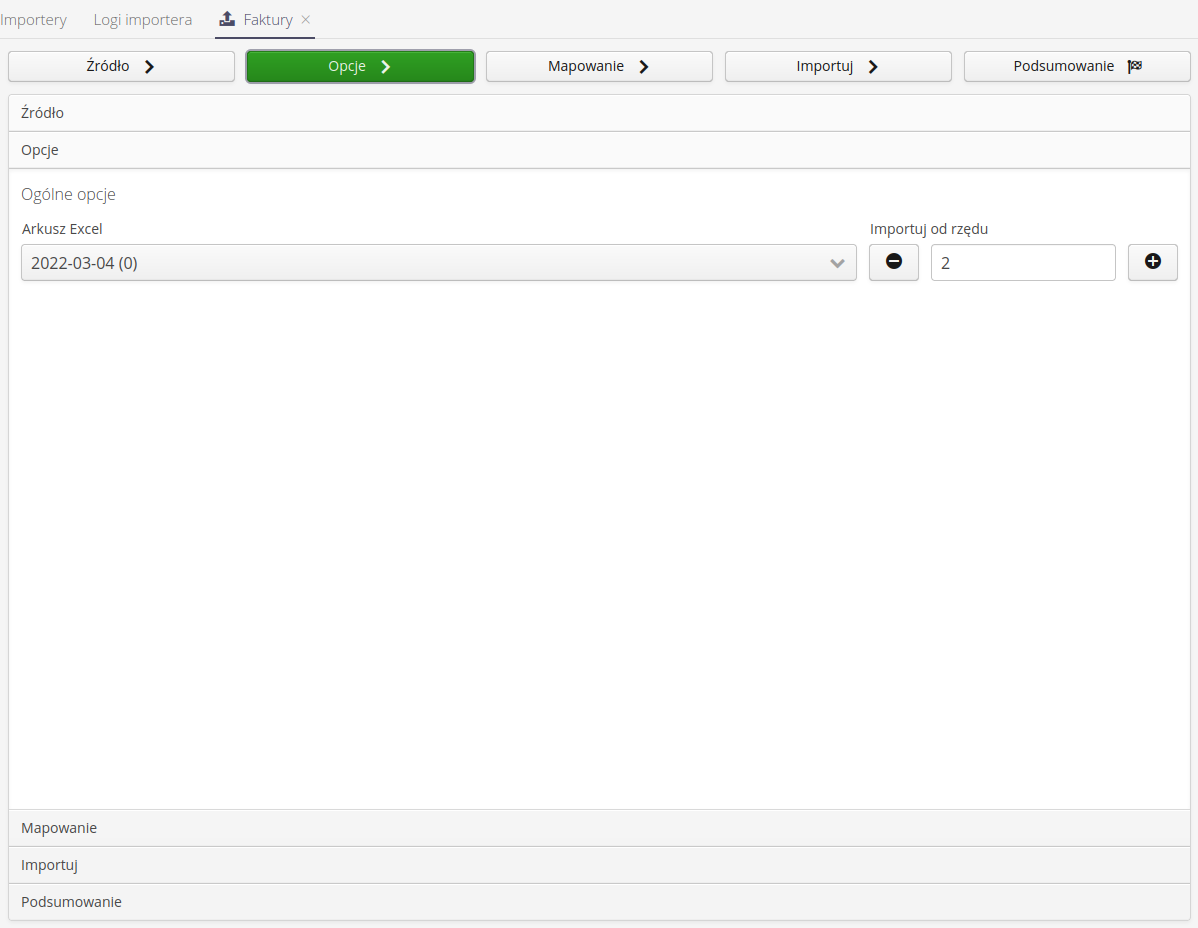
In the case of XLS/CSV data, in the next step, the system allows you to indicate the sheet from which we will import and the row from which we will import data. For CSV files, we can indicate the data format (what is the data separator, e.g. comma, semicolon, etc.)
This configuration allows the import of files that have many internal sheets and e.g. headers and other data, so that the data to be imported is only in the lower rows of a given sheet.
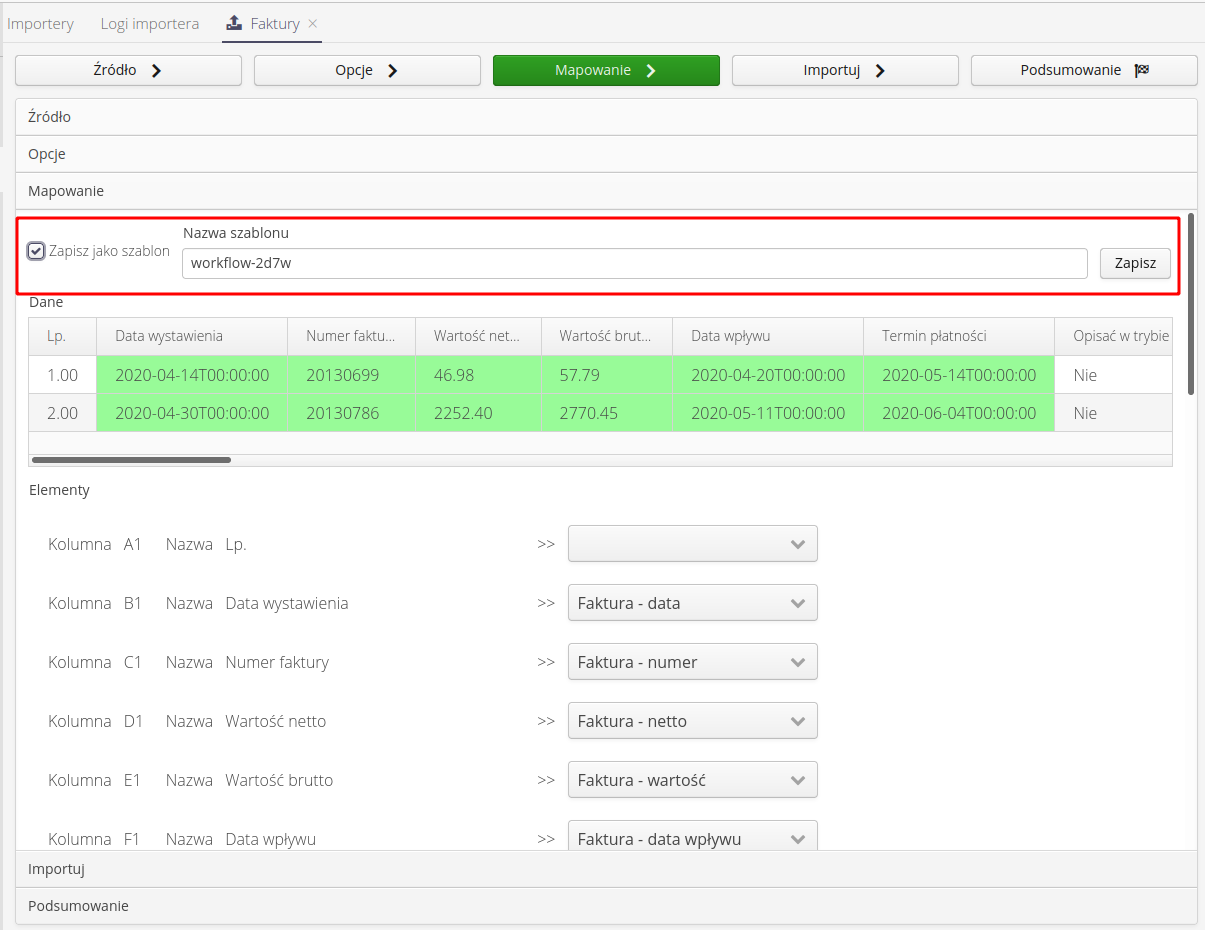
After moving on, we come to the main section of the import definition. Column mappings. Here, the system shows in the table view the first two rows that will be imported. The data and headers correspond exactly to what is loaded in the file that will be imported.
In the further part of the interface there are all available columns in the source file and a checkbox. In it, you can indicate which columns in the source file correspond to the available fields for importing a given element - invoices here.
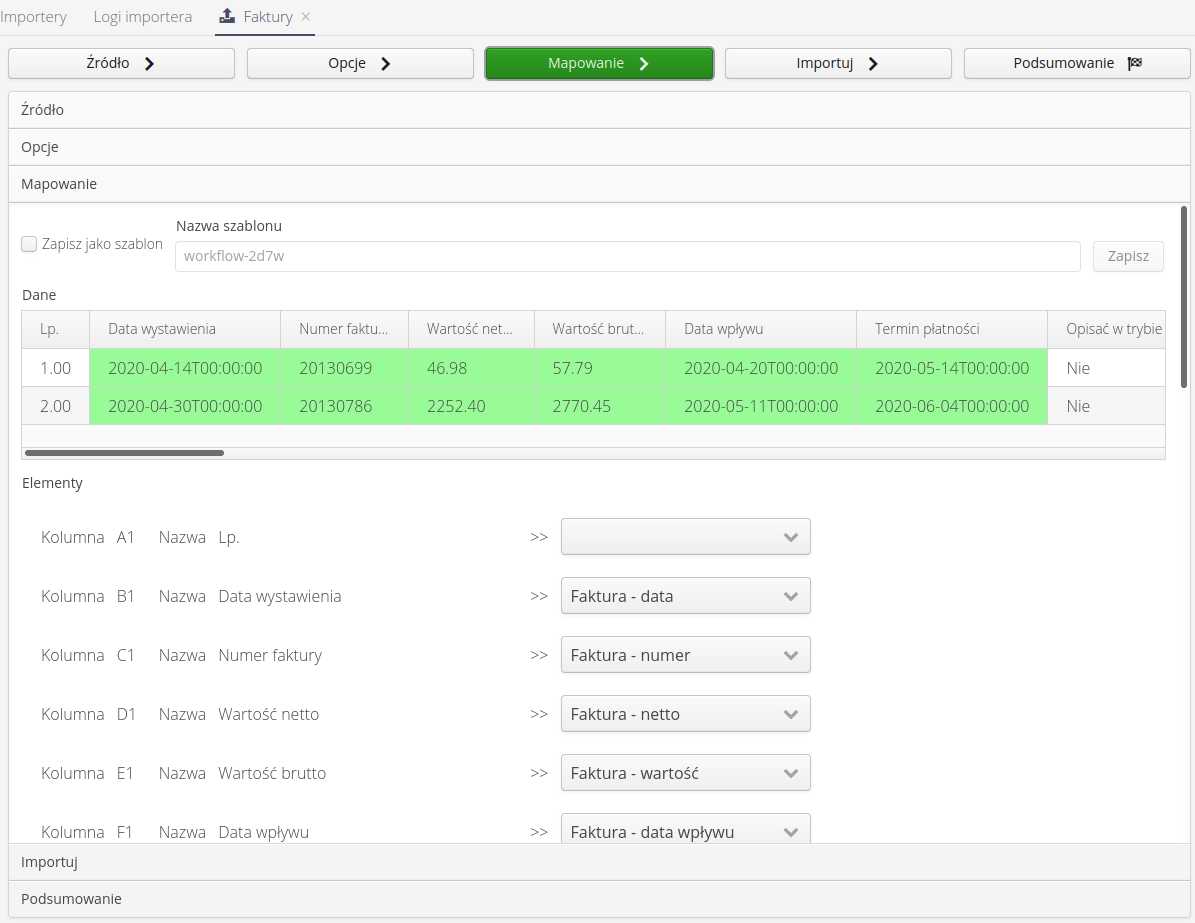
| Not all columns should or must be used. We select and map those fields that are important to us and that we want to include in the system after import. |
In addition, in the latest versions of the system, it is possible to define permanent fields, i.e. those that do not exist in the source data, but which we want to be initialized to default values (constant for all imported records). This allows you to quickly enter data, e.g. invoice category, already during import and we do not have to modify the input file all the time (adding the category manually).
| Some fields are mandatory in the system and the importer will not allow you to proceed to the next step if they are not selected. However, some fields require a common existence. This is not verified by the system and if they are not provided, it will either stop the import or assume the default values. |
If we think the mapping is complete, we can save it as a template. The template allows you to reuse this configuration for other files and significantly speeds up subsequent data imports and protects against possible mistakes. In order to save the template, select the save template action in the mapping window.
After moving on, we go to the actual import window. Here we can check the data import and perform the target import (with saving data in the database).
To import data as a test, i.e. without saving data in the system, select the Test run' option. DO NOT IMPORT DATA. By default, this option is enabled. This allows you to check the import. After invoking the `Execute action, the system reads the data from the input file and imports them. The log window shows information about performed activities and created records. In the log you can verify that the import is running correctly and that we have not made any error in data mapping.

If the import looks correct, we can disable the test run and import the data into the system. Once done, we can go to the summary view, which will present information and a summary.

Always in the history of imports (separate tab of the importer) we can check the history of imports and its results.
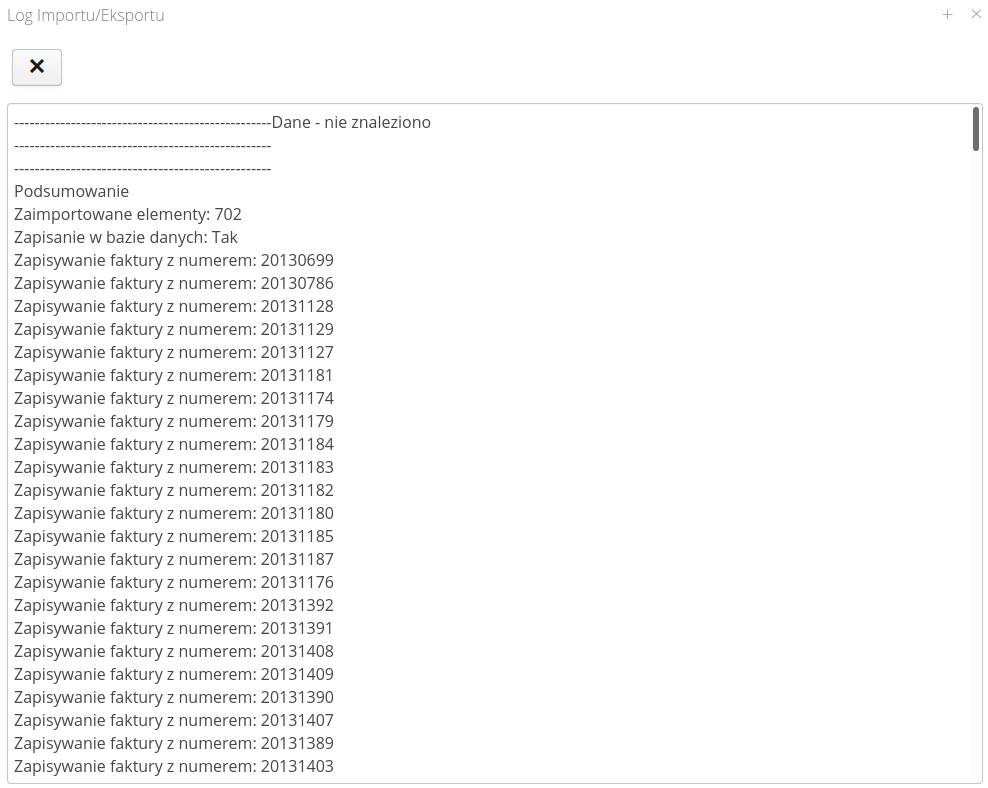
We close the importer window. The data is already in the system :)
simplified import
If we already have a defined template for data import, we can use a simplified data importer. The simplified data importer allows you to quickly import a data file directly from the main view of the system. This allows the import functionality to be made available to ordinary employees in the system. They do not need to know the mapping mechanism or perform configuration. Their only task is to select the appropriate template for data import.
For some objects in the system - those that most often use periodic importers - the "Import data" action has been added in the context menu of the list of these elements. In the invoice view, this action is also available.

After its activation, the simplified importer window appears. It only contains two steps. Data selection, import and summary.
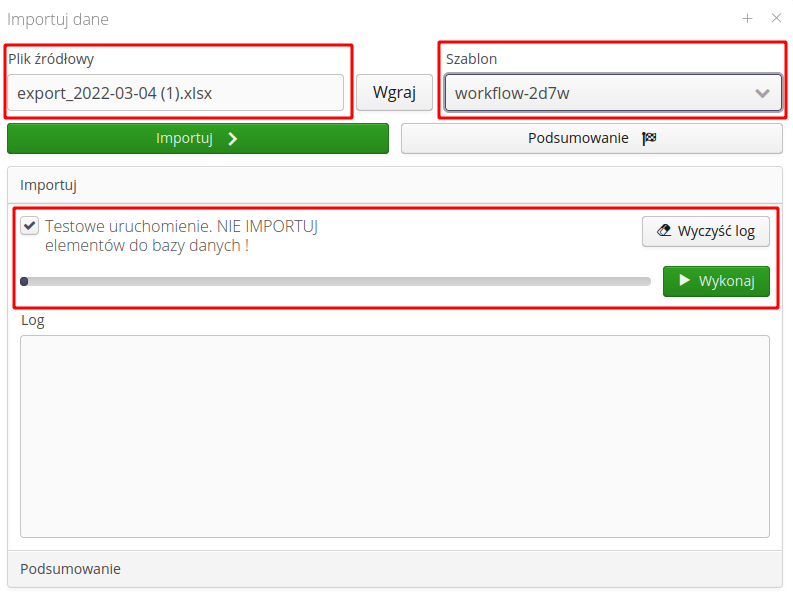
In the data selection step, the user only has to load the file and specify the template that will be used for import. After these two clicks, he can import data (including a test import run). The system will use the defined configuration to import data into the system.
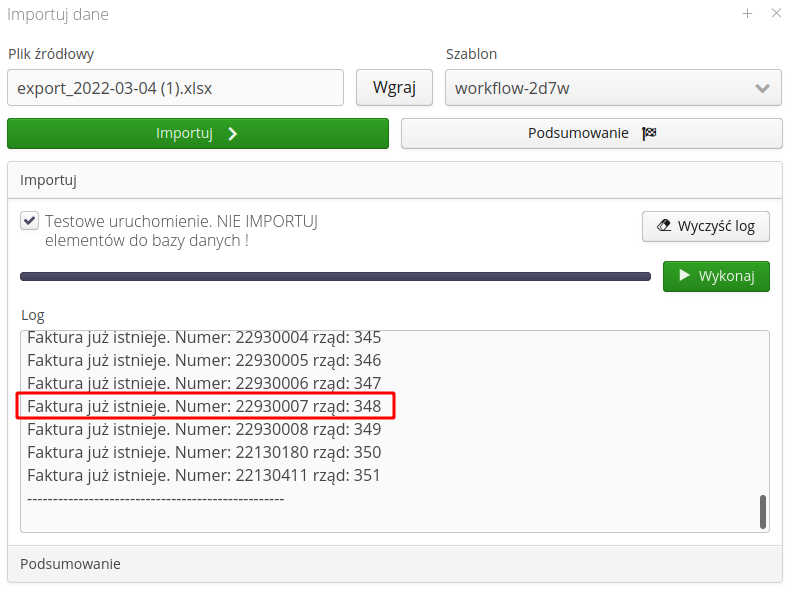
If the system detects existing records, it will display appropriate information as in the example below. If an invoice with a given number and issuer is already entered in the system, it will be skipped. This allows you to safely import data into the system without having to worry about very accurate import data.
The system, like any computer program, is not 100% immune to data errors. If the invoice number or the supplier differs, this record will be treated as a new one and imported into the system. For example, the issuer named in the import file Company X and Company X Ltd are two different companies for a computer :)
|
additional edition - category
After importing invoices, we can view them and enter additional information regarding categorization, assignment to orders/cost accounts. We do it in the context menu of the list of invoices and there we can specify data such as a category (e.g. lease, purchase, repair) and assign a given invoice to a specific work order (Structural Element) or cost account.
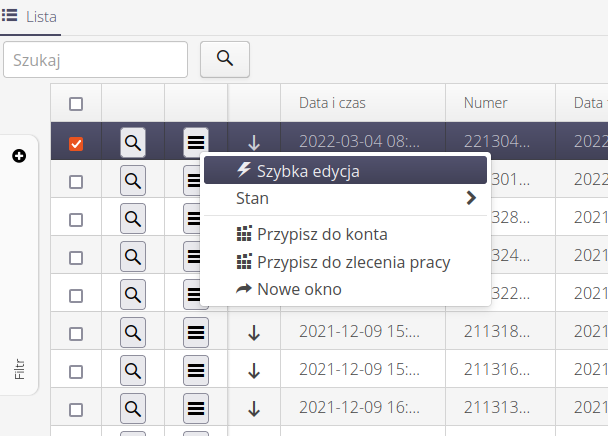
This allows you to divide invoices/costs into selected cost centers or activities/objects.
| The Howto is based on system version 1.17.0.2 (03.2022) and presents features that may not be available in your system. Ask AMAGE about making this functionality available. |
| Due to the ongoing development of the system, some screens or configuration files may look slightly different, but will still retain the full functionality described here. This does not affect the essential functions described in this document. |